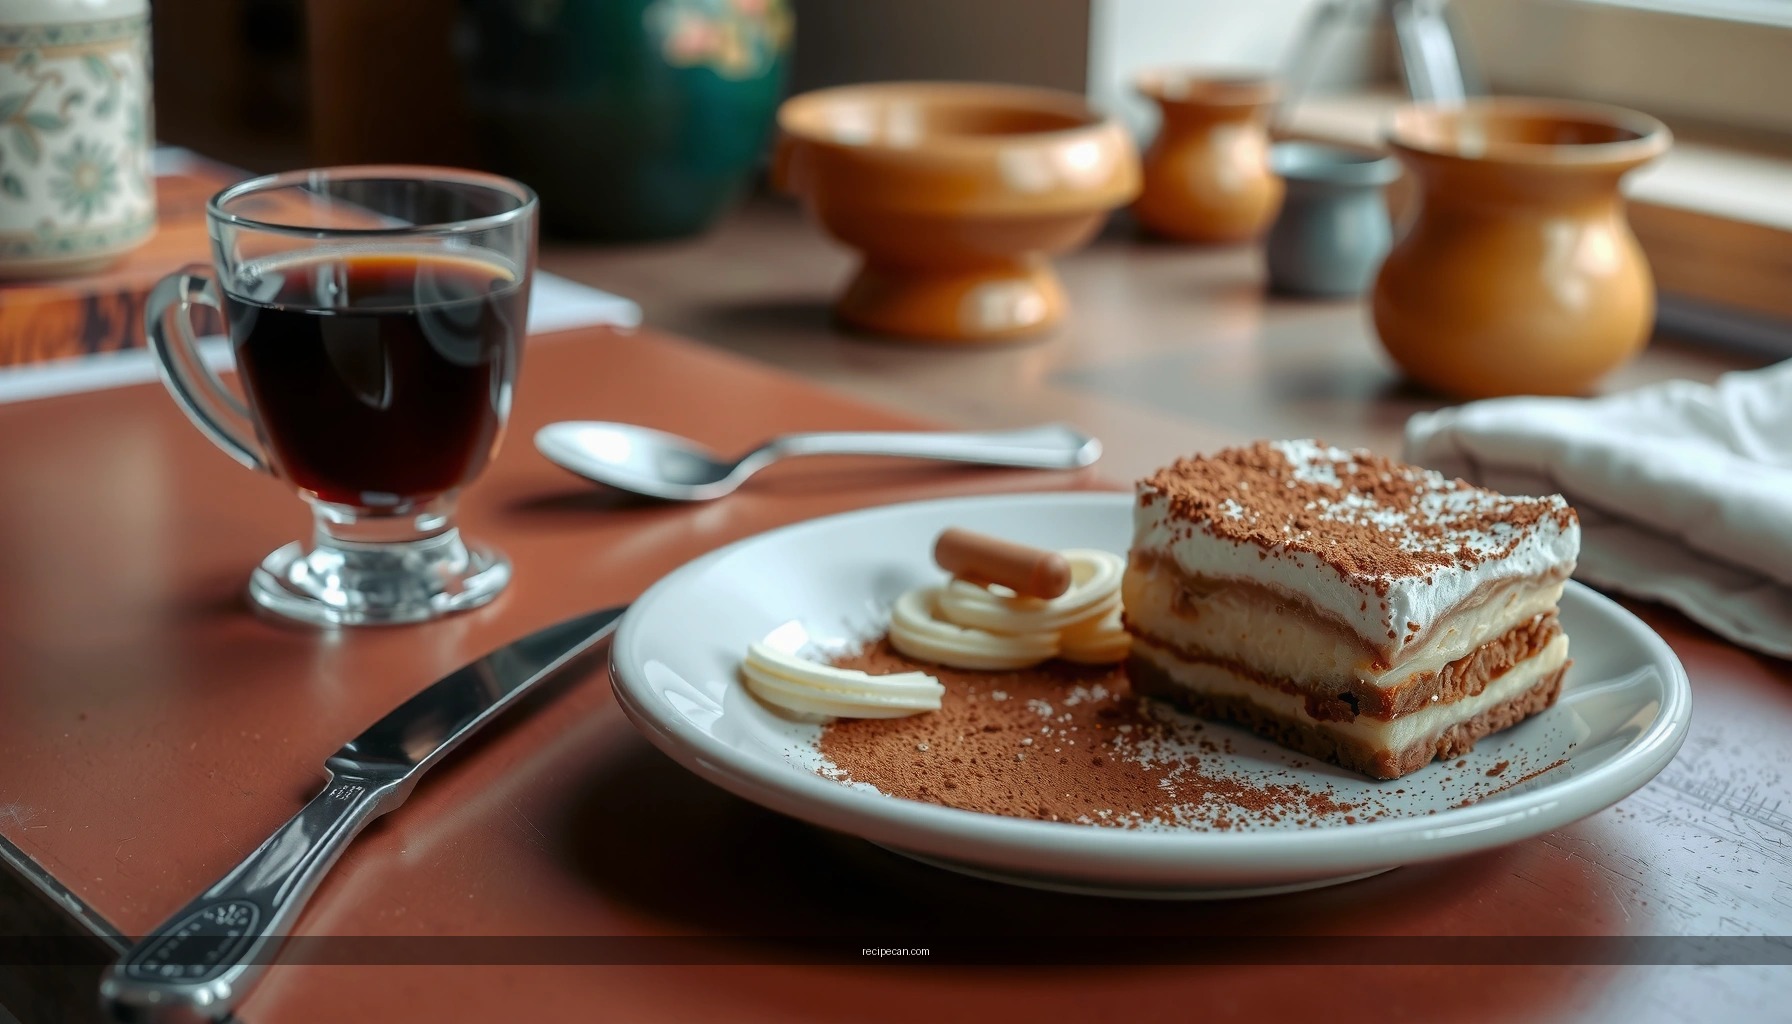
Want the best Italian tiramisu recipe with classic flavor and foolproof ease? This guide delivers the clear winner: authentic tiramisu built with the right espresso-to-cocoa balance, proper mascarpone folding, and clean assembly so the texture sets without turning soggy. Follow these easy steps and you’ll get a restaurant-worthy dessert with slices that hold and a finish that tastes unmistakably Italian.
Make classic Italian tiramisu at home by layering espresso-soaked ladyfingers with a mascarpone egg mixture, then chilling until it’s sliceable and set. This recipe walks you through each step—so you get a creamy mascarpone texture, bold coffee flavor, and a neat final cocoa dusting instead of a runny dessert.
Classic Italian Tiramisu Ingredients

A traditional tiramisu is built from a small set of ingredients that must be handled correctly: rich mascarpone, lightly sweetened eggs, coffee, ladyfingers, and cocoa. While you can adjust flavors (vanilla, a touch of rum, or a coffee-forward espresso), authenticity comes from balance and technique rather than complexity.
– Mascarpone, eggs, sugar (plus vanilla or coffee flavor if desired)
– Espresso or strong coffee and ladyfingers
– Cocoa powder for the final dusting
What to buy (and why it matters):
– Mascarpone: Use full-fat mascarpone for the signature thick, creamy body. If it’s cold when you begin, it blends more predictably.
– Eggs: Use fresh eggs and split carefully—clean bowl separation reduces the risk of a grainy cream.
– Ladyfingers (savoiardi): Choose firm, dry ladyfingers that hold up briefly to espresso without collapsing.
– Coffee: Strong espresso (or very strong brewed coffee) is essential; the flavor should stand up against the sweetness and dairy richness.
– Cocoa powder: Use unsweetened cocoa for the “classic bitter” finish.
Tiramisu Ingredient Benchmarks for Texture Consistency (8 Portions)
| # | Ingredient Parameter | Target | Why It Matters | Expected Result |
|---|---|---|---|---|
| 1 | Ladyfinger soak time | 1–2 seconds per side | Prevents collapse and pooling | ★ Stable layers |
| 2 | Coffee concentration (espresso) | 12–15 g dose, double shot | Ensures bold coffee flavor | ★ Coffee-forward taste |
| 3 | Mascarpone temperature | Refrigerated (about 4–8°C) | Improves thickness during mixing | ★ Cream holds shape |
| 4 | Sugar in yolk mixture | 50–70 g for 4 yolks | Balances acidity and coffee bitterness | ★ Sweetness in range |
| 5 | Whites (if used) | Soft peaks only | Adds lift without loosening cream | ★ Light, not airy |
| 6 | Cocoa dusting timing | Just before serving | Maintains dry, aromatic top layer | ★ Crisp cocoa finish |
| 7 | Chill time | 4–6 hours minimum | Sets structure for clean slicing | ★ Firm, sliceable texture |
Prepare the Mascarpone Cream

The mascarpone cream is the core of Italian tiramisu. Done correctly, it’s thick, silky, and spoonable—never runny. The goal is to combine dairy richness with a lightened texture, while avoiding overmixing that can break structure.
Follow this sequence:
– Whip yolks with sugar until smooth and slightly lighter
Whisking yolks with sugar is about texture and dissolution—granules should disappear, and the mixture should look paler and more fluid.
– Fold in mascarpone gently for a thick, creamy base
Use a gentle folding motion, not aggressive whipping. Mascarpone can become elastic or lose its characteristic smooth density if overworked.
– Beat whites to soft peaks (optional for extra lightness) and fold carefully
If you prefer a slightly lighter tiramisu, whip whites to soft peaks and fold them in. “Soft peaks” means the foam holds a shape briefly but still looks glossy—this keeps the cream stable when chilled.
Quality control checks:
– Cream should coat the spoon with a slow, thick drip.
– No streaks of mascarpone should remain, but the cream should not look over-aerated.
– If the cream seems loose, chill it 10–15 minutes before assembling—this often restores structure.
Practical note for business-style consistency: If you’re making this for guests, assemble with the cream at a predictable temperature. A cream that’s too warm will loosen faster during layering.
Brew and Soak the Espresso

Tiramisu is fundamentally a coffee dessert. The espresso does more than flavor—it also hydrates the ladyfingers to create the contrast with the mascarpone cream.
– Brew strong espresso and let it cool slightly
Use freshly brewed espresso for maximum aroma. Let it cool just enough so it doesn’t melt the mascarpone or over-warm the ladyfingers.
– Quick-dip ladyfingers to avoid sogginess
Dip quickly, flip, and dip again for a second or two—your target is “coffee-kissed,” not soaked through.
– Aim for even soaking so every bite tastes balanced
Spoon or dab coffee on each side if your ladyfingers vary in thickness. Consistency here is what prevents “dry edges, wet center” issues.
How to control bitterness and balance:
– If your espresso is extremely dark-roasted and bitter, you can mellow it with a small splash of milk or use a slightly less intense brew.
– Avoid sweetened coffee; tiramisu already has sugar in the cream and sweetness in the ladyfingers.
Actionable workflow tip: Pour espresso into a shallow bowl for efficient dipping. Keep it close to your assembly area so you’re not rushing.
Layering Instructions for the Perfect Tiramisu
Layering is where the dessert transforms from ingredients into a cohesive slice. The most common failure point is incorrect order or uneven build—either of which can lead to messy cuts and uneven texture.
– Start with a cream layer, then add a single layer of soaked ladyfingers
The bottom cream layer helps stabilize the structure so the first slice lifts cleanly.
– Repeat layers until your dish is filled
Typically, two to three repeating layers work well in a standard 8×8 inch (or similar) dish.
– Finish with a generous cocoa dusting on top
Dust right before serving to keep cocoa from absorbing moisture and turning dark and damp.
Best-practice assembly method:
1. Spread a thin, even cream layer in the dish.
2. Place soaked ladyfingers in a single layer with minimal gaps.
3. Add cream and smooth the surface.
4. Repeat until you reach the top.
5. Dust with cocoa through a fine sieve for a light, even coating.
Consistency matters: Press ladyfingers very gently—enough to seat them, not enough to compress them into coffee.
Chill Time and Best Serving Tips
Tiramisu needs time in the refrigerator. Chilling is not optional; it’s the mechanism that sets the mascarpone and lets coffee and cream meld into the signature flavor profile.
– Refrigerate at least 4–6 hours (overnight is even better)
Overnight chilling produces the most cohesive texture, making it easier to slice and more flavorful.
– Keep layers intact by serving cold
Tiramisu should be served straight from the refrigerator. If it warms too much, the mascarpone softens and the layers can blur.
– Slice with a clean knife for neat portions
Wipe the knife between cuts. A clean blade preserves sharp lines and prevents creamy smearing.
Serving ideas for real-world hosting:
– Portion into individual cups if you want guaranteed neat presentation.
– Let cups sit at cool room temperature for only 3–5 minutes before serving—enough to soften slightly, not enough to loosen.
Common Mistakes to Avoid
Even with excellent ingredients, technique determines outcome. These are the pitfalls that most often separate “tasty” from “best result.”
– Over-soaking ladyfingers, which can make tiramisu watery
If you see pooling espresso at the bottom, the dips were too long or the ladyfingers too thin. Shorten dip time and cool espresso more fully.
– Overmixing the cream, which can affect texture and thickness
Mascarpone should be folded in gently. If you whip too aggressively, the cream can lose the dense, spoonable quality that firms up during chilling.
– Skipping chilling time, leading to loose layers
Without sufficient refrigeration, the dessert won’t set. Even a 2-hour rest often isn’t enough for clean slicing—aim for the full 4–6 hours.
If you notice early signs of trouble:
– Cream too loose: Chill the cream for 10–15 minutes before assembling.
– Tiramisu too soft after chilling: Let it chill longer (up to overnight). Many “soft failures” become sliceable with extra set time.
Enjoy this Italian tiramisu recipe by following the layers carefully and giving it enough chill time to set. Make it today—brew your espresso, assemble your dessert, and dust with cocoa just before serving for the best results.
At its best, Italian tiramisu is simple: bold coffee flavor, thick mascarpone cream, precise layering, and adequate chilling. If you focus on quick soaking (not soggy ladyfingers), gentle cream preparation, and the right refrigeration window, you’ll get a creamy, sliceable dessert with the classic cocoa-flecked finish.
Frequently Asked Questions
What is the best Italian tiramisu recipe for beginners?
A classic Italian tiramisu recipe uses espresso-soaked ladyfingers, mascarpone cheese, eggs, sugar, and cocoa powder. For beginners, choose room-temperature mascarpone and fresh eggs, and assemble quickly to avoid soggy layers. Make sure the espresso is strong and cooled to prevent the custard from becoming watery. Chill the tiramisu for at least 4–6 hours so the flavors meld and the texture sets properly.
How do I make Italian tiramisu without raw eggs?
If you want to avoid raw eggs, use a pasteurized-egg tiramisu method or gently cook the egg mixture over low heat until it thickens. Another popular option is to use a mascarpone base with a stabilized yolk mixture, then fold in whipped whites for a light texture. Make sure the custard is not too hot when combining so mascarpone stays smooth and creamy. This keeps your Italian tiramisu recipe safe while still tasting authentic.
Why does my tiramisu turn out runny, and how can I fix it?
Runny tiramisu usually comes from over-soaking the ladyfingers, warm mascarpone, or an under-set custard. Use quick dips of ladyfingers into cooled espresso (just seconds per side) so the layers hold structure. If the mixture seems loose, chill longer—cold helps the mascarpone stabilize and thicken. For next time, ensure your coffee isn’t hot and that you whisk egg components until they reach a glossy, thick consistency.
Which espresso should I use for an authentic Italian tiramisu recipe?
Use a strong espresso or espresso-style coffee because tiramisu needs bold bitterness to balance the sweetness of mascarpone. Freshly brewed espresso is ideal, but cooled strong coffee works well in an Italian tiramisu recipe. Avoid overly sweet flavored coffee, which can overpower the classic flavor profile. Let the coffee cool to room temperature so the ladyfingers absorb evenly without melting the cream.
How long should Italian tiramisu chill before serving?
For the best results, chill Italian tiramisu for at least 4–6 hours, though overnight is even better for flavor development. The resting time allows the ladyfingers to fully soften while keeping a distinct layered texture. If you slice it too soon, it may look loose or separate because the custard hasn’t set. Serve cold, and dust with cocoa powder right before serving for the freshest, richest appearance.
References
- Tiramisu
https://en.wikipedia.org/wiki/Tiramisu - https://pubmed.ncbi.nlm.nih.gov/?term=italian+tiramisu+recipe
https://pubmed.ncbi.nlm.nih.gov/?term=italian+tiramisu+recipe - https://www.sciencedirect.com/search?qs=tiramisu%20recipe
https://www.sciencedirect.com/search?qs=tiramisu%20recipe - tiramisu recipe | Nature Search Results
https://www.nature.com/search?q=tiramisu%20recipe - https://www.bbc.co.uk/search?q=tiramisu%20recipe
https://www.bbc.co.uk/search?q=tiramisu%20recipe - https://www.theguardian.com/search?q=tiramisu%20recipe
https://www.theguardian.com/search?q=tiramisu%20recipe - Search Thousands of Recipes – NYT Cooking
https://cooking.nytimes.com/search?query=tiramisu%20recipe - Google Scholar Google Scholar
https://scholar.google.com/scholar?q=italian+tiramisu+recipe - Google Scholar Google Scholar
https://scholar.google.com/scholar?q=tiramisu+recipe+mascarpone+savoiardi - Google Scholar Google Scholar
https://scholar.google.com/scholar?q=tiramisu+recipe+espresso+egg+mixing+technique


