Get the original tiramisu cake recipe that delivers the classic, creamy layers and clean coffee-chocolate flavor you want—without guesswork. This step-by-step method shows you exactly how to make the mascarpone cream, assemble the cake, and get that perfect set every time. If your goal is a true traditional tiramisu cake, this is the one to make.
This original tiramisu cake recipe delivers the signature coffee-soaked ladyfingers and a luxuriously smooth mascarpone cream with a straightforward, no-stress assembly. If you follow the prep discipline—proper coffee strength, gentle folding, and adequate chilling—you’ll get clean slices and that classic cocoa finish every time.
Original Tiramisu Cake Ingredients

At its core, tiramisu is a balance of three elements: strong coffee, creamy mascarpone, and light structure from ladyfingers. To keep this recipe true to the classic flavor profile, source the right ingredients and use them with intention.
– Mascarpone (the cream base): Choose a high-quality mascarpone for the richest texture. Standard supermarket mascarpone is fine, but avoid overly watery products; thick mascarpone whips more reliably and produces a cream that holds its shape during slicing.
– Espresso or strong coffee (the soak): Use espresso or very strong coffee brewed from dark roast. Coffee provides both flavor and moisture—its intensity matters because ladyfingers absorb quickly. If your coffee tastes weak on its own, the final cake will taste diluted.
– Ladyfingers (structure): Traditional *savoiardi* are preferred. They’re designed to absorb liquid without collapsing instantly, which is why quick dipping technique is so important.
– Cocoa powder (finish): Use unsweetened cocoa powder for authenticity and contrast. Dutch-process cocoa is darker and milder; natural cocoa is brighter and more traditional in bite.
For the creamy filling, classic tiramisu typically uses eggs and sugar:
– Egg yolks + sugar for richness and emulsification.
– Egg whites (optional in some versions) for extra lift and a mousse-like texture.
Shortcut variation (still credible): If you need a simplified approach for a business-paced schedule, you can use pasteurized eggs and keep the yolk mixture approach. If you want to reduce complexity further, you can replace the egg component with a mascarpone-and-whipped-cream method, but texture will vary from classic tiramisu—so consider this a “close to classic” version rather than a true replica.
To make ingredient planning easy, here’s a practical equivalency table for key components (useful for scaling and portioning):
Tiramisu Ingredient Benchmarks (8–10 Servings)
| # | Component | Target Amount | Why It Matters | Quality Signal |
|---|---|---|---|---|
| 1 | Mascarpone | 500 g | Cream stability and classic mouthfeel | Smooth, holds ridges |
| 2 | Espresso / Strong coffee | 2–2.5 cups (480–600 ml) | Flavor intensity for coffee-soaked layers | Tastes bold before soaking |
| 3 | Ladyfingers | 24–30 pieces | Moisture absorption without collapse | Light, not brittle |
| 4 | Egg yolks | 4 large | Classic richness and emulsified cream | Thick ribbons after mixing |
| 5 | Sugar (for filling) | 120–140 g | Sweetness balance against coffee bitterness | Dissolves fully (no grain) |
| 6 | Cocoa powder (finish) | 2–3 tbsp | Visual contrast and chocolate aroma | Sieved for a clean dust |
| 7 | Chill time | 6–12 hours | Sets cream, melds flavor, improves slicing | Firm edges after chilling |
Essential Equipment & Prep Steps

You don’t need specialized pastry tools to make a classic tiramisu cake, but you do need the basics—and you need to manage temperature and timing.
Equipment checklist
– Mixing bowls: One for yolk/sugar, one for mascarpone whipping.
– Whisk (or mixer): A mixer speeds up consistency; a whisk works if you have patience.
– Cake pan or springform pan: A springform pan helps with clean release. A glass baking dish is also acceptable if you plan to serve with a spoon.
– Measuring tools + spatula: Accurate coffee and consistent cream folding are your best friends.
– Sieve for cocoa: Sieving prevents clumps and ensures that “restaurant” dusting effect.
Prep discipline (the part many home bakers skip)
1. Brew espresso/coffee and chill it. Warm coffee can make mascarpone loosen and can cause uneven soaking.
2. Separate eggs carefully (if using the classic egg method). Small mistakes create texture problems.
3. Measure ladyfingers and plan your layer count before assembly. This avoids interruptions while the coffee is ready and the cream is prepared.
4. Set up a “dipping station”: Keep coffee in a shallow bowl for quick dipping and easy control.
This approach is especially valuable for anyone making tiramisu for a schedule-heavy event: you reduce the number of decision points during the assembly phase, which leads to more consistent results.
Make the Mascarpone Cream

The mascarpone cream should feel smooth, light, and stable—never grainy, never runny, and never over-aerated. Think of it as an emulsion you build gently.
– Whip mascarpone first until smooth. Mascarpone can be slightly firm or lumpy straight from the fridge. Whipping evens texture so it folds in cleanly later.
– Mix egg yolks and sugar until paler and thicker. This step dissolves sugar and builds body. Mix until you see a ribbon-like texture from the whisk.
– Fold together gently. Add the yolk mixture to the mascarpone gradually and fold, not beat. Folding preserves air and protects the cream from becoming dense or curdled.
Consistency control tips
– If the cream looks too thick, it may be under-mixed; a short, gentle adjustment can help.
– If it looks loose, keep everything cooler and avoid extended mixing. Overhandling at room temperature can soften mascarpone and loosen the emulsion.
– If using whipped egg whites, fold them last. Whip to soft peaks so the cream remains airy but not fragile.
The professional takeaway: treat the cream as a controlled process. Your goal is a stable, spreadable texture that slices cleanly after chilling.
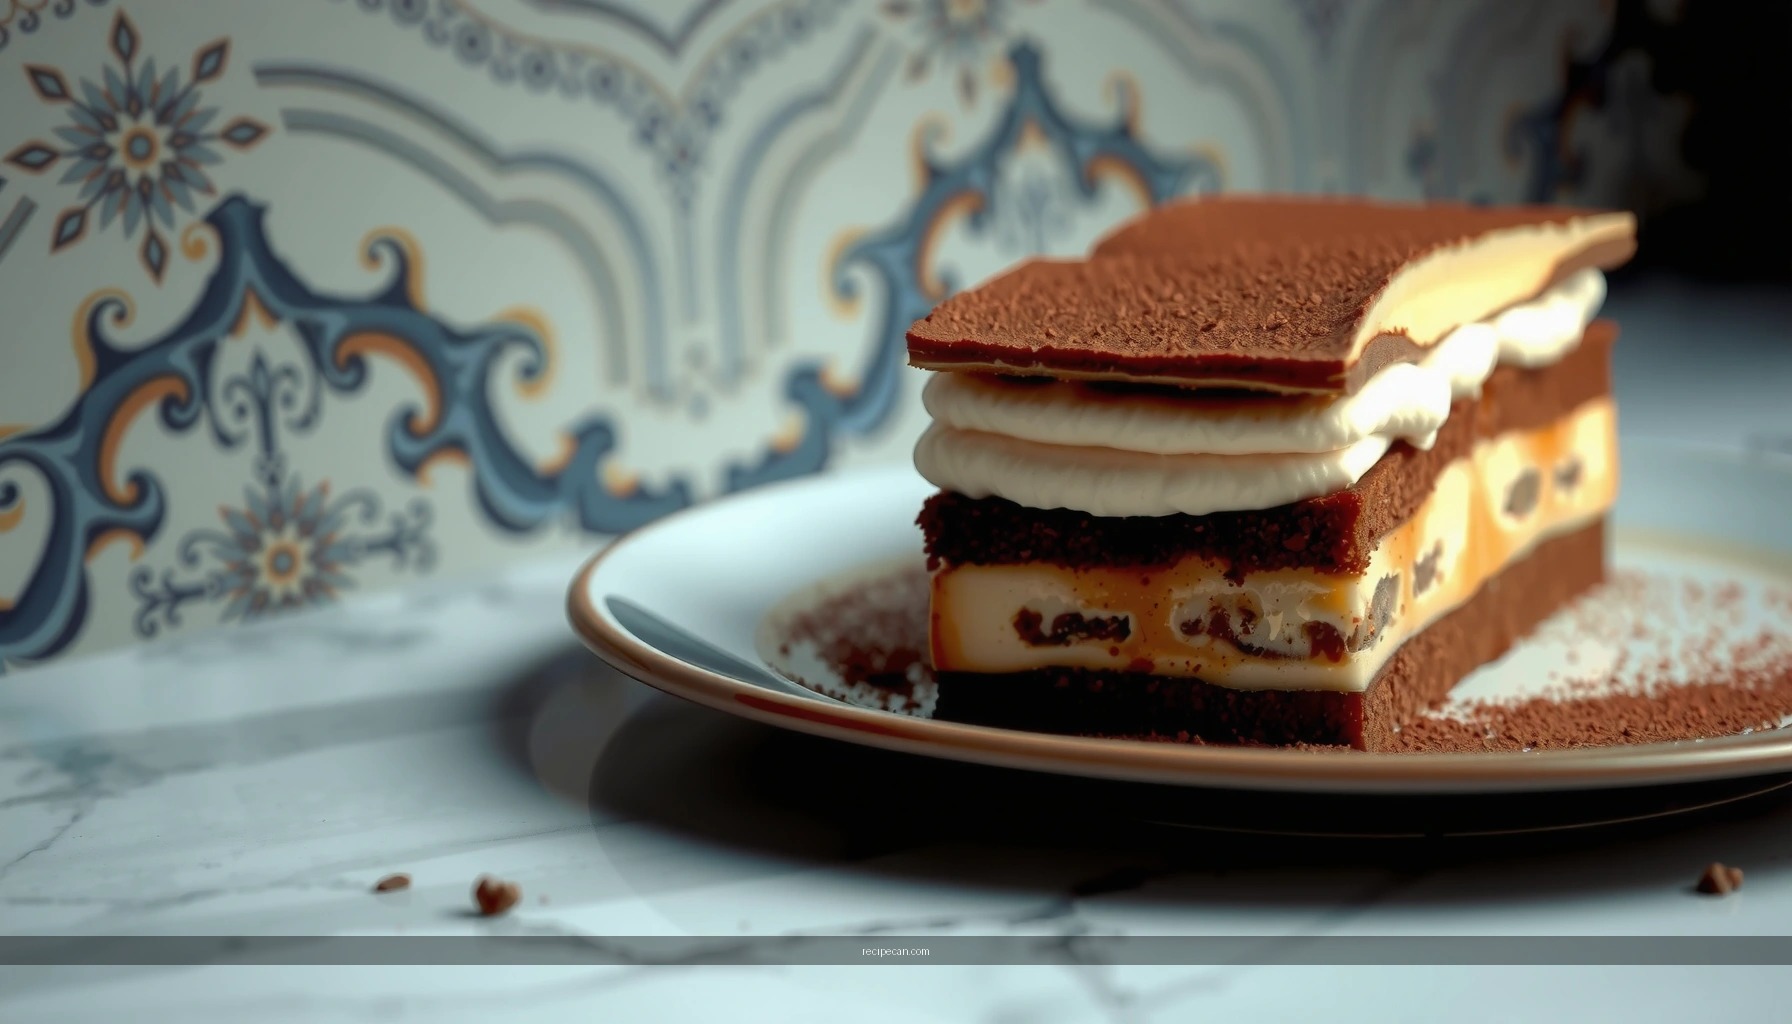
Assemble the Tiramisu Cake Layers
Layering is where tiramisu either becomes “classic and elegant” or “messy and soggy.” The fix is technique and speed.
– Quickly dip ladyfingers in coffee (don’t soak too long). A fast dip of about 1–2 seconds per side is typically enough. The goal is surface absorption, not full saturation.
– Layer coffee-soaked ladyfingers and cream evenly. Distribute ladyfingers consistently so every slice has the same ratio of cake-to-cream.
– Maintain gentle pressure when spreading cream. Spread to the edges without compressing. Over-pressing can disturb the sponge structure and create uneven moisture distribution.
Common failure points (and how to prevent them)
– Soggy middle: Usually caused by long soaking or by leaving coffee at warm temperature while assembling.
– Dry layers: Coffee too weak, too little coffee contact, or too little cream coverage.
– Cream splitting: Often the result of overmixing after combining mascarpone with the yolk mixture, or ingredients being too warm.
If you’re aiming for “showpiece” slicing, use a springform pan and align ladyfingers tightly. That structural consistency is what makes the final cuts look intentional.
Chill and Set for Best Texture
Chilling is not optional if you want the classic tiramisu mouthfeel. It allows moisture from the coffee to distribute, and it helps the cream firm up.
– Refrigerate long enough for the cake to set and the flavors to meld. For best results, plan 6–12 hours. Overnight is often the sweet spot.
– Dust cocoa just before serving. Cocoa can absorb moisture and darken as it sits. A final dust preserves that fresh, crisp top finish and improves visual appeal.
Texture benchmarks after chilling
– The cream should hold shape when you gently tap the surface.
– The edges should be slightly firmer than the center, indicating proper set.
– When slicing, the layers should stay distinct rather than smearing into one uniform mass.
This is where your earlier decisions pay off: correct coffee strength, controlled soaking, and gentle folding create a slice that looks as good as it tastes.
Serving Tips & Storage
The final outcome depends on slicing method and handling—especially if you’re serving for guests or packaging portions.
– Slice with a sharp knife (wipe between cuts) for neat, defined layers. A clean blade prevents cocoa and cream from dragging across the next section.
– Store refrigerated and cover well. Tiramisu holds best when protected from fridge odors and moisture loss. Use a tight cover or wrap the pan.
– Enjoy within a few days for best quality. Typically, 2–3 days preserves the best texture balance. Past that window, the coffee-soaked components can soften further and the cocoa finish may dull.
If you’re serving in a business setting (meetings, catered events, client tastings)
– Consider portioning into individual servings before the crowd arrives. Individual cups reduce slicing pressure and keep layers intact.
– Keep cocoa dusting for the last moment, especially if the presentation matters.
Conclusion
This original tiramisu cake recipe is classic because it respects the process: strong, chilled coffee; quick ladyfinger dipping; a smooth mascarpone cream built with gentle folding; and ample refrigeration to set the structure. Follow these fundamentals and you’ll reliably produce creamy, coffee-forward layers with a clean, professional look—finished with a fresh cocoa dust that signals “true tiramisu” at first bite.
Frequently Asked Questions
What are the key ingredients in an original tiramisu cake recipe?
An original tiramisu cake recipe typically uses ladyfingers or sponge cake layers, mascarpone cheese, eggs (or pasteurized egg yolks), sugar, strong espresso, and cocoa powder. Many versions also include a splash of coffee liqueur (optional) and a pinch of salt to balance sweetness. The quality of the mascarpone and espresso matters most for an authentic, rich tiramisu flavor.
How do you make tiramisu cake without getting soggy layers?
To prevent sogginess, lightly dip or brush the ladyfingers/sponge with espresso instead of soaking them, and use just enough coffee to flavor without saturating. If you’re layering homemade sponge, let it cool completely so it can absorb moisture evenly. Also, chill the cake for several hours so the mascarpone filling sets, which helps maintain clean layers.
Why is mascarpone important in an original tiramisu cake recipe?
Mascarpone gives tiramisu its signature creamy texture and mild, slightly sweet flavor that holds up well in a layered dessert. Using substitutions like cream cheese can change the taste and mouthfeel, often making it tangier or less luxurious. For the best results, choose mascarpone labeled specifically for tiramisu or for cooking and desserts.
Which espresso type is best for the coffee flavor in tiramisu cake?
Use strong espresso or espresso concentrate so the coffee flavor is bold enough to stand out against the mascarpone. If you don’t have an espresso machine, brewed very strong coffee or instant espresso mixed with hot water works well in an original tiramisu cake recipe. Aim for a concentrated, not watery, coffee base—then cool it before assembling to avoid softening the layers too quickly.
How long should you chill tiramisu cake before serving?
Most original tiramisu cake recipes taste best after chilling at least 4–6 hours, and overnight is ideal for deeper flavor and stable layers. During chilling, the mascarpone filling firms up and the ladyfingers or sponge fully absorb the espresso. For best presentation, dust cocoa powder right before serving so it stays fresh and doesn’t dissolve into the cream.
References
- Tiramisu
https://en.wikipedia.org/wiki/Tiramisu - Mascarpone
https://en.wikipedia.org/wiki/Mascarpone - Lady finger
https://en.wikipedia.org/wiki/Ladyfinger - Ladyfingers (biscuits)
https://en.wikipedia.org/wiki/Savoiardi - https://en.wikipedia.org/wiki/Espresso
https://en.wikipedia.org/wiki/Espresso - Cocoa powder
https://en.wikipedia.org/wiki/Cocoa_powder - Cocoa
https://en.wikipedia.org/wiki/Cocoa - Google Scholar Google Scholar
https://scholar.google.com/scholar?q=original+tiramisu+recipe - Google Scholar Google Scholar
https://scholar.google.com/scholar?q=history+of+tiramisu+mascarpone+savoiardi - https://scholar.google.com/scholar?q=tiramisu+origin+first+documented+recipe Google Scholar
https://scholar.google.com/scholar?q=tiramisu+origin+first+documented+recipe


