Learn how to prepare a tiramisu recipe step by step, from soaking the ladyfingers to building a smooth mascarpone layer and getting the right chill time. Follow these instructions exactly and you’ll produce a classic, sliceable tiramisu with bold espresso flavor and no runny texture. This guide answers the practical question of how to make tiramisu successfully on your first try.
You can prepare a classic tiramisu by layering espresso-soaked ladyfingers with a mascarpone cream, then chilling it long enough to set cleanly. The key is controlling soaking time, whipping and folding technique, and refrigeration so every slice holds its structure while keeping the dessert light and creamy.
Gather Ingredients and Equipment

A successful tiramisu recipe starts with mise en place—having the right ingredients measured and ready—because the most timing-sensitive steps (espresso cooling and ladyfinger dipping) happen quickly. For a traditional flavor profile, you’ll want classic mascarpone tiramisu ingredients: mascarpone, eggs, sugar, strong espresso or coffee, ladyfingers, and cocoa powder (for dusting and visual finish). Optional add-ins like vanilla or a splash of coffee liqueur can refine flavor, but don’t replace the core components.
What to measure carefully
– Mascarpone: Use full-fat mascarpone for stability and richness.
– Eggs and sugar: You’ll create a silky base by whisking egg yolks with sugar until noticeably paler.
– Espresso/coffee: Brew strong coffee; diluted coffee makes layers taste flat and weak.
– Ladyfingers: Choose ones designed for tiramisu (plain savoiardi-style works best).
Equipment that actually matters
– Clean mixing bowls (important for egg-white volume).
– Whisk and/or electric mixer for egg yolk cream and egg whites.
– A shallow dish or loaf pan for even layering.
– Sieve or fine mesh strainer for cocoa dusting (prevents clumps).
– Spatula for folding—folding preserves aeration.
Operational planning
Plan chilling time before you begin. Tiramisu is not fully “finished” the moment it’s assembled—it needs refrigeration for the cream to firm slightly and for flavors to meld.
Tiramisu Ingredients & What They Do (Practical Guide)
| # | Ingredient | Typical Role | Target Quality/Method | Impact on Texture | Result Rating |
|---|---|---|---|---|---|
| 1 | Mascarpone | Cream body | Use cold mascarpone; don’t overheat | Defines cream thickness | ★★★★★ |
| 2 | Egg yolks | Emulsion base | Whisk until pale and thick | Improves slice stability | ★★★★★ |
| 3 | Egg whites | Lightness | Whip to soft peaks (not dry) | Reduces heaviness | ★★★★☆ |
| 4 | Strong espresso/coffee | Soaking flavor | Cool slightly; avoid hot soaking | Controls sogginess | ★★★★★ |
| 5 | Ladyfingers | Layer structure | Dip quickly; set on cream immediately | Determines chew level | ★★★★☆ |
| 6 | Cocoa powder | Aroma & finish | Dust right before serving | Keeps surface looking fresh | ★★★★☆ |
| 7 | Sugar | Sweetness & texture | Whisk thoroughly to dissolve | Improves cream smoothness | ★★★★☆ |
Make the Espresso and Prep the Ladyfingers

This step largely determines whether your tiramisu tastes bold and stays sliceable. Start by brewing strong espresso or dark roast coffee. Then let it cool until it’s warm, not hot—about the temperature of a comfortable cup. Hot liquid can soften ladyfingers too quickly and destabilize the cream.
How to dip (the “quick” technique)
– Dip each ladyfinger briefly—just enough to coat the surface.
– Remove it promptly and transfer directly to the cream layer.
– Work in batches so the first dipped fingers don’t sit and overhydrate.
A common professional approach is to treat dipping like “assembly,” not soaking: a fast pass in, quick out, then place. If you want a slightly more pronounced coffee flavor, you can dust the top layer lightly with cocoa and add a bit more coffee to the base—but avoid prolonging contact time with the liquid.
Consistency matters more than speed
– Use the same dipping duration across the whole layer.
– Keep your espresso surface level steady (a shallow bowl allows uniform contact).
– If your ladyfingers are particularly dry, dip for slightly longer—but monitor the texture: they should remain supportive, not floppy.
Prepare the Mascarpone Cream

The mascarpone cream is where texture becomes “restaurant level.” The goal is a base that is creamy but structured, with air incorporated for lightness.
1) Whisk yolks with sugar
Separate eggs carefully—any yolk contamination can interfere with egg-white whipping. Whisk egg yolks and sugar until the mixture turns paler and thicker. This step dissolves sugar and creates a smooth emulsion that supports the mascarpone texture.
2) Fold in mascarpone
Add mascarpone and whisk just until smooth. Overmixing isn’t usually harmful in the yolk stage, but you should avoid beating so long that the mixture becomes grainy. Once it looks uniform, stop.
3) Whip whites and combine gently
Whip egg whites to **soft peaks**. Soft peaks hold shape but still look glossy and pliable. Fold the whites into the mascarpone base gently:– Use a spatula.
– Fold slowly in sections (bottom to top).
– Stop when no white streaks remain.
This is not a “stirring” moment. Gentle folding preserves the air that makes tiramisu feel light rather than heavy.
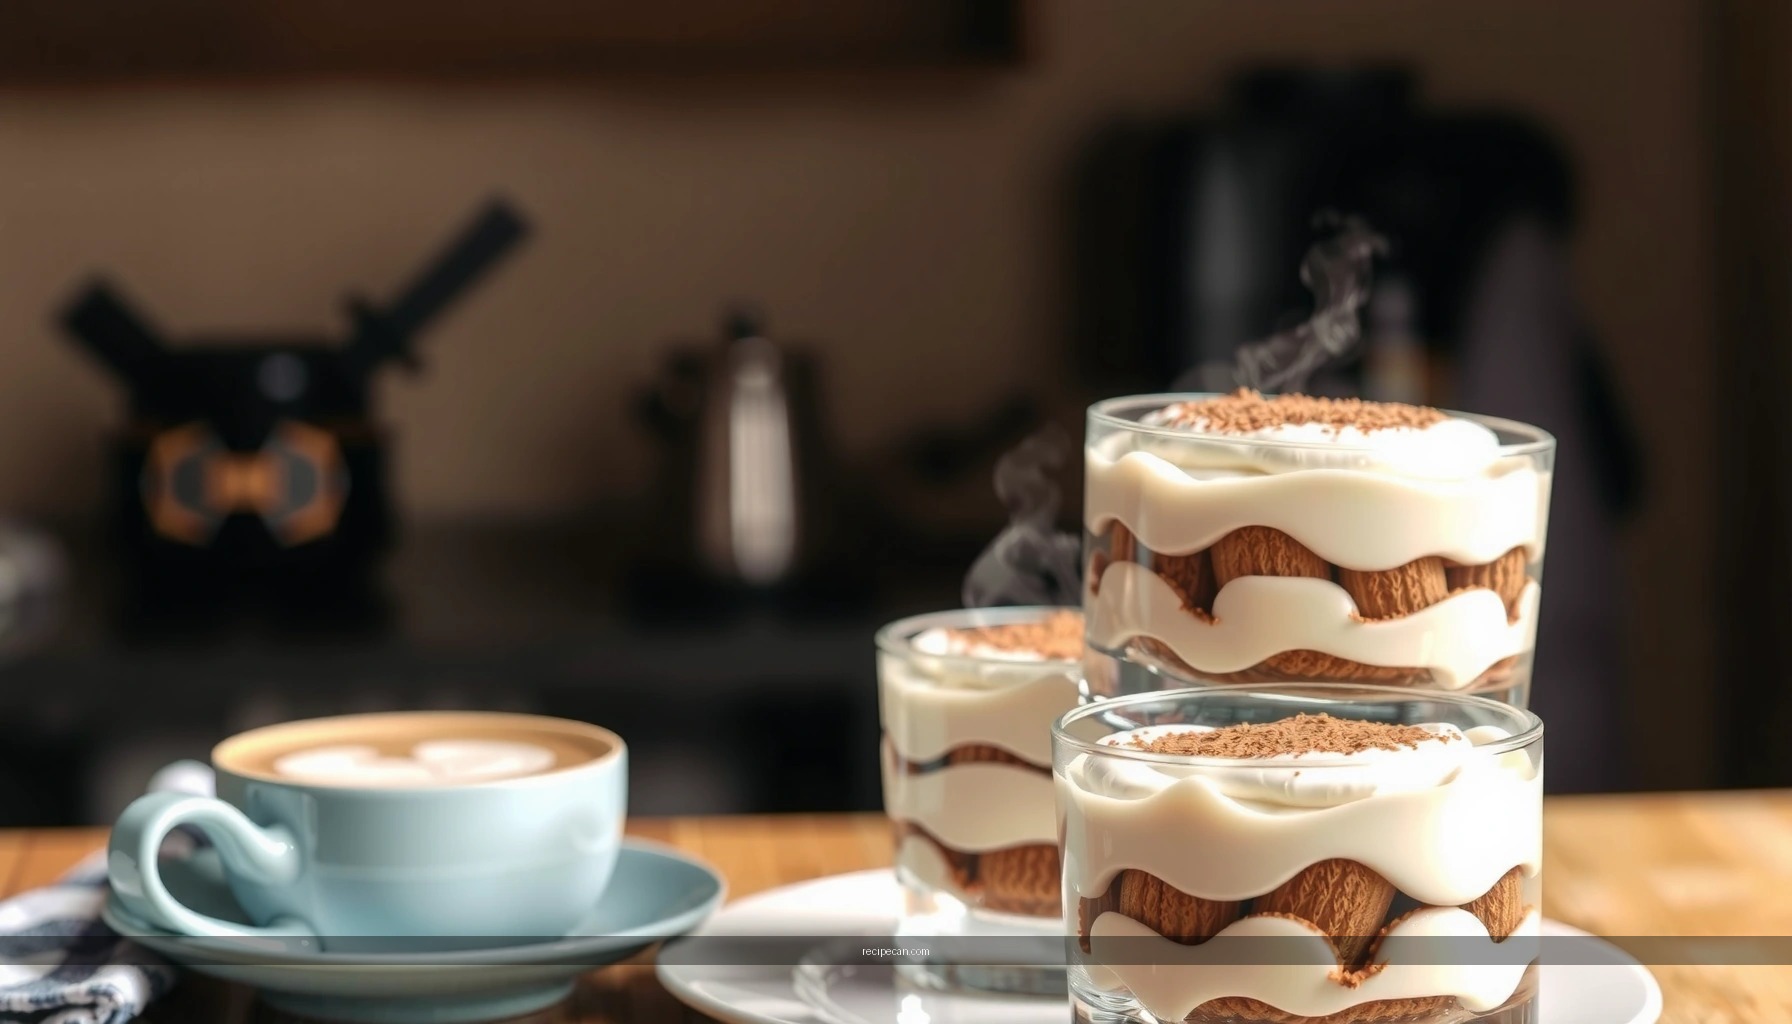
Assemble the Tiramisu Layers
Layering is both practical and sensory: you’re building contrast between coffee-soaked texture and airy cream. Assemble in a dish with enough height for distinct strata—commonly a rectangular baking dish or a deep trifle-style bowl.
Core assembly rhythm
– Start with a thin layer of cream at the bottom to prevent the first ladyfingers from sliding.
– Add a layer of espresso-dipped ladyfingers in a single consistent pattern.
– Spread mascarpone cream evenly over the top.
– Repeat until you reach the top.
Even distribution prevents weak spots
Uneven cream thickness creates uneven firmness after chilling. If you see a gap or thick mound while spreading, smooth it right away. For clean slices, aim for uniformity.
Settle without compressing
Tap the dish lightly to settle layers, but don’t press. Compressing the tiramisu can force liquid upward and make the final slice feel dense or watery.
Chill and Set Before Serving
Chilling isn’t optional if you want “sliceable tiramisu.” Refrigeration allows the cream to firm and the ladyfingers to hydrate evenly. It also lets coffee aroma and cocoa notes distribute throughout the dessert.
Recommended timing
– Minimum: 4–6 hours in the refrigerator.
– Best practice: overnight for more reliable structure and flavor integration.
Finish for presentation
Dust with cocoa powder right before serving. Cocoa absorbs moisture over time and can dull the look. Use a fine sieve for a controlled, even dusting—this gives you that crisp, professional finish.
Slicing method
Use a clean, sharp knife. Wipe or rinse between slices for neat edges. If you’re serving a group, plan to remove the tiramisu from the refrigerator briefly only as needed to keep the layers firm.
Common Mistakes to Avoid
Even with the right tiramisu recipe, a few predictable errors can ruin texture or flavor balance. Here are the most common pitfalls and what they do to the finished dessert:
– Over-soaking ladyfingers → watery tiramisu
Ladyfingers that absorb too much espresso break down into soft mush. The result is pooling coffee liquid and blurry layers. Dip quickly and transfer immediately.
– Overmixing after adding egg whites → dense or deflated cream
Once egg whites are folded in, treat the mixture carefully. Overstirring collapses the foam structure that provides lift. Fold gently, stop early, and trust the final mix to smooth out.
– Skipping chilling time → poor slice integrity
If you serve too early, the cream won’t set properly and the layers may slide. Respect the refrigeration window, especially for larger dishes.
– Using hot espresso → uneven hydration
Hot liquid accelerates softening and can slightly distort the cream’s set behavior. Cool the coffee to warm, not scorching.
– Dusting cocoa too early → dull appearance
Cocoa can absorb moisture and create a pasty top layer. Dust right before serving for crisp contrast.
If you follow the layering method, make a smooth mascarpone cream, and chill thoroughly, your tiramisu recipe will come out rich, light, and sliceable. Pick your dish size, prep your espresso, and start assembling today—then chill and serve with a fresh cocoa dusting.
Tiramisu is one of those desserts where “small” process decisions deliver measurable results: quick, consistent dipping; a mascarpone cream that’s smooth but aerated; and refrigeration long enough for clean slices. Use this step-by-step workflow to build confidence in texture and timing—then refine flavors (espresso strength, cocoa intensity, and optional liqueur) once the foundation is reliably set.
Frequently Asked Questions
What ingredients do I need to prepare a classic tiramisu recipe?
To prepare tiramisu, you typically need mascarpone cheese, eggs (or egg yolks), sugar, brewed espresso (or strong coffee), ladyfingers, and cocoa powder. Many home cooks also use vanilla extract for depth of flavor. If you’re aiming for a safer no-raw-egg approach, you can choose pasteurized eggs or use an egg-free mascarpone filling method.
How do I properly prepare the coffee for tiramisu so the ladyfingers don’t get soggy?
Brew strong espresso and let it cool to room temperature before assembling. Dip each ladyfinger quickly—about 1–2 seconds per side—so it absorbs flavor without falling apart. For best results, avoid pooling excess coffee in the dish and layer promptly to maintain tiramisu’s creamy texture and clean structure.
Why is my tiramisu filling runny, and how can I fix it?
A runny mascarpone filling is usually caused by underwhipping eggs/sugar or mixing ingredients too loosely, which prevents the mixture from thickening. Make sure you whip egg yolks (or yolks plus sugar) until lighter and slightly ribboning before folding into mascarpone. If the mixture is already runny, chill it briefly to help it set, then gently re-fold to restore a smoother tiramisu consistency.
Which method is best for preparing tiramisu—raw eggs, pasteurized eggs, or a no-egg version?
Raw eggs can create a silky, traditional texture, but it’s important to use fresh eggs and practice food safety. Pasteurized eggs are the best middle ground for many people because they reduce risk while still allowing classic tiramisu flavor and texture. If you want the easiest and safest option, choose a no-egg mascarpone method (often using whipped cream) for a similarly creamy dessert without egg concerns.
How do I assemble and chill tiramisu for the best flavor and texture?
Start by spreading a layer of mascarpone mixture, then add a single layer of coffee-dipped ladyfingers, followed by more cream, repeating until you reach your desired height. Finish with a generous dusting of cocoa powder right before serving or shortly after chilling to prevent it from dissolving. Chill tiramisu for at least 4–6 hours (overnight is best) so the ladyfingers absorb coffee and the flavors meld into a cohesive dessert.
References
- Tiramisu
https://en.wikipedia.org/wiki/Tiramisu - https://www.theguardian.com/lifeandstyle/2012/apr/11/tiramisu-recipe
https://www.theguardian.com/lifeandstyle/2012/apr/11/tiramisu-recipe - https://cooking.nytimes.com/recipes/1015879-tiramisu
https://cooking.nytimes.com/recipes/1015879-tiramisu - Tiramisu | Meaning, Ingredients, Origin, Desserts, & Taste | Britannica
https://www.britannica.com/topic/tiramisu - Google Scholar Google Scholar
https://scholar.google.com/scholar?q=tiramisu+recipe+preparation+method - Google Scholar Google Scholar
https://scholar.google.com/scholar?q=tiramisu+mascarpone+eggs+safety - Google Scholar Google Scholar
https://scholar.google.com/scholar?q=coffee+soaked+ladyfingers+tiramisu+texture - https://pubmed.ncbi.nlm.nih.gov/?term=tiramisu
https://pubmed.ncbi.nlm.nih.gov/?term=tiramisu - https://www.sciencedirect.com/search?qs=tiramisu&show=100
https://www.sciencedirect.com/search?qs=tiramisu&show=100 - Google Scholar Google Scholar
https://scholar.google.com/scholar?q=how+to+prepare+tiramisu+recipe


