Need a simple tiramisu dessert recipe with easy classic layers? This recipe delivers the real, café-style results—silky mascarpone cream, espresso-soaked ladyfingers, and cocoa on top—without complicated steps. Follow it once and you’ll know exactly how to build tiramisu that slices cleanly, tastes rich, and sets properly for serving.
Yes—you can make a rich, classic tiramisu with creamy mascarpone layers and espresso flavor in a straightforward, low-stress process. This easy tiramisu dessert recipe walks you through the mascarpone filling, a quick coffee dip, clean layer assembly, and the chill time that turns everything into the signature, spoon-tender texture.
Ingredients for a Simple Tiramisu Dessert Recipe

Tiramisu is all about balance: creamy mascarpone, lightly sweet eggs (or an easier no-egg alternative), bold espresso, and a final cocoa dusting that cuts through the richness. Below is a practical ingredient checklist for an authentic yet approachable result.
– Mascarpone cheese (the foundation of the filling)
– Eggs (for the traditional version) *or* an egg-free option if you prefer
– Espresso or strong coffee (freshly brewed is best)
– Ladyfingers (Savoiardi)—softened by the coffee but not turned mushy
– Unsweetened cocoa powder (for the top and flavor depth)
– Granulated sugar (to balance bitterness and brighten sweetness)
– Vanilla extract (optional, but commonly used for warmth)
– Salt (a small amount improves overall flavor clarity)
Actionable tip: If your espresso tastes slightly sharp or too acidic, consider adding a teaspoon of sugar while the coffee cools. The goal is a “coffee bite,” not a harsh one.
Operational note for consistency: Plan on about 1 package (typically ~24–30 ladyfingers) depending on your dish size and how tightly you layer.
Tiramisu Assembly Time & Chill Impact (Guidance for Best Results)
| # | Factor | Recommended Target | If You Go Faster/Longer | Taste Outcome |
|---|---|---|---|---|
| 1 | Ladyfinger dip time | ~1–2 seconds per side | >3 seconds | Soggy, unstable layers |
| 2 | Mascarpone mixing | Until just smooth | Overmixing | Grainier texture |
| 3 | Chill time before serving | At least 4 hours | Under 2 hours | Less set, watery bite |
| 4 | Chill time (optimal) | Overnight (~12 hours) | Over 48 hours | Texture can soften too far |
| 5 | Cocoa application timing | Right before serving | Hours in advance | Cocoa dissolves into paste |
| 6 | Coffee strength | “Bold” coffee (espresso-like) | Weak brewed coffee | Flavor fades |
| 7 | Layer coverage | Even cream thickness | Uneven spread | Less “wow” bite distribution |
Make the Tiramisu Cream (Mascarpone Filling)

The mascarpone filling is where tiramisu earns its “luxury” reputation. The objective is a smooth, stable cream that holds its shape in layers while still feeling soft when you spoon it.
– Whisk mascarpone until smooth and creamy.
Mascarpone can be thick and slightly uneven straight from the tub. Whisking (or beating gently) until it’s smooth helps avoid lumps in the final dessert.
– Combine eggs with sugar (for the classic method) for a light texture.
When using eggs, the classic approach whips yolks with sugar (and often folds whites for extra lift). Even if you keep it simple, the key is sugar dissolving fully and the mixture turning pale and airy.
– Fold everything gently to keep the filling airy.
Folding matters because it preserves air. Overmixing can deflate the texture and make the cream feel dense rather than creamy.
Why this works (quick analytical view):
Tiramisu cream quality depends on fat stability + aeration. Mascarpone provides the fat base for the silky mouthfeel; whipping/dissolving sugar contributes volume; gentle folding protects that volume so the layers feel tender, not heavy.
Practical safety/ease note:
If you prefer to minimize egg handling, choose a no-egg filling or use an egg-free mascarpone cream method. The result won’t be identical to tradition, but it can be equally impressive for an easy tiramisu dessert.
Prepare the Coffee Dip

Coffee is the “flavor engine” in this tiramisu recipe. The goal is to infuse the ladyfingers with enough espresso flavor while maintaining structure.
– Brew strong espresso or coffee and let it cool slightly.
Hot coffee can soften ladyfingers too quickly and can partially melt the cream if you assemble immediately. Let it cool to comfortably warm (or room temperature).
– Mix in a little sugar or flavoring if desired.
A small amount can mellow bitterness and create a smoother overall profile. Vanilla can also complement cocoa.
– Dip ladyfingers quickly so they soften without getting soggy.
Work efficiently: dip briefly, remove, and immediately layer. Think “brief contact,” not soaking.
Pro tip for businesslike consistency:
Make your coffee, prep your dish, and only then start dipping. A slow assembly increases the chance ladyfingers absorb too much liquid.
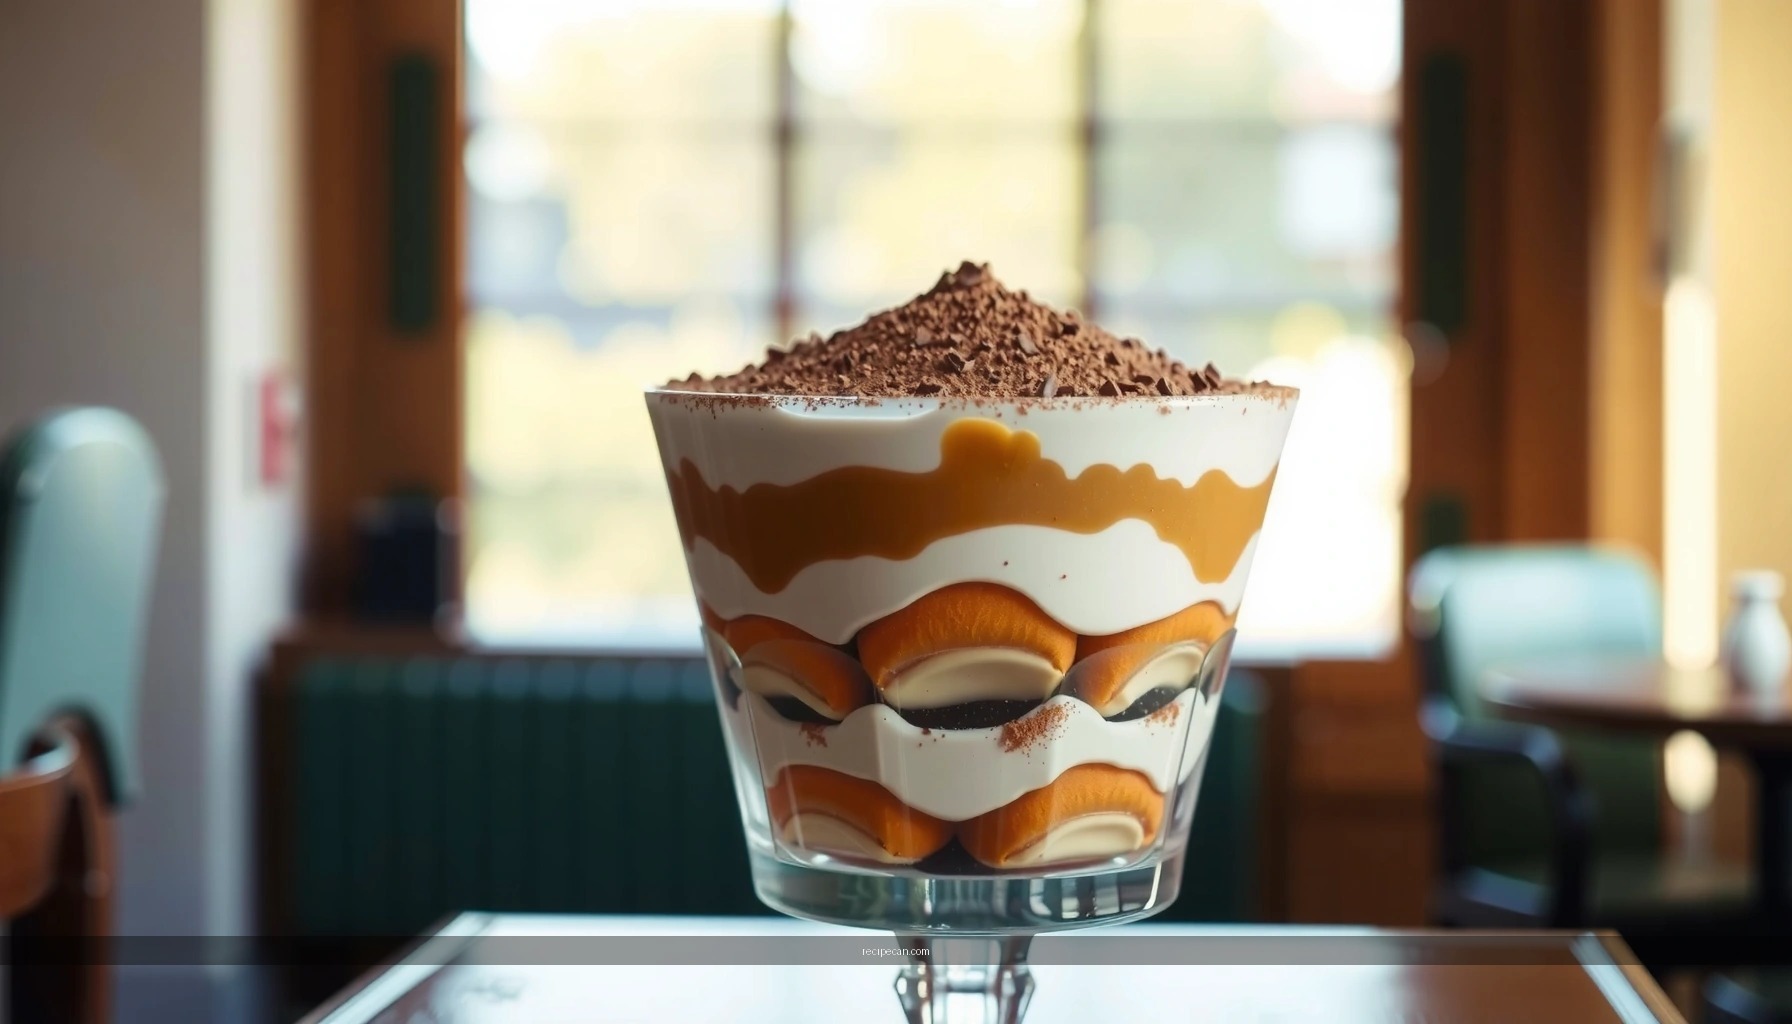
Assemble the Easy Tiramisu Layers
Layering is where this easy tiramisu dessert recipe becomes reliably repeatable. If your assembly is clean and evenly distributed, your finished tiramisu will slice or spoon beautifully.
– Layer coffee-dipped ladyfingers with the mascarpone cream.
Place a layer of dipped ladyfingers at the bottom, then spread cream evenly over them. Aim for consistent thickness so every bite has balanced coffee and cream.
– Repeat until you reach the top of your dish or cups.
Two to three layers are typical. In individual cups, you can do thinner layers to maximize visual contrast.
– Smooth the final cream layer for a clean presentation.
Use an offset spatula or the back of a spoon to even out the surface. This makes the top look professional and ensures cocoa dusting sits cleanly.
Common assembly mistake to avoid:
Pressing too hard compresses ladyfingers and can cause uneven texture. Gentle spreading and firm-but-not-pressing placement produces the best spoon-tender result.
Chill and Serve for the Best Flavor
Chilling isn’t optional—it’s the final “technique” that turns separate components into one integrated dessert.
– Refrigerate at least 4 hours (overnight is even better).
During chilling, coffee moisture distributes and cream firms. Overnight gives the flavors time to meld for a deeper, more cohesive taste.
– Dust generously with cocoa powder right before serving.
Cocoa should stay dry and powdery. If you dust too early, moisture can dissolve the top layer into a darker paste.
– Serve chilled for the best creamy texture.
Cool tiramisu feels firmer and more layered. Let it sit just 5–10 minutes if you want slightly softer cream.
Flavor engineering insight:
Coffee flavor comes through best when the cream is chilled and thick enough to carry the aroma. Serving too warm can make the cream feel looser and dilute the perceived coffee intensity.
Variations and Make-Ahead Tips
This section is where you can tailor your tiramisu for lifestyle, dietary needs, and scheduling demands—without losing the classic identity.
– Try a no-egg version for an even simpler, safer option.
Use an egg-free mascarpone cream approach or a stable whipped-cream + mascarpone blend. These methods reduce egg handling and still deliver a creamy, stable texture when chilled.
– Add chocolate shavings or a splash of liqueur for extra depth.
Small additions can elevate flavor complexity. Options include finely grated dark chocolate or a modest splash of coffee liqueur (used sparingly so it doesn’t overpower the espresso/cocoa balance).
– Make ahead up to 1–2 days for best flavor and convenience.
Tiramisu is an excellent make-ahead dessert because chilling improves integration. Cover it well to prevent fridge odors and keep the surface tidy.
Scheduling strategy:
If you’re serving for a gathering, assemble the day before, keep it chilled, and dust with cocoa shortly before guests arrive. This protects the classic look and ensures peak texture.
This simple tiramisu dessert recipe is all about easy assembly, creamy mascarpone filling, and a quick coffee dip—then letting the fridge do the rest. Make it today, chill it for the best texture, and dust with cocoa before serving for that classic finish.
Tiramisu is one of those desserts where “technique” really means timing and texture control: smooth mascarpone, quick coffee dipping, even layers, and enough refrigeration for everything to set properly. Follow the steps above, choose either the classic egg method or an easier no-egg approach, and you’ll reliably produce rich, creamy tiramisu with the unmistakable espresso-and-cocoa flavor—ready to serve with a professional, polished presentation.
Frequently Asked Questions
What is the simplest tiramisu dessert recipe you can make at home?
A simple tiramisu dessert recipe typically uses mascarpone, brewed espresso (or strong coffee), ladyfingers, eggs (optional), sugar, and cocoa powder. Layer soaked ladyfingers with a creamy mascarpone mixture, repeat the layers, then chill until set. For an easy no-fuss option, you can use whipped mascarpone with sweetened condensed milk or whipped cream to avoid tempering eggs. This keeps the process straightforward while still delivering classic tiramisu flavor.
How do you make tiramisu without eggs using a simple recipe?
For an egg-free simple tiramisu dessert recipe, whip mascarpone with sugar (and sometimes a splash of vanilla) until smooth, then fold in whipped cream for a lighter texture if desired. Briefly dip ladyfingers in espresso—just a few seconds per side—so they absorb flavor without turning soggy. Assemble the layers, refrigerate for at least 4 hours (overnight is best), and finish with cocoa powder dusted on top. This method avoids raw eggs and makes the cream easier to prepare.
Why does my tiramisu turn watery or soggy, and how can I fix it?
Tiramisu gets watery when ladyfingers soak too long in coffee or when the mascarpone mixture is too thin. To fix it, dip ladyfingers quickly (aim for 1–2 seconds each side) and use espresso that’s cooled slightly rather than hot. Also make sure your mascarpone is well-mixed and, if needed, chill the cream before assembling so it holds its shape. Finally, refrigerate long enough for the layers to set—usually at least 4 hours.
What’s the best type of coffee or espresso to use for a simple tiramisu?
The best coffee for tiramisu is strong, flavorful espresso or strongly brewed coffee because it provides the signature tiramisu bitterness that balances the sweetness. Use cooled espresso so the ladyfingers absorb evenly without accelerating mushiness. For a non-alcoholic option, you can skip liquor entirely; if you want an upgrade, a small splash of coffee liqueur can add depth. Choose a coffee you enjoy drinking, since its flavor will come through in the simple tiramisu dessert recipe.
Which ingredients make the creamiest simple tiramisu, and what substitutions work?
For a creamy simple tiramisu dessert, focus on quality mascarpone and proper layering with ladyfingers (or savoiardi). If mascarpone is hard to find, you can substitute with cream cheese blended until smooth, but texture may be slightly less authentic—whipping in a bit of heavy cream can help. Use unsweetened cocoa powder for the classic finish, and avoid overly wet substitutions that can thin the filling. With the right mascarpone base and controlled coffee dipping, you’ll get a rich, stable tiramisu cream and dessert-like texture.
References
- Tiramisu
https://en.wikipedia.org/wiki/Tiramisu - Tiramisu | Meaning, Ingredients, Origin, Desserts, & Taste | Britannica
https://www.britannica.com/topic/tiramisu - Mascarpone
https://en.wikipedia.org/wiki/Mascarpone - Lady finger
https://en.wikipedia.org/wiki/Ladyfinger - Espresso
https://en.wikipedia.org/wiki/Espresso - Cocoa
https://en.wikipedia.org/wiki/Cocoa - https://scholar.google.com/scholar?q=simple+tiramisu+dessert+recipe Google Scholar
https://scholar.google.com/scholar?q=simple+tiramisu+dessert+recipe - Google Scholar Google Scholar
https://scholar.google.com/scholar?q=tiramisu+recipe+ladyfingers+mascarpone+espresso - Google Scholar Google Scholar
https://scholar.google.com/scholar?q=authentic+tiramisu+recipe+history - https://pubmed.ncbi.nlm.nih.gov/?term=tiramisu
https://pubmed.ncbi.nlm.nih.gov/?term=tiramisu


