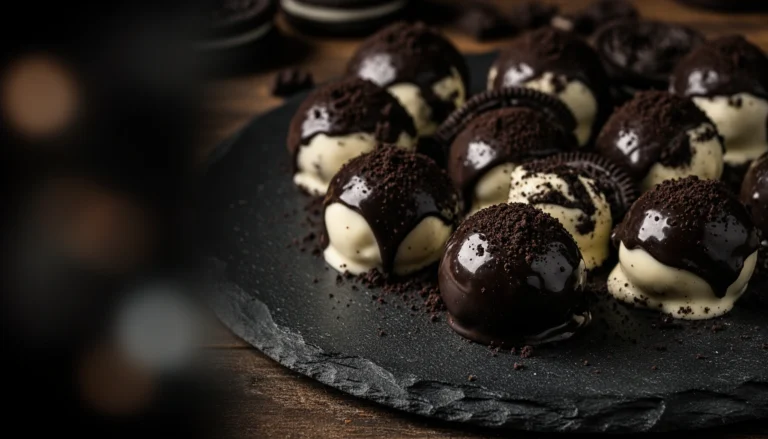
This recipe for Oreo Balls delivers the easiest no-bake Oreo treats that set up reliably with a rich, cookie-studded bite. You’ll learn the exact crumble-to-cream-cheese ratio, how to mix and chill for clean rolling, and what to coat them with for a crisp finish. If you want fast, foolproof Oreo balls for parties or last-minute dessert, this is the one to make.
Recipe for Oreo Balls made simple: crush Oreos, mix with cream cheese, roll, coat, and chill—no oven required. If you follow the measurements and troubleshooting guidance below, you’ll get smooth, scoopable Oreo balls (not dry, crumbly centers) with optional coatings that match any occasion or flavor profile.
Gather Ingredients for Oreo Balls

To make easy no-bake Oreo treats with reliable texture, start with the right ingredient balance: crushed Oreo cookies for structure and cream cheese to bind and create the creamy “filling” inside each ball.
– Oreo cookies (regular or double-stuffed): crushed into fine crumbs so the mixture binds smoothly.
– Cream cheese (full-fat recommended): soft enough to mix thoroughly, providing the creamy consistency.
Optional add-ins (flavor control)
– Vanilla extract (½ tsp): adds depth to the chocolate-cookie profile without overpowering it.
– Pinch of salt (optional): sharpens sweetness and enhances the Oreo flavor—especially if you use very sweet coatings.
Coating options (choose based on the look you want)
– Melted chocolate (semi-sweet or dark): classic, deeper flavor.
– White chocolate: brighter contrast and a dessert-shop aesthetic.
– Sprinkles: quick customization for holidays, birthdays, or themed events.
Quick measurement baseline (for dependable texture)
– Oreo cookies: 24 Oreos (about 2 standard packs of cookies, depending on pack size)
– Cream cheese: 8 oz (1 standard block), softened
– Optional vanilla: ½ tsp
– Optional salt: pinch
These proportions are the sweet spot for rollable Oreo balls that hold their shape after chilling.
Make the Oreo Mixture

The Oreo mixture is where texture is won or lost. The two main variables are how finely you crush the Oreos and how thoroughly you mix the cream cheese.
– Crush Oreos finely for a smoother texture
Use a food processor for the most consistent crumb size. If you crush by hand, you can end up with uneven granules that create a grainier bite. The goal is a “sand-like” crumb that disperses evenly.
– Mix cream cheese until the dough holds together
Combine softened cream cheese with the Oreo crumbs and mix until no dry pockets remain. You’re aiming for a thick, moldable mixture—similar to a soft cookie dough.
– Troubleshooting for smooth, not crumbly results
– If too crumbly: add cream cheese 1 tablespoon at a time, mixing thoroughly after each addition. Cream cheese rebinds the crumb and improves cohesion.
– If too soft/wet: chill the mixture 15–30 minutes before rolling. Cold temperature firms the fat and makes shaping easier.
Actionable technique tip:
After mixing, let the bowl sit at room temperature for 3–5 minutes if your cream cheese was very cold—then remix briefly. Overmixing isn’t the issue; uneven temperature is.
Flavor and texture perspective (why this works)
This recipe functions like a no-bake cookie filling:
– Oreos contribute cookie crumbs and cocoa flavor
– Cream cheese contributes fat + moisture that binds the crumbs into a cohesive ball
When chilled, the cream cheese firms up and locks the shape—so coating and serving stay clean and consistent.
Roll and Shape the Oreo Balls

Rolling is mostly about consistency and speed. Oreo balls are simple, but even small temperature changes can affect how they hold together.
– Scoop and roll into even-sized balls for consistent results
Use a cookie scoop or spoon for uniformity. Even sizing helps the balls chill at the same rate and prevents some from cracking while others stay soft.Target size: about 1 tablespoon of mixture per ball (yields roughly 24 balls with the measurements above).
– Work quickly to prevent the mixture from warming up
If your kitchen runs warm, the mixture can soften quickly. Keep the bowl covered and return it to the fridge between batches if needed.
– Place on a lined tray to keep shapes intact
Line a baking sheet with parchment paper or a silicone mat. Refrigerate the formed balls 15 minutes before coating to reduce breakage.
Professional-level execution tip:
Wear food-safe gloves or lightly wet your fingertips (or use a tiny smear of neutral oil on hands) if the mixture sticks. This prevents you from compressing the balls unevenly.
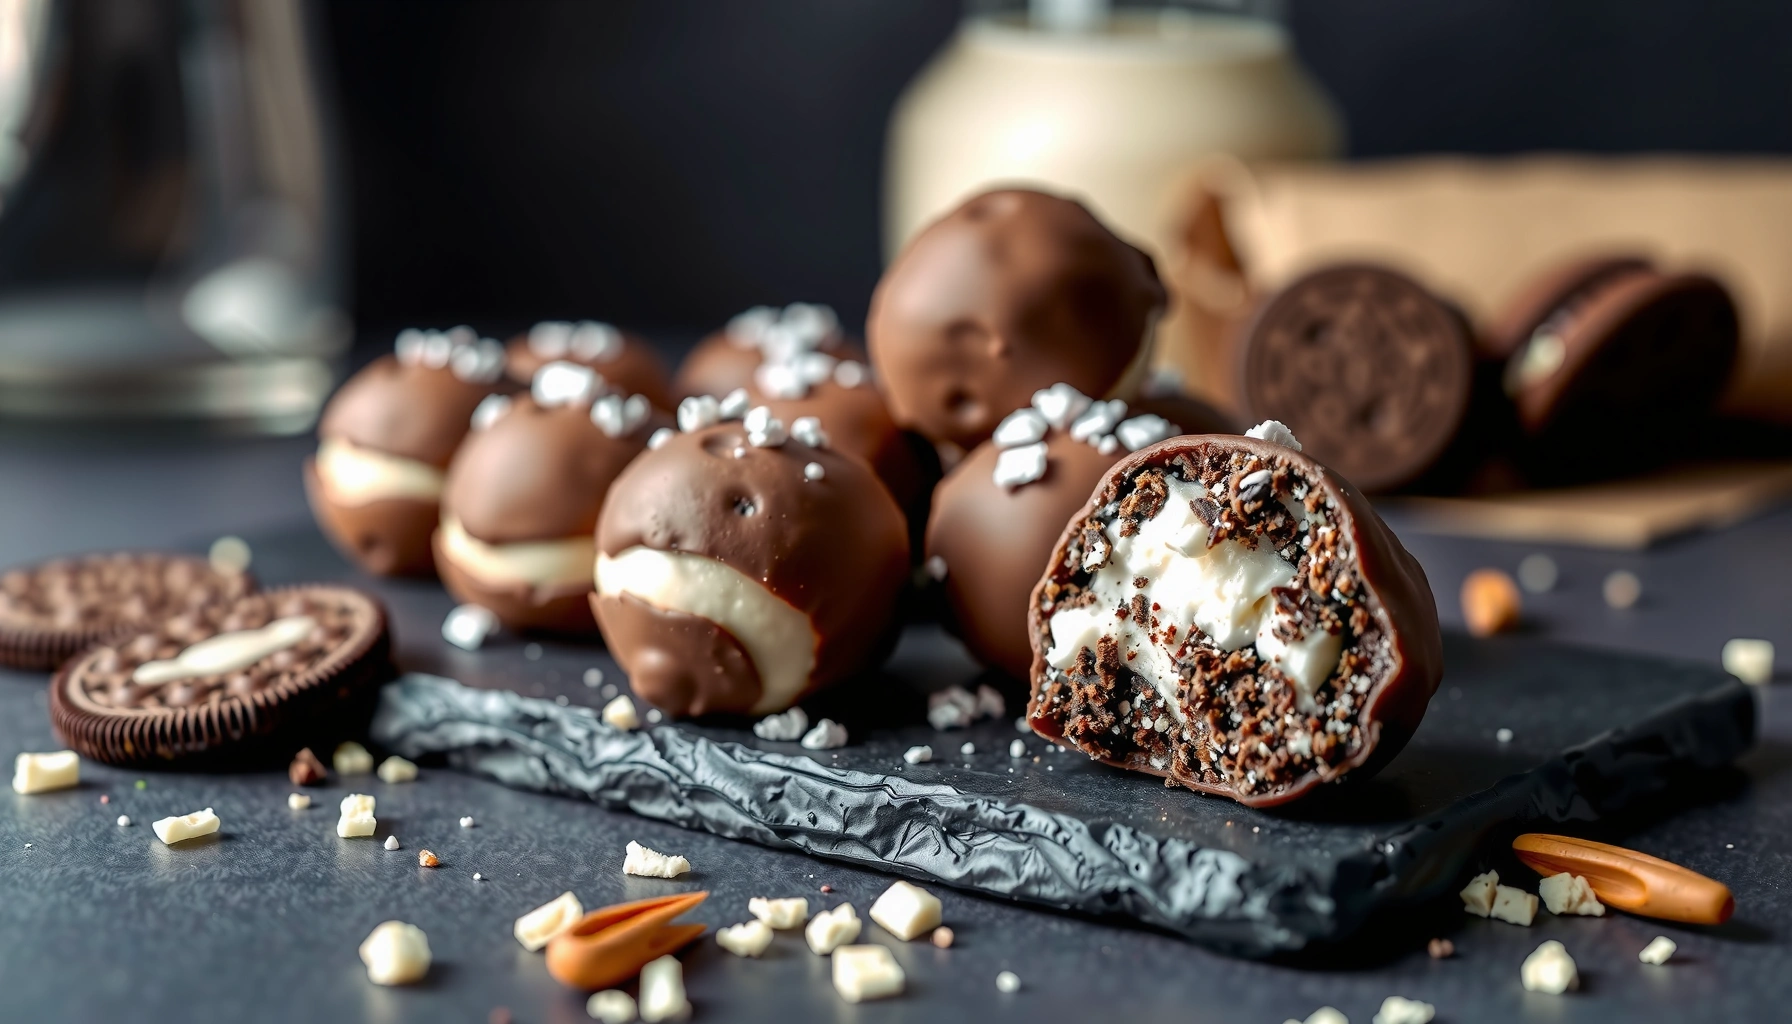
Coat the Oreo Balls

Coating is where you turn a delicious interior into a finished, gift-worthy treat. The goal is an even shell that sets without cracking.
– Dip each ball in melted chocolate (or drizzle for a lighter coating)
– For a thicker, cleaner finish: dip, then rotate to coat evenly.
– For a lighter look: place on a rack and drizzle chocolate using a spoon or piping bag.
– Let excess drip off for a clean finish
After dipping, tap the bottom edge gently against the side of the bowl or remove and hold over the bowl for a few seconds. This reduces puddles that can cause chocolate to pool at the base.
– Add sprinkles or toppings before the coating sets
Chocolate sets fast. Add sprinkles immediately after coating so they adhere properly.
Coating temperature matters:
Melt chocolate slowly (microwave in short bursts or use a double boiler). If chocolate is too hot, it can soften the Oreo balls before the shell forms, leading to messy edges.
Option highlights
– Semi-sweet chocolate: classic contrast and balanced sweetness.
– Dark chocolate: more grown-up flavor; pairs well with a pinch of salt.
– White chocolate: excellent for celebrations; works especially well with colorful sprinkles.
Data snapshot: expected yield and typical timing
The table below summarizes practical, real-world expectations for this easy no-bake Oreo treat process (assuming standard Oreo packs and 8 oz cream cheese block).
Oreo Balls Workflow: Yield and Timing Guide
| # | Step | Typical time | What you’re verifying | Consistency impact |
|---|---|---|---|---|
| 1 | Crush Oreos (fine crumbs) | 5–8 min | No large cookie chunks | High |
| 2 | Mix with cream cheese | 3–6 min | No dry crumbs remain | High |
| 3 | Roll into balls | 10–15 min | Uniform size (~1 Tbsp) | Medium |
| 4 | Chill before coating | 15–30 min | Balls feel firm to the touch | High |
| 5 | Coat + set | 20–35 min | Shell is opaque and firm | Medium |
| 6 | Final chill (serve-ready) | 30–60 min | Centers are scoop-stable | High |
| 7 | Yield (24 Oreos + 8 oz cream cheese) | ~24 balls | Size target stays consistent | Predictable |
Chill and Serve
Chilling is not optional if you want smooth, sliceable stability and clean coating. Think of it as the “set” phase that turns a soft mixture into a formed dessert bite.
– Chill until firm (typically 30–60 minutes)
After coating, refrigerate until the chocolate shell feels solid. If you’re in a time crunch, you can chill longer to firm the centers for easier handling.
– Store chilled for best texture and flavor
Oreo balls taste best when cold but not frozen. Slightly soften for 3–5 minutes at room temperature before serving for a creamier bite.
– Serve as a dessert bite for parties, holidays, or snacking
Arrange them in mini cupcake liners for easy grab-and-go serving at events. Their no-bake nature also makes them ideal for offices, potlucks, and holiday spreads where you want reliable, mess-minimizing desserts.
Storage and Make-Ahead Tips
If you’re planning ahead, Oreo balls are one of the most convenient no-bake desserts you can prepare. They hold well because the cream cheese binding and chocolate shell protect the interior.
– Refrigerate in an airtight container to keep them fresh
Place them in a single layer if possible, or separate layers with parchment paper. Refrigeration helps prevent the coating from softening too quickly.
– Freeze on a tray, then transfer to a freezer bag for longer storage
Freeze formed and/or coated balls in a single layer first, then bag them once firm. This prevents sticking and makes portioning easy later.
– Thaw in the fridge before serving for best texture
Thawing slowly keeps the cream cheese from becoming grainy or watery. Plan on transferring to the fridge several hours (or overnight) before serving.
Make-ahead strategy for events:
Prepare the Oreo balls up to the rolling and initial chilling stage the day before. Coat the next day for the freshest-looking shell and the most appealing texture.
Oreo balls are quick to make and perfect for make-ahead treats—just mix crushed Oreos with cream cheese, roll, coat, and chill. Follow the steps above for smooth results, then store extra in the fridge (or freezer) and enjoy whenever you need an easy dessert.
No-Bake Oreo Balls conclusion: If you crush the cookies finely, use softened cream cheese, correct mixture texture early (more binder if crumbly; brief chill if too soft), and chill until the coating is fully set, you’ll consistently get smooth, stable Oreo balls that taste like a bakery treat—without turning on the oven.
References
- Google Scholar Google Scholar
https://scholar.google.com/scholar?q=Oreo+balls+recipe - Google Scholar Google Scholar
https://scholar.google.com/scholar?q=Oreo+truffles+cream+cheese+ganache - Google Scholar Google Scholar
https://scholar.google.com/scholar?q=cookie+truffles+chocolate+truffle+method - Oreo
https://en.wikipedia.org/wiki/Oreo - Chocolate truffle
https://en.wikipedia.org/wiki/Chocolate_truffle - Ganache
https://en.wikipedia.org/wiki/Ganache - https://en.wikipedia.org/wiki/Truffle_(confectionery
https://en.wikipedia.org/wiki/Truffle_(confectionery - Cake pop
https://en.wikipedia.org/wiki/Cake_pop - Cream cheese
https://en.wikipedia.org/wiki/Cream_cheese - Cookie
https://en.wikipedia.org/wiki/Cookie