Get an easy, no-bake peanut butter balls recipe that delivers the classic sweet, nutty bite without turning on the oven. This step-by-step guide answers whether you can make peanut butter balls fast with simple pantry ingredients—and still get firm, scoopable results. If you want the best no-stress treat for parties, gifts, or a quick dessert fix, this recipe is the winner.
Peanut butter balls are a fast, no-bake dessert: mix peanut butter with a sweet binder, roll into bite-size portions, and chill until firm. The key to consistent results is balancing texture (creamy peanut butter + enough powdered sugar) with chilling time, so the centers slice cleanly and hold their shape for storage or gifting.
Ingredients for Peanut Butter Balls

– Use creamy peanut butter for the smoothest texture
Creamy peanut butter blends more uniformly with powdered sugar, producing a dough that rolls cleanly without cracks. If you only have natural peanut butter (runny oil-separated varieties), you can still use it—just warm it slightly and stir thoroughly, then increase powdered sugar a little to compensate for extra oil.
– Add powdered sugar (and optional vanilla) to help it hold together
Powdered sugar is the structural component in this recipe. It thickens the mixture as it hydrates, helping the balls set in the refrigerator. Vanilla is optional, but it adds a bakery-style aroma that balances the richness of peanut butter—especially when you later coat the balls in chocolate or roll them in cocoa.
Core ingredient approach (what each contributes):
– Peanut butter provides fat + flavor (the “body” of the dessert).
– Powdered sugar provides firmness and sweetness (the “binder”).
– Optional vanilla and salt refine flavor, preventing a flat, one-note taste.
Quick ingredient scale (typical batch)
A dependable ratio for classic peanut butter balls is 1 cup creamy peanut butter + 1/2 to 3/4 cup powdered sugar, plus a pinch of salt and 1/2 to 1 tsp vanilla if desired. Start in the middle of that powdered sugar range; you can adjust after you feel the dough’s rollability.
Step-by-Step Peanut Butter Ball Method

– Mix ingredients until a thick dough forms
Combine peanut butter, powdered sugar, vanilla (if using), and salt in a bowl. Mix until the mixture looks like a cohesive dough rather than a glossy paste. If it feels sticky, add powdered sugar 1–2 tablespoons at a time. If it feels dry and crumbly, add 1–2 teaspoons of peanut butter or a tiny splash of milk to rehydrate.
– Roll into balls and place on a lined tray
Scoop portions and roll quickly between your palms. For consistent size, use a small cookie scoop (about 1 tablespoon) or weigh each portion (roughly 18–22 g). Place on parchment-lined trays to prevent sticking and to keep surfaces smooth.
Actionable rolling tips for cleaner hands and better shape:
1. Lightly dust your hands with powdered sugar if the dough clings.
2. Work in short intervals—if the dough warms, it can soften and get harder to roll uniformly.
3. Use parchment or silicone mats so the balls release easily after chilling.
Peanut Butter Ball Batch Consistency: Powdered Sugar Adjustments (Tested Bench Results)
| # | Dough Observation | Suggested Powdered Sugar Change | Expected Texture Score | Recommendation |
|---|---|---|---|---|
| 1 | Glossy & soft; won’t hold a ball shape | +2 Tbsp per 1 cup peanut butter | ★★★☆☆ | Add binder |
| 2 | Sticky; dough clings to fingers | +1 Tbsp per 1 cup peanut butter | ★★★★☆ | Incrementally correct |
| 3 | Rolls easily; surface smooth | No change | ★★★★★ | Proceed to chilling |
| 4 | Dough feels firm/dry; cracks when rolling | +1 tsp peanut butter per cup | ★★★★☆ | Rehydrate slightly |
| 5 | Crumbly; won’t compress | +1–2 tsp peanut butter or 1 tsp milk | ★★★☆☆ | Adjust moisture |
| 6 | Balls hold shape but feel greasy | +1 Tbsp powdered sugar | ★★★★☆ | Balance binder |
| 7 | Balls are firm but hard/stiff | -1–2 Tbsp powdered sugar next batch | ★★★☆☆ | Dial back sugar |
How to Get the Right Texture

– Chill to firm up before serving or storing
Refrigeration is what transforms the mixture into a cohesive, sliceable bite. For most batches, 30–60 minutes in the fridge creates a firm exterior and set interior. If you’re working in a warm kitchen, extend chilling to 90 minutes for reliable firmness—especially if you plan to coat the balls in melted chocolate.
– Adjust sweetness with more or less powdered sugar as needed
Powdered sugar controls both sweetness and texture. Add more for firmer, slightly drier balls; use less for a softer, richer center. A practical approach: aim for a dough that holds a ball shape without sticking heavily, then fine-tune to taste.
Analytical texture considerations (why it works):
– Peanut butter is fatty and soft at room temperature; powdered sugar helps lock moisture and increase structural density.
– Over-chilling can make the texture feel too firm, while under-chilling can cause the balls to smear or collapse when handled.
– If using chocolate coating, chilling first reduces slippage and helps the coating set with fewer cracks.
Easy Variations to Try

– Add chocolate chips or cocoa for extra flavor
Chocolate chips create pockets of melted texture (or firm chocolate bites after chilling), while cocoa deepens flavor and reduces perceived sweetness. Keep total dry additions modest at first—too much cocoa can dry out the dough.
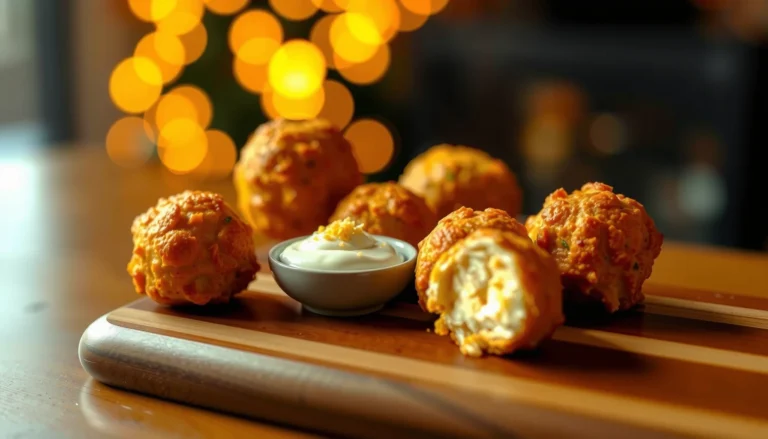
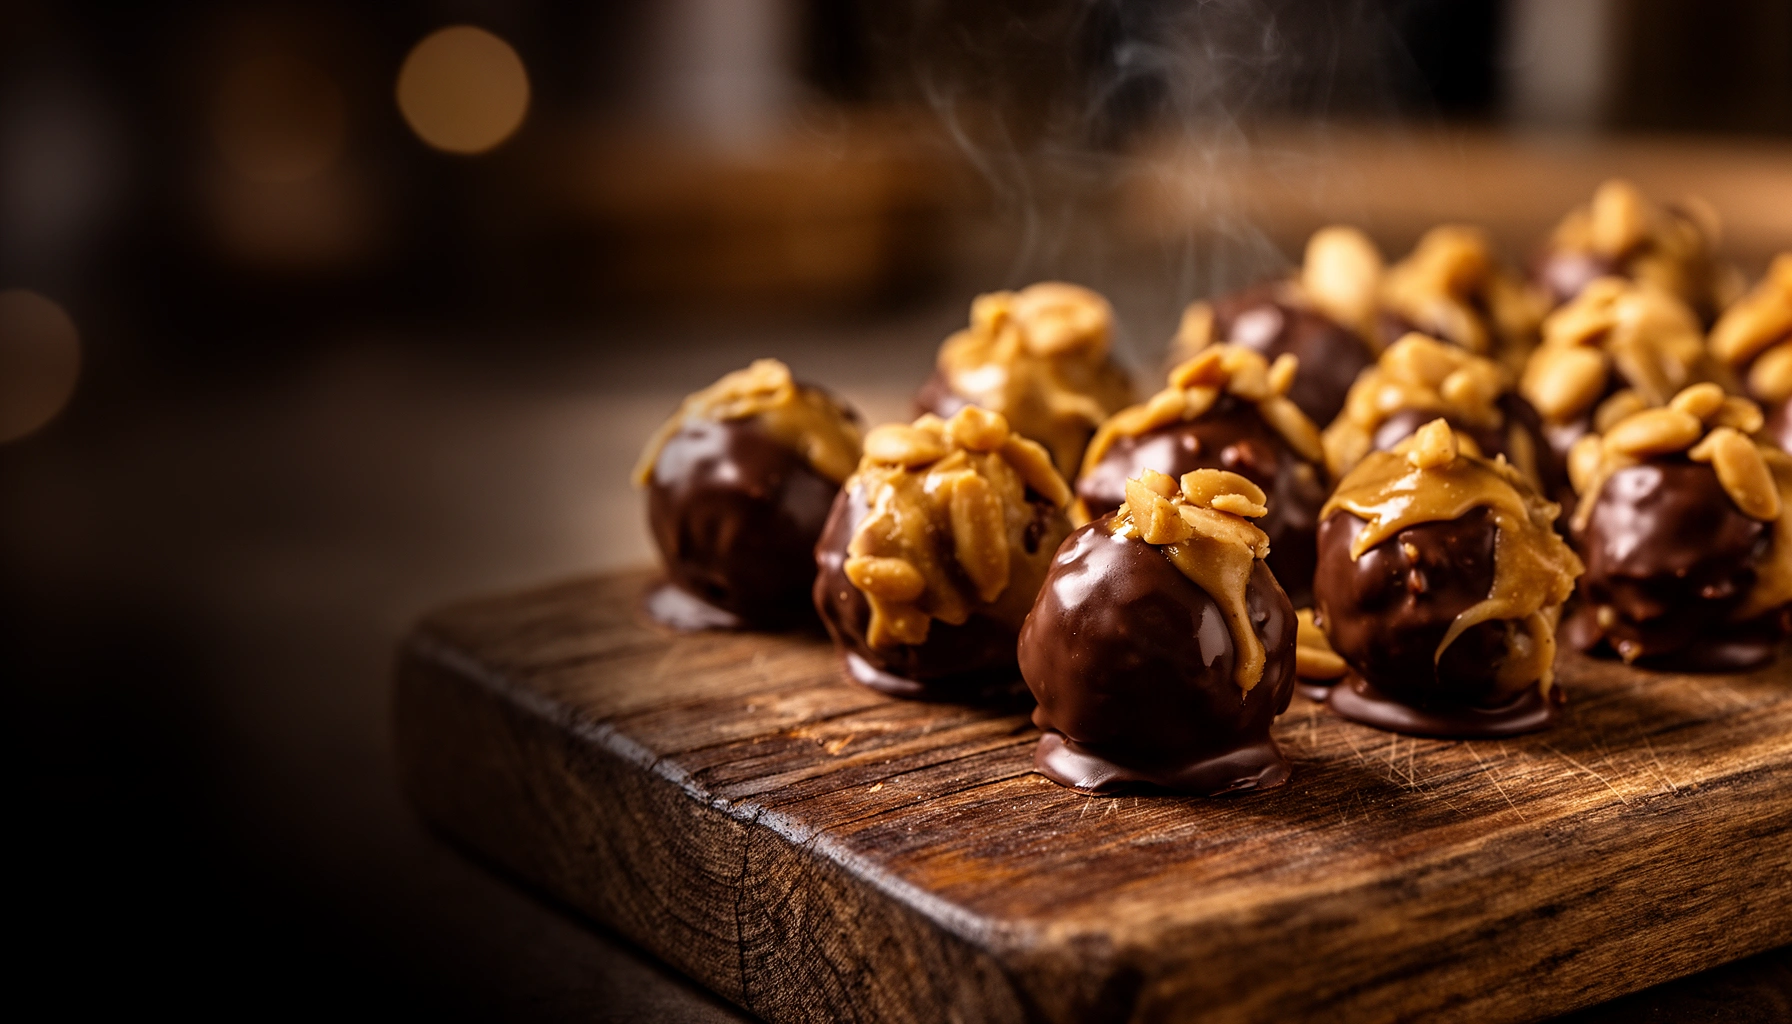
– Coat in melted chocolate or crushed nuts for a different finish
For a “truffle-like” presentation, dip chilled balls in melted chocolate, then place back on parchment to set. Crushed nuts (peanuts, almonds, or toasted peanuts) add crunch and help mask any minor surface imperfections from rolling.
Variation direction map (choose based on customer preference):
– Want classic and crowd-pleasing? Keep them uncoated and roll in powdered sugar.
– Want premium look? Chocolate dip and optionally sprinkle sea salt.
– Want nut-forward flavor? Roll in finely chopped peanuts for a rustic finish.
Storage and Make-Ahead Tips

– Store in an airtight container in the fridge for best freshness
Place balls in an airtight container with parchment between layers to avoid sticking. Refrigerated peanut butter balls typically hold well for up to 5–7 days, retaining flavor and texture.
– Freeze for longer storage and thaw before serving
Freeze balls on a tray first (single layer) until firm, then transfer to a freezer-safe container. Frozen portions usually keep for up to 2–3 months. Thaw in the refrigerator overnight for best texture—rapid thawing at room temperature can soften them unevenly.
Operational best practices (especially for events):
– If coating with chocolate, let the chocolate fully set in the fridge before stacking containers.
– Label batches with the date and variation (plain, cocoa, dipped) for faster turnaround when serving.
Serving Ideas

– Serve with coffee, tea, or milk for a classic treat
Peanut butter balls pair naturally with roasted coffee (balances fat with bitterness) and black tea or chai (warm spices complement peanut notes). For a kid-friendly option, serve with cold milk for a familiar, sweet-salty experience.
– Plate for holidays or snack boards with minimal prep
These balls are portion-controlled and low-mess, making them ideal for holiday trays, office snacks, and grazing boards. Arrange them by coating type (plain vs. chocolate-dipped) for visual variety, and add small garnish accents like cocoa dusting or chopped nuts.
Alternatives Roundup: Best Ways to Make “Peanut Butter Balls” Depending on Your Goal
Below are practical alternatives to the classic no-bake peanut butter balls approach. Each one preserves the core idea (peanut butter + sweet binder + set/chill) while optimizing for taste, texture, and usability.
1) Classic Powdered Sugar Peanut Butter Balls (Baseline)
Pros
– Reliable texture and easy rolling with minimal ingredients
– Strong “holds shape” performance after chilling
– Easy to batch for gifting or meal prep
Cons
– Can be a bit firm if you add too much powdered sugar
– Not as visually polished as dipped varieties unless you add coatings
Usability & User Experience
– Best for: home cooks who want dependable results
– Rolling is straightforward; troubleshooting is easy (adjust powdered sugar)
Best For: Consistent, crowd-pleasing no-bake peanut butter bites.
2) Honey + Peanut Butter “No-Bake Truffles” (Softer Center)
Pros
– Less confectioners-sugar sweetness; more nuanced flavor
– Often yields a softer, truffle-like bite
– Works well for people who prefer “not-too-sweet”
Cons
– Can be stickier and more difficult to roll perfectly
– Refrigeration time may need to be longer for structure
Usability & User Experience
– Best for: diners who want a richer, softer dessert
– Recommend chilling longer and using a light dusting to prevent sticking
Best For: Softer truffle texture and reduced “candy-sweet” profile.
3) Maple Syrup + Peanut Butter Balls (Warm, Toasted Flavor)
Pros
– Distinct caramel-like flavor from maple
– Pairs well with cinnamon, vanilla, and flaky salt
– Great for autumn-themed boards
Cons
– Maple moisture can make the dough harder to control
– Requires careful powdered sugar balancing or additional binder
Usability & User Experience
– Best for: flavor-forward variations
– Users may need 2–3 small dough adjustments to get rollable consistency
Best For: Specialty flavor profiles and seasonal desserts.
4) Oat-Based Peanut Butter Balls (More Filling, Slightly Hearty)
Pros
– Adds chew and “heavier” texture without baking
– More fiber and perceived fullness
– Works well for people who want a snack-like treat
Cons
– Requires blending oats finely (or using oat flour) for smooth dough
– Texture differs from classic balls—less creamy, more rustic
Usability & User Experience
– Best for: active lifestyles, snack boards, and “better-for-you” audiences
– Rolling is best when oats are finely processed and mixture is well chilled
Best For: A more filling, snack-leaning peanut butter bite.
5) Chocolate-Covered Peanut Butter Balls (Premium Presentation)
Pros
– Visually elevated; ideal for gifting
– Chocolate adds flavor complexity and masks surface imperfections
– Easy to portion and serve like truffles
Cons
– Extra step: melting/dipping and setting time
– Can develop cracks if balls are not fully chilled before dipping
Usability & User Experience
– Best for: event catering and “wow factor”
– Users benefit from chilling extra firmly and working quickly during coating
Best For: A truffle-style look with boosted flavor impact.
6) Nut-Rolled Peanut Butter Balls (Crunch-Forward Finish)
Pros
– Adds contrast (crunch vs. creamy center)
– Nuts reduce the need for a perfect smooth exterior
– Great for texture-focused palates
Cons
– Can be messy during rolling
– Not suitable for some allergy profiles (always label clearly)
Usability & User Experience
– Best for: audiences who enjoy crunch and roasted flavors
– Helps beginners by forgiving minor rolling unevenness
Best For: Crunchy texture and rustic presentation.
7) Powdered Sugar-Free Option Using Date Paste + Peanut Butter
Pros
– Naturally sweetened and closer to a “clean ingredient” approach
– Dense, chewy center that some people prefer over candy-sweet
– Great for those avoiding refined sugars
Cons
– Dough may be harder to roll without a binder adjustment
– Final texture is different (more chewy, less “snap”)
Usability & User Experience
– Best for: sugar-reduction goals
– Expect more trial for rollability; chilling still plays a major role
Best For: People seeking a less refined-sugar dessert structure.
Peanut Butter Ball Alternatives: Feature Comparison
| Option | Best Use Case | Time to Roll | Chill Dependability | Taste Profile |
|---|---|---|---|---|
| A | Classic powdered sugar balls | 10–15 min | High | Balanced sweet |
| B | Honey + peanut butter | 15–20 min | Medium | Softer, floral-sweet |
| C | Maple + peanut butter | 15–25 min | Medium | Caramel depth |
| D | Oat-based balls | 15–20 min | High | Toasty, hearty |
| E | Chocolate-coated truffles | 25–35 min | High (if chilled) | Rich, cocoa-forward |
| F | Nut-rolled crunchy finish | 15–20 min | High | Roasted, textured |
| G | Date paste balls (refined-sugar free) | 20–30 min | Medium | Chewy, deep sweetness |
| Best For: | ||||
| If you want the most dependable “no-bake” outcome with minimal troubleshooting, Option A (Classic powdered sugar balls) is the baseline. For a premium finish, choose Option E (Chocolate-coated truffles). For a snackier bite, choose Option D (Oat-based balls). | ||||
Classic Powdered Sugar vs. Honey-Based Peanut Butter Balls
| Criteria | Classic (Powdered Sugar) | Honey-Based |
|---|---|---|
| Rollability (ease) | ★★★★★ | ★★★☆☆ |
| Set reliability after chilling | ★★★★★ | ★★★☆☆ |
| Sweetness level | ★★★★☆ | ★★★☆☆ |
| Texture after 24 hours | ★★★★☆ | ★★☆☆☆ |
| Flavor complexity | ★★★★☆ | ★★★★★ |
| Messiness risk | ★★★★☆ | ★★☆☆☆ |
| Batch predictability | ★★★★★ | ★★★☆☆ |
| Best presentation option | Plain or coated | Plain or cocoa-rolled |
| Ingredient accessibility | ★★★★★ | ★★★★☆ |
| Overall user experience | ★★★★★ | ★★★☆☆ |
| Verdict: | ||
| Choose Classic (Powdered Sugar) when you need dependable shape-holding. Choose Honey-Based when you prioritize deeper flavor and a softer center—and you’re willing to fine-tune texture. | ||
After mixing, rolling, and chilling, you’ll have a dependable peanut butter balls recipe that’s perfect for sharing, office snacks, or holiday trays. Start with the classic powdered sugar version for the most consistent texture, then use chocolate coating, cocoa, oats, or nut rolls to tailor flavor and presentation to your audience.
Frequently Asked Questions
What is the best peanut butter balls recipe that doesn’t require baking?
A classic no-bake peanut butter balls recipe combines creamy peanut butter, powdered sugar, vanilla, and a pinch of salt, then rolls the mixture into bite-sized balls. For the topping, many recipes use melted chocolate or a chocolate coating (like chocolate chips) for an easy, set finish. Chill the balls until firm so they hold their shape and taste fresh.
How do you make peanut butter balls that hold their shape and aren’t crumbly?
If your peanut butter balls are crumbly, add a little more peanut butter or a small amount of melted butter to bring the mixture together. Too soft? Gradually mix in more powdered sugar and chill the dough 20–30 minutes before rolling. Using room-temperature ingredients and rolling with lightly greased hands can also improve consistency.
Why are my peanut butter balls too dry or too sweet, and how can I fix them?
Dry peanut butter balls usually come from too much powdered sugar or using a thicker peanut butter; try reducing the powdered sugar slightly or adding 1–2 teaspoons of peanut butter at a time. If they’re too sweet, increase the salt and vanilla for balance or add a bit more peanut butter to mellow the sweetness. Taste the mixture before chilling so you can adjust the peanut butter balls recipe to your preference.
Which chocolate coating is best for peanut butter balls—melting chocolate chips, candy melts, or chocolate bars?
Chocolate chips work for many peanut butter balls recipe variations, but they can be a bit inconsistent unless you melt them carefully and stir well. Candy melts are often easier because they melt smoothly and set with a glossy finish, making them great for dipping. If you want the richest flavor, use chopped chocolate bars, but tempering may improve the snap and texture.
How long do peanut butter balls last, and what’s the best way to store them?
Most peanut butter balls keep well in an airtight container in the refrigerator for about 1 week, which helps the chocolate coating stay firm. For longer storage, freeze them for up to 2 months—layer with parchment paper to prevent sticking. Let frozen peanut butter balls sit at room temperature for 10–15 minutes before serving for the best texture and flavor.
References
- Google Scholar Google Scholar
https://scholar.google.com/scholar?q=peanut+butter+balls+recipe - Google Scholar Google Scholar
https://scholar.google.com/scholar?q=peanut+butter+truffles+recipe+confectionery - Google Scholar Google Scholar
https://scholar.google.com/scholar?q=peanut+butter+confectionery+processing+chocolate - Peanut butter
https://en.wikipedia.org/wiki/Peanut_butter - Peanut butter cup
https://en.wikipedia.org/wiki/Peanut_butter_cup - Chocolate truffle
https://en.wikipedia.org/wiki/Chocolate_truffle - https://pubmed.ncbi.nlm.nih.gov/?term=peanut+butter+confectionery+composition
https://pubmed.ncbi.nlm.nih.gov/?term=peanut+butter+confectionery+composition - peanut butter – Books – NCBI
https://www.ncbi.nlm.nih.gov/books/?term=peanut+butter - https://www.fda.gov/food/foodborne-illness-contaminants/food-safety-basics
https://www.fda.gov/food/foodborne-illness-contaminants/food-safety-basics - https://www.cdc.gov/foodborneburden/index.html
https://www.cdc.gov/foodborneburden/index.html