Get the best challah french toast recipe for fluffy, golden slices with a crisp edge—whether you’re cooking for breakfast or brunch. This straightforward method turns rich challah into custardy, tender toast using an easy soak and the right heat, so you get restaurant-level results without fuss. If your goal is clearly defined texture and color, this is the winning approach.
Challah French toast comes out best when you soak thick slices of challah in a vanilla-cinnamon custard (eggs + milk or cream) for a brief, controlled time—then pan-fry until deeply golden while the center sets and stays custardy. This recipe gives you precise measurements, a reliable soak window, and practical cooking techniques so you can consistently achieve crisp edges and a tender interior without guesswork.
Ingredients for ChallaH French Toast

– Use challah slices (slightly stale works best) for the richest texture
– Gather eggs, milk (or half-and-half), vanilla, cinnamon, salt, and butter
Challah is ideal for French toast because its egg-rich crumb and slightly sweet flavor absorb custard evenly without turning gummy. “Slightly stale” matters: day-old challah has more structure and soaks more predictably, which helps your slices hold their shape while the inside becomes custardy rather than soggy. If your loaf is fresh, you can replicate the benefit by cubing and toasting lightly or leaving slices uncovered for a few hours.
Core ingredient guidance (what each one does)
– Challah bread: Thick-cut slices (about 1–1¼ inches) for a custardy center and crisp crust.
– Eggs: Provide structure and richness; they set into that signature French toast custard texture.
– Milk (or half-and-half):
– Milk yields a lighter custard with a clean flavor.
– Half-and-half creates a more luxurious mouthfeel and browns a touch faster due to higher fat.
– Vanilla: Rounds out egg richness and complements cinnamon.
– Cinnamon: Adds warmth and aromatic depth; use it confidently—this is not a subtle dessert.
– Salt: Makes the sweetness taste more “defined” and balances egg flavor.
– Butter: Adds flavor and browning; use it for the best results rather than neutral oil alone.
Practical ingredient list (for 6–8 servings)
Use this as your working benchmark as you cook—scalable depending on slice count.
– 12–14 slices of challah (cut thick, or 6–8 large thick slices if you prefer fewer pieces)
– 6 large eggs
– 1½ cups (360 ml) milk or half-and-half
– 2 teaspoons vanilla extract
– 2 teaspoons ground cinnamon
– ½ teaspoon salt
– 2–4 tablespoons butter (for pan-frying; add as needed)
Custard Mixture (Best Flavor Balance)

– Whisk eggs with milk, vanilla, cinnamon, and a pinch of salt
– Aim for a pourable custard and fully coat each slice
A great custard is the difference between “bread that tasted eggy” and “custardy, golden French toast.” You want it pourable (not thick like pudding), so it can penetrate the challah quickly while still leaving you control over soak time.
Custard mixing method (consistent results)
1. Crack the eggs into a wide bowl to speed whisking and reduce streaks.
2. Add milk (or half-and-half), vanilla, cinnamon, and salt.
3. Whisk until the mixture looks uniform—about 20–30 seconds.
Thickness target (how to know you nailed it)
If your custard coats a spoon in a thin layer and lightly drips back into the bowl, it’s ready. If it feels too thick, add 1–2 tablespoons milk at a time. If it’s too thin, add 1 egg white or a small extra egg yolk—but only if you’re adjusting frequently. For most kitchens, the ingredient ratios above are the reliable baseline.
Make it operational: coat evenly, not just “wet”
When you dip challah, aim for full surface contact. Turn each slice so both sides see custard—this improves browning symmetry and helps the center set evenly. Uneven coating often shows up as pale patches or pockets that don’t feel custardy.
How to Soak and Cook
– Soak each side for about 20–60 seconds (don’t over-saturate)
– Cook in butter over medium heat until browned, then flip once
Soaking is where most people either overdo it (leading to soggy centers) or underdo it (leaving dry bread). For challah French toast, the goal is surface penetration + quick custard set, not full saturation.
Recommended soak time by slice thickness
– Thick slices (about 1–1¼ inch): soak 20–40 seconds per side
– Slightly thinner slices: soak 15–30 seconds per side
– Very large slices: check by texture—custard should soak in without the slice collapsing
Rule of thumb: If your slice bends easily or feels heavy and wet in your hands, it’s likely over-saturated. In that case, reduce soak time next batch.
Cooking process (flip once, manage heat)
1. Heat a skillet over medium and melt butter.
2. Place soaked slices in the pan—don’t crowd.
3. Cook until the bottom is deep golden, then flip once.
4. Cook the second side until set and browned.
Butter management tip: Butter can brown and burn as quickly as bread browns—especially with sugar and dairy present. If the first side browns too quickly (within ~2 minutes), lower heat slightly. If it takes too long, increase heat slightly. Consistency here drives that signature crisp edge.
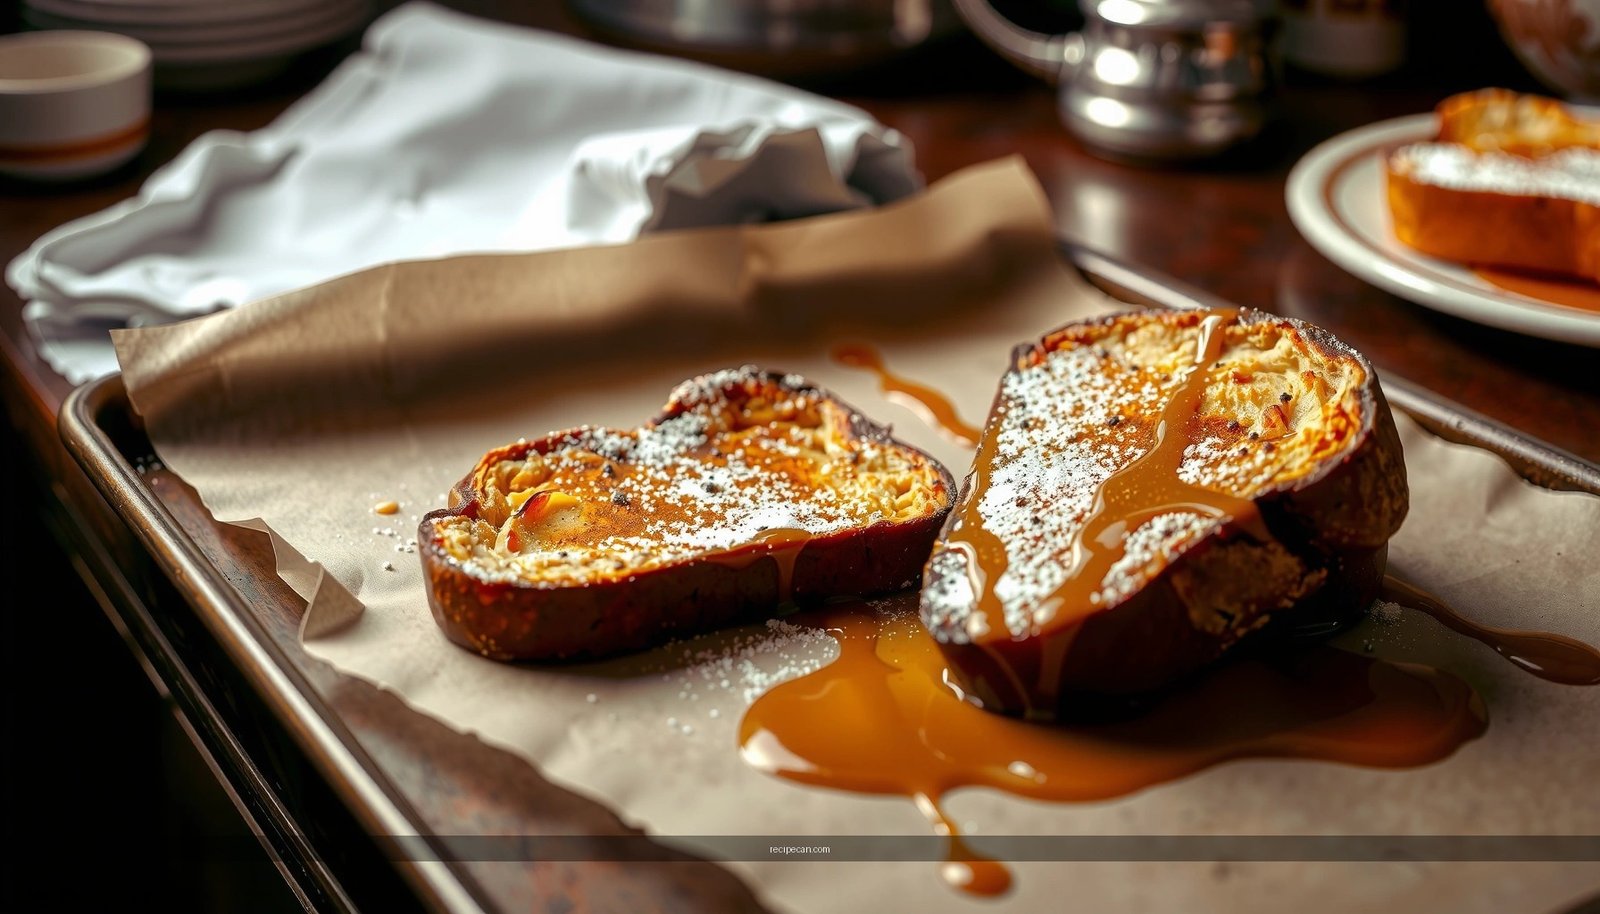
Visual performance checklist
– Edges: should look crisp and caramelized
– Center: should feel custardy, not wet
– Top: should not be pale; it should show gentle browning where custard reached
Custard Soak Time vs. Slice Thickness (Challah French Toast)
| # | Slice Thickness | Soak / Side | Expected Texture | Cook Reliability |
|---|---|---|---|---|
| 1 | 1¼ inch (standard thick) | 20–40 sec | Custardy center, crisp edges | ★★★★★ |
| 2 | 1 inch (lean thick) | 18–35 sec | Balanced custard, slightly quicker set | ★★★★☆ |
| 3 | ¾ inch (thin thick) | 12–25 sec | Custardy but more “bready” in center | ★★★☆☆ |
| 4 | ½ inch (very thin) | 8–15 sec | Best for quick bites; risk of drying | ★☆☆☆☆ |
| 5 | 1¼ inch (over-soak risk) | 45–90 sec | More absorption; can turn soggy | ★★☆☆☆ |
| 6 | 1 inch (under-soak risk) | 5–10 sec | Custard may not fully set in center | ★★☆☆☆ |
| 7 | 1¼ inch (ideal repeatable) | 20–30 sec | Most consistent custard + browning | ★★★★★ |
Tips for Crispy Edges and Soft Centers
– Cook in batches to keep the pan from cooling down
– Let finished slices rest briefly for best texture
This is the operational side of the recipe—the part that turns “tasty” into “restaurant-level.” Two issues typically sabotage texture: pan temperature drops and steam doesn’t have anywhere to go.
1) Batch cooking protects browning
When you crowd the skillet, the bread cools the pan and the butter stops sizzling aggressively. Instead of browning, you get steaming—leading to softer edges and a less-defined crust.
Actionable approach:
– Cook 3–4 slices at a time in a typical 10–12 inch skillet (adjust by slice size).
– Keep heat at medium and allow the pan to return to a steady sizzle between batches.
2) Brief resting improves structure
After cooking, move slices to a plate (or a rack if you have one). Rest for 1–3 minutes. This short pause allows:
– excess surface moisture to dissipate
– custard to finish setting slightly
– crust to maintain crispness rather than collapsing immediately under syrup
3) Control butter flavor without burning
If the butter starts to foam aggressively or smell nutty-brown, it’s close to burning. Add a fresh tablespoon of butter for the next batch rather than forcing everything through one fat cycle. That preserves flavor and prevents bitterness.
4) Choose the right browning cue
Don’t rely only on time. Use appearance:
– When the bottom is deep golden, flip.
– If the first side is browning too fast, lower heat slightly rather than extending cook time.
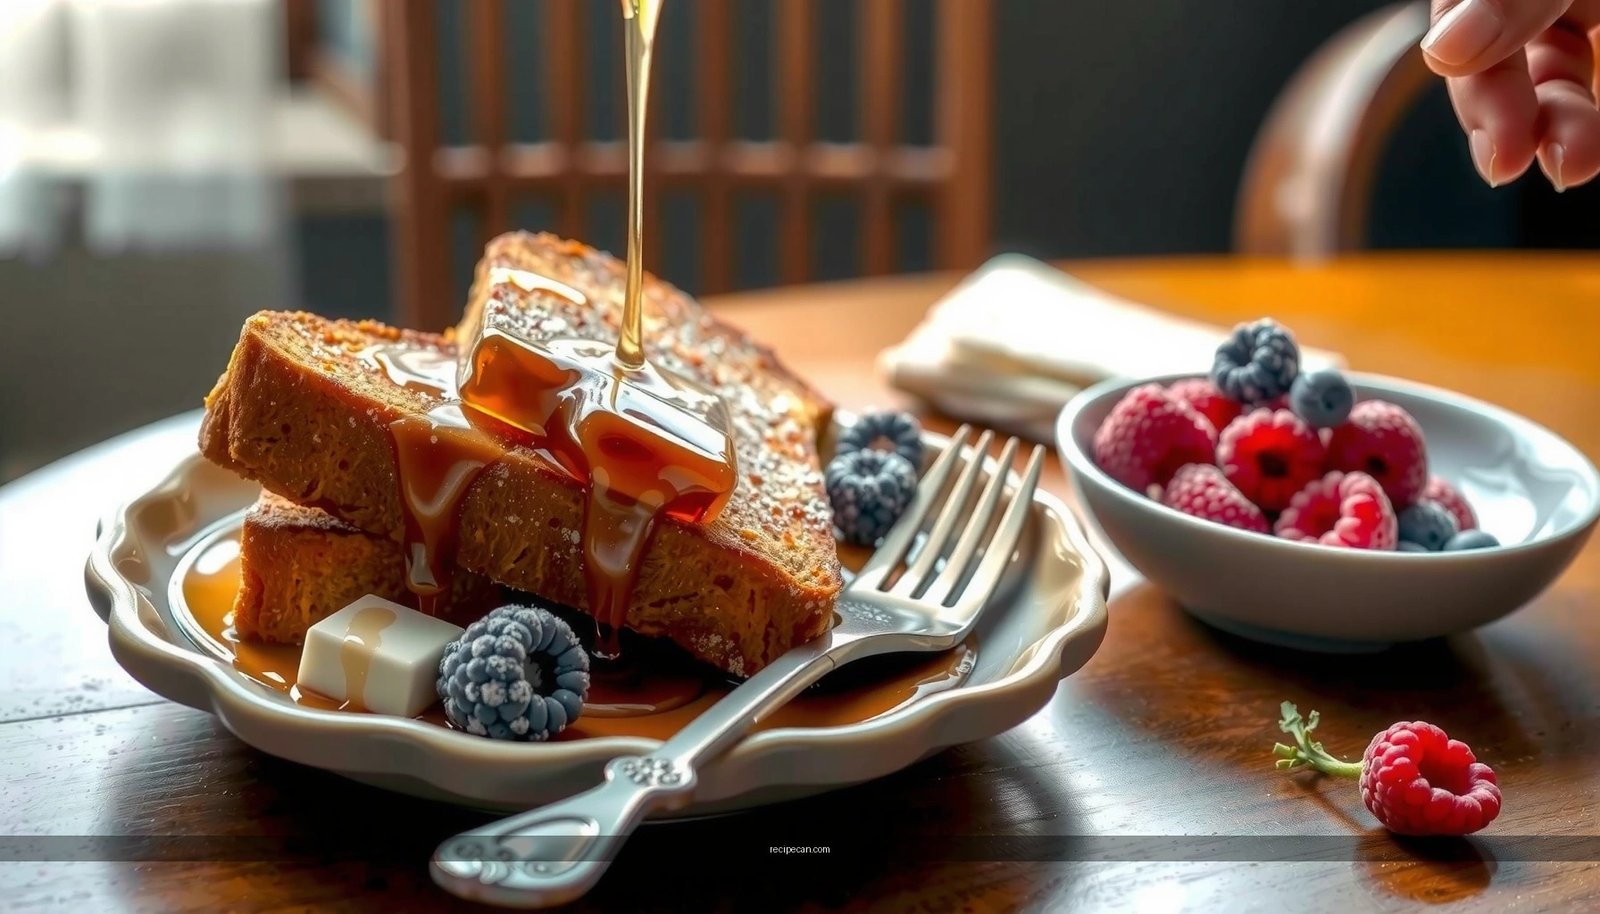
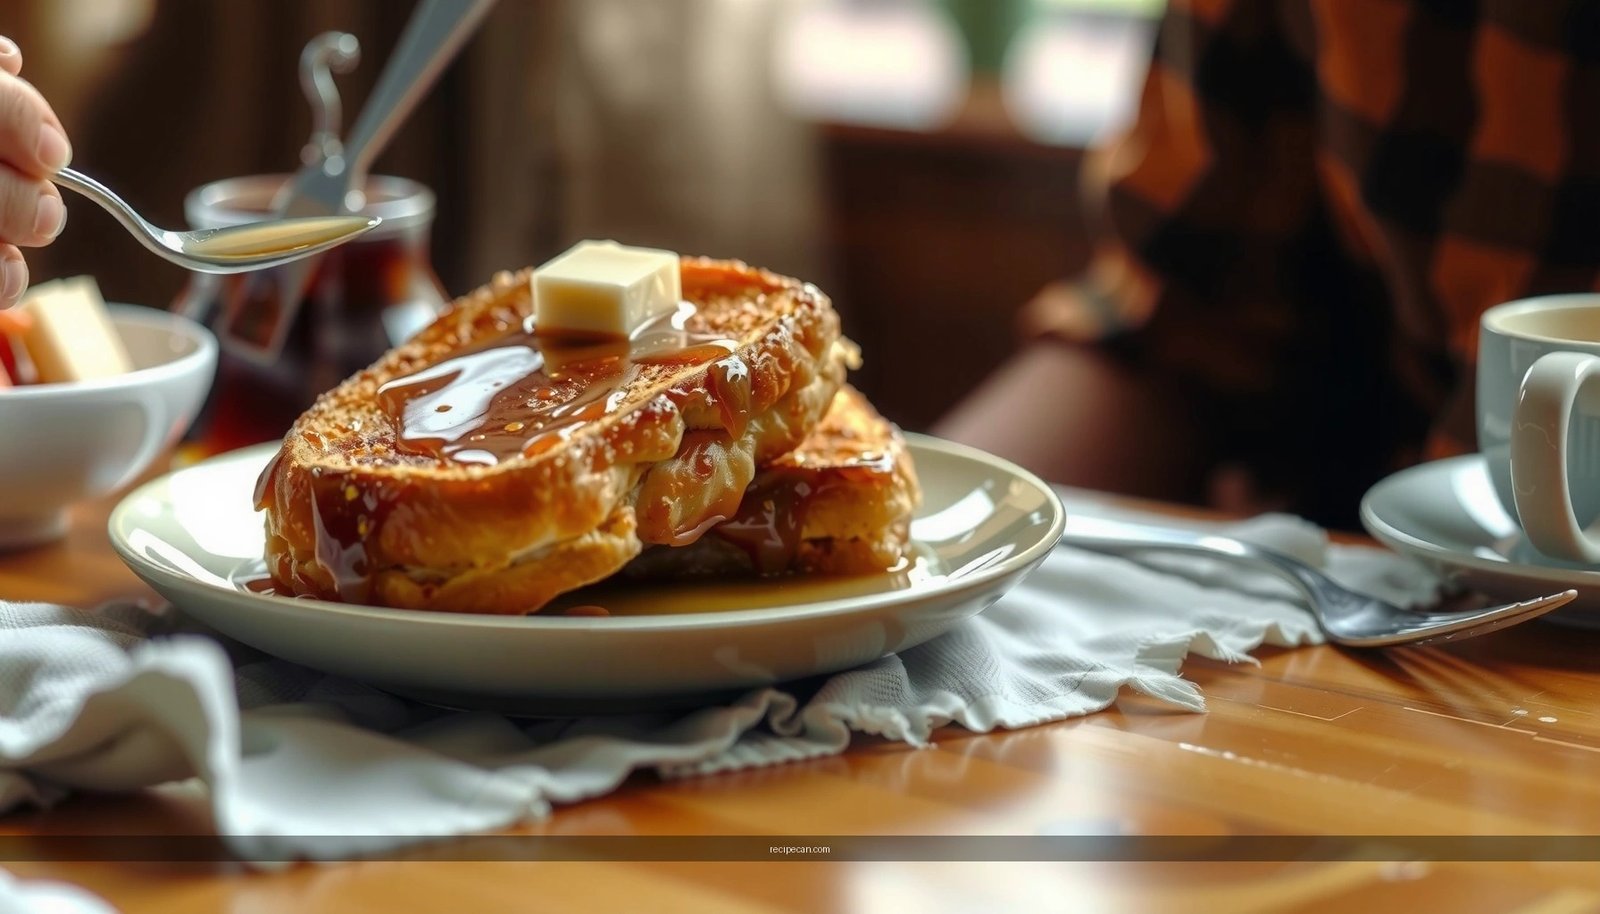
Toppings and Serving Ideas
– Classic options: maple syrup and powdered sugar
– Try fruit, whipped cream, or a drizzle of honey for extra flavor
Toppings should complement the custard, not overpower it. With cinnamon and vanilla already doing the heavy lifting, you can lean into contrast—sweet + bright, or creamy + fruity.
Classic, high-confidence pairings
– Maple syrup: Traditional and balanced; pour just before serving so edges stay crisp.
– Powdered sugar: Adds a light “restaurant finish” with minimal moisture impact.
Upgrade variations for different occasions
– Fruit topping:
– sliced strawberries, blueberries, or caramelized bananas
– add a spoon of jam or preserves for a glossy finish
– Whipped cream: Best for brunch; choose lightly sweetened whipped cream to avoid clashing with syrup.
– Honey drizzle: Works especially well if you reduce cinnamon slightly or want a more floral profile.
– Optional savory-leaning twist: a small pat of butter + flaky salt can highlight the sweetness of challah.
Serving workflow tip: Keep toppings separate and assemble right before eating. French toast is best hot, crisp at the edges, and custardy at the center—toppings that add moisture too early can soften the crust.
Make-Ahead and Storage Options
– Prep custard ahead of time and slice challah in advance
– Store leftovers in the fridge and reheat gently to retain tenderness
French toast is naturally friendly to planning. For busy mornings or brunch events, you can prep components ahead while keeping the final texture strong.
Make-ahead strategies that don’t compromise quality
1. Prepare custard the night before:
– Cover and refrigerate.
– Whisk again before dipping slices to re-incorporate any separated components.
2. Slice challah in advance:
– Store slices in a container with paper or parchment to prevent excess moisture.
3. Dip and cook when ready:
– For best crisp edges, soak and cook in the same window.
Storage and reheating
– Refrigerate leftovers promptly in an airtight container for up to 2–3 days.
– Reheat gently to avoid toughening:
– Skillet: warm over low heat with a small dab of butter
– Oven: 300°F / 150°C for 8–12 minutes until heated through
Avoid microwaving when possible, because it tends to steam the bread and can reduce that desirable crisp edge.
Portion control for events
If you’re serving a group, cook in batches and hold briefly in a low oven (around 200°F / 95°C) on a rack. Avoid covering tightly; trapped steam can soften crust quality.
Tuning the Recipe for Reliable Outcomes (Decision Guide)
To help you make quick, evidence-based adjustments, use this operational decision framework:
– If your center is too bready/dry, increase soak time by 10–15 seconds per side next batch.
– If your toast is soggy, reduce soak time and cook with slightly higher heat (or smaller batches).
– If your toast is browning too fast, lower heat and allow the custard more time to set.
These micro-adjustments keep your challah French toast consistent even when slice thickness, pan type, or bread freshness varies.
In conclusion, this challah French toast recipe delivers the two outcomes that matter most—golden crisp edges and a soft, custardy center—by combining a balanced egg-vanilla-cinnamon custard with controlled soaking and medium-heat pan-frying. Follow the recommended soak window, cook in manageable batches, and rest briefly before serving, then choose toppings like maple syrup, fruit, or honey to finish with confidence. Make it for breakfast or brunch this weekend, and once you’ve dialed in your ideal soak time, you’ll be able to reproduce the same professional-grade results every time.
Frequently Asked Questions
What is the best challah for making French toast?
The best challah for French toast is a slightly stale loaf, because it absorbs the custard without turning mushy. Look for a rich, eggy crumb and a soft interior that can soak up the mixture evenly. If your challah is fresh, cube and leave it out for 30–60 minutes (or toast it lightly) before dipping.
How do you make challah French toast without it getting soggy?
Cut the challah into thick slices and use an egg-rich custard with a moderate amount of milk—too much liquid can lead to sogginess. Dip each slice quickly (about 10–20 seconds per side) so it soaks but doesn’t collapse. Cook on a preheated nonstick skillet or griddle over medium heat until golden, then finish in the oven briefly if you want extra dryness and even cooking.
Why does challah French toast taste so good compared to other bread?
Challah is naturally enriched with eggs and sometimes a hint of sweetness, which creates a custardy, caramel-like flavor when cooked. Its airy texture also holds onto the custard well, giving you that classic French toast interior. That combination makes challah French toast extra indulgent even with simple ingredients like cinnamon and vanilla.
Which custard ingredients work best for challah French toast?
A reliable custard uses eggs, whole milk (or half-and-half for extra richness), vanilla extract, and cinnamon, plus a pinch of salt to balance sweetness. For a classic bakery-style flavor, add a tablespoon of sugar or maple syrup and whisk thoroughly until fully combined. If you like it fragrant, a little nutmeg or orange zest pairs especially well with challah French toast.
How can you meal-prep challah French toast for a quick breakfast?
Assemble ahead by cutting the challah into slices and mixing the custard in a bowl, then refrigerating both separately. Right before cooking, dip the slices in the custard and cook fresh for the best texture, since sogginess is more likely after long soaking. Alternatively, you can cook, cool, and reheat on a wire rack in a 325°F oven until crisp around the edges.
References
- French toast
https://en.wikipedia.org/wiki/French_toast - Challah
https://en.wikipedia.org/wiki/Challah - Brioche
https://en.wikipedia.org/wiki/Brioche - Bread sauce
https://en.wikipedia.org/wiki/Bread_sauce - https://www.bbc.co.uk/food/recipes/frenchtoast_90871
https://www.bbc.co.uk/food/recipes/frenchtoast_90871 - Easy French toast recipe | Good Food
https://www.bbcgoodfood.com/recipes/french-toast - https://www.nytimes.com/2024/03/15/dining/french-toast-recipe.html
https://www.nytimes.com/2024/03/15/dining/french-toast-recipe.html - Google Scholar Google Scholar
https://scholar.google.com/scholar?q=challah+french+toast+recipe - Google Scholar Google Scholar
https://scholar.google.com/scholar?q=french+toast+with+eggs+milk+custard+soak+ratio - Google Scholar Google Scholar
https://scholar.google.com/scholar?q=challah+egg+bread+texture+french+toast