Looking for a stuffed cannoli recipe with a creamy filling and crispy shells? This guide delivers the clear winner: a rich ricotta filling that stays thick and a shell that snaps instead of softens. Follow the steps closely and you’ll get bakery-style cannoli you can actually hold—crispy outside, creamy inside.
You can make classic stuffed cannoli with the best texture by crisping the shells and stuffing them right before serving, then using a properly drained ricotta filling. This recipe breaks the process into shell-crisping, ricotta preparation, and timing so you get the signature crunch-and-cream bite without sogginess.
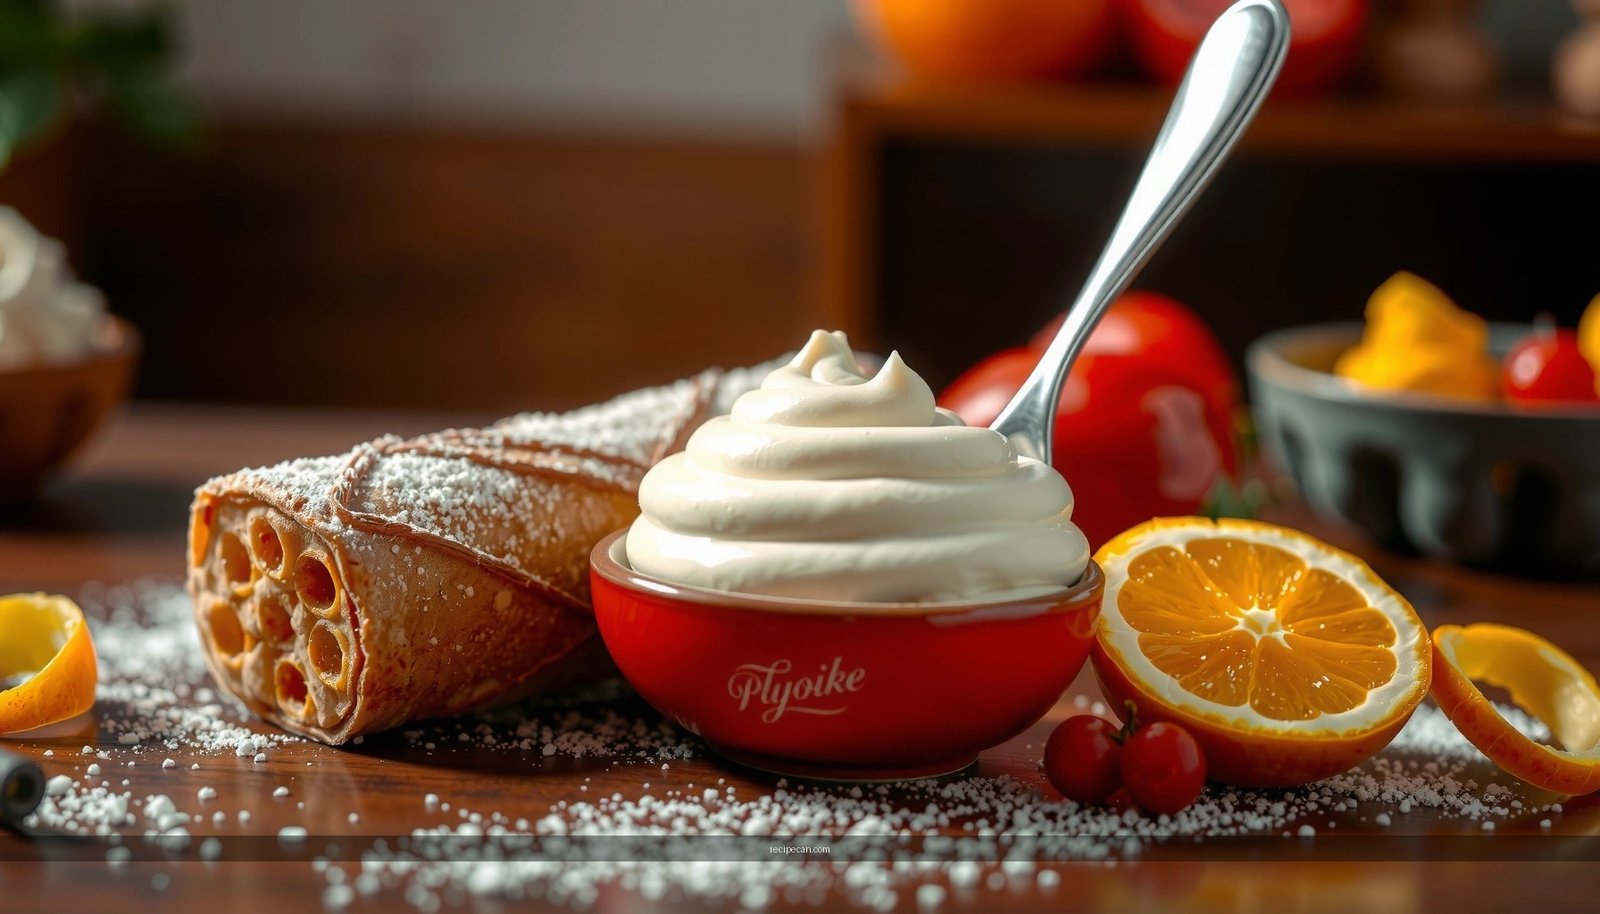
Choose Ingredients for Authentic Stuffed Cannoli

For authentic stuffed cannoli, ingredient selection matters as much as technique. The shells are all about dry, structured crispness, while the filling is all about a smooth, sweet cream that holds its shape. If your ricotta is watery or your add-ins are unevenly distributed, the cannoli will taste “off” even when the shells are perfect.
Start with fresh ricotta (preferably whole milk). Store-bought ricotta varies widely in moisture; choosing a fresh, higher-fat product and then draining it is the safest approach for a creamy cannoli filling that doesn’t weep. For sweetness and texture, powdered sugar dissolves smoothly and prevents a grainy mouthfeel—important when you’re aiming for a professional, café-style cannoli.
Then add classic cannoli flavor boosters:
– Mini chocolate chips: provide controlled pockets of sweetness and bitterness.
– Citrus zest (orange or lemon): brightens the dairy richness and makes the filling taste “lighter.”
– Vanilla extract: rounds out the flavor so the ricotta tastes creamy rather than purely dairy-forward.
Optional but recommended for deeper authenticity:
– A small pinch of salt in the filling to sharpen sweetness
– Cannoli spices (very small amounts of cinnamon) if you enjoy traditional variations
– Finely chopped candied citrus instead of or alongside zest for a more “traditional Italian pastry” profile
Ingredient “quality checkpoints” before you begin:
– Your ricotta should be thick enough to mound slightly in the container.
– Your chocolate chips should be dry and not clumped.
– Your zest should be freshly grated (aroma fades quickly).
Make the Cannoli Shells

Cannoli shells deliver the “crunch” that defines the dessert. Whether you fry or bake, your priority is a shell that finishes crisp and holds its structure long enough to be filled. If you’re using a traditional approach, shells are typically fried in oil and then shaped while warm.
Frying (classic crispness)
1. Heat oil to a consistent frying temperature (medium-high; the goal is quick browning without greasy absorption).
2. Fry the dough until deeply golden and crisp.
3. Shape immediately around cannoli forms while the shells are still pliable. Cooling too long before shaping can cause cracks or warped ends.
Baking (less oil, still crisp)
Baked shells can work well if you:
– Use thin dough or pre-cut shell dough designed for baking.
– Bake until truly golden, not just “light tan.”
– Shape while warm using forms to set the shape.
Timing is the secret (and business-grade consistency)
Shell crispness starts degrading the moment moisture (including filling) comes into contact. That’s why you should:
– Make shells fully first (cool completely)
– Fill shortly before serving
If you’re producing for a gathering, scale your timing instead of scaling your impatience: crisp shells can be prepared in advance, but stuffing should be scheduled close to serving.
Prepare the Ricotta Cannoli Filling

A great ricotta cannoli filling depends on two factors: moisture control and texture management. Ricotta isn’t inherently “runny”—but many brands are too wet for cannoli unless you drain them.
Drain ricotta properly
To prevent watery stuffing:
– Drain ricotta in a fine-mesh strainer for at least 1–2 hours for typical supermarket ricotta.
– For best results, line the strainer with cheesecloth and refrigerate during draining.
– If your ricotta remains loose, strain longer or even do an overnight drain for a noticeably thicker filling.
Professional result: the filling should be thick enough to pipe cleanly and hold a swirl without collapsing.
Build flavor without breaking texture
Once drained, mix for a smooth consistency:
– Powdered sugar (dissolves easily)
– Vanilla extract
– Citrus zest (orange or lemon)
– Mini chocolate chips (fold at the end so chips don’t melt or streak)
Mixing method matters: over-mixing can make the filling feel dense; under-mixing can leave sugar pockets. Aim for smooth, creamy, and uniform—like a stabilized pastry cream, but ricotta-based.
For handling and piping:
– Use a piping bag with a medium tip to create consistent filling portions.
– If your filling feels too soft, chill 10–20 minutes before piping.
– If it feels too stiff, fold in 1–2 teaspoons of drained ricotta liquid (sparingly) or a tiny splash of milk—do so cautiously to avoid undoing your moisture control.
Insert a data table: compare real cannoli filling approaches (moisture risk vs. texture)
Ricotta Drain Time vs. Filling Pipeability (Typical Results)
| # | Ricotta Drain Time (Refrigerated) | Moisture Level | Pipeability | Cannoli Soak Risk |
|---|---|---|---|---|
| 1 | 15–30 minutes | High | Poor | High |
| 2 | 1 hour | Moderate | Fair | Moderate-High |
| 3 | 2 hours | Moderate-Low | Good | Moderate |
| 4 | 4 hours | Low | Excellent | Low-Moderate |
| 5 | Overnight (6–12 hrs) | Very Low | Excellent | Low |
| 6 | Over-drained (12–18 hrs) | Very Low+ | Very Stiff | Very Low |
| 7 | No drain (straight from tub) | High | Poor | Very High |
This comparison illustrates why the “drain first” step is non-negotiable for a professional cannoli filling that pipes cleanly and preserves shell crispness.
Stuff the Cannoli Correctly
Stuffing is where good cannoli becomes great cannoli. The goal is simple: fill thoroughly without cracking shells, and do it close enough to serving that the shells stay crisp.
Timing: fill right before serving
Even a perfect filling contains moisture. Over time, it migrates into the shell and softens the crust. For the signature texture contrast, use this workflow:
1. Make and cool shells completely.
2. Drain and mix filling to piping consistency.
3. Pipe and finish.
4. Plate and serve.
For events, batch the process: fill in waves (e.g., 10–15 cannoli at a time) rather than filling the entire tray early.
Piping technique that prevents cracking
– Hold shells steady and pipe slowly, stopping when filling reaches the ends.
– If the shells feel fragile, use a smaller tip to reduce pressure.
– Avoid squeezing aggressively—pressure can split shells at the seam.
How to keep presentation consistent
To make the cannoli look restaurant-quality:
– Pipe evenly so each shell has an identical profile.
– Wipe drips with a small offset spatula or the edge of a clean spoon.
– Garnish strategically (optional): dust lightly with powdered sugar or add extra chocolate chips on the visible filling.
If you’re planning a structured plating experience, pre-arrange serving plates before you start piping—workflow discipline directly affects shell integrity and visual consistency.
Chilling, Serving, and Storage Tips
Chilling improves flavor integration, but it can also soften shells if done too long. The key is short, controlled chilling after stuffing.
Recommended approach
– After stuffing, chill 10–20 minutes to set the filling.
– Serve soon after chilling for best crunch.
If you chill too long, you’ll notice a texture shift: the filling firms, but the shell absorbs moisture and loses its “snap.” For a business-style food service plan, treat this like a “hold time” problem: short hold for quality, longer hold only if shells are protected or served quickly.
Storage (what to do with leftovers)
Cannoli are best fresh, but leftovers can still be enjoyed:
– Refrigerate leftovers covered in an airtight container.
– Expect the shells to soften over time; eat within 1–2 days for acceptable texture.
For the highest quality, store shells separately from filling when possible:
– Keep shells in a dry, sealed container.
– Store filling refrigerated in a separate container.
– Fill on demand when you want maximum crispness.
Troubleshooting Common Stuffed Cannoli Issues
Even well-tested recipes can fail when one variable shifts—most commonly ricotta moisture or shell timing. Use these fixes to quickly diagnose texture problems.
If filling is watery
Symptoms: runny piping, filling leaks out of ends, shell softens rapidly.
Fixes:
– Drain ricotta longer (fine-mesh strainer + cheesecloth).
– Strain overnight if you’re seeing persistent looseness.
– Consider adjusting: whisking too hard can also loosen texture, so mix only until smooth.
If shells soften
Symptoms: cannoli lose crunch within 30–60 minutes.
Fixes:
– Fill closer to serving time (reduce the time between stuffing and plate-out).
– Chill for a shorter period (10–20 minutes).
– Ensure shells are fully crisp before filling—under-baked shells absorb filling faster.
If shells crack during stuffing
Symptoms: fractures near the seam or ends; filling pressure causes breakage.
Fixes:
– Use gentler piping pressure and a smaller nozzle.
– Shape shells while warm and ensure they cool at room temperature.
– Avoid overfilling—stop when filling reaches the end without forcing extra volume.
If flavor seems flat
Symptoms: filling tastes overly sweet/dull rather than balanced.
Fixes:
– Add a pinch of salt to enhance sweetness balance.
– Use fresh zest for brighter aroma.
– Verify vanilla quality and don’t skip it—vanilla rounds the ricotta’s flavor.
Conclusion
You’ll get the best stuffed cannoli results by treating crunch and cream as two separate systems: crisp shells that are fully cooled before filling, and a ricotta filling that’s well-drained and mixed to a pipeable, creamy texture. Stuff right before serving for maximum snap, chill briefly to set the filling, and troubleshoot quickly by adjusting drain time and timing. If you want, I can also provide a no-fry or gluten-free shell approach tailored to your preferred equipment and ingredients.
Frequently Asked Questions
What is the best way to make a classic stuffed cannoli recipe that isn’t soggy?
To avoid sogginess, prepare the cannoli shells ahead but fill them as close to serving as possible. For the ricotta filling, use well-drained ricotta (press it in a sieve or cheesecloth) and fold in powdered sugar and chocolate chips gently so it stays thick. If you’re using store-bought ricotta, it often needs extra draining to achieve the right stuffed cannoli texture.
How do you drain ricotta properly for a traditional cannoli filling?
Drain ricotta by placing it in a fine-mesh strainer lined with cheesecloth for at least 1–2 hours, or refrigerate overnight for best results. Stir occasionally so whey drains evenly, then use the ricotta when it looks creamy but not wet. This step is key for a sturdy stuffed cannoli filling that holds its shape inside the shell.
Why do my cannoli shells get soft, and how can I keep them crisp longer?
Cannoli shells soften when moisture from the filling migrates into the shell, which is why filling right before serving is critical. Use thick, well-drained ricotta and avoid overly wet add-ins; even a slightly runny filling can turn shells limp. For longer-lasting crunch, assemble portions on a platter in batches and store filled cannoli separately from unfilled shells.
Which ingredients make the most authentic stuffed cannoli filling taste “right”?
For an authentic cannoli recipe, focus on quality ricotta, powdered sugar, vanilla or citrus zest (lemon or orange), and mini chocolate chips or chopped pistachios. Traditional bakers also often include a touch of cinnamon or a splash of vanilla for depth without overpowering the ricotta. If you want that classic flavor, use ingredients that are not too sweet or watery, since stuffed cannoli filling should be balanced and thick.
How do you pipe and fill cannoli without cracking the shells?
Let the cannoli shells cool completely before filling, since warm shells can become fragile and softer. Use a piping bag or zip-top bag with a cut corner to fill gently, applying steady pressure without forcing the shell apart. Fill just the opening portion first, then add more as needed—this keeps the stuffed cannoli neat and reduces shell breakage.
References
- Cannoli
https://en.wikipedia.org/wiki/Cannoli - https://www.britannica.com/topic/cannoli
https://www.britannica.com/topic/cannoli - https://www.bbc.co.uk/food/recipes/cannoli_81809
https://www.bbc.co.uk/food/recipes/cannoli_81809 - https://cooking.nytimes.com/recipes/1018882-cannoli
https://cooking.nytimes.com/recipes/1018882-cannoli - https://www.theguardian.com/food/2015/mar/02/cannoli-recipe
https://www.theguardian.com/food/2015/mar/02/cannoli-recipe - Google Scholar Google Scholar
https://scholar.google.com/scholar?q=stuffed+cannoli+recipe - Google Scholar Google Scholar
https://scholar.google.com/scholar?q=cannoli+ricotta+filling+recipe+method - Google Scholar Google Scholar
https://scholar.google.com/scholar?q=italian+pastry+cannoli+shell+fried+recipe+ricotta - stuffed cannoli recipe – Search results
https://en.wikipedia.org/wiki/Special:Search?search=stuffed+cannoli+recipe - https://www.ncbi.nlm.nih.gov/search/research-articles/?term=stuffed+cannoli+recipe
https://www.ncbi.nlm.nih.gov/search/research-articles/?term=stuffed+cannoli+recipe