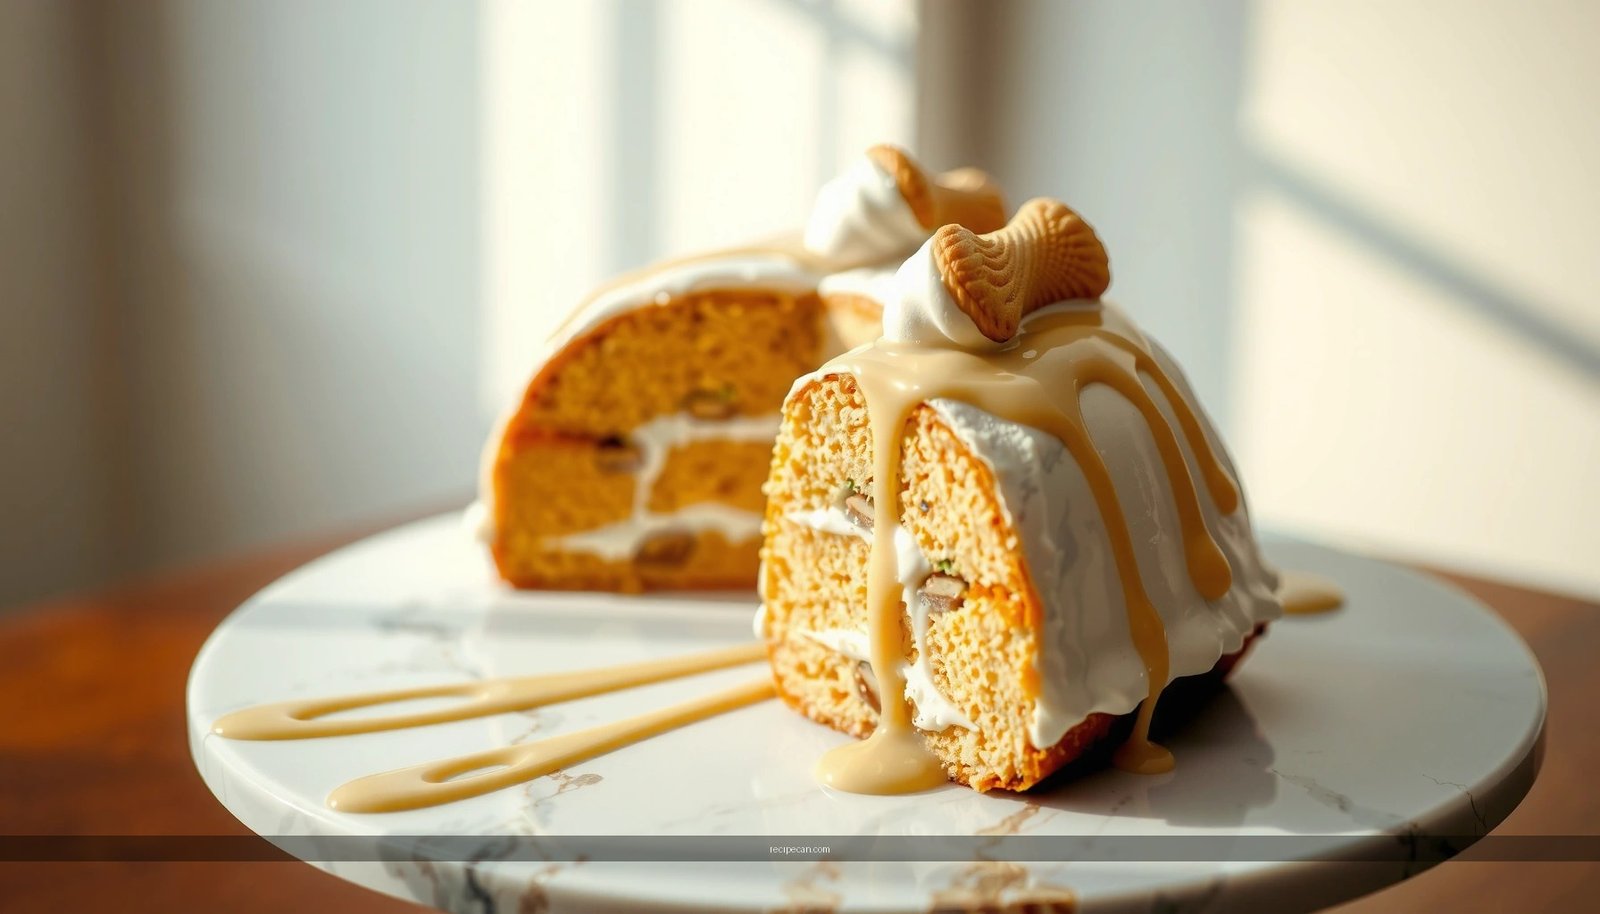
Want the Carrabba’s Cannoli Cake recipe that actually tastes like the restaurant classic? This guide gives you the quickest path to a rich, layered cannoli-style cake at home—clear steps, reliable timing, and the exact components that make it taste right. If you can follow a straightforward baking process, you’ll end up with the winner: a Cannoli Cake worthy of serving straight from the pan.
Make Carrabba’s cannoli cake at home by layering tender cake with a rich, tangy ricotta-cream filling and crunchy candied bits for that unmistakable cannoli flavor. With the right ricotta texture (not watery) and a brief chilling step before slicing, you can achieve clean layers and a restaurant-style bite every time.
This guide breaks down each stage—ingredients, cannoli cream, bake timing, assembly technique, and troubleshooting—so your cannoli cake stays creamy, sliceable, and flavorful from the first forkful.
Ingredients for Carrabba’s Cannoli Cake
– Gather cake ingredients (flour, sugar, eggs, baking powder, etc.) plus ricotta, mascarpone, and vanilla for the filling
– Plan for cannoli-style mix-ins like mini chocolate chips, chopped pistachios, or crushed waffle/cookie bits
To make a Carrabba’s-style cannoli cake, you’re essentially building two components: a moist vanilla cake base and a creamy ricotta filling that’s thick enough to hold layers.
Cake base (typical 9×13-inch or 8×10-inch pan style)
– Granulated sugar
– Baking powder
– Fine salt
– Eggs (for structure and moisture)
– Milk or buttermilk (for softness)
– Neutral oil or melted butter
– Vanilla extract
Cannoli filling (the signature flavor)
– Ricotta cheese (whole milk preferred for best texture)
– Mascarpone (adds silkiness; optional but highly recommended)
– Powdered sugar (dissolves faster than granulated and reduces graininess)
– Vanilla extract
– Ground cinnamon (optional, but common in cannoli profiles)
– Mini chocolate chips
– Chopped pistachios (or toasted almonds if you prefer)
– Crushed waffle cones or vanilla wafer/cookie crumbs (for crunch and “cannoli shell” texture)
Key ingredient note (important): ricotta consistency
If your ricotta is watery, your filling will thin out and can cause sliding layers. Before mixing:
– Drain ricotta in a fine-mesh sieve for 10–20 minutes, or
– Stir ricotta and then let it sit in the fridge 30 minutes to tighten.
Quick ingredient targets (what “good” looks like)
Cannoli Cake Build: Targets for Texture & Bake Quality
| # | Component | Target Amount | Why It Matters | Result |
|---|---|---|---|---|
| 1 | Ricotta thickness | Drained 10–20 min | Prevents runny filling | Firm, sliceable layers |
| 2 | Mascarpone (optional) | Adds ~25–35% creaminess | Smoother, richer mouthfeel | Silky texture |
| 3 | Sweetener type | Powdered sugar | Dissolves quickly, less grain | Clean sweetness |
| 4 | Vanilla/cinnamon | 1–2 tsp vanilla + ⅛ tsp cinnamon | Cannoli-like warm aroma | Restaurant-style flavor |
| 5 | Chocolate chips | ~½–1 cup mini chips | Distributes “cannoli” bursts | Even pockets of chocolate |
| 6 | Pistachio crunch | 2–3 tbsp chopped | Adds nutty, candied-style texture | Noticeable cannoli crunch |
| 7 | Chill before slicing | 30–60 minutes | Locks in layers for clean cuts | Sharp edges, no slipping |
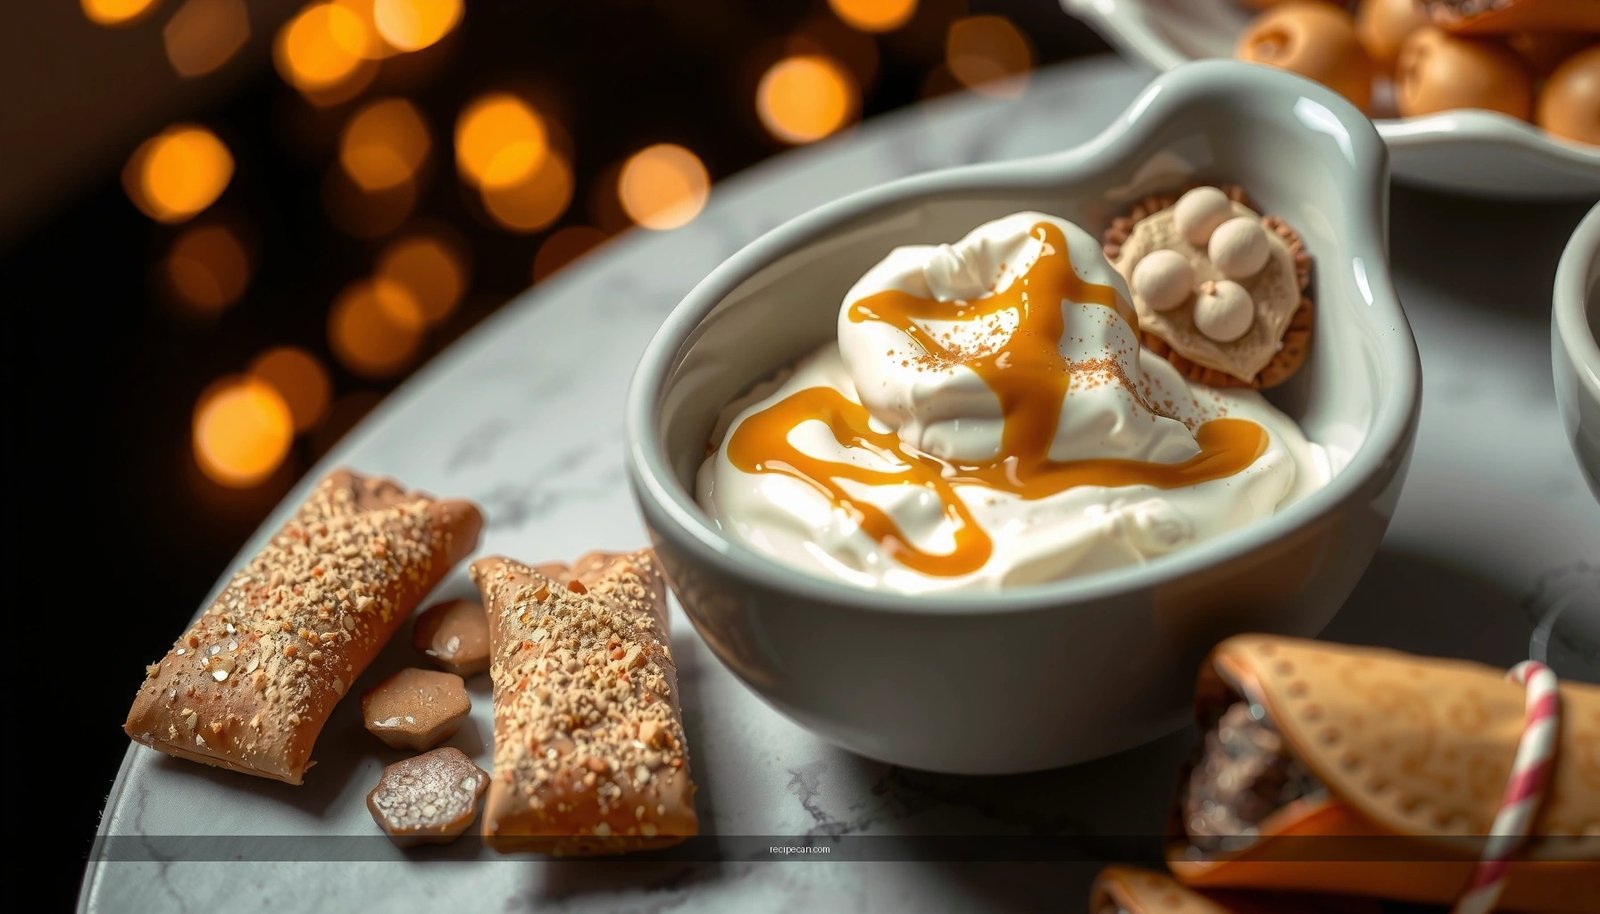
Make the Cannoli Cream Filling
– Whip ricotta (and mascarpone if using) until smooth, then fold in sugar and vanilla
– Stir in your cannoli mix-ins gently to keep the filling creamy but textured
A great cannoli cake filling is more than flavor—it’s structure. The filling must be thick, glossy, and pipe-like enough to spread in layers without collapsing.
Step-by-step filling method
1. Drain ricotta (if needed).
Place ricotta in a fine-mesh sieve over a bowl for 10–20 minutes. The goal is a spreadable consistency, not a dry crumb.
2. Blend until smooth.
Beat ricotta (and mascarpone, if using) until no lumps remain. Use a hand mixer on medium speed—don’t rush this step.
3. Sweeten with powdered sugar.
Add powdered sugar gradually, then blend until smooth. This avoids graininess.
4. Flavor with vanilla (and optional cinnamon).
Vanilla provides the classic dessert fragrance. A tiny pinch of cinnamon mimics traditional cannoli depth without tasting “spiced.”
5. Fold in mix-ins last.
Mix-ins (mini chocolate chips, chopped pistachios, or crushed wafers) should be folded gently with a spatula so the filling remains creamy.
Analytical perspective: what goes wrong most often
– Filling too soft: usually from under-drained ricotta or over-mixing with warmed cheese. Chill the filling 15 minutes if it loosens.
– Filling too sweet or flat: powdered sugar may be too high; keep balance by adding vanilla and a small pinch of salt to bring flavor forward.
– Lost texture: if you over-whip after adding mix-ins, you can break the chips and crumble the crunchy bits.
Bake the Cake Base
– Prepare the batter and bake until a toothpick comes out clean
– Let the cake cool fully before assembly to prevent filling from melting or sliding
The cake base should be tender and supportive—soft enough to feel moist, but baked fully so it doesn’t sink or tear when layered.
Baking process (reliable technique)
1. Preheat and prep the pan.
Use parchment paper or grease + flour to prevent sticking.
2. Mix dry ingredients separately.
Whisk flour, baking powder, and salt. Even distribution gives consistent rise.
3. Mix wet ingredients until emulsified.
Combine eggs, sugar, milk/buttermilk, oil/butter, and vanilla. Mix until smooth, then add dry to wet.
4. Bake until fully set.
Start checking early. The cake is done when a toothpick comes out clean or with a few dry crumbs (not wet batter).
5. Cool completely.
This is non-negotiable for cannoli cake assembly. If the cake is warm, the ricotta cream can melt, leading to uneven layers.
Texture benchmark
A well-baked vanilla cake should spring back lightly when touched and have no “wet” center. If the cake is underbaked, the filling will cause sagging over time.
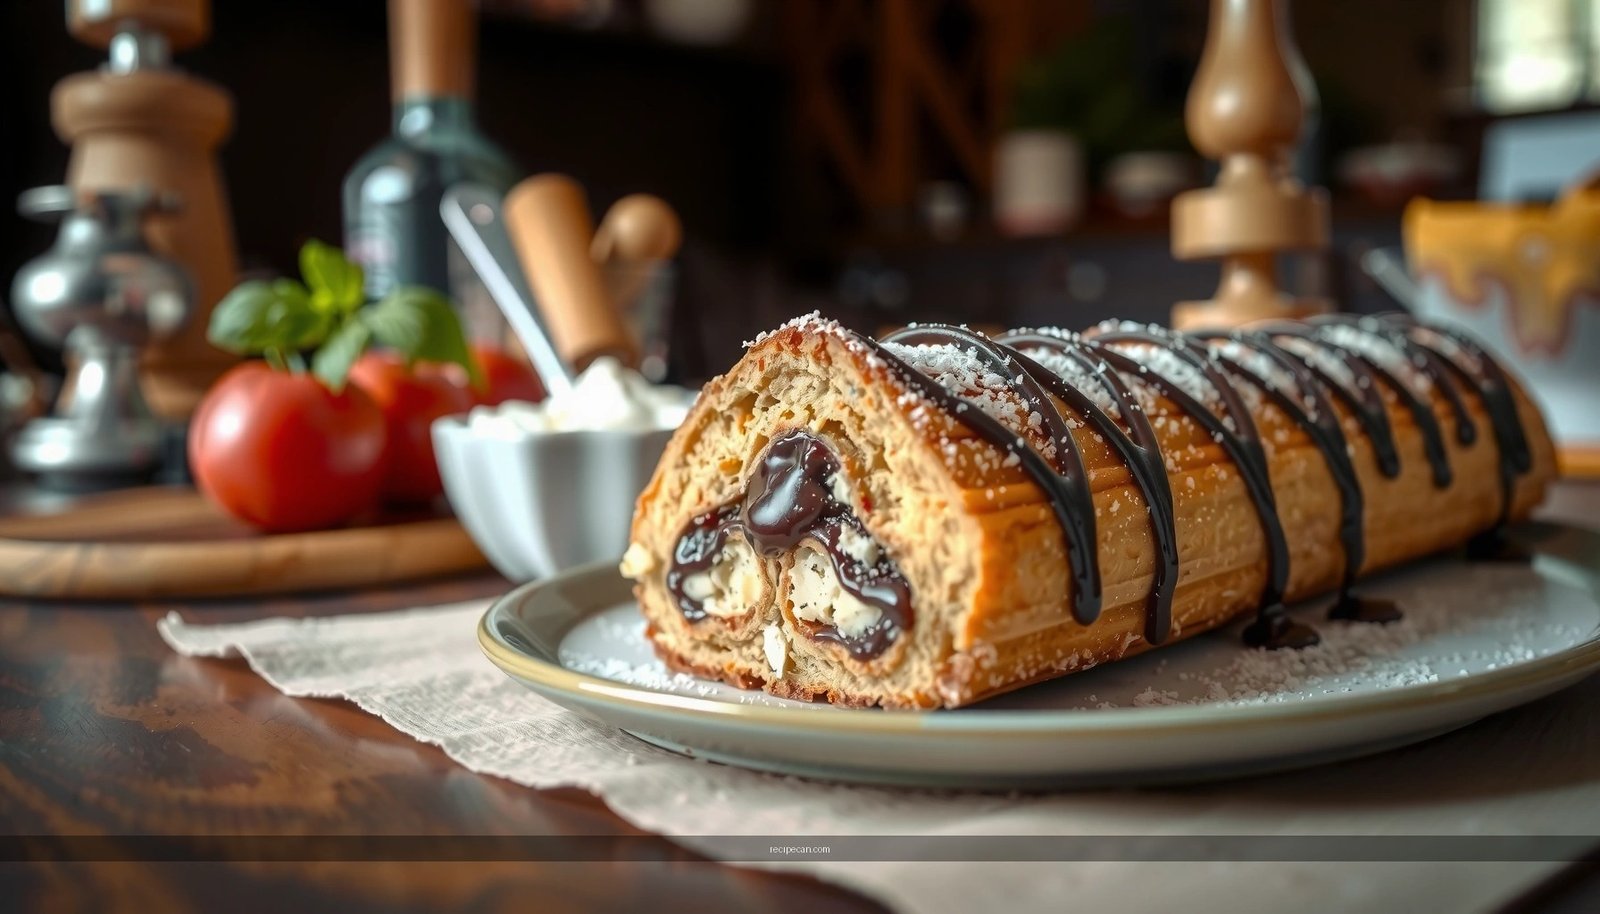
Assemble the Cannoli Cake
– Layer cake and cannoli filling for even coverage and the signature cannoli-cake slices
– Chill briefly so the layers set and cut cleanly
Assembly is where your results either look like a restaurant slice—or like a tasty but messy dessert.
Assembly method that improves slice quality
1. Level the cake (optional but worth it).
If your cake has a dome, trim the top lightly with a serrated knife so layers stack evenly.
2. Spread a thin “anchor” layer.
Add a modest layer of filling first, then spread to the edges. This prevents the rest of the filling from sliding.
3. Use consistent layer thickness.
A simple strategy: spread to a uniform depth rather than “eyeballing” thicker areas.
4. Add the second cake layer (if using a layered structure).
Repeat spreading filling between layers until you reach the desired height.
5. Chill before cutting.
Chill 30–60 minutes so the filling firms up for clean cannoli cake slices.
Professional-level tip: cut with control
For sharp slices:
– Use a wide, thin knife.
– Wipe the blade between cuts.
– Cut after chilling rather than immediately after assembly.
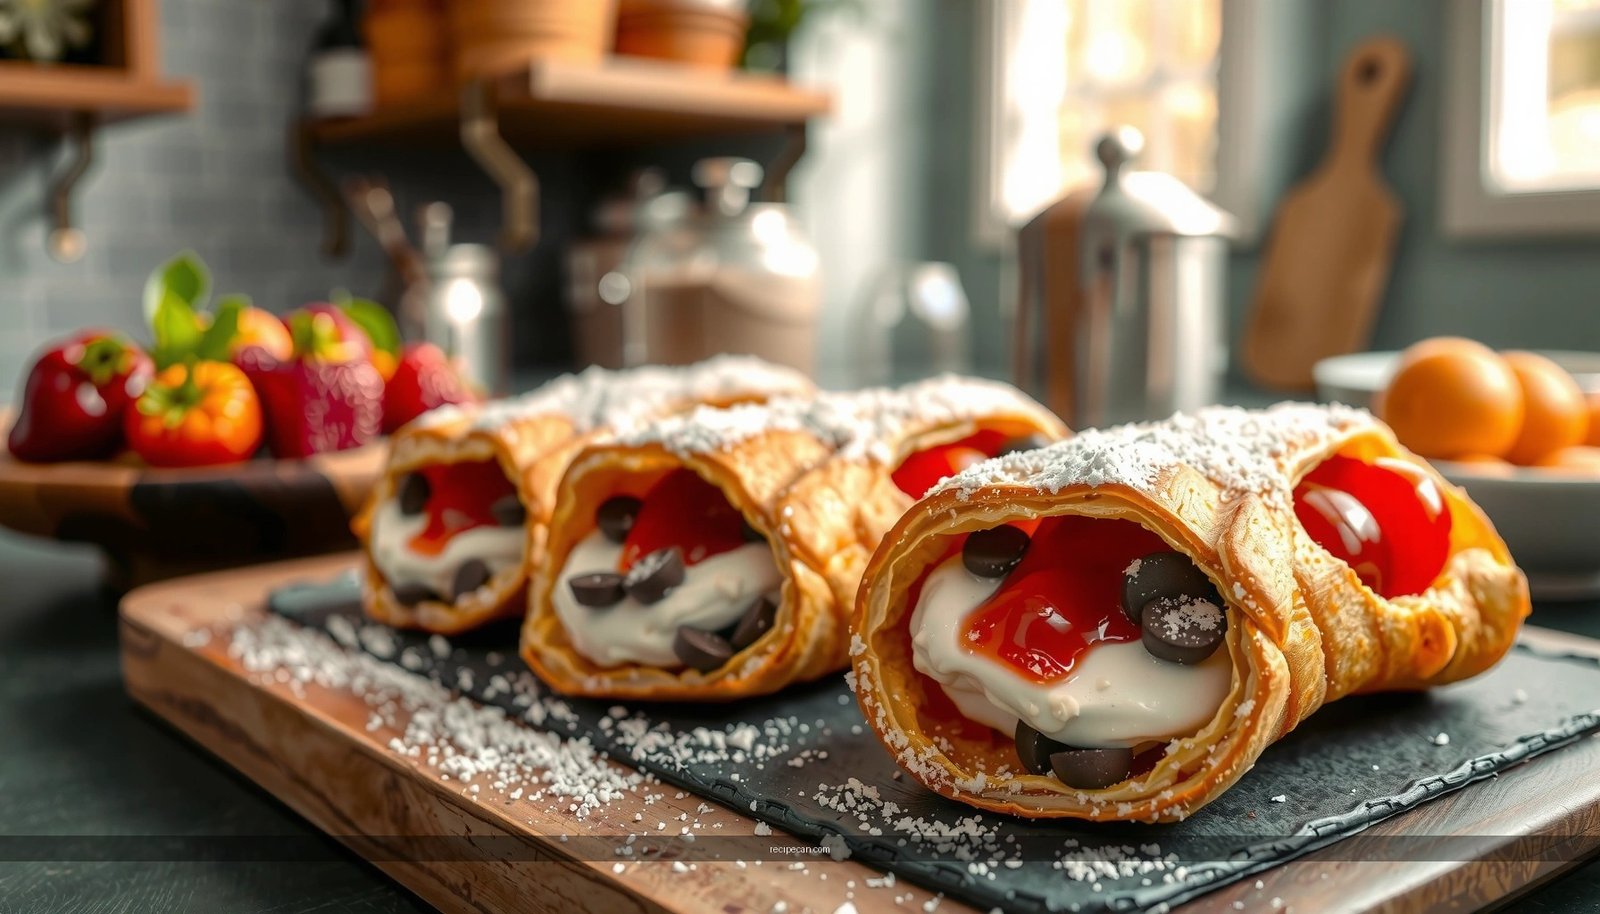
Add the Final Toppings and Texture
– Finish with crushed pistachios, chocolate chips, or candied pieces to mimic cannoli crunch
– Optional: dust with powdered sugar for a restaurant-style look
Toppings provide contrast: creamy filling plus crunchy, candied bits. This final step is what makes cannoli cake feel “complete.”
Best topping combinations (balanced, not overloaded)
– Classic profile: chopped pistachios + mini chocolate chips
– More shell-like crunch: crushed waffle cones/vanilla wafers + pistachios
– Dessert-bar vibe: candied orange peel (sparingly) + chocolate chips
– Presentation boost: powdered sugar lightly dusted right before serving
Make it look intentional
Instead of randomly scattering toppings, place them in a more even layer near the top, then press very lightly so they adhere to the cream.
Serving, Storage, and Make-Ahead Tips
– Serve chilled for best flavor and firmer slices
– Store covered in the fridge and assemble a few hours ahead for optimal set and texture
Carrabba’s cannoli cake style is ideal for planning ahead because chilling improves both flavor and texture.
Serving recommendations
– Serve chilled.
Cold ricotta creams taste brighter and slices hold shape better.
– Let it sit briefly at room temperature before serving (optional).
10 minutes can soften flavors without making the filling run.
Storage guidelines
– Refrigerate covered.
Store in the fridge to keep the filling stable.
– Consume within 3–4 days for best texture and freshness.
Make-ahead strategy (how professionals plan timing)
– Assemble 2–6 hours ahead for clean layers.
– If you need to prepare earlier, assemble and freeze only if your filling is stable and you can thaw carefully in the fridge. For most home bakers, fridge-only make-ahead is safer for texture.
Simple troubleshooting
– If your slices look soft: next time drain ricotta longer and chill longer after assembly.
– If cake feels dry: underbaked cake is a common culprit—bake to clean toothpick, but avoid overbaking by checking early.
A well-made Carrabba’s cannoli cake is all about precision: drained, smooth ricotta for a thick filling; fully baked, completely cooled cake for stable layers; and a short chill to lock in structure before slicing. Follow this recipe’s ingredient logic and assembly technique—then finish with pistachios and chocolate for cannoli-style crunch—and you’ll consistently get a dessert that tastes authentic, looks polished, and slices cleanly every time.
Frequently Asked Questions
What is Carrabba’s Cannoli Cake, and what makes it taste like cannoli?
Carrabba’s Cannoli Cake is a layered Italian-style dessert that combines moist cake with a sweet ricotta filling and hints of classic cannoli flavors like vanilla, cinnamon, and chocolate. It’s designed to mimic cannoli’s creamy texture by using a ricotta-based filling (often stabilized with ingredients like mascarpone or whipped cream) and adding chocolate chips or mini chocolate for that signature crunch. This is why people searching for a “cannoli cake recipe” often look for a version with both creamy filling and chocolate accents.
How do you make a Carrabba’s cannoli cake recipe without the filling turning runny?
To prevent runny cannoli filling, use well-drained ricotta (press it or drain it through cheesecloth) before mixing. If your recipe includes whipped cream or mascarpone, chill the filling before assembling and avoid overmixing once dairy is added—overmixing can break the texture. Many home cooks also find it helps to let the assembled cake chill in the refrigerator for several hours so the filling sets properly before slicing.
How should you assemble and chill Carrabba’s cannoli cake for the best texture?
Assemble your cannoli cake by stacking cake layers evenly and spreading the ricotta filling to the edges without overloading it. After assembly, refrigerate the cake at least 4–6 hours (or overnight) so the cannoli filling firms up and the layers hydrate for clean slices. If you’re serving a “copycat Carrabba’s cannoli cake,” chilling is one of the biggest secrets for getting that restaurant-style consistency.
Which ingredients are best for a classic cannoli flavor in a Carrabba’s cannoli cake recipe?
For authentic cannoli flavor, choose high-quality ricotta (preferably whole milk), pure vanilla extract, and mini chocolate chips or finely chopped chocolate. A small pinch of cinnamon can add that warm, dessert-shop depth, but keep it subtle so it doesn’t overpower the dairy. If your goal is a close “copycat” result, using mascarpone (or a stabilized whipped cream) often improves the richness and helps match the creamy texture of the original cannoli cake.
Why does cannoli cake taste better the next day, and can you make it ahead?
Cannoli cake tastes better after resting because the cake absorbs some moisture from the ricotta filling, which softens the crumb and intensifies the flavors of vanilla and chocolate. Making it ahead also gives the filling time to set, leading to cleaner cuts and a smoother, more cohesive dessert. If you’re planning a party, prepare the cake the day before and refrigerate it—this is a common approach for a Carrabba’s cannoli cake recipe that holds up well for serving.
References
- Google Scholar Google Scholar
https://scholar.google.com/scholar?q=Carrabba%27s+cannoli+cake+recipe - Google Scholar Google Scholar
https://scholar.google.com/scholar?q=Carrabba%27s+cannoli+cake - Google Scholar Google Scholar
https://scholar.google.com/scholar?q=cannoli+cake+recipe - Google Scholar Google Scholar
https://scholar.google.com/scholar?q=cannoli+cream+ricotta+mascarpone+food+science - Google Scholar Google Scholar
https://scholar.google.com/scholar?q=Italian+dessert+cannoli+history+techniques - Cannoli
https://en.wikipedia.org/wiki/Cannoli - Ricotta
https://en.wikipedia.org/wiki/Ricotta - Mascarpone
https://en.wikipedia.org/wiki/Mascarpone - https://www.britannica.com/topic/cannoli
https://www.britannica.com/topic/cannoli - Ricotta | Cheese, Whey, & Production | Britannica
https://www.britannica.com/topic/ricotta