This complete expert guide to safely making plum jam provides precise techniques and essential tips for both novice and experienced canners. Mastering the art of plum jam not only enhances flavor but also ensures food safety and quality preservation. Following the right protocols is crucial to avoid common pitfalls and achieve a deliciously rich, homemade jam.
What This Guide Covers (And What It Doesn’t)

This comprehensive guide details the step-by-step process for safely making plum jam at home. It includes essential ingredients, equipment, and safety protocols while offering both traditional and low-sugar plum jam recipes. Readers will find a method that aligns with their taste and dietary preferences. Aimed at home cooks with basic kitchen skills, this guide is perfect for those eager to preserve seasonal plums effectively. However, it does not delve into alternative fruit preserves or jam-making techniques beyond plum jam.
Who Should Read This

This guide is tailored for home canners, bakers, and fruit enthusiasts eager to make plum jam from scratch, focusing on safety and quality. A basic understanding of kitchen hygiene and food preservation techniques is beneficial, particularly the importance of using sterilized equipment. It is ideal for individuals looking to store their plum harvests long-term while adhering to safe canning practices. If you seek quick jam recipes or lack familiarity with canning methods, this guide may not be suitable for you.
The Step-by-Step Protocol

1. Gather Ingredients and Equipment: Measure 2 pounds of ripe plums, 1/4 cup of lemon juice, and 2 cups of granulated sugar. Prepare canning jars, lids, and a water bath canner. Ensure that your jars are suitable for canning and free of cracks or chips.
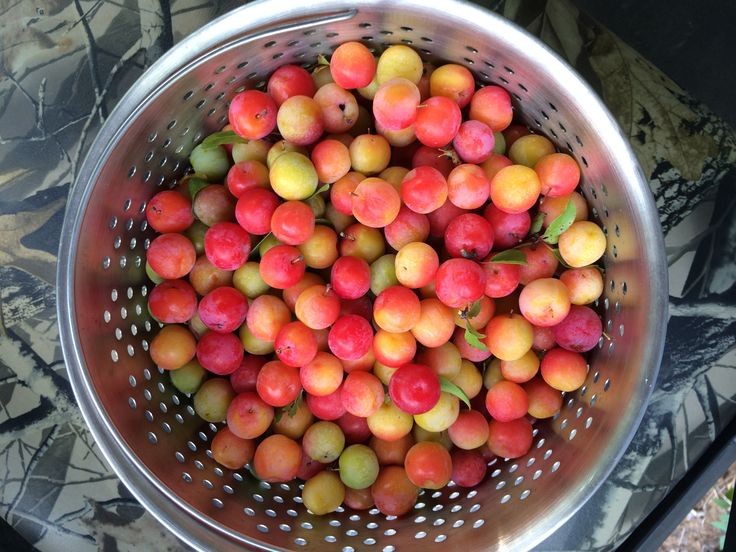
2. Prepare the Plums: Wash the plums thoroughly under cool running water to remove any dirt or residues. Halve the plums and remove the pits. Optionally, chop the fruit into smaller pieces to achieve a finer jam texture. This crucial step significantly impacts the final consistency of your jam.
3. Cook the Jam Mixture: In a large, heavy-bottomed pot, combine the prepared plums, lemon juice, and sugar. Heat over medium until the sugar dissolves completely. Once dissolved, increase the heat to bring the mixture to a rolling boil, stirring frequently. Continue boiling for about 20-25 minutes, or until the mixture thickens.
4. Check the Consistency: Use a candy thermometer to check the gel point, which should reach 220°F (104°C). If you do not have a thermometer, perform the “plate test” by placing a spoonful of jam on a cold plate. After a few minutes, tilt the plate; if the jam holds its shape and does not run, it’s ready for canning.
5. Prepare the Jars: While the jam cooks, sterilize your canning jars by placing them in the water bath canner and boiling them for 10 minutes. Keep the jars hot until you’re ready to fill them to prevent cracking.
6. Fill the Jars: Once the jam has reached the correct consistency, carefully ladle it into the hot, sterilized jars, leaving about 1/4 inch of headspace at the top. Wipe the rims of the jars with a clean, damp cloth to remove any residue that could interfere with proper sealing.
7. Seal the Jars: Place the sterilized lids on top of the filled jars and screw on the metal bands until they are fingertip-tight. Avoid overtightening, as this can prevent air from escaping during the canning process.
8. Process the Jars: Return the filled jars to the water bath canner. Ensure that the water covers the jars by at least an inch. Bring the water to a rapid boil and process the jars for 5 to 10 minutes, depending on your altitude (see further details in the Edge Cases section).
9. Cool and Store: After processing, use jar tongs to carefully remove the jars from the canner and place them on a clean dish towel or cooling rack. Allow them to cool completely, typically for 12-24 hours. Check the seals by pressing the center of each lid; if it does not flex, the jar has sealed properly. Store the sealed jars in a cool, dark place.
Warning Signs: When Not to Follow This

– Do not use plums that show any signs of spoilage, such as mold, an off smell, or excessive bruising, as these can compromise the safety of the jam.
– Avoid attempting this recipe if you lack the proper canning equipment, including a water bath canner and sterilized jars, as this can lead to unsafe preservation.
– Do not proceed with this recipe if you are unsure about the acidity levels of your plums; maintaining the correct pH is crucial for safe canning. The pH level should ideally be below 4.6 for safe preservation.
– If you have had previous allergic reactions to plums or ingredients in the recipe, consult with a healthcare provider before attempting this jam.
The Most Common Mistakes (And Their Consequences)
– Underestimating Sugar Needs: Using less sugar than specified can result in a jam that doesn’t set properly, affecting texture and preservation. This can lead to spoilage and a runny product that lacks the desired consistency.
– Not Sterilizing Jars: Failing to adequately sterilize jars introduces bacteria, leading to spoilage or foodborne illness. Always ensure jars are properly sterilized to minimize risk.
– Skipping the Gel Point Check: Ignoring the gel point can result in a runny jam that lacks both the desired consistency and shelf stability. Always verify proper thickness before canning.
– Insufficient Processing Time: Not processing jars for the recommended time can create unsafe conditions, allowing harmful bacteria to grow, which can lead to serious foodborne illnesses such as botulism.
Special Cases That Need a Different Approach
– Using Different Plum Varieties: Some plum varieties have a higher water content, requiring adjustments in sugar and cooking time to achieve the right consistency. Monitor the cooking process closely.
– Low-Sugar or No-Sugar Recipes: If using pectin for low-sugar jam, follow specific instructions for pectin usage, as the method and timing differ from traditional recipes. Consult the pectin packaging for guidance on amounts and cooking times.
– Allergies or Dietary Restrictions: For those with dietary concerns, consider using alternative sweeteners or pectin varieties that suit specific health needs. Always check ingredient labels for allergens.
– High-Altitude Adjustments: At elevations above 1,000 feet, adjust boiling times and ingredient ratios according to local guidelines to ensure proper preservation. For every 1,000 feet above sea level, increase processing time by 1-2 minutes.
When You Need a Professional
– If you are unsure about your canning methods or have concerns about food safety, such as previous botulism cases in your area, it is crucial to consult a food preservation expert or your local extension office.
– Seek professional advice if you plan to can large quantities of plum jam and need assistance with scaling recipes safely and effectively.
– If you experience any adverse reactions after consuming home-canned plum jam, contact a healthcare professional immediately.
– For specialized dietary needs or health conditions that may affect your ability to safely preserve food, consult a registered dietitian or nutritionist.
Sources and Further Reading
– National Center for Home Food Preservation: Guidelines on safe canning and preserving practices, specifically for jams and jellies.
– USDA Complete Guide to Home Canning: A comprehensive resource detailing proper canning techniques and safety protocols.
– Ball Canning’s “The Ball Book of Canning and Preserving”: Offers a variety of jam recipes with a focus on safe preservation methods.
– “Canning and Preserving for Beginners” by Carla H. Jones: A guide that covers the essentials of canning, including troubleshooting common issues in jam making.
By following the detailed steps outlined in this guide, you can savor the fruits of your labor in the form of delicious plum jam while ensuring the quality and safety of your preserved goods. Enjoy your canning journey, and relish the sweet rewards for months to come!
Frequently Asked Questions
What ingredients do I need for a basic plum jam recipe?
To make a basic plum jam, you’ll need ripe plums, granulated sugar, and lemon juice. A typical ratio is about 2 pounds of plums to 1 to 1.5 pounds of sugar, depending on your sweetness preference. The lemon juice helps balance the flavors and aids in the gelling process.
How do I properly sterilize jars for my plum jam?
To sterilize jars for your plum jam, wash them in hot, soapy water and rinse well. Then, place the jars in a preheated oven at 225°F (110°C) for about 10-15 minutes, or you can boil them in water for 10 minutes. Properly sterilized jars prevent contamination and ensure your jam lasts longer.
Why is my plum jam not setting, and how can I fix it?
If your plum jam is not setting, it may be due to insufficient pectin or cooking time. To fix this, you can reheat the jam and add commercial pectin according to the package instructions, or cook it longer to evaporate more liquid. Make sure to test the consistency by placing a spoonful on a cold plate to see if it gels.
What is the best way to store homemade plum jam?
The best way to store homemade plum jam is in a cool, dark place, like a pantry or cupboard, after it has been properly sealed in sterilized jars. Once opened, keep it in the refrigerator, where it can last for up to three weeks. For long-term storage, consider freezing the jam in airtight containers.
Which plums are best for making jam?
The best plums for making jam are those that are ripe and sweet, such as Italian plums or Santa Rosa plums, as they have a good balance of sweetness and acidity. Avoid using overripe or damaged plums, as they may affect the flavor and texture of your jam. Choosing high-quality fruit will ensure a rich and flavorful plum jam.
References
- Fruit preserves
https://en.wikipedia.org/wiki/Jam - https://www.bbc.co.uk/food/recipes/plum_jam_64473
https://www.bbc.co.uk/food/recipes/plum_jam_64473 - https://www.nytimes.com/2015/09/20/magazine/how-to-make-jam.html
https://www.nytimes.com/2015/09/20/magazine/how-to-make-jam.html - https://www.sciencedirect.com/topics/agricultural-and-biological-sciences/jam
https://www.sciencedirect.com/topics/agricultural-and-biological-sciences/jam - https://www.verywellfit.com/how-to-make-jam-5184512
https://www.verywellfit.com/how-to-make-jam-5184512 - Google Scholar Google Scholar
https://scholar.google.com/scholar?q=plum+jam+recipe - Google Scholar Google Scholar
https://scholar.google.com/scholar?q=plum+preservation+methods - Google Scholar Google Scholar
https://scholar.google.com/scholar?q=fruit+jam+recipes - Jam | food | Britannica
https://www.britannica.com/topic/jam-food - plum jam recipe – Search results
https://en.wikipedia.org/wiki/Special:Search?search=plum+jam+recipe