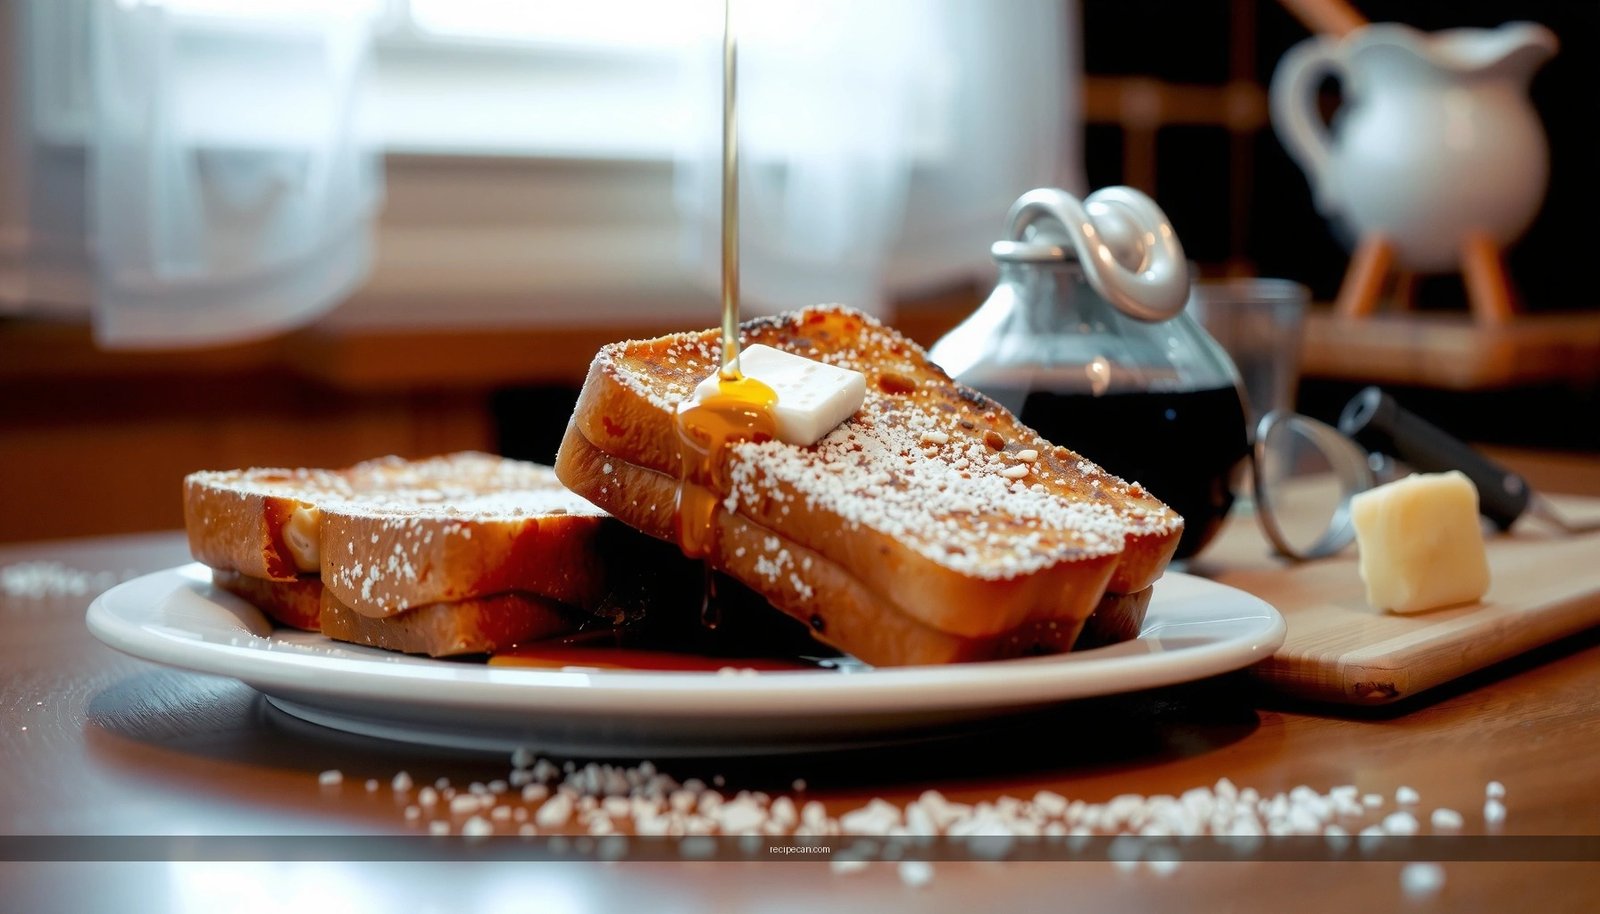
Need a make ahead French toast recipe that tastes as good as the day you make it? This prep-in-advance method delivers bread soaked overnight, baked to crisp edges and custardy centers with minimal morning work. If you’re planning breakfast for a crowd or want stress-free timing, this is the clear winner.
Make ahead French toast is the easiest way to guarantee a warm, custardy breakfast with minimal morning work—assemble it in a baking dish, soak it in custard, refrigerate, then bake when you’re ready. With the right bread choice, custard ratio, and a covered-then-uncovered baking method, you’ll get the tender interior and lightly crisp top that usually takes real attention on a busy weekday.
Make-ahead breakfast plans succeed or fail on one principle: timing. French toast isn’t just “soaked bread”—it’s a controlled transfer of moisture from custard into bread, followed by heat-driven setting of eggs and caramelization at the surface. When you prep in advance, you’re effectively front-loading much of that moisture exchange, which is why refrigeration time, dish size, and bread thickness matter. Below, you’ll get a practical approach you can scale for family breakfasts, hosting guests, or meal prep for the week.
Make Ahead French Toast: What You Need

The best make ahead French toast recipes rely on three things: absorbent bread, a custard that sets cleanly, and add-ins that don’t disrupt soaking.
– Choose sturdy bread like brioche or challah that soaks well
French toast is only as good as its bread structure. Brioche and challah are ideal because they’re rich (egg and butter in the dough), which increases tenderness and flavor while still holding shape. If you want more lift and less risk of mush, choose breads with thicker slices (about 3/4–1 inch) and a tight crumb. For a leaner option, sourdough works, but you’ll need a slightly longer soak and careful custard coverage to avoid dry spots.
– Use a classic custard base (eggs, milk, cream, vanilla, cinnamon)
For reliable results, target a custard that balances richness with set. Eggs provide structure; milk/cream add moisture and body; vanilla and cinnamon create the classic “French bakery” aroma. A common, dependable ratio for a standard casserole (about 8–10 slices, depending on thickness) is:
6 large eggs + 1 1/4 cups milk + 1 cup cream + 1–2 teaspoons vanilla + 1–2 teaspoons cinnamon + 1/3 cup sugar (optional, depending on your topping plans).
The sugar can be reduced if you plan to serve with maple syrup or fruit—too much sugar in the custard can make the surface brown too quickly during baking.
– Plan simple add-ins like berries or a touch of sugar for extra flavor
Add-ins should support the custard rather than “steal” it. Berries are great, but use them judiciously: fresh or frozen berries can release juice and increase sogginess if they’re overloaded. A better strategy is to scatter berries lightly (or use thawed berries and pat them dry) and serve the rest as a finishing topping after baking. If you want additional sweetness baked into the bread, add a small sprinkle of sugar to the top surface just before baking rather than mixing lots of sweet add-ins directly into the custard.
To make prep more analytical—and repeatable—use the table below as a “quality checklist” for make-ahead French toast outcomes. These are practical benchmarks based on how long French toast typically needs to soak in the refrigerator and how bread choice affects texture and bake performance.
Make-Ahead French Toast Benchmarks (Casserole Size ~ 8–10 Slices)
| # | Bread Type | Refrigerated Soak (Recommended) | Most Common Texture Result | Browning Risk |
|---|---|---|---|---|
| 1 | Brioche | 6–10 hours | Custardy, tender center | Low |
| 2 | Challah | 6–10 hours | Balanced custard set | Low |
| 3 | Sourdough (thick slices) | 8–14 hours | Custard-forward, slightly firmer bite | Medium |
| 4 | Texas toast (brioche-style) | 4–8 hours | Very soft, quick to set | Medium |
| 5 | White sandwich bread | 3–5 hours | Tender but easiest to become soggy | High |
| 6 | Whole wheat (enriched) | 6–12 hours | Hearty flavor, slightly drier edge | Medium |
| 7 | Gluten-free loaf (egg-rich) | 4–7 hours | Custardy, crumbly-soft finish | Medium |
How to Prep and Assemble

A reliable make ahead French toast assembly process minimizes uneven soaking—one of the most common causes of dry corners or soggy centers.
– Arrange bread slices in a greased baking dish in an even layer
Use a dish that fits the bread with minimal empty space. If slices are packed too tightly, custard can’t circulate evenly; if the dish is too large, the custard pools and certain slices stay under-saturated. Grease the dish lightly to prevent sticking and reduce the need for extra scrubbing after baking.
Tip: If your slices are thick, cut them to consistent thickness so the soak time works across every piece.
– Pour custard over the top, ensuring all bread is well saturated
Pour slowly and let it settle. You’re aiming for full contact—bread should look damp through the crumb, not just coated on the surface. If needed, gently press the slices down with a spatula so custard reaches the top of each piece.
Analytical note: Custard absorption is governed by both bread porosity and time at cold temperatures. Refrigeration slows down absorption, but it doesn’t stop it—hence why you still need a meaningful soak window.
– Cover and refrigerate so the flavors soak in while you prep the rest of your morning
Cover tightly with foil or plastic wrap to prevent drying and to keep the dish from picking up refrigerator odors. Refrigeration also gives the eggs time to distribute through the custard, setting you up for a cleaner bake.
Refrigeration, Soaking, and Timing
Timing is the difference between “custardy perfection” and “breakfast disappointment.” The goal is saturated bread with a custard interior that sets when heated.
– Refrigerate for at least 4 hours (overnight works best)
Minimum: 4 hours is usually enough for standard brioche/challah slices to absorb custard. Overnight (8–12 hours) produces a deeper custard profile and more uniform texture. If you’re planning for guests, overnight is your safest option because it creates a buffer window.
– Know when to bake: take it from the fridge and let it sit briefly if needed
When you remove the dish from the refrigerator, let it sit at room temperature for about 15–25 minutes before baking. This helps the center bake more evenly and reduces the risk of an over-browned top with a still-cold middle. If you bake immediately from the fridge, you can still get good results—just expect the baking time to run slightly longer.
– Adjust soaking time depending on bread thickness to avoid soggy toast
Thicker bread benefits from longer soaking because heat takes longer to penetrate. Thinner bread should soak less time to prevent excess liquid retention. As a practical rule:
– Thicker slices (1 inch): 8–12 hours
– Medium slices (3/4 inch): 6–10 hours
– Thin slices (< 1/2 inch): 3–6 hours
If you’re unsure, start with 6–8 hours and bake a tester portion first time you try a new bread.
Bake Directions for Best Texture
Bake method matters because French toast has two texture targets: a set custard interior and a browned, slightly crisp top.
– Bake covered first to set the custard, then uncover to brown the top
Bake initially with foil covering the dish. This traps steam, ensuring the custard cooks through without drying the top. Then uncover near the end so the surface can brown and caramelize.
A dependable approach: Bake at 350°F (175°C) covered for ~25–35 minutes, then uncovered for ~10–15 minutes. Actual times vary by dish size, slice thickness, and whether the dish is fully cold.
– Look for bubbling custard and golden edges as your doneness cue
Don’t rely on a single minute mark. Instead, look for gentle bubbling at the edges and center, plus golden color on the top surfaces. If the top browns faster than the center sets, recover with foil and continue baking in short increments.
Quality check: Insert a knife into the thickest slice—if it comes out with no wet custard, you’re done.
– Let it rest briefly before serving so it slices and plates cleanly
Rest for 5–10 minutes. This allows the custard to finish setting and reduces runniness when you portion. If you cut immediately, steam and loosened custard can seep, especially with enriched breads like brioche.
Storage and Reheating Instructions
Make ahead doesn’t end at baking. Storing and reheating correctly preserves texture—especially the exterior crispness.
– Store leftovers in an airtight container in the fridge for up to 3–4 days
Cool the dish to room temperature first (don’t leave it out for extended periods). Airtight storage prevents drying and reduces flavor transfer from other foods in the refrigerator.
– Reheat in the oven or air fryer to keep the exterior crisp
Use oven or air fryer for the best texture. Reheating gently re-sets the custard and rehydrates the bread without turning the top soggy. As a baseline, reheat at 325°F (165°C) until warmed through, typically 8–15 minutes, depending on portion size.
– Microwave works in a pinch, but oven reheating preserves the best texture
Microwave reheats quickly but tends to soften the crust and can make custard weep. If you must use a microwave, cover the portion loosely to retain moisture, and reheat in shorter bursts to avoid overheating.
Freezing Tips (Optional)
Freezing is a strong option if you batch-cook for weekends or want a future “emergency breakfast” option.
– Freeze assembled, unbaked French toast for up to 1 month for future mornings
Assemble as usual, cover well, and freeze before baking. Freezing stops soaking and keeps the custard distributed. To reduce freezer burn, wrap tightly and keep the dish in an airtight container or freezer-safe bag.
– Thaw overnight in the fridge, then bake as directed
Thawing restores even absorption and makes bake performance consistent. After thawing, bake using the covered-then-uncovered method described above.
– Label and date your dish to keep your make-ahead routine stress-free
This is the difference between “frozen success” and guessing later. Add baking instructions and portion count notes if you like.
Make ahead French toast transforms breakfast from a time-sensitive task into a planned workflow. By assembling in a greased dish, saturating thoroughly in classic custard, and refrigerating long enough for the bread to absorb flavors, you set up a bake that produces tender interiors and a nicely browned top. Use covered baking first for even custard set, uncover to brown, rest before serving, and reheat leftovers in the oven for the best texture.
If you want an easy win this week, make one batch, bake it when your schedule allows, and store/reheat strategically—your future mornings will be noticeably calmer, and your French toast will stay reliably delicious.
Frequently Asked Questions
What’s the best way to make ahead French toast the night before?
Assemble your French toast casserole the evening before by layering bread with a seasoned egg-milk mixture, then cover and refrigerate overnight. Use thick, sturdy bread (like brioche or challah) so it absorbs the custard without turning mushy. In the morning, bake straight from the fridge for a convenient make ahead French toast recipe that’s ready for brunch fast.
How do you prep French toast ahead of time without getting soggy?
Choose bread that’s slightly stale or toasted, and cut it into even slices so it soaks uniformly. Let the egg mixture soak briefly in the refrigerator, but avoid soaking for too long—overnight is ideal for most make ahead French toast recipes. If you’re preparing fully assembled portions, drain excess liquid before baking and bake promptly once ready.
How do you store and reheat make ahead French toast so it stays fluffy?
After baking, cool French toast completely, then store leftovers in an airtight container in the refrigerator for up to 3–4 days. Reheat in a 325°F (165°C) oven or toaster oven until warmed through to preserve a crisp edge, rather than microwaving, which can soften the texture. For meal prep, you can reheat individual servings quickly while keeping your make ahead French toast taste and texture consistent.
Why is soaking bread in the custard for make ahead French toast important?
Soaking time helps the bread absorb the egg and milk mixture, creating the custardy center that makes French toast satisfying instead of dry. With make ahead French toast, chilling helps the custard penetrate evenly while the bread firms up a bit, improving slice integrity when baked. Too little soaking can lead to a bready result, while too much can cause sogginess—overnight usually hits the sweet spot.
Which bread works best for a make ahead French toast casserole?
Brioche, challah, and Texas toast are popular choices because they’re rich, thick, and hold their shape well during baking. Avoid very soft white sandwich bread if you want a non-soggy make ahead French toast recipe, unless you use it sparingly and reduce soaking time. For best results, use day-old bread and cut into uniform pieces so the custard distributes evenly.
References
- Google Scholar Google Scholar
https://scholar.google.com/scholar?q=make-ahead+french+toast+overnight+recipe - Google Scholar Google Scholar
https://scholar.google.com/scholar?q=overnight+french+toast+bread+soaking+custard+ratio - Google Scholar Google Scholar
https://scholar.google.com/scholar?q=french+toast+make-ahead+food+safety+refrigeration - French toast
https://en.wikipedia.org/wiki/French_toast - https://www.fda.gov/food/consumers/food-safety-basics/food-safety-basics-refrigeration-and-food-storage
https://www.fda.gov/food/consumers/food-safety-basics/food-safety-basics-refrigeration-and-food-storage - Preventing Food Poisoning | Food Safety | CDC
https://www.cdc.gov/foodsafety/keep-food-safe.html - https://www.fsis.usda.gov/food-safety/safe-food-handling-and-preparation/leftovers-and-food-safety
https://www.fsis.usda.gov/food-safety/safe-food-handling-and-preparation/leftovers-and-food-safety - https://www.fsis.usda.gov/food-safety/safe-food-handling-and-preparation/putting-food-away-refrigerator-and-freezer
https://www.fsis.usda.gov/food-safety/safe-food-handling-and-preparation/putting-food-away-refrigerator-and-freezer - Custard
https://en.wikipedia.org/wiki/Custard - Refrigeration
https://en.wikipedia.org/wiki/Refrigeration