This cannoli shells recipe easy delivers crisp, shatter-ready shells at home with a simple dough and straightforward frying steps. If you’ve been burned by soft cannoli shells, this is the method built for consistent crunch. Follow the timing and technique here and you’ll get golden, crackling shells that hold up when filled.
Make easy cannoli shells at home by using a simple dough, frying it quickly, and shaping it tightly around cannoli forms for that classic crisp texture. If you follow the key technique—thin rolling, hot oil, tight wrapping, and filling right before serving—you can prevent soggy shells and get a reliably golden crunch every batch.
Easy Cannoli Shell Dough Essentials

Cannoli shells start with a dough that’s intentionally modest and crisp-friendly. The classic goal is not “tender pasta dough”—it’s a fryable pastry that puffs slightly at the surface and stays rigid once cooled. For an easy cannoli shells recipe, you want a dough that’s rollable, elastic enough to wrap without tearing, and resilient enough to brown quickly without absorbing excess oil.
Use basic pantry ingredients and a straightforward dough mix
A reliable at-home dough typically includes flour, a fat component (often butter or lard), a sweetener (usually a small amount of sugar), and a binder/structure element (commonly a splash of wine, vinegar, or another acidic ingredient). The acid helps relax gluten and promotes a crisp, crackly shell rather than a chewy one. If you want a “simple and consistent” workflow, pre-measure ingredients so you can mix, rest, roll, and fry without delays—dough that sits too long can dry out and become harder to roll thin.
A practical, easy dough approach:
– Flour for structure (all-purpose works well).
– Sugar in small quantity for light browning (don’t oversweeten—high sugar can burn faster).
– Butter or lard for shortening effect (butter adds flavor; lard often improves flakiness).
– Pinch of salt to balance sweetness.
– Egg for binding (optional but common).
– Dry white wine or a small amount of vinegar to enhance crispness.
– Warm water as needed to reach a smooth, pliable dough.
Rest the dough briefly for easier rolling and crisp results
Resting is one of the most underestimated steps in a cannoli shells recipe easy to follow. Even a 20–30 minute rest improves dough rollability by relaxing gluten. That means thinner sheets with fewer cracks—critical because thin dough is what produces a “glass-like” crunch after frying. Cover the dough with plastic wrap or a bowl and keep it at room temperature. Avoid chilling too long unless your dough is very warm; overly cold dough can become stiff and resistant to thin rolling.
Target dough behavior: smooth, slightly elastic, not tacky. If it feels sticky, add flour a teaspoon at a time; if it’s tough, knead in a few drops of water.
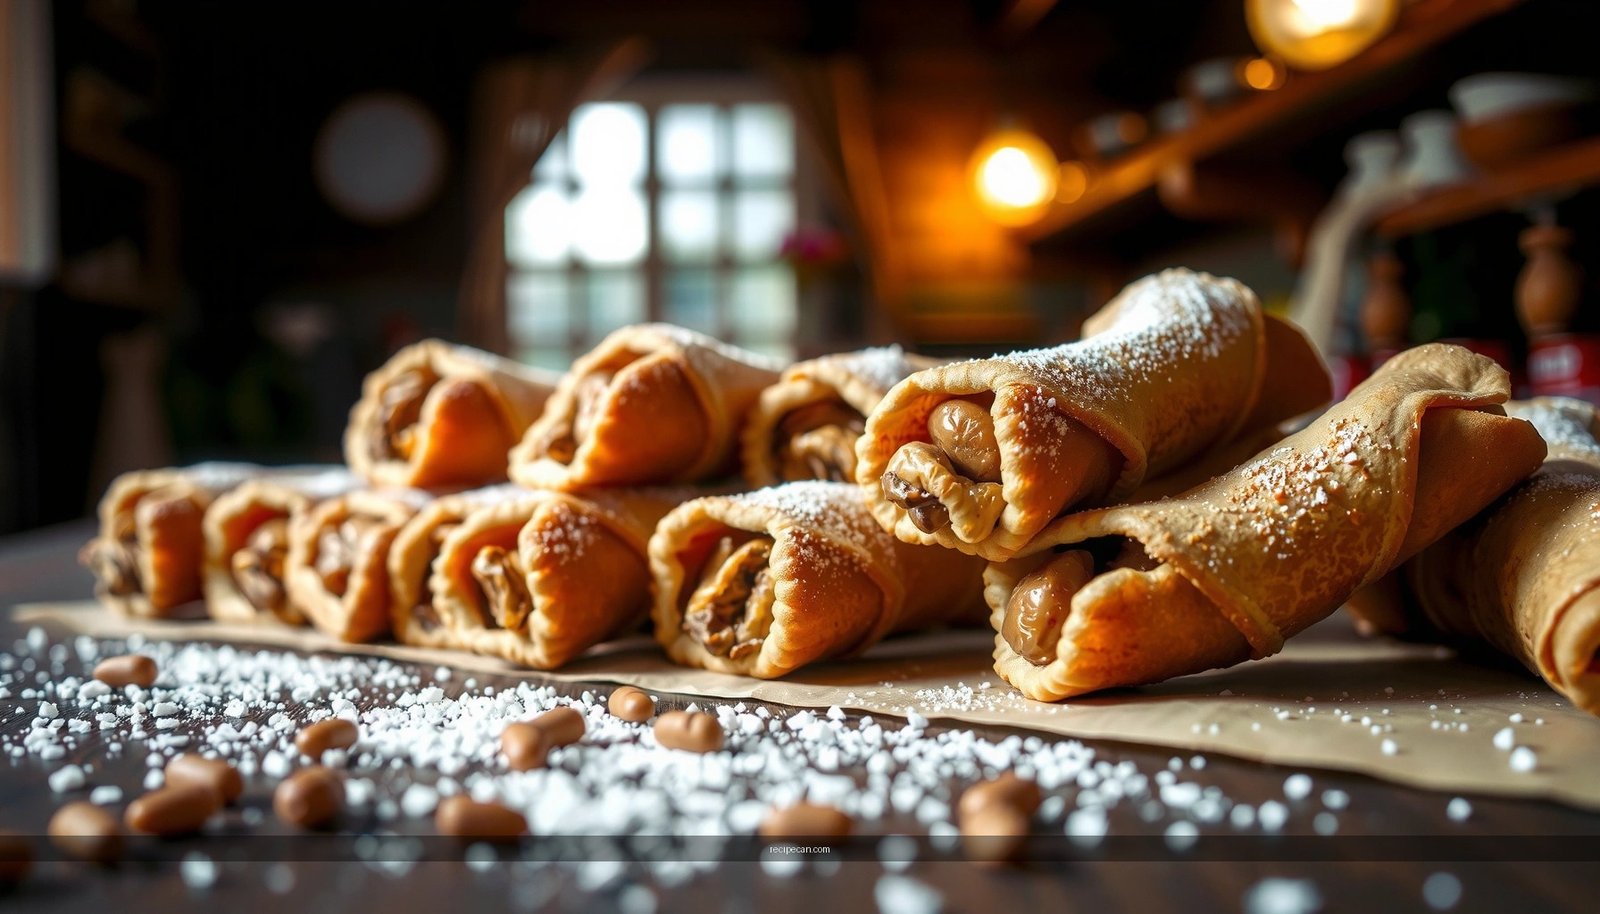
Shape Your Cannoli Shells for Perfect Curl

The signature look of cannoli shells—those tight, even curls—depends on both cutting precision and wrapping tension. Poor shaping usually doesn’t show up until after frying: shells might unroll, brown unevenly, or end up too thick to crisp fully. When you shape correctly, you create consistent contact points with the hot oil, which improves browning and crackling.
Roll the dough thin and cut even strips
Thin rolling is the “make or break” variable. For a classic bite, aim for a dough thickness around the equivalent of a few sheets of paper—roughly 1–2 mm. If your dough is thicker, it will likely stay soft inside after frying because the center can’t dehydrate quickly enough.
– Use a lightly floured surface.
– Roll in stages (don’t fight the dough in one pass).
– Cut strips of consistent width (often about 2–2.5 cm depending on form size).
Wrap tightly around cannoli forms for consistent shape
Cannoli forms (metal tubes) conduct heat and help set the shell’s curl. They also affect the final crispness: thin dough creates a delicate shell that releases easily once cooled.
Wrapping best practices:
– Wrap each strip with slight overlap (a consistent seam helps prevent gaps).
– Keep tension firm—the strip should adhere to itself rather than sit loosely.
– Leave the ends slightly tapered if possible; this helps shells fry through at the edges.
– Work efficiently: once wrapped, shells should go into oil quickly.
A key analytical point: tight wrapping reduces trapped air pockets. Less internal air means more uniform heating, which translates into better browning and a more reliable crisp texture. That’s how a simple cannoli shells recipe turns into restaurant-style results at home.
What Changes Crispness Most in Easy Homemade Cannoli Shells
| # | Factor | Typical Home Range | Impact on Crispness | Practical Target |
|---|---|---|---|---|
| 1 | Dough thickness | 1.0–2.0 mm | High | ~1.5 mm |
| 2 | Oil temperature | 175–190°C | High | 188°C |
| 3 | Wrap tightness | Firm overlap | Medium–High | No gaps |
| 4 | Fry time per shell | 40–70 sec | Medium | Golden edges |
| 5 | Oil batch overcrowding | 1–2 dozen/hr | Medium | Small batches |
| 6 | Cooling method | Fully cool before filling | High | Dry, room temp |
| 7 | Fill timing | 0–30 min pre-serve | Very High | Fill last moment |
Frying Tips for Golden, Crispy Shells

Frying is where the “easy” part becomes measurable. You control crispness through oil temperature, shell movement, and timing. Cannoli shells fry fast, so your process should be organized: forms ready, tongs nearby, and a draining station set before oil reaches temperature.
Fry in hot oil and avoid overcrowding the pan
Hot oil drives rapid moisture loss and browning. If the oil temp drops—often from adding too many shells at once—the dough absorbs more oil and browns slowly, leading to softness and uneven crispness.
Operational best practices:
– Use a thermometer if possible.
– Add shells in small batches to keep oil stable.
– Keep shells from touching too aggressively; overcrowding can cause them to stick or cook unevenly.
Turn as needed until evenly golden and crisp
Most cannoli shells need only a short fry cycle, frequently under a minute. Turn them gently as they color. The right shade is a combination of:
– lightly bubbling surface,
– steady golden color,
– crisp edges that look set rather than pale.
A useful “quality control” cue: if the shell looks pale in the middle seam, it likely hasn’t finished dehydration. If it’s already very dark outside but still slightly soft inside, your dough may be too thick or oil may be too cool (or both).
Drain, Cool, and Store Properly
After frying, you’re no longer cooking—you’re preserving structure. Any moisture trapped on the surface can migrate inward as steam cools, which is a common cause of soft cannoli shells even when they initially look perfect.
Drain on paper towels immediately after frying
Drain promptly so excess oil doesn’t sit on the surface. Use a rack if you have one; racks are even better because air circulates and reduces re-softening. If you rely on towels, transfer shells off towels once the surface stops glistening.
Let shells cool fully before filling to prevent sogginess
Cooling completes the crisp set. Fill too early and the warmth plus any moisture from filling accelerates softening.
Timing guidance:
– Let shells cool to room temperature.
– Only then fill—ideally within the window of “just before serving.”
If you’re making shells ahead, store them properly (see below) to reduce humidity exposure.
Storage that protects crunch
– Store unfilled shells in an airtight container once fully cooled.
– Keep them away from steam sources (like a running dishwasher area or uncovered humid foods).
– For best results, avoid refrigerating shells; cool air plus moisture can affect texture.
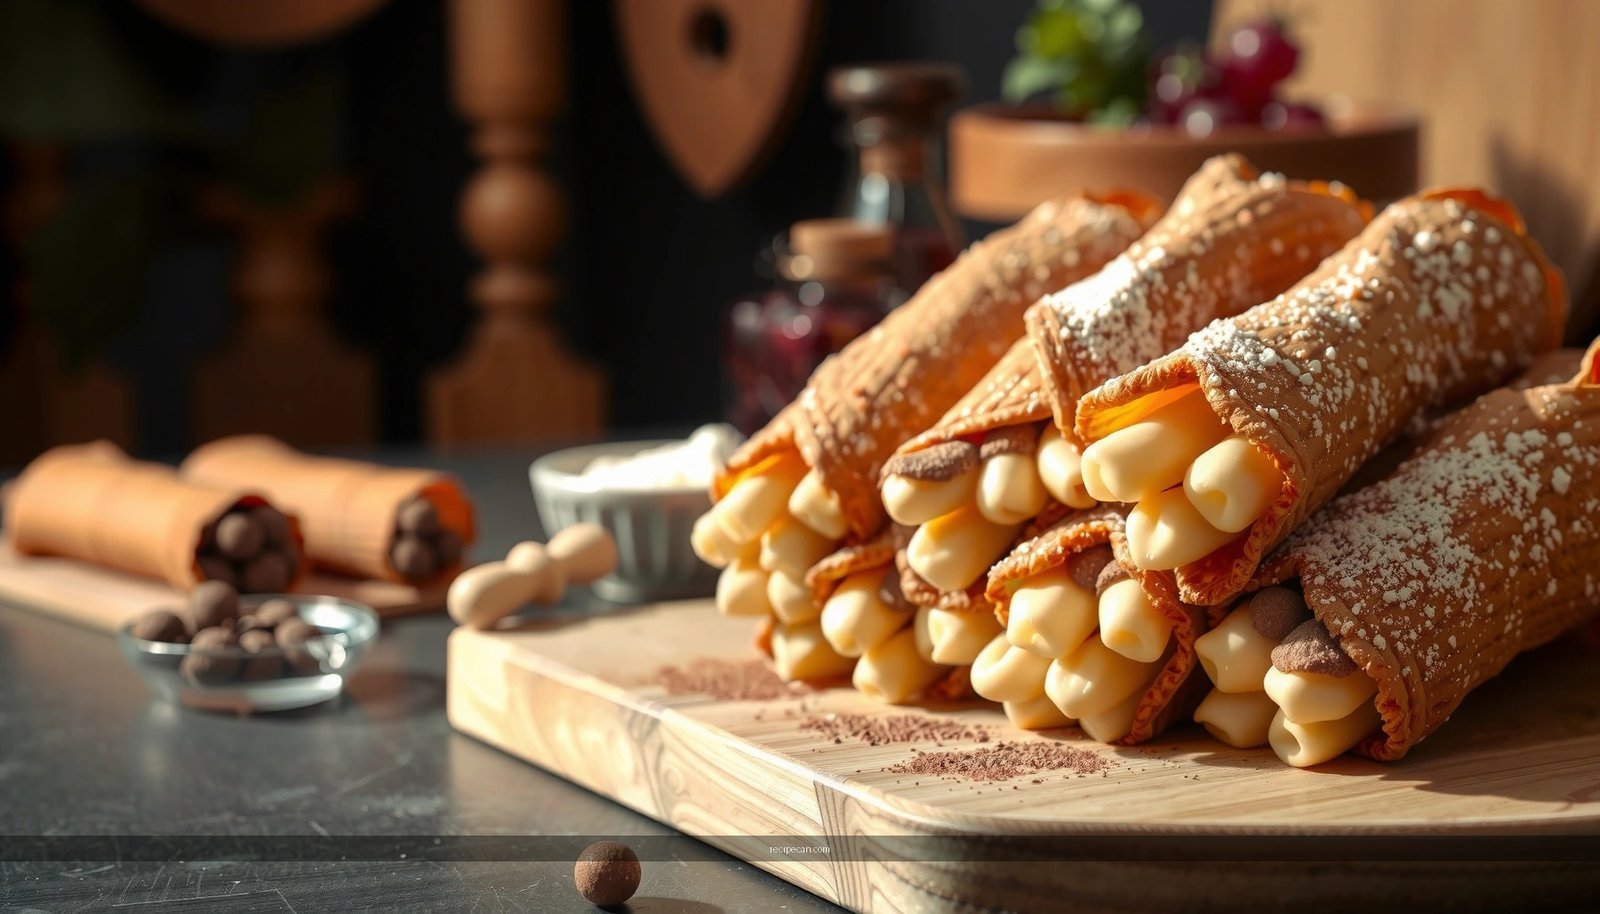
Best Filling Prep (So Shells Stay Crisp)
A crisp cannoli shell is a system, and filling is the final variable. The best filling doesn’t just taste better—it also supports shell integrity by limiting moisture transfer.
Fill right before serving for maximum crunch
In practical terms, the difference between “good” and “great” is fill timing. The longer filled shells sit, the more the shell absorbs moisture and softens. Even high-quality fillings can break the crisp if held too long.
For consistency:
– Pipe or spoon filling at the last moment.
– If serving at an event, plan a staged workflow: fill in batches as guests arrive.
Choose a thick ricotta filling and sweeten to taste
A common reason for soggy shells is watery ricotta. High-quality results require ricotta that’s drained and optionally sweetened based on taste.
Filling thickness strategies:
– Drain ricotta in a fine sieve or cheesecloth before mixing.
– Mix until smooth, but don’t leave it loose.
– Sweeten to preference; add citrus zest or vanilla for balance.
If your filling is too soft, it will leak into the shell seam and degrade crispness faster. Thick filling creates a tighter moisture barrier and preserves the “crack” you want.
Common Mistakes to Avoid
Even experienced bakers can lose crispness due to a few predictable missteps. Treat this section as a troubleshooting checklist.
Don’t roll too thick—thicker shells won’t crisp well
Thin dough dehydrates fast. If your cannoli shells come out chewy or soft after cooling, it often traces back to thickness. Use a consistent rolling plan and cut even strips so every shell fries at the same rate.
Avoid under-frying or cooling too briefly before use
Under-frying leaves internal moisture. Cooling too briefly means the shell hasn’t fully set; filling too soon then speeds softening. If you’re unsure, slightly extend fry time in small increments rather than adding multiple shells at once and causing temperature swings.
Additional operational errors (watch for these)
– Oil temp drifting low: Overcrowding is the most common cause.
– Loose wrapping: Gaps can puff and later trap steam.
– Filling ahead of time: Even a great ricotta mixture will soften shells when held.
Quick Dough Workflow (for consistent results)
If you want a repeatable, business-like process, treat the cannoli shells recipe easy method like a production line:
1. Mix dough until smooth.
2. Rest 20–30 minutes.
3. Roll thin, cut strips.
4. Wrap tightly on forms.
5. Fry in small batches at stable high heat.
6. Drain promptly.
7. Cool fully.
8. Fill immediately before serving.
This workflow reduces variability—the main driver of inconsistent crispness.
Final testing tip: make one “pilot batch” to calibrate fry time and oil temperature. Then scale to your full batch once you know your ideal golden shade.
Fresh, crisp cannoli shells are all about thin dough, tight wrapping, hot frying, and filling at the last moment. Follow this easy cannoli shells recipe, make a batch, and try your favorite ricotta filling right before serving for the best crunch—then experiment with timing and frying to match your ideal shade. With the right temperature management and cooling discipline, your homemade shells can deliver the classic crisp texture you expect from Italian pastry shops.
Frequently Asked Questions
What is the easiest cannoli shells recipe for beginners?
A beginner-friendly cannoli shells recipe typically uses a simple dough made from flour, sugar, a little butter or lard, and dry white wine (or Marsala) to help create a crisp, flaky shell. Many home cooks also add a touch of baking powder for lighter shells that fry up quickly. Choose a reliable filling pair—like ricotta cannoli filling—so your focus stays on getting crisp cannoli shells right.
How do you make homemade cannoli shells crispy and not soggy?
To keep cannoli shells crispy, roll the dough thin and fry at a consistent oil temperature—usually around 350°F (175°C)—so the shells puff without soaking up oil. Drain shells well on a rack (not paper towels) and cool completely before filling. For best results, fill cannoli shells only shortly before serving, since moisture from the filling will soften the shells over time.
Why do my cannoli shells break when I roll or fry them?
Cannoli shells often break when the dough is too thick, rolled unevenly, or the gluten hasn’t been rested properly. Let the dough rest before rolling, and use cannoli forms/tubes so the dough wraps tightly and evenly. Also avoid overcrowding the fryer—shells need room to bubble and set quickly—so they dry out just enough to stay intact.
What’s the best flour and fat to use in an easy cannoli shells recipe?
For an easy cannoli shells recipe, all-purpose flour is the most common choice and works well for crisp, fryable dough. Using a fat like butter or lard helps create a tender-but-crisp shell texture; lard often yields classic, flaky results, while butter gives a slightly different flavor. If you want a straightforward path, stick to one reliable fat and follow the dough hydration closely until it’s smooth and elastic.
Which oil is best for frying cannoli shells, and how long should you fry them?
For frying cannoli shells, choose a neutral high-heat oil such as vegetable oil, canola, or peanut oil so the flavor doesn’t overpower the dessert. Fry each shell until golden and crisp, typically about 1–3 minutes depending on thickness and temperature. Keep the oil temperature steady, remove shells promptly, and cool them fully before filling for the best crunch.
References
- Cannoli
https://en.wikipedia.org/wiki/Cannoli - Fried dough
https://en.wikipedia.org/wiki/Fried_dough - Deep frying
https://en.wikipedia.org/wiki/Deep_frying - Italian meal structure
https://en.wikipedia.org/wiki/Italian_dessert - https://en.wikipedia.org/wiki/Italian_cuisine
https://en.wikipedia.org/wiki/Italian_cuisine - Pastry
https://en.wikipedia.org/wiki/Pastry - https://britannica.com/topic/cannoli
https://britannica.com/topic/cannoli - Google Scholar Google Scholar
https://scholar.google.com/scholar?q=cannoli+shells+recipe - Google Scholar Google Scholar
https://scholar.google.com/scholar?q=cannoli+shell+pastry+dough+fried - Google Scholar Google Scholar
https://scholar.google.com/scholar?q=deep-fried+dough+recipe+Italy+cannoli