Need a tiramisu recipe that’s simple and easy without sacrificing the classic taste? This step-by-step guide shows you exactly how to layer espresso-soaked ladyfingers and mascarpone cream for a dessert that sets up cleanly and tastes like it came from an Italian bakery. Follow these straightforward instructions, and you’ll get a reliable, crowd-pleasing tiramisu every time.
Make simple, easy tiramisu at home by layering coffee-soaked ladyfingers with a smooth mascarpone cream, then chilling it until sliceable. If you follow the timing cues—especially brief dipping and adequate refrigeration—you’ll get a classic dessert with clean layers and balanced flavor, even on your first attempt.
Simple Tiramisu Ingredients

Tiramisu is built on a short list of recognizable ingredients, but the real “secret” is choosing quality items and understanding what each one does in the final texture. At a minimum, you’ll need mascarpone, eggs (traditional method) or alternatives, sugar, espresso/coffee, and ladyfingers—plus cocoa powder for the iconic finish. Below is an ingredient framework you can use to source consistently and avoid common texture problems (grainy cream, watery layers, or overly bitter coffee notes).
Core components and what to look for:
– Mascarpone: Choose a fresh, high-fat mascarpone for a thick, stable cream. If it’s old or overly soft, the mixture may not hold its shape after chilling.
– Eggs + sugar (traditional): The yolks provide richness and color, while the whites (when used) can help lighten the cream. For food-safety reasons or convenience, you can use pasteurized eggs or an alternative method (see below).
– Coffee/espresso: Use espresso or strong brewed coffee. The flavor should be assertive enough to cut through the sweetness, but not so harsh that it overwhelms the mascarpone.
– Ladyfingers (savoiardi): Aim for dry, crisp ladyfingers that absorb coffee predictably. Soft or stale cookies can crumble or become gummy too quickly.
– Cocoa powder: Use unsweetened cocoa for the classic bitter-sweet balance and visual contrast.
Egg alternatives (practical options):
– Pasteurized eggs: Best for traditional-style texture while staying more manageable.
– Mascarpone-only cream approach: Some modern home recipes reduce or eliminate raw egg usage by relying on whipped cream or a stabilized dairy base. This can be easier, but the flavor profile will be slightly less “classic.”
Home Tiramisu Ingredient Ratios for a 9×13-inch Pan (Serves ~12)
| # | Ingredient | Amount | Function | Adjustment Signal |
|---|---|---|---|---|
| 1 | Mascarpone | 24 oz (680 g) | Cream body & richness | If thin, chill 10 min before layering |
| 2 | Egg yolks (pasteurized) | 5 large | Emulsification & classic flavor | If mixture looks curdled, stop mixing & whisk gently off-heat |
| 3 | Granulated sugar | 3/4 cup (150 g) | Sweetness & yolk stability | For less sweet, reduce by 2 tbsp |
| 4 | Egg whites (optional, pasteurized) | 3 large | Lightness & softer mousse texture | If not foamy, whisk longer or replace with pasteurized carton whites |
| 5 | Espresso / strong coffee | 2 cups (480 ml) | Moisture & coffee flavor | Too weak? Brew darker or increase strength by 25% |
| 6 | Ladyfingers | ~40–45 pieces | Structural layers | If breaking, dip for 1–2 seconds less |
| 7 | Unsweetened cocoa powder | 3–4 tbsp | Classic finish | For heavier cocoa, dust just before serving |
Quick Prep: Make the Mascarpone Cream

The mascarpone cream is where tiramisu becomes “classic”—and where many home cooks either under-mix (grainy, separated texture) or over-mix (dense and less airy than expected). The goal is smooth, thick, and spreadable. Keep mixing controlled: whisk until emulsified and then stop, and fold gently if you’re adding whipped egg whites.
A dependable workflow:
1. Temper the yolks with sugar: Whisk yolks and sugar until the mixture looks lighter and thicker. This helps the sugar dissolve and supports a smoother final texture.
2. Blend mascarpone in stages: Add mascarpone gradually and mix just until uniform. Mascarpone can be stubborn—mixing too little leaves streaks; mixing too aggressively can tighten the texture.
3. Fold in lightness (optional): If you’re using whipped egg whites, fold gently in 2–3 additions. Folding maintains air bubbles for a lighter mouthfeel.
Texture checkpoints (highly practical):
– Spread test: The cream should mound slightly when spooned and then settle slowly. If it’s runny, chill 10–15 minutes before layering.
– No streaks: When you swipe a spoon through the cream, it should look consistently glossy and creamy.
Food-safety note (businesslike but important): If you use eggs, use pasteurized eggs or follow a method that relies on pasteurized ingredients. This makes your tiramisu not only delicious but also reliably safe for guests.
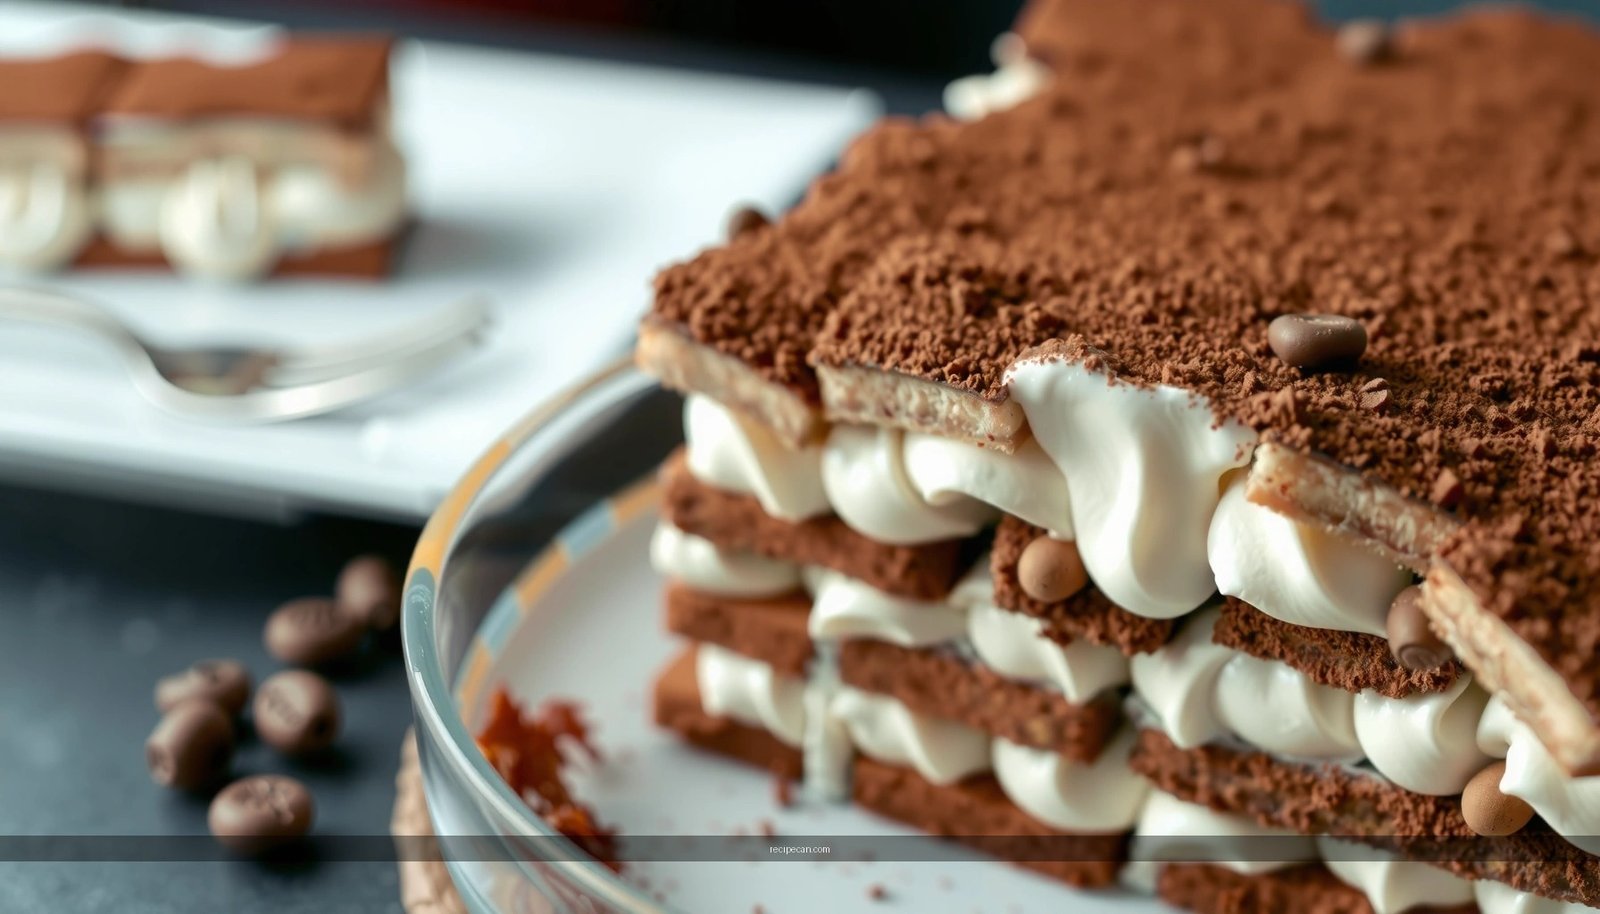
Layering the Perfect Tiramisu

Layering is where classic tiramisu either shines or becomes watery. The core technique is brief coffee dipping and even distribution—think “coated,” not “soaked.” Ladyfingers should absorb enough coffee to flavor each bite, but they should still hold their structure after chilling.
How to dip ladyfingers correctly:
– Dip each side for about 1–2 seconds, then immediately place in the dish.
– If your coffee is too hot, it can soften ladyfingers too quickly. Use coffee at room temperature (or cool).
– Arrange ladyfingers tightly without crushing them. Gaps may cause uneven slices.
How to layer for balanced flavor:
– Use a consistent pattern: ladyfingers → cream → ladyfingers → cream.
– Spread the cream to the dish edges. Inconsistent thickness can lead to a “soft” zone that slices poorly.
– Apply gentle pressure when spreading—enough to level, not enough to compress the ladyfingers.
Analytical perspective: Tiramisu texture is essentially a moisture-management equation. Coffee moisture migrates into the ladyfingers while the cream sets in the fridge. Brief dipping reduces excess free liquid, which is why it’s the main lever you can control at home.
Chill Time for Best Results
Chilling is not optional if you want clean slices and stable layers. Refrigeration allows the mascarpone mixture to firm, the ladyfingers to fully hydrate, and the flavors to meld into a cohesive dessert.
Recommended timing:
– Minimum: 4–6 hours in the refrigerator
– Best: Overnight (8–12 hours)
What happens during chilling:
– The cream firms and becomes sliceable
– Coffee distributes more evenly through ladyfingers
– Cocoa topping integrates subtly without dissolving into liquid
Serving readiness test:
– After chilling, the surface should look set and slightly matte.
– When you slice, the layers should separate cleanly without pooling coffee/cream at the edges.
Easy Serving Tips
For a classic presentation, keep the final touches close to serving time. Cocoa powder can absorb surface moisture, and knife technique affects slice sharpness.
Serving best practices:
– Dust cocoa right before serving: Use a fine sieve so you get a light, even dusting rather than clumps.
– Use a sharp knife: Wipe the blade between cuts for neat, defined layers.
– Portion size matters: For a 9×13-inch dish, plan for about 12 servings for balanced coffee-to-cream ratio.
Optional but effective finishing ideas:
– Add a light coffee aroma by serving with espresso or coffee-flavored beverages.
– For visual contrast, dust cocoa on top only, not between layers—this preserves slice cleanliness.
Common Mistakes to Avoid
Most tiramisu “failures” are predictable and preventable. If you understand what goes wrong, you can correct it mid-process or simply avoid it next time.
– Over-soaking ladyfingers can make tiramisu watery
– Fix: Dip 1–2 seconds per side, and use room-temperature coffee.
– Skipping chilling can prevent proper setting and clean structure
– Fix: Refrigerate at least 4–6 hours; overnight is best.
– Cream that seems runny or grainy
– Fix: Ensure mascarpone is fresh, mix only until smooth, and chill briefly if needed.
– Flavor imbalance (too bitter or too sweet)
– Fix: Adjust coffee strength or sugar slightly next batch; taste brewed coffee before you pour.
– Uneven layers leading to poor slicing
– Fix: Spread cream consistently to the edges and layer ladyfingers in a tight, uniform grid.
From a process-management standpoint, the two biggest controllable variables are dipping time and chilling time. If you nail those, the rest becomes easier.
Tiramisu is easiest when you focus on quick cream prep, brief coffee dipping, and enough chilling time. Follow these simple steps, make it once, and then adjust sweetness or coffee strength to match your taste—try it today and serve a classic dessert with minimal stress.
Frequently Asked Questions
What’s the simplest easy tiramisu recipe with no-cook steps?
Use an easy tiramisu recipe that relies on store-bought ladyfingers (or quick cake slices) and a no-cook coffee soak. Whisk mascarpone, whipped cream (or whipped heavy cream), sugar, and a pinch of salt, then layer with coffee-dipped ladyfingers and cocoa powder. Chill at least 4 hours (overnight is best) so the tiramisu sets and flavors develop without any cooking.
How do I make tiramisu if I don’t want raw eggs—what’s a good alternative?
Choose an egg-free tiramisu approach by using mascarpone plus whipped cream and sugar, skipping traditional raw-egg zabaglione. If you want extra stability, whip the mascarpone mixture until smooth and fold gently into whipped cream to keep it airy. This keeps your simple easy tiramisu recipe safer and still creamy, especially when refrigerated long enough to thicken.
Why does my tiramisu turn out runny, and how can I fix it?
Runny tiramisu usually comes from over-soaking the ladyfingers or not whipping the mascarpone/cream enough. Dip each ladyfinger quickly—just a second or two—so it absorbs coffee without breaking down, and chill between layers if needed. Also, ensure your mascarpone is cold and your filling is thick before assembling; a longer chill time (6–12 hours) will help firm it up.
Which coffee should I use for an easy tiramisu recipe—espresso or instant?
For the best flavor with minimal effort, use espresso for a strong, classic taste, or instant espresso diluted with hot water for convenience. Let the coffee cool before dipping so the ladyfingers don’t soften too fast. A simple easy tiramisu typically tastes best when the coffee is bold and not overly sweet—then balance sweetness with the mascarpone layer.
Best way to assemble simple easy tiramisu so it holds its shape?
Layer in a thin, even thickness: a base of coffee-dipped ladyfingers, then mascarpone filling, then repeat, finishing with cocoa powder. Gently spread the filling to avoid mixing it into the coffee layer, and press lightly so the dessert compacts. Chill covered for at least 4 hours, because the simplest easy tiramisu needs time to set for clean slices.
References
- Tiramisu
https://en.wikipedia.org/wiki/Tiramisu - https://cooking.nytimes.com/recipes/1016273-tiramisu
https://cooking.nytimes.com/recipes/1016273-tiramisu - https://www.britannica.com/food/tiramisu
https://www.britannica.com/food/tiramisu - https://pubmed.ncbi.nlm.nih.gov/?term=tiramisu
https://pubmed.ncbi.nlm.nih.gov/?term=tiramisu - Google Scholar Google Scholar
https://scholar.google.com/scholar?q=tiramisu+recipe+easy+simple - Google Scholar Google Scholar
https://scholar.google.com/scholar?q=tiramisu+dessert+coffee+mascarpone+egg+food+science - Google Scholar Google Scholar
https://scholar.google.com/scholar?q=efficacy+of+raw+egg+in+tiramisu+preparation - Google Scholar Google Scholar
https://scholar.google.com/scholar?q=tiramisu+recipe+simple+easy - tiramisu recipe simple easy – Search results
https://en.wikipedia.org/wiki/Special:Search?search=tiramisu+recipe+simple+easy - https://www.ncbi.nlm.nih.gov/search/research-articles/?term=tiramisu+recipe+simple+easy
https://www.ncbi.nlm.nih.gov/search/research-articles/?term=tiramisu+recipe+simple+easy