Looking for an easy tiramisu recipe that still delivers classic, coffee-soaked layers and a silky mascarpone filling? This step-by-step guide gives you the quickest route to authentic tiramisu with simple ingredients and clear timing—from dipping the ladyfingers to chilling for clean slices. If you want the best results without complicated technique, this is the version to make.
This easy tiramisu recipe delivers a classic, creamy coffee-soaked dessert with minimal effort—no baking required. By focusing on smooth mascarpone whipping, correctly cooled espresso, and patient chilling, you can achieve clean layers and a sliceable texture that consistently impresses.
This version stays faithful to traditional tiramisu while optimizing for reliability at home: you’ll prepare a stable mascarpone-and-cream base, dip ladyfingers briefly (so they soak without turning gummy), assemble in layers, and chill until the flavors meld. Whether you’re making tiramisu for a dinner party or a weeknight craving, the method below is designed to reduce common failure points—runny filling, overly bitter coffee, and soggy layers.
What You Need for an Easy Tiramisu

– Mascarpone, heavy cream, espresso (or strong coffee), and ladyfingers
– Cocoa powder and sugar (plus vanilla or a pinch of salt if desired)
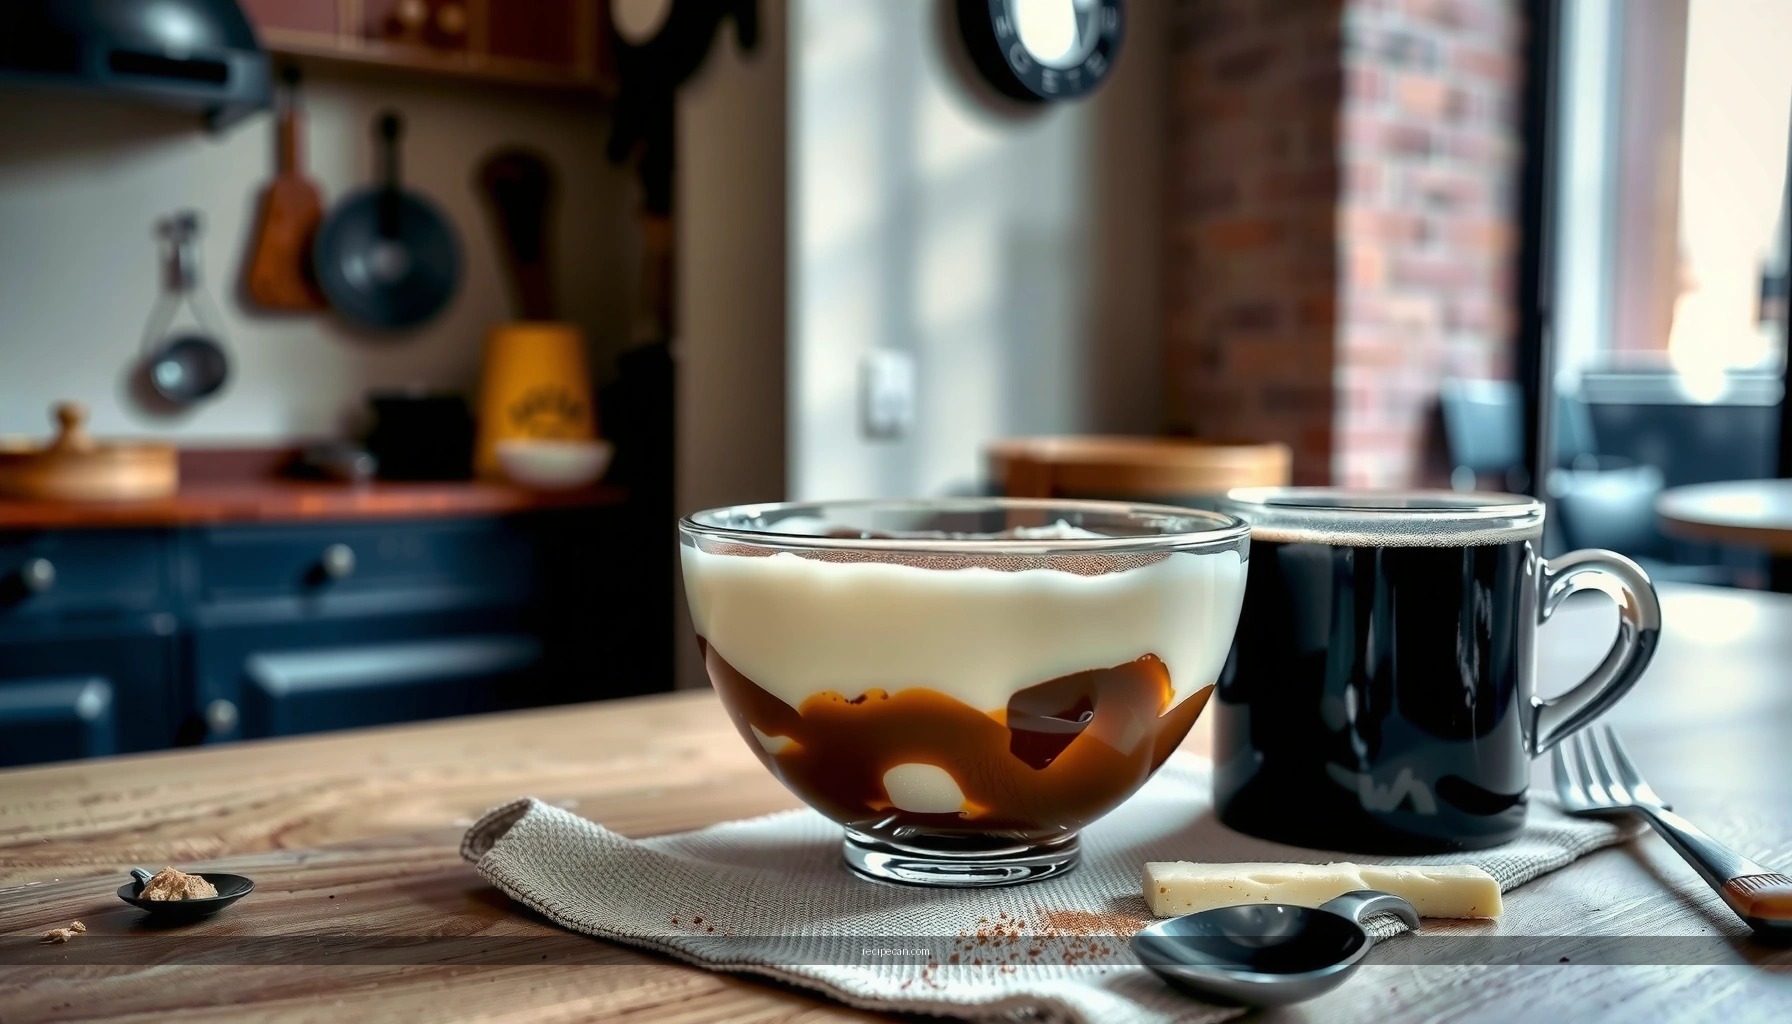
Tiramisu is fundamentally a controlled texture problem: the mascarpone mixture must be thick enough to hold a layer, the coffee must be strong enough to flavor but not drown, and the ladyfingers must absorb quickly and then stop. To do that well, your ingredient choices matter.
Mascarpone: Use full-fat mascarpone for the best body and stability. Low-fat versions can be thinner, which increases the risk of a soft, difficult-to-slice dessert.
Heavy cream: Cold heavy cream whips better and supports a firm mascarpone mixture. If your kitchen is warm, chill your bowl and whisk attachment for faster, thicker results.
Espresso/coffee: Use freshly brewed espresso or very strong coffee. Weak coffee dilutes flavor and can make the dessert taste flat—especially after chilling.
Ladyfingers: Choose classic Italian-style ladyfingers (savoiardi). They are designed to absorb liquid without instantly disintegrating. If you substitute sponge cake, the result can become less “layered” and more “spongy.”
To make your shopping decisions more deliberate, here’s a practical “ingredients vs. performance” view for common tiramisu components and how they affect texture and flavor.
Tiramisu Ingredient Choices & Expected Impact (Home Results)
| # | Ingredient Choice | Texture Risk | Flavor Strength | Best Use |
|---|---|---|---|---|
| 1 | Full-fat mascarpone | Low | ★ ★ ★ ★ ★ | Classic stable layers |
| 2 | Low-fat mascarpone | High | ★ ★ ★ ★ ☆ | Only if whipped firmly |
| 3 | Fresh espresso, slightly cooled | Low | ★ ★ ★ ★ ★ | Even coffee soak |
| 4 | Drip coffee, standard strength | Medium | ★ ★ ★ ☆ ☆ | Flavor may seem muted |
| 5 | Ladyfingers (savoiardi) | Low | ★ ★ ★ ★ ☆ | Clean, layered slices |
| 6 | Cake substitute (sponge/cake squares) | Medium | ★ ★ ★ ★ ☆ | Less “ladyfinger” structure |
| 7 | Cocoa dusting right before serving | Low | ★ ★ ★ ★ ★ | Best visual and aroma |
Quick Ingredient Prep

– Brew espresso and cool it slightly before dipping
– Whip mascarpone mixture until smooth and thick for clean layers
A fast tiramisu is only “easy” if you control the two variables that most affect texture: temperature and whipping consistency.
1. Brew espresso (or strong coffee) and set it aside for 5–10 minutes. You want it warm but not hot. Hot coffee softens ladyfingers too quickly and can cause filling slippage as steam warms the mascarpone.
2. Whip your cream first—either in a chilled bowl or directly if your kitchen isn’t warm—until it’s thick enough to form soft peaks.
3. Combine with mascarpone gently. Mix until smooth, then stop. Overmixing can break the airy structure and lead to a thinner, less stable filling.
Pro workflow for clean layers:
– Keep ladyfingers dry until assembly.
– Portion your coffee into a shallow bowl for quick dipping.
– Prepare a spatula and a serving dish so you’re not scrambling mid-assembly.
If you’re adding vanilla (or a pinch of salt), do it now so it distributes evenly. A pinch of salt is subtle but helps the cocoa and coffee taste more balanced rather than flat or overly bitter.
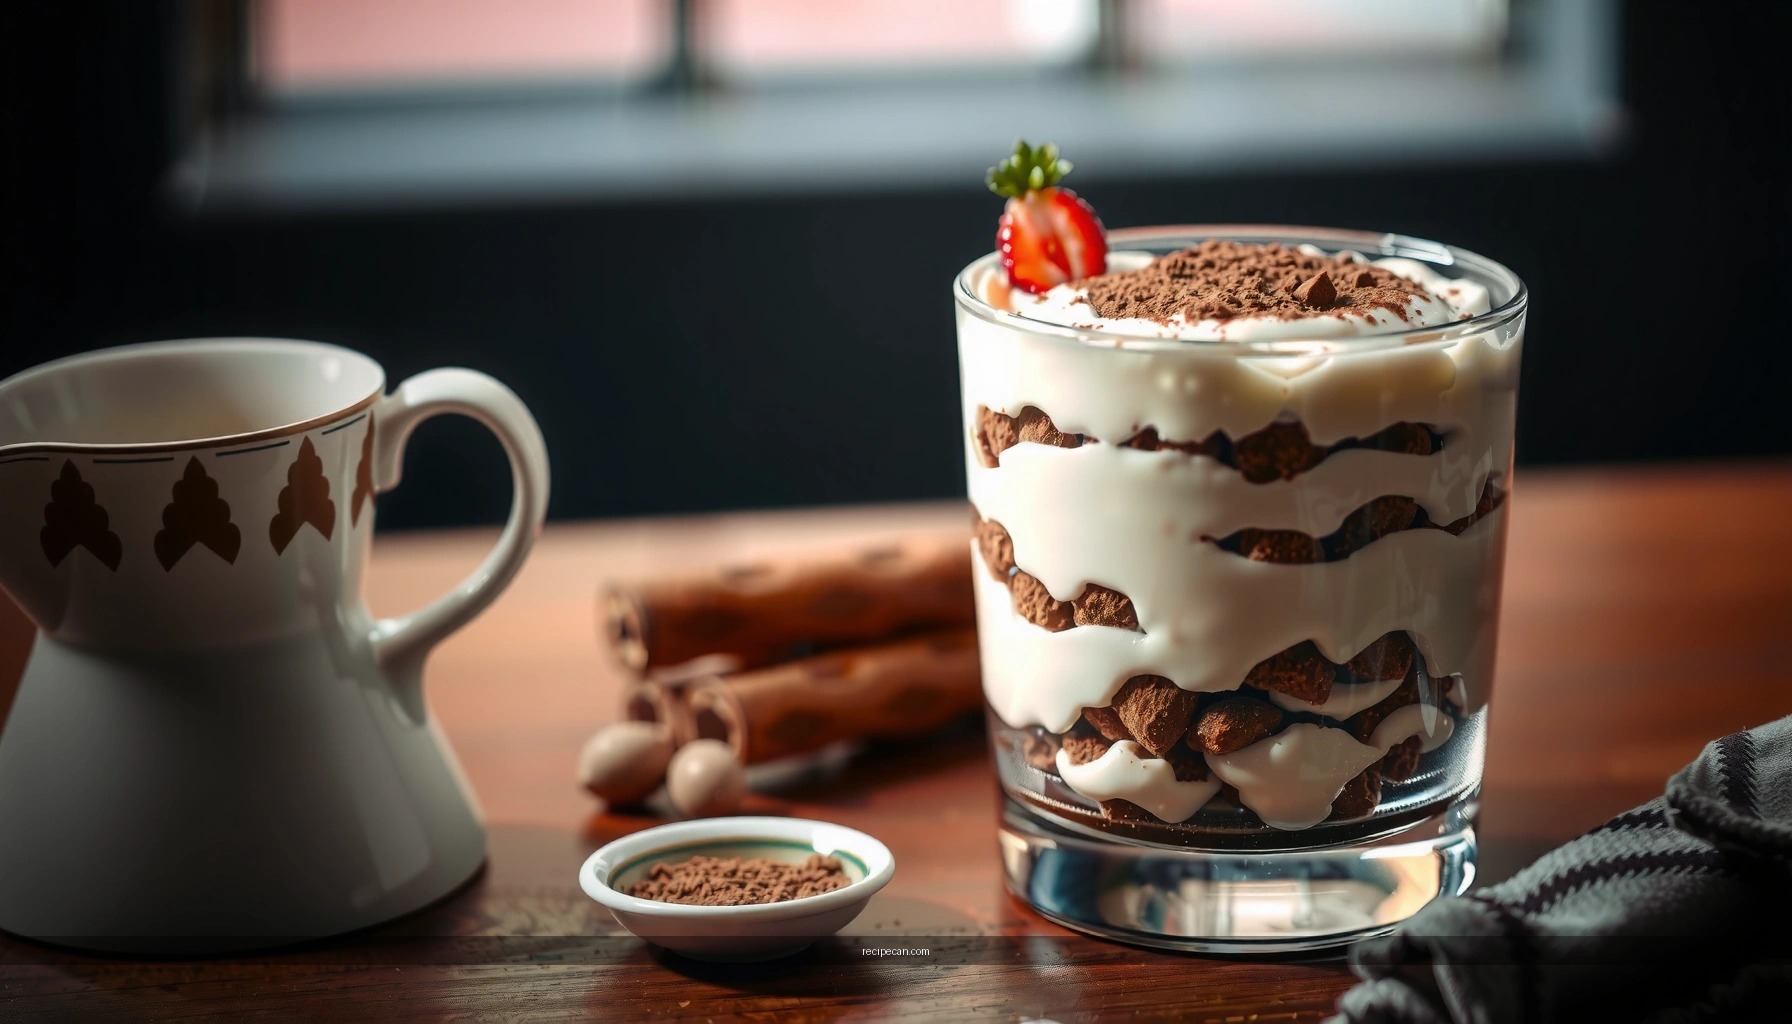
Assemble the Layers

– Dip ladyfingers briefly in coffee, then layer in a dish
– Spread mascarpone mixture evenly between layers for balanced sweetness
Layering is where tiramisu becomes “classic,” because the experience is built in the contrast: soft cookie + coffee aroma + creamy filling.
The dipping rule (the #1 technique)
Dip each ladyfinger briefly—about 1–3 seconds per side—just enough to coat the surface. The ladyfingers should still hold their form when placed in the dish. If they bend or tear, you dipped too long or your coffee is too warm.
A reliable assembly pattern
– Bottom layer: Arrange a single layer of dipped ladyfingers covering the dish base (slight gaps are fine).
– Middle: Spread mascarpone mixture evenly. Use a spatula to press lightly so you remove air pockets and create firm slices.
– Repeat: Add another dipped layer, then finish with mascarpone.
For even sweetness and structure, don’t overload the top layer. Tiramisu typically tastes best when each bite has both coffee and cream in proportion. Overfilling can make the dessert seem one-note—too rich, too thick, or too soft.
To provide a quick “fit-for-purpose” view for different preparation preferences, use this comparison when deciding how you’ll execute the recipe.
Best Method Fit for Your Tiramisu Goal
| ✓ | Feature | Classic (Fast, No Eggs) | Extra-Stable (More Whip) | Service-Ready (Party) |
|---|---|---|---|---|
| ★ | Whipping target | Soft peaks | Firm soft peaks | Firm peaks |
| ★ | Coffee dip time | 1–3 sec | 1–2 sec | 1–2 sec |
| ★ | Layer thickness | Balanced | Slightly thinner | Even, consistent |
| ★ | Chill time | 4–6 hrs | Overnight | Overnight preferred |
| ★ | Best texture outcome | Creamy + sliceable | Very firm slices | Holds shape for serving |
| ★ | Complexity | Low | Low–medium | Medium |
| ★ | Risk of runny layers | Medium | Low | Low |
| ★ | Coffee flavor intensity | Balanced | Slightly brighter | Slightly brighter |
| ★ | Best for beginners | Yes | Mostly | Yes with planning |
| ★ | Cleanup and timing | Fastest | More waiting | More scheduling |
| ★ | Verdict | Most broadly reliable | Best for firm slices | Best for serving windows |
Chill for Best Texture
– Refrigerate at least 4 hours (overnight is even better)
– Let it set so slices hold their shape and flavors meld
Chilling isn’t optional if you want a clean, professional-looking tiramisu. During refrigeration, the mascarpone firms up and the coffee disperses through the ladyfingers, producing a unified flavor rather than distinct “cookie then cream” bites.
Timing guidance:
– Minimum: 4 hours. The dessert will taste good, but slicing may be slightly softer.
– Ideal: 8–12 hours (overnight). This is when you get the most consistent structure and the richest integration of coffee aroma with vanilla-cocoa sweetness.
A key operational point: keep the dessert covered in the fridge to prevent cocoa dust absorption or surface drying. If you dust cocoa early, it can look dull by serving time—dusting later preserves the aroma and visual impact.
Easy Topping and Serving Tips
– Dust generously with cocoa powder right before serving
– Serve chilled and portion with a clean spoon or knife
Topping is where presentation meets taste. Cocoa powder should be applied immediately before serving to avoid moisture loss and clumping. Use a fine sieve and dust evenly across the top.
Serving best practices:
– Use a clean, sharp knife and wipe between cuts for crisp edges.
– For neat portions, dip the blade in warm water and dry quickly—this helps slice through cream cleanly.
– Serve cold, because tiramisu’s flavor and texture are designed for low temperatures.
If you’re serving at a business event or potluck, consider portioning into smaller ramekins. Individual servings chill faster and are easier to transport without texture collapse.
Common Fixes if Something Goes Off
– If it’s too runny, chill longer or whip the cream to stiffer peaks
– If it’s too bitter, use less espresso strength or add a touch more sugar
Even with the best method, small deviations can happen. The good news is that tiramisu is forgiving—if you diagnose the issue early.
If your tiramisu is too runny
Likely causes include under-whipped cream, warm mascarpone, or coffee dipping that over-softened ladyfingers.
Fix options:
– Chill longer (at least 6–8 additional hours).
– Whip cream stiffer next time: aim for firm soft peaks rather than loose peaks.
– Check temperature: if your filling feels loose while mixing, pause and chill the bowl 10–15 minutes, then resume gently.
If your tiramisu tastes too bitter
Bitter notes usually come from espresso strength, coffee temperature, or over-dipping.
Fix options:
– Brew a milder coffee or reduce espresso intensity.
– Add a small amount of sugar to balance bitterness.
– Dip ladyfingers for less time. A quick soak delivers coffee aroma without overpowering.
To help you make these adjustments quickly, here’s a decision-ready “quick compare” table.
Tiramisu Troubleshooting: Diagnose & Adjust
| ↔ | Criteria | Too Runny | Too Bitter |
|---|---|---|---|
| 1 | Top texture | Soft/unstable | Creamy but overpowering |
| 2 | Slicing results | Edges collapse | Edges OK; flavor dominates |
| 3 | Ladyfinger absorption | Possibly over-dipped | May be over-dipped (less likely) |
| 4 | Primary sensory signal | Mouthfeel too loose | Sharp, harsh coffee note |
| 5 | Immediate fix | Chill longer | Add a touch more sugar |
| 6 | Best next bake adjustment | Whip cream stiffer | Use less intense espresso |
| 7 | Coffee temperature role | Hot coffee can loosen layers | Hot coffee can taste harsher |
| 8 | Likelihood from method | High if cream under-whipped | High if espresso too strong |
| 9 | Verdict | Fixable with patience | Fixable with balance |
| 10 | Prevention checklist | Chill + firm peaks | Cool coffee + balanced sweetness |
After chilling, your easy tiramisu should be creamy, layered, and ready to impress with minimal effort. Make it once and you’ll have a go-to dessert for birthdays, dinner parties, or weeknight cravings—so gather your ingredients and start layering today.
A final reminder: tiramisu quality is determined less by fancy steps and more by disciplined timing—slightly cooled coffee, properly whipped mascarpone, brief ladyfinger dips, and sufficient chilling. Follow the steps above and you’ll reliably produce a classic, sliceable dessert that tastes like you spent hours in the kitchen.
Frequently Asked Questions
What ingredients do I need for an easy tiramisu recipe?
For an easy tiramisu recipe, you’ll typically need mascarpone cheese, heavy cream (or whipped cream), espresso (or strong coffee), ladyfingers, sugar, and cocoa powder. Many people also add vanilla extract and a pinch of salt to balance the sweetness. If you want extra flavor, consider using dark rum or coffee liqueur, but you can easily make an alcohol-free version.
How do I make an easy tiramisu without eggs?
To make an easy tiramisu recipe without eggs, whip mascarpone with sugar and fold it into lightly whipped cream until smooth. Use espresso that has cooled slightly, then quickly dip ladyfingers so they absorb flavor without turning soggy. Layer the mascarpone mixture and dipped ladyfingers, then dust with cocoa powder and refrigerate to let the tiramisu set.
Why does my tiramisu turn out runny, and how can I fix it?
A runny tiramisu usually happens when mascarpone is mixed too aggressively or the cream isn’t whipped to soft peaks before combining. It can also be caused by over-soaking the ladyfingers in espresso, which adds too much liquid. Chill the dessert at least 4 hours (overnight is best), and if it’s already assembled, try adding a thicker whipped mascarpone layer and re-chilling.
What’s the best way to dip ladyfingers for an easy tiramisu recipe?
For the best results, dip each ladyfinger briefly—about 1 second per side—so it’s moistened but still holds its structure. Let excess coffee drip off before layering to prevent sogginess. This method keeps your easy tiramisu creamy and sliceable while still delivering strong espresso flavor in every bite.
Which coffee should I use for an easy tiramisu?
Use strong brewed espresso for the most classic tiramisu flavor, but any robust coffee works if you can brew it with enough intensity. Let the coffee cool slightly before assembling so the ladyfingers don’t break down too quickly. For a smoother taste, you can also combine espresso with a small splash of milk or use cooled café-quality coffee to keep the dessert balanced.
References
- Tiramisu
https://en.wikipedia.org/wiki/Tiramisu - Tiramisu | Meaning, Ingredients, Origin, Desserts, & Taste | Britannica
https://www.britannica.com/topic/tiramisu - https://cooking.nytimes.com/recipes/1016231-classic-tiramisu
https://cooking.nytimes.com/recipes/1016231-classic-tiramisu - Google Scholar Google Scholar
https://scholar.google.com/scholar?q=easy+tiramisu+recipe - Google Scholar Google Scholar
https://scholar.google.com/scholar?q=tiramisu+recipe+mascarpone+eggs - Google Scholar Google Scholar
https://scholar.google.com/scholar?q=no-egg+tiramisu+recipe - Google Scholar Google Scholar
https://scholar.google.com/scholar?q=traditional+tiramisu+ingredients+and+method - easy tiramisu recipe – Search results
https://en.wikipedia.org/wiki/Special:Search?search=easy+tiramisu+recipe - https://www.ncbi.nlm.nih.gov/search/research-articles/?term=easy+tiramisu+recipe
https://www.ncbi.nlm.nih.gov/search/research-articles/?term=easy+tiramisu+recipe