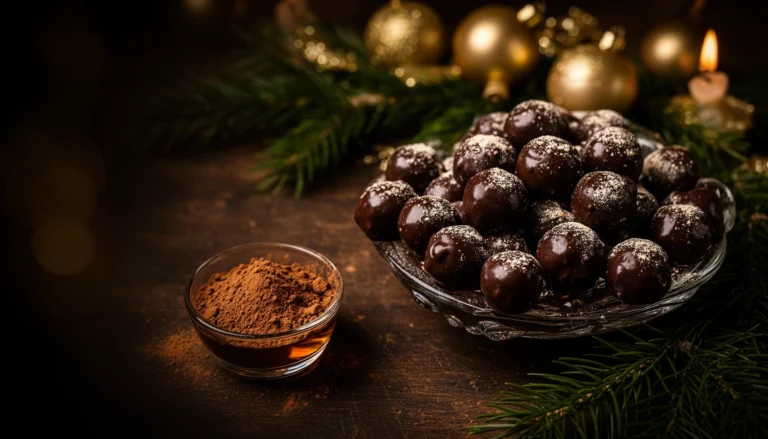
Want a cake balls recipe that reliably turns out perfect, bite-sized treats every time? This step-by-step guide shows exactly how to crumble cake, mix in the right amount of frosting, roll cleanly, and coat for a smooth finish that holds its shape. If your goal is easy, dependable cake balls with minimal fuss, follow these steps and you’ll get them.
Make cake balls by crumbling baked cake, mixing with frosting, rolling into bite-size balls, then coating and setting—so you get a quick, no-fuss dessert. With the right cake-to-frosting ratio and a brief chill before and after coating, you can consistently produce clean, firm cake balls with a smooth chocolate shell every time.
Ingredients for a Cake Balls Recipe

– Choose your favorite cake flavor and matching frosting
Vanilla cake with vanilla frosting is the most forgiving base, while chocolate cake with chocolate frosting is ideal if you want a deeper, more dessert-forward flavor. For best results, use a frosting style that spreads easily (creamy or “whipped” textures work particularly well).
– Add optional mix-ins like sprinkles for extra fun
Sprinkles can be mixed into the interior (for a surprise pop) or added on top after coating (for a classic bakery look). If using mix-ins inside the balls, go lighter than you think—too many add-ins can make the mixture crumbly.
– Use chocolate or candy melts for the coating
Practical yield note: This process typically makes about 24–36 cake balls depending on how large you roll them (roughly 1 to 1½ tablespoons per ball).
Cake Ball Texture Guide: Recommended Mix Ratios (By Weight)
| # | Cake Type | Bake Weight (g) | Frosting to Add (g) | Expected Rollability |
|---|---|---|---|---|
| 1 | Vanilla sheet cake | 300 | 120 | High (firm, smooth) |
| 2 | Chocolate sheet cake | 300 | 130 | High (holds shape) |
| 3 | Dense pound cake | 300 | 110 | Very high (minimal crumble) |
| 4 | Boxed white cake mix bake | 300 | 125 | High (easy rolling) |
| 5 | Carrot cake (moist) | 300 | 100 | Medium-high (best after chilling) |
| 6 | Gluten-free vanilla cake | 300 | 135 | High (slightly tackier helps grip) |
| 7 | Very light/airy sponge | 300 | 140 | Medium (needs longer chill) |
Bake and Crumble the Cake

– Bake the cake (or use a store-bought cake) and cool completely
Warm cake will steam and clump, making the mixture difficult to roll. If you’re short on time, cool the cake faster by placing it in a single layer, then chill it briefly to firm it up.
– Crumble cake into fine, even pieces for best texture
Think “cookie crumbs” rather than “crumbly chunks.” Fine crumbs mix with frosting more uniformly, resulting in cake balls that slice cleanly (if you cut one) and coat without gaps.
– Remove any large chunks to prevent uneven cake balls
Large chunks act like rigid pockets. They can cause the ball to crack during rolling or create thin spots in the chocolate coating. A quick pass through your fingers or a sifter-like crumble (carefully, by hand) improves consistency.
Quality tip from a systems perspective: consistency matters more than exact flavor. By standardizing crumble size, you reduce variation in moisture absorption—so your cake ball texture becomes predictable across batches.
Mix With Frosting (Best Texture Tips)

– Combine crumbled cake with frosting until the mixture holds together
Start mixing gently, then switch to thorough pressing and folding. The goal is a “soft dough” that sticks when squeezed but isn’t wet or paste-like.
– Start with a smaller amount of frosting and adjust as needed
Over-frosting is the most common failure mode—it makes the mixture sticky, difficult to roll, and prone to slumping during coating. If it feels dry, add frosting 1–2 teaspoons at a time (or small dollops if using a stand mixer).
– Chill the mixture briefly so it’s easier to roll
A 15–30 minute chill firms the fat in the frosting and improves handling. If your kitchen is warm, chill longer (up to ~45 minutes) so the balls don’t deform.
Analytical guideline:
If the mixture is crumbly: increase frosting slightly or compress longer.
If the mixture is tacky/wet: chill longer or add a bit more cake crumbs (not flour) to rebalance.
Roll and Chill Cake Balls

– Scoop and roll into uniform balls for consistent size
Use a cookie scoop or measure roughly with a tablespoon for repeatable results—uniform balls mean even chocolate thickness and consistent setting time.– Place on a lined tray to avoid sticking
Parchment paper works well; silicone mats can also help. Lightly press each ball to smooth it, but don’t compact too hard—over-compression can create dense centers.
– Chill until firm to help the coating adhere
Chill at least 30 minutes before dipping. For best results, aim for balls that feel cold and solid to the touch. If you’re coating in multiple rounds, keep the remaining balls chilled so they don’t warm up and smear.
Time-saving method: roll all balls first, then coat in small batches. This avoids the temptation to dip immediately (when handling heat can soften the interior).
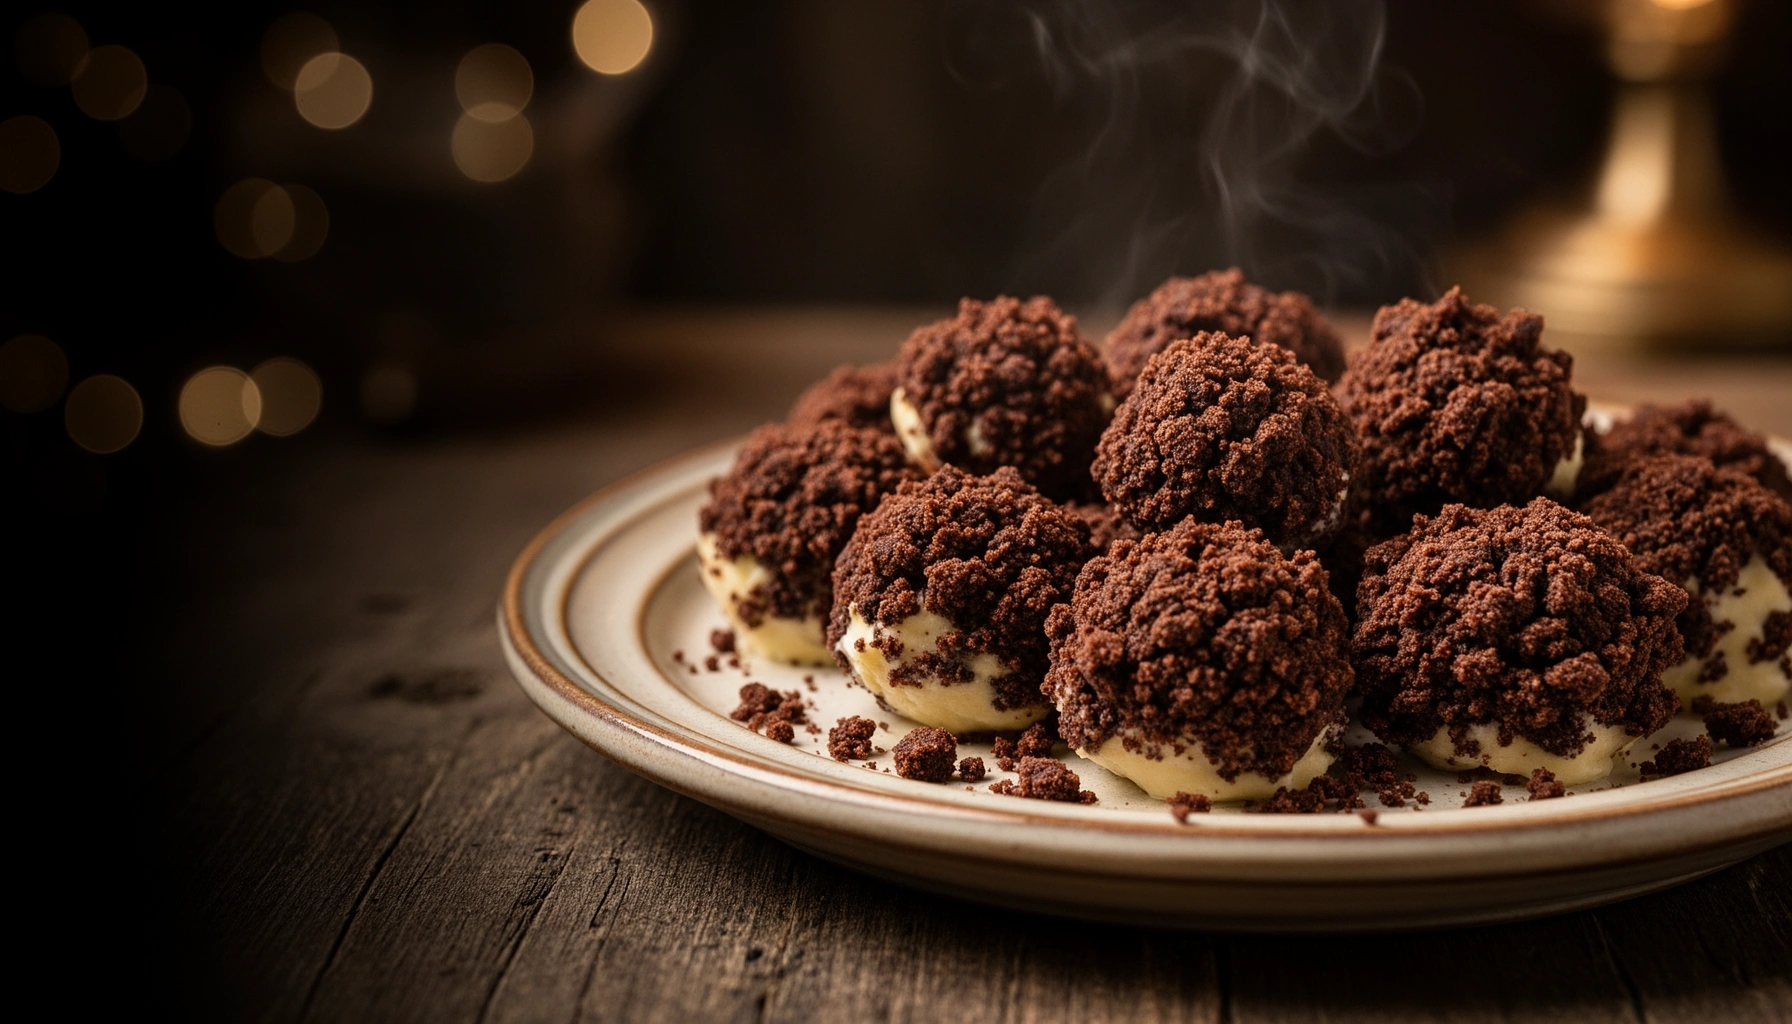
Coat With Chocolate (Melt and Dip Guide)

– Melt chocolate or candy melts until smooth and fluid
Use short heating intervals (especially for chocolate chips) and stir until fully melted. For candy melts, follow package directions, and stir frequently to prevent scorching. If your coating is too thick, thin it with a small amount of vegetable oil or coconut oil (only if compatible with the product you’re using).
– Dip each ball, let excess drip off, then set on parchment
Use a fork or dipping tool to lower the ball into the melted coating. Lift, tap gently to remove excess, then place the ball on parchment. This “drip then set” step is what prevents heavy bottoms and keeps the shell smooth.
– Add sprinkles or toppings right after coating
Chocolate sets quickly—add toppings within seconds. If you wait too long, the sprinkles won’t adhere and will fall off.
Troubleshooting (quick fixes):
– Coating looks streaky or grainy: the chocolate may be overheated or seized. Lower heat, add a small amount of oil (or re-melt carefully), and stir thoroughly.
– Shell won’t fully cover: balls may be too warm or the coating too thick. Chill the balls longer and re-check melt fluidity.
– Shell cracks after setting: interior likely too firm or coating too cold. Keep balls chilled but not frozen, and dip at a workable coating temperature.
Serving, Storage, and Make-Ahead Options
– Serve at cool room temperature for best flavor and bite
Cake balls taste best slightly chilled rather than fridge-cold. If stored overnight, let them sit 10–20 minutes before serving so the interior softens and the chocolate is pleasantly firm.
– Store covered in the fridge for freshness
Use an airtight container. Refrigeration helps maintain shape and slows frosting drying. For best texture, avoid leaving them uncovered because the chocolate can develop condensation and the interior can dry.
– Freeze for make-ahead events and thaw before serving
Freeze in a single layer first, then transfer to a freezer bag or container once solid. Thaw in the fridge overnight for the cleanest texture. Avoid rapid thawing at room temperature if you’re in a humid environment, as condensation can affect the chocolate finish.
Make-ahead strategy: prepare and coat up to several days in advance, then refresh your presentation with a light topping garnish (extra sprinkles or a drizzle) right before serving.
—
Cake balls are simple: crumble cake, mix with frosting, roll, and coat—then chill so they hold their shape. If you focus on consistent crumble size, adjust frosting gradually, and respect the chilling times before and after dipping, you’ll get reliable texture and a professional-looking chocolate shell. Try a flavor pairing you love (like vanilla cake with vanilla frosting or chocolate cake with chocolate coating), and consider making a batch ahead so you’re always ready for parties, gifting, or a quick sweet craving.
Frequently Asked Questions
How do you make cake balls from scratch step by step?
Start by baking a cake and letting it cool completely, then crumble it into fine crumbs. Mix the crumbs with frosting (about 1/2 to 2/3 cup frosting per cake, adjusting for the right consistency) until the mixture holds together. Scoop and roll into balls, chill for 15–30 minutes, then dip in melted chocolate or candy coating and let them set on parchment paper. For best results, avoid warm cake crumbs and use a smooth coating technique so your cake balls recipe sets cleanly.
What is the best frosting to use for cake balls?
The best frosting is a thick, spreadable frosting that binds well, such as buttercream frosting or classic vanilla frosting. Avoid very runny frosting because it can make the cake balls too soft and cause them to fall apart during dipping. If you want a firmer texture, reduce the frosting slightly or chill the rolled balls longer; this helps your cake balls recipe stay stable and neat.
Why do my cake balls fall apart after dipping?
Cake balls typically fall apart when the mixture is too dry or the balls were not chilled enough before dipping. If your mixture won’t hold together, add frosting a little at a time, and make sure you roll them firmly and evenly. Also ensure the chocolate is not too hot and the cake balls recipe has fully set before moving them—using parchment and giving them time to harden prevents breakage.
How do you prevent cake balls from cracking or getting a dull coating?
Cracking often happens when the candy coating and cake balls have mismatched temperatures or when the coating is too thick. Chill the cake balls well, then dip quickly with smooth, even coverage; letting excess drip briefly helps create a cleaner shell. For a shiny finish in a cake balls recipe, melt coating gently and consider tempering or using a high-quality candy melt that sets without streaks.
Which chocolate coating is best for cake balls—chocolate chips or candy melts?
Candy melts (couverture-style “treat” wafers) are usually the best choice because they melt smoothly, coat evenly, and set with a clean snap for cake balls. Chocolate chips can work, but they often require a bit of oil or shortening and may set less consistently, sometimes leading to a softer or mottled finish. Choose your coating based on the look you want—candymelts are ideal for a classic cake balls recipe with a professional appearance.
References
- Cake pop
https://en.wikipedia.org/wiki/Cake_pop - Chocolate truffle
https://en.wikipedia.org/wiki/Chocolate_truffle - Ganache
https://en.wikipedia.org/wiki/Ganache - https://en.wikipedia.org/wiki/Tempering_(chocolate
https://en.wikipedia.org/wiki/Tempering_(chocolate - Cake
https://en.wikipedia.org/wiki/Cake - Google Scholar Google Scholar
https://scholar.google.com/scholar?q=cake+pop+recipe+technique - Google Scholar Google Scholar
https://scholar.google.com/scholar?q=cake+balls+coating+chocolate+science - Google Scholar Google Scholar
https://scholar.google.com/scholar?q=crumb+based+dessert+formation+chocolate+coating - Food Safety | Food Safety | CDC
https://www.cdc.gov/foodsafety/index.html - Food Safety | Food Safety and Inspection Service
https://www.fsis.usda.gov/food-safety