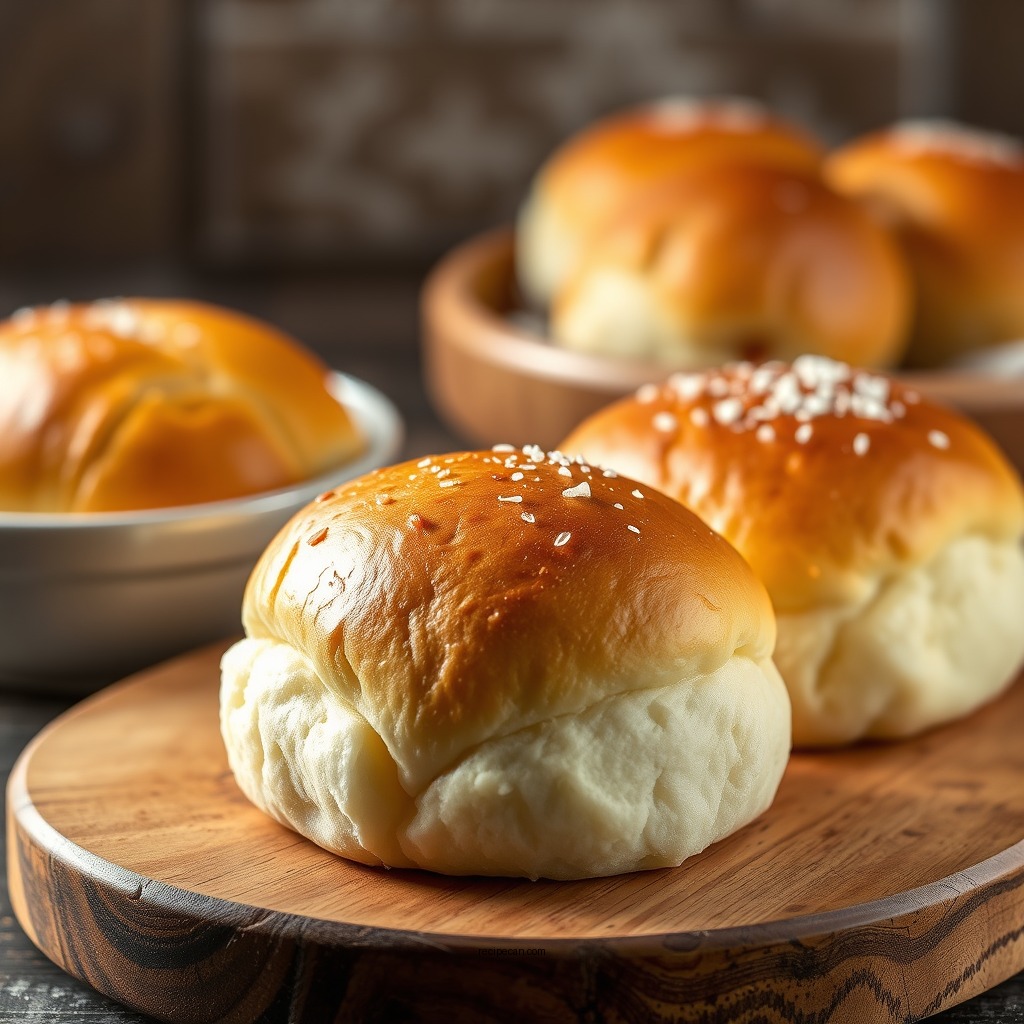
The best yeast roll recipe yields soft, fluffy rolls that are perfect for any meal. With a few simple ingredients and some patience, you can create rolls that will impress your family and friends. This guide will walk you through the process, ensuring you achieve perfect results every time. Whether you’re preparing a holiday feast, a casual dinner, or a family gathering, homemade yeast rolls can elevate your meal and provide comfort and satisfaction in every bite.
Essential Ingredients for Perfect Yeast Rolls

To craft the perfect yeast rolls, selecting the right ingredients is crucial. Here are the key components you’ll need:
– High-Quality All-Purpose Flour: This ingredient is essential for achieving the right texture and structure in your rolls. Opt for unbleached flour, which contains higher protein content, aiding gluten development for that perfect fluffy bite.
– Active Dry Yeast or Instant Yeast: Both types of yeast work effectively, though instant yeast offers the convenience of not requiring activation in warm water. Active dry yeast needs to be activated; it will foam when mixed with warm milk and sugar, signaling it is ready to work.
– Sugar: Sugar not only adds sweetness but also serves as food for the yeast, promoting fermentation and contributing to the rolls’ overall flavor and browning during baking.
– Salt: Don’t overlook salt; it enhances flavor and controls yeast activity, preventing the rolls from over-rising.
– Milk and Butter: These ingredients provide moisture and richness. Whole milk or buttermilk can enhance the flavor, while unsalted butter adds a luxurious texture.
By carefully selecting these ingredients, you set the foundation for producing rolls that are not only fluffy but also rich in flavor.
Step-by-Step Preparation

The preparation of yeast rolls requires attention to detail and patience. Here’s a step-by-step guide to ensure success:
1. Activating the Yeast: If using active dry yeast, warm 1 cup of milk to about 110°F (43°C) and stir in 2 tablespoons of sugar. Sprinkle the yeast over the top and let it sit for about 5 to 10 minutes until foamy. This indicates that the yeast is active and ready to go. If using instant yeast, you can skip this step and mix it directly with your dry ingredients.
2. Combining Ingredients: In a large bowl, mix 4 cups of all-purpose flour and 1 teaspoon of salt. Create a well in the center and pour in the activated yeast mixture along with 4 tablespoons of melted butter. Stir until a dough forms.
3. Kneading the Dough: Transfer the dough onto a floured surface and knead for about 8-10 minutes until it becomes smooth and elastic. Proper kneading develops the gluten necessary for the rolls’ structure.
4. First Rise: Place the dough in a greased bowl, cover it with a clean kitchen towel, and let it rise in a warm place until it doubles in size. This usually takes about 1 hour.
This careful preparation is essential for achieving the light and airy texture characteristic of perfect yeast rolls.
Shaping the Rolls

Once your dough has risen, it’s time to shape the rolls:
1. Dividing the Dough: Gently punch down the risen dough to release air bubbles. Divide the dough into 12 equal portions for standard-sized rolls or 24 for smaller ones.
2. Shaping: Take each portion and roll it into a ball. Tuck the edges underneath to create a smooth surface. This technique helps create tension on the surface of the dough, resulting in a better rise when baked.
3. Arranging the Rolls: Place the shaped rolls into a greased baking dish, ensuring they are close but not touching. This allows the rolls to rise up rather than outwards, creating a soft, fluffy texture.
4. Second Rise: Cover the dish again and let the rolls rise for another 30 minutes to 1 hour, until they have puffed up significantly.
The shaping and second rise are critical steps that contribute to the fluffiness of the final product.
Baking the Rolls
With the rolls shaped and risen, it’s time to bake:
1. Preheating the Oven: Preheat your oven to 375°F (190°C). This temperature is ideal for baking rolls, allowing them to rise and brown evenly.
2. Baking: Bake the rolls for 20-25 minutes, or until they are golden brown on top and sound hollow when tapped. You can check the internal temperature; it should reach about 190°F (88°C).
3. Finishing Touch: Once out of the oven, brush the tops of the rolls with melted butter. This not only adds flavor but also gives them a beautiful glossy finish.
Following these steps will ensure that your rolls are perfectly baked, with a crusty exterior and a soft, fluffy interior.
Tips for Success
To enhance your yeast roll-making experience and ensure consistent results, consider the following tips:
– Use a Kitchen Scale: For precise measurements, especially with flour, using a kitchen scale can help achieve consistency in your rolls.
– Experiment with Flour Types: While all-purpose flour is standard, experimenting with bread flour can yield a chewier texture due to its higher protein content.
– Allow for Adequate Rising Time: Don’t rush the rising process; both rises are crucial for developing the rolls’ airy structure. If your kitchen is cool, consider placing the dough in a slightly warm oven with the light on.
– Avoid Overworking the Dough: Kneading is important, but overworking can lead to tough rolls. Aim for a smooth, elastic texture without excessive kneading.
Implementing these tips will help you refine your technique and produce consistently delightful yeast rolls.
Variations to Try
Once you’ve mastered the basic yeast roll recipe, consider these variations to add your personal touch:
– Herbs and Cheese: Incorporate dried herbs, such as rosemary or thyme, into the dough for an aromatic flavor. Adding shredded cheese, like cheddar or parmesan, can elevate the taste significantly.
– Sweet Rolls: For a sweet treat, mix in cinnamon, raisins, or chocolate chips. You can also glaze the rolls with a light icing made from powdered sugar and milk after baking.
– Unique Shapes: Instead of traditional rolls, try shaping the dough into knots, crescents, or even braids for visual appeal. These shapes can also make for an interesting presentation.
By experimenting with these variations, you can cater to different tastes and occasions, making your yeast rolls a versatile addition to any meal.
Top 7 Ingredients for Yeast Rolls
| # | Ingredient | Quantity | Purpose |
|---|---|---|---|
| 1 | All-Purpose Flour | 4 cups | Structure |
| 2 | Active Dry Yeast | 2 ¼ tsp | Leavening |
| 3 | Sugar | 2 tbsp | Flavor & Food for Yeast |
| 4 | Salt | 1 tsp | Flavor & Control Yeast |
| 5 | Milk | 1 cup | Moisture |
| 6 | Butter | 4 tbsp | Flavor & Moisture |
| 7 | Egg (Optional) | 1 | Richness |
Rising Time for Yeast Rolls
The best yeast roll recipe is simple to follow and yields delightful results. By using quality ingredients, following the steps carefully, and applying the tips provided, you’ll be able to create rolls that elevate any meal. Don’t hesitate to experiment with variations to find your perfect flavor! Enjoy baking and sharing these delicious rolls with loved ones.
Frequently Asked Questions
What are the key ingredients for the best yeast roll recipe?
The best yeast roll recipe typically includes all-purpose flour, active dry yeast, sugar, salt, warm milk or water, and butter. These ingredients work together to create a soft, fluffy texture and rich flavor, making your yeast rolls irresistible.
How do I make my yeast rolls rise properly?
To ensure your yeast rolls rise properly, make sure to use warm liquids (between 110°F and 115°F) to activate the yeast without killing it. Additionally, allow the dough to rise in a warm, draft-free area, and cover it with a clean cloth to maintain moisture during the rising process.
Why do my yeast rolls come out dense instead of fluffy?
Dense yeast rolls often result from using too much flour, not allowing enough rise time, or using expired yeast. To achieve light and fluffy rolls, measure your flour accurately, give the dough ample time to rise, and always check the freshness of your yeast before baking.
Which type of yeast is best for making rolls?
Both active dry yeast and instant yeast are excellent choices for making rolls. However, instant yeast is often considered the best option because it can be mixed directly into the dry ingredients without needing to be proofed, resulting in a quicker and more reliable rise.
What is the best way to store homemade yeast rolls?
The best way to store homemade yeast rolls is to let them cool completely, then place them in an airtight container at room temperature for up to two days. For longer storage, you can freeze them in a sealed bag, and they will maintain their quality for up to three months.
References
- Bread roll
https://en.wikipedia.org/wiki/Yeast_roll - https://www.britannica.com/topic/yeast-bread
https://www.britannica.com/topic/yeast-bread - https://www.ncbi.nlm.nih.gov/pmc/articles/PMC5000052/
https://www.ncbi.nlm.nih.gov/pmc/articles/PMC5000052/ - https://scholar.google.com/scholar?q=best+yeast+roll+recipe Google Scholar
https://scholar.google.com/scholar?q=best+yeast+roll+recipe - Google Scholar Google Scholar
https://scholar.google.com/scholar?q=yeast+rolls+history - https://www.sciencedirect.com/topics/food-science/yeast
https://www.sciencedirect.com/topics/food-science/yeast - https://www.ncbi.nlm.nih.gov/pmc/articles/PMC6265555/
https://www.ncbi.nlm.nih.gov/pmc/articles/PMC6265555/ - Food Technology Magazine
https://www.ift.org/news-and-publications/food-technology-magazine/issues/2020/may/columns/food-technology-and-innovation - https://www.ncbi.nlm.nih.gov/pmc/articles/PMC6522674/
https://www.ncbi.nlm.nih.gov/pmc/articles/PMC6522674/ - https://www.ncbi.nlm.nih.gov/pmc/articles/PMC6371756/
https://www.ncbi.nlm.nih.gov/pmc/articles/PMC6371756/