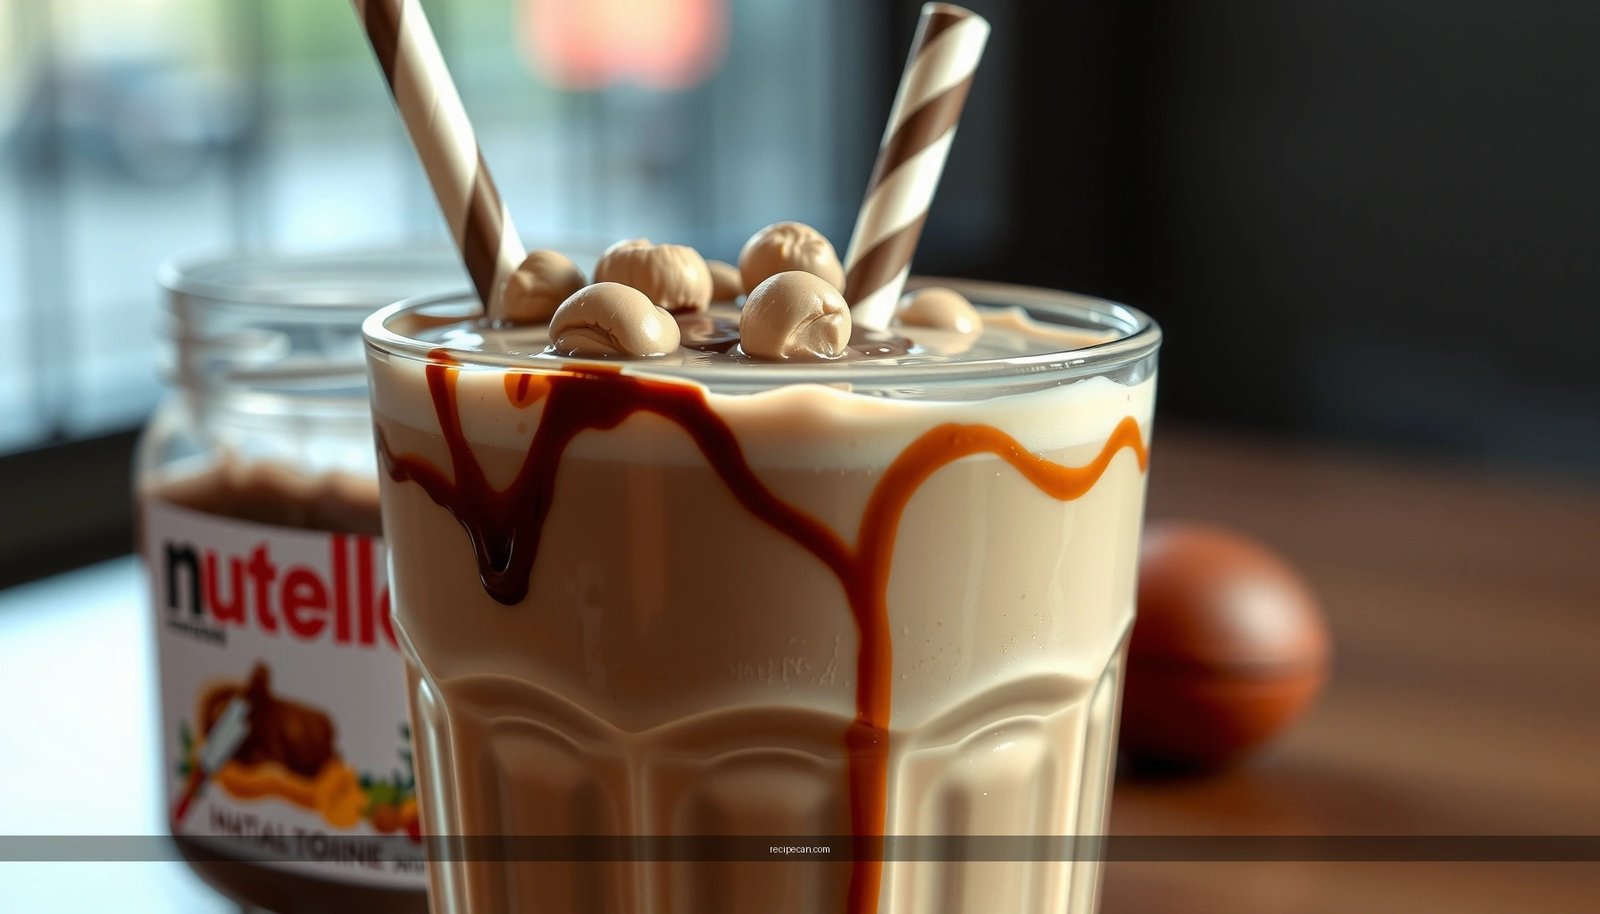
Searching for a Nutella milkshake recipe that’s creamy, easy, and truly chocolatey? This recipe delivers a thick, silky Nutella milkshake with bold hazelnut flavor and no complicated steps. Follow it once and you’ll know exactly how to make the milkshake you want—fast, smooth, and rich.
Blend Nutella with cold milk (and ice for thickness) until smooth, and you’ll get a rich, creamy chocolate-hazelnut milkshake in minutes. With just a few ingredients—and a couple of smart adjustments to sweetness and texture—you can reliably recreate that café-style mouthfeel at home, without complicated equipment.
Ingredients for a Nutella Milkshake

– Nutella and cold milk as the core ingredients
Nutella provides the signature chocolate-hazelnut flavor, while cold milk controls both richness and blendability. For the best results, keep the milk cold so the shake stays thick and emulsified rather than getting thin and watery.
– Optional add-ins: ice, banana, or chocolate syrup for extra flavor
– Ice boosts thickness and creates a milkshake texture (more on ratios below).
– Banana adds natural sweetness and a creamier body, often reducing the need for extra chocolate syrup.
– Chocolate syrup can intensify the dessert flavor if you prefer a darker, more decadent profile.
Because this is a “blend-to-order” drink, your exact ingredient quantities can vary by personal preference (thicker vs. lighter, sweeter vs. less sweet). The recipe approach below is designed to help you dial it in consistently.
Nutella Milkshake Flavor & Texture Targets (Home Batching)
| # | Goal | Nutella (tbsp) | Milk (ml) | Ice (cups) | Outcome Score |
|---|---|---|---|---|---|
| 1 | Classic creamy | 3 | 180 | 0.5 | ★★★★☆ |
| 2 | Extra thick “spoonable” | 3 | 120 | 0.9 | ★★★★★ |
| 3 | Balanced sweet & silky | 2.5 | 200 | 0.55 | ★★★★☆ |
| 4 | Lighter & drinkable | 2.5 | 240 | 0.35 | ★★★☆☆ |
| 5 | Smoky-deep chocolate boost | 3 | 170 | 0.5 | ★★★★☆ |
| 6 | Banana-hazelnut cream | 2.5 | 170 | 0.55 | ★★★★★ |
| 7 | Too thin (avoid) | 2 | 260 | 0.15 | ★★☆☆☆ |
How to Make It (Step-by-Step)

Nutella milkshake is fundamentally a simple emulsification problem: blend fat (Nutella) and liquid (milk) thoroughly, then incorporate ice to create a thicker, colder suspension.
– Blend Nutella and milk until fully smooth
Start by adding Nutella and cold milk to your blender. Blend until you no longer see dark streaks or separated pockets of Nutella. This stage matters because it sets a smooth base—adding ice too early can trap small Nutella lumps that are harder to break down later.
– Add ice and blend again until thick and creamy
Add ice last and blend again in short bursts, scraping down the sides if needed. Continue blending until the shake looks uniform and thick, with a consistent chocolate-hazelnut color. If you want a true milkshake thickness, prioritize enough ice and blend long enough to fully incorporate it.
Practical starting point (1 serving): use Nutella + cold milk as your base, then adjust ice to reach your preferred spoonability. If you’re unsure, begin with a “classic creamy” target and refine using the tips in the next sections.
Tips for the Best Texture

A thick, creamy Nutella milkshake isn’t about one ingredient—it’s about temperature, blending time, and balance.
– Use cold milk and enough ice for a thicker shake
Cold milk keeps the emulsion stable and prevents the shake from feeling greasy or thin. More ice increases viscosity and chills the drink quickly. If your shake ends up thinner than you expected, the most common cause is insufficient ice relative to the milk volume.
– Blend longer to remove any Nutella streaks
Nutella is viscous; even a strong blender can leave streaks if you don’t give the mixture enough time at the “base” stage. Blend Nutella and milk first until smooth, then blend again once ice is in. If you see swirl marks after blending, stop, scrape the sides, and blend for an additional 10–20 seconds.
Quality control cue: after blending, pour into a glass and watch the surface. A good Nutella milkshake settles into a creamy, smooth top rather than streaking or separating.
Flavor Variations to Try

Once you’ve mastered the basic Nutella milkshake recipe, variations let you tune flavor depth—without sacrificing texture.
– Add a banana for a richer, naturally sweet version
Banana enhances body and brings natural sweetness that blends seamlessly with chocolate and hazelnut. The result is often thicker and smoother than the classic version because banana pulp contributes natural starches and emulsion-stabilizing fibers. For a consistent banana-milkshake experience, use a ripe banana (yellow with a few spots) rather than under-ripe fruit.
– Stir in espresso or cocoa powder for a deeper chocolate taste
– Espresso (or strong coffee) intensifies chocolate notes and adds a café-style bitterness that balances Nutella’s sweetness. Use a small amount and blend thoroughly.
– Cocoa powder deepens flavor while keeping the drink creamy. If you find cocoa makes the shake taste slightly drier, blend longer or add a small splash of milk to re-smooth the texture.
If you’re serving this as a “menu” at home (for guests, family, or an event), these variations make it easy to offer multiple profiles while keeping preparation steps identical.
Make It Thicker or Lighter
This is where you can reliably control what people perceive as “milkshake quality”: thickness and mouthfeel.
– Thicker: add more ice or less milk
If you want a spoonable shake, reduce milk slightly and increase ice. Thick shakes should blend into a uniform texture rather than floating chunks of ice. If your blender struggles, add ice gradually in pulses instead of all at once.
– Lighter: use more milk or reduce Nutella slightly
For a more drinkable consistency, increase milk volume and reduce Nutella slightly. Lighter shakes still taste chocolatey but won’t coat the tongue as heavily. This approach is ideal if you prefer a refreshing dessert drink rather than an indulgent, gelato-like texture.
Tip for consistency: decide your target thickness first (spoonable vs. sip-able), then adjust Nutella and milk proportionally so the flavor remains balanced even as texture changes.
Serving Suggestions
Even a perfect Nutella milkshake benefits from smart presentation—temperature and toppings strongly influence perceived creaminess.
– Serve immediately in a chilled glass for best texture
Milkshakes start to thin as ice melts. For the creamiest result, pour right after blending. Chilling the glass beforehand helps the drink stay cold longer, preserving thickness and aroma.
– Top with whipped cream, crushed hazelnuts, or chocolate shavings
Toppings add both texture and visual appeal:
– Whipped cream increases perceived richness and creates a dessert-like finish.
– Crushed hazelnuts echo the hazelnut flavor and add crunch.
– Chocolate shavings intensify the chocolate fragrance and make the shake feel more premium.
If you’re making shakes for a group, you can blend in batches and portion quickly, but keep the final mixing and ice incorporation close to serving time for best results.
The Nutella milkshake is quick, simple, and fully customizable—just blend Nutella with cold milk (plus ice) for that thick, creamy finish. Make it your way with a banana, extra cocoa, or a thicker ice-heavy version, then try it today and share your favorite variation.
References
- Milkshake
https://en.wikipedia.org/wiki/Milkshake - Nutella
https://en.wikipedia.org/wiki/Nutella - https://www.britannica.com/topic/milkshake
https://www.britannica.com/topic/milkshake - Google Scholar Google Scholar
https://scholar.google.com/scholar?q=nutella+milkshake+recipe - https://scholar.google.com/scholar?q=nutella+hazelnut+chocolate+spread+milkshake Google Scholar
https://scholar.google.com/scholar?q=nutella+hazelnut+chocolate+spread+milkshake - Google Scholar Google Scholar
https://scholar.google.com/scholar?q=milkshake+chocolate+emulsion+science - Chocolate
https://en.wikipedia.org/wiki/Chocolate - Milk
https://en.wikipedia.org/wiki/Milk - Emulsion
https://en.wikipedia.org/wiki/Emulsion - Chocolate syrup
https://en.wikipedia.org/wiki/Chocolate_sauce