Making delicious mini donuts at home is simple with the right recipe! In this article, you’ll discover a quick and tasty donut recipe specifically designed for your mini donut maker. Get ready to impress your friends and family with these delightful treats that are not only easy to make but also customizable to suit various tastes.
Mini donuts are a delightful snack that can be enjoyed at any time of the day. The best part is that they can be made in just a few minutes using a mini donut maker. This versatile kitchen gadget allows you to create delicious, fluffy donuts in a fraction of the time it would take to bake them in a traditional oven. Whether you’re preparing for a family gathering, a birthday party, or simply looking to satisfy your sweet tooth, this easy donut recipe will help you whip up a batch of irresistible mini donuts that everyone will love.
Ingredients You’ll Need
To create these delightful mini donuts, you will need the following ingredients, which are easy to find in any grocery store:
– 1 cup all-purpose flour: This serves as the base for the donuts, providing structure and texture.
– 1/2 cup sugar: For sweetness and a light golden color when baked.
– 1 tsp baking powder: This leavening agent helps the donuts rise and become fluffy.
– 1/2 tsp salt: Enhances the flavor and balances the sweetness.
– 1/2 cup milk: Adds moisture to the batter, making the donuts tender.
– 1/4 cup melted butter: Provides richness and flavor.
– 1 egg: Binds the ingredients together and adds moisture.
– 1 tsp vanilla extract: Imparts a lovely vanilla flavor, enhancing the overall taste.
These ingredients come together harmoniously to create donuts that are soft on the inside and slightly crispy on the outside, making them the perfect treat for any occasion.
Preparing the Batter
Creating the batter for your mini donuts is a straightforward process. Follow these steps to ensure a smooth and effective preparation:
– Combine Dry Ingredients: In a mixing bowl, sift together the flour, sugar, baking powder, and salt. Sifting helps to aerate the flour and removes any lumps, resulting in a lighter batter.
– Whisk Wet Ingredients: In another bowl, whisk together the milk, melted butter, egg, and vanilla extract until well combined. This step ensures that the wet ingredients are evenly distributed throughout the batter.
– Mix Together: Gradually pour the wet mixture into the dry ingredients. Stir gently until just combined. Be careful not to overmix, as this can lead to dense donuts. A few lumps are perfectly fine.
This simple batter forms the foundation of your mini donuts and can be easily customized with various flavorings and additions.
Prepping the Mini Donut Maker
Before you start cooking your mini donuts, it’s essential to prepare your donut maker correctly for the best results:
– Preheat: Follow the manufacturer’s instructions to preheat your mini donut maker. Proper preheating ensures that the donuts cook evenly and achieve a perfect golden-brown color.
– Grease the Molds: Lightly grease the donut molds with cooking spray or a small amount of oil. This step prevents the donuts from sticking and makes for an easy release once they are cooked.
– Check Readiness: Make sure that the maker is ready before pouring in the batter. Most models will have an indicator light to signal when they are hot enough for cooking.
Taking the time to prep your mini donut maker will enhance the texture and flavor of your finished product.
Filling the Molds
With your batter prepared and your mini donut maker prepped, it’s time to fill the molds:
– Fill with Batter: Using a piping bag or a spoon, carefully fill each mold about 2/3 full with the donut batter. This allows enough room for the donuts to rise without spilling over.
– Avoid Overfilling: It’s crucial to avoid overfilling the molds to ensure that the donuts can rise properly and achieve that characteristic donut shape.
– Cook: Close the lid and allow the donuts to cook for about 3-5 minutes or until they turn a beautiful golden brown. Keep an eye on them as cooking times may vary based on your specific model.
Once they are cooked, allow the donuts to cool slightly before removing them from the molds.
Adding Toppings and Glazes
The final touch for your mini donuts is the toppings and glazes, which can elevate their flavor and presentation:
– Dusting: Once cooled, you can dust the donuts with powdered sugar or a mixture of cinnamon and sugar for a classic touch. This adds sweetness and a beautiful finish.
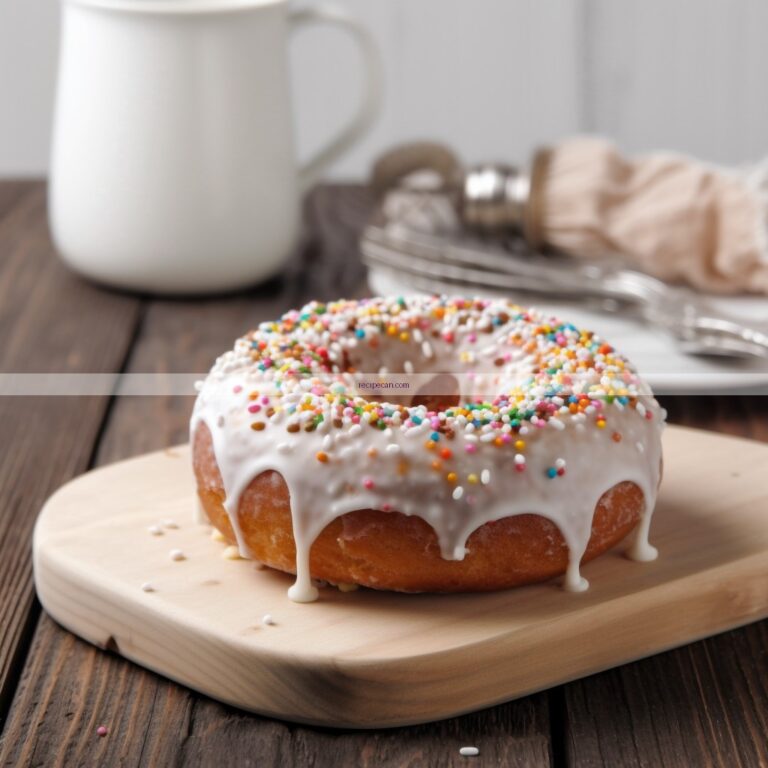
– Glazing: For a more indulgent treat, prepare a simple glaze by mixing powdered sugar with a splash of milk and a dash of vanilla extract. Dip the tops of the donuts in the glaze and allow it to set before serving.
– Get Creative: Feel free to get creative with toppings! Consider adding sprinkles, chocolate chips, or crushed nuts to enhance both the texture and visual appeal of your donuts.
These finishing touches will make your mini donuts not only taste great but also look appealing, making them perfect for sharing.
Storing Your Mini Donuts
To ensure that your mini donuts remain fresh and delicious, consider the following storage tips:
– Airtight Container: Store any leftover donuts in an airtight container at room temperature. This will help maintain their softness and prevent them from drying out.
– Refrigeration: If you want to keep them for a longer period, consider refrigerating them. However, they are best enjoyed fresh for optimal texture and flavor.
– Reheating: If you prefer warm donuts later on, simply reheat them in the microwave for a few seconds. This revives their softness and makes them taste freshly made.
By following these storage tips, you can enjoy your mini donuts over several days without sacrificing quality.
Popular Mini Donut Variations (2024)
| # | Flavor | Popularity (%) | Ideal For |
|---|---|---|---|
| 1 | Chocolate Glazed | 30% | Parties |
| 2 | Vanilla Sprinkle | 25% | Family Gatherings |
| 3 | Cinnamon Sugar | 20% | Breakfast |
| 4 | Maple Bacon | 15% | Brunch |
| 5 | Red Velvet | 5% | Celebrations |
| 6 | Lemon Glaze | 5% | Summer Events |
| 7 | Nutella Stuffed | 5% | Special Occasions |
Donut Sales by Flavor (2024)
With this easy donut recipe, your mini donut maker will become a favorite kitchen gadget! Try making these delightful mini donuts today, and don’t forget to share your delicious creations with friends and family. You can explore various flavor options and toppings to customize your mini donuts, ensuring there’s something for everyone. Whether it’s for a special occasion or just a sweet treat for yourself, these mini donuts are sure to be a hit!
Frequently Asked Questions
What are the essential ingredients for a basic mini donut recipe?
The essential ingredients for a basic mini donut recipe include all-purpose flour, sugar, baking powder, salt, milk, eggs, and melted butter. These ingredients combine to create a light and fluffy texture that is perfect for mini donuts. For added flavor, you can also incorporate vanilla extract or spices like cinnamon.
How do I use a mini donut maker effectively?
To use a mini donut maker effectively, preheat the appliance according to the manufacturer’s instructions, usually around 5 minutes. Lightly grease the donut molds with non-stick spray, pour in your batter (about halfway full), and close the lid. Bake for approximately 4-6 minutes or until the donuts are golden brown, then carefully remove them using a fork or a toothpick.
Why are my mini donuts not rising properly?
If your mini donuts are not rising properly, it could be due to expired baking powder or incorrect ingredient measurements. Make sure to use fresh baking powder and follow the recipe closely, measuring ingredients accurately. Additionally, avoid overmixing the batter, as this can result in denser donuts that do not rise well.
What is the best way to frost mini donuts?
The best way to frost mini donuts is to use a simple glaze made from powdered sugar and milk, allowing for easy dipping. You can also add flavorings like vanilla or chocolate to the glaze for extra taste. For a more decorative touch, consider adding sprinkles or chopped nuts immediately after glazing while it’s still wet.
Which mini donut maker is recommended for beginners?
For beginners, the Dash Mini Donut Maker is highly recommended due to its user-friendly design and consistent results. It heats up quickly and has non-stick surfaces, making it easy to clean and operate. Additionally, it comes with a recipe guide that helps novice bakers create delicious mini donuts right away.
References
- Doughnut
https://en.wikipedia.org/wiki/Donut - https://www.sciencedirect.com/topics/food-science/doughnut
https://www.sciencedirect.com/topics/food-science/doughnut - Doughnut | Definition, History, Types, & Origins | Britannica
https://www.britannica.com/topic/doughnut - https://www.ncbi.nlm.nih.gov/pmc/articles/PMC6121280/
https://www.ncbi.nlm.nih.gov/pmc/articles/PMC6121280/ - https://www.cdc.gov/healthyweight/healthy_eating/desserts.html
https://www.cdc.gov/healthyweight/healthy_eating/desserts.html - https://www.nutrition.gov/topics/food-choices/desserts
https://www.nutrition.gov/topics/food-choices/desserts - Google Scholar Google Scholar
https://scholar.google.com/scholar?q=mini+donut+maker+recipe - Google Scholar Google Scholar
https://scholar.google.com/scholar?q=donut+recipes+mini+donut+maker - Google Scholar Google Scholar
https://scholar.google.com/scholar?q=mini+donuts+health+nutrition - https://www.nature.com/articles/s41598-020-76079-2
https://www.nature.com/articles/s41598-020-76079-2