This overnight French toast casserole recipe delivers the best “wake up to ready breakfast” payoff, with custardy bread that stays tender and slices clean. It answers the key question of how to assemble it the night before without soggy edges, so it reliably bakes to golden, caramelized perfection. Follow the steps for a make-ahead casserole that serves a crowd with minimal last-minute work.
Make an overnight French toast casserole by soaking cubed bread in a sweet egg-and-milk custard the night before, then baking until puffed, set, and golden. You’ll get an easy, make-ahead breakfast that holds its shape for a crowd—and this recipe walks you through the exact ingredient setup, soak time, and bake timing so your casserole reliably comes out custardy in the middle and crisp on top.
Gather Ingredients for Overnight French Toast Casserole

A successful overnight French toast casserole starts with two choices: the bread (it must absorb custard without collapsing) and the custard ratio (it must soak thoroughly and set in the oven).
– Use sturdy bread (brioche or challah) cut into cubes for best texture
Brioche and challah are ideal because they’re rich and springy. Use bread that’s 1–2 days old if possible—slightly dried bread absorbs custard more evenly than freshly baked bread. Aim for cubes around ¾–1 inch so each piece soaks but still bakes into cohesive layers.
– Combine eggs, milk (or cream), sugar, vanilla, and cinnamon for the soak
The classic custard base is the egg-and-milk mixture (often with a little cream for richness), plus sugar for browning and a warm spice profile. Vanilla adds bakery-like aroma, while cinnamon contributes the “French toast” identity.
Practical guidance: if you want a more custardy center, choose whole milk or half-and-half; if you want a lighter texture, use milk, but ensure you soak long enough for full penetration.
– Choose mix-ins like berries or chocolate chips if you want extra flavor
Mix-ins should be balanced: too many “wet” ingredients (like very juicy fruit) can create soggy pockets. Great options include:
– Berries (fresh or frozen—thawed and lightly drained helps)
– Chocolate chips (stable during baking and provides pockets of melty sweetness)
– Dried fruit (soak-friendly and less likely to bleed moisture)
Add mix-ins after arranging the bread, or fold a portion directly into the custard and sprinkle extra on top.
Quick data at-a-glance: What custard soak time typically delivers
Custard Soak Time vs. Texture Outcome (Overnight French Toast Casserole)
| # | Soak Duration | Expected Center Texture | Edge Browning | Bake Reliability |
|---|---|---|---|---|
| 1 | 6 hours | Partially set, lighter custard | Good | Medium |
| 2 | 8 hours | Custardy, evenly soaked | Very good | High |
| 3 | 10 hours | Thick custard set, soft bread | Excellent | Very high |
| 4 | 12 hours | Fully absorbed, more “bread pudding” feel | Excellent | High |
| 5 | 14 hours | Can feel dense in the center | Good | Medium |
| 6 | 16 hours | Highest risk of over-softening | Variable | Low |
| 7 | 20 minutes “quick soak” | Dry center pockets | Fast browning | Low |
Prepare the Casserole Base

The base assembly step determines how evenly the casserole sets. Treat it like production planning: bread placement, custard coverage, and pre-bake seasoning are your control points.
– Arrange bread evenly in a greased baking dish
Use a dish that matches your bread volume so the casserole bakes uniformly. Grease the pan lightly to prevent sticking and to help edges brown. Spread cubes in a single, even layer—avoid over-stuffing, which blocks custard from moving between pieces.
– Pour the custard over top, making sure bread is fully saturated
Pour slowly to help liquid wick into the bread. If some cubes look dry, add a small splash of warm milk or custard (a tablespoon at a time) until the surface looks uniformly moist. For best results, the top should not be “floating” dry pieces after pouring—everything should appear damp.
– Optional: add fruit layers or sprinkle in cinnamon-sugar for extra warmth
For fruit: place berries in pockets rather than piling them. Consider a light toss with sugar if using berries, which helps draw out moisture before baking. For cinnamon-sugar, dusting adds an aromatic crust; keep it light so it doesn’t become a thick, overly sweet layer.
Pro tip for consistency: if you plan to serve immediately after baking, keep the dish uncovered for the last moments so the top browns properly. If you plan to hold the casserole for a short time, bake to set and let it rest covered loosely to prevent steam from making the crust gummy.
Refrigerate Overnight for Best Results
This is where “overnight” becomes more than a label—it’s the technical step that makes the dish dependable. Refrigeration gives time for full absorption while keeping ingredients food-safe.
– Cover and refrigerate for 8–12 hours so it fully absorbs
The sweet spot is typically 8–12 hours. During that window, the custard penetrates each bread cube, leading to a consistent, sliceable interior. Less than ~6 hours can leave pockets of under-soaked bread; longer than ~14 hours can over-soften edges and make the center heavier.
– Press gently once (optional) to ensure even soaking without breaking bread
After 30–60 minutes of chilling (or once it’s evenly poured), you may gently press down with a spatula. This “sets contact” between custard and bread, improving absorption. Don’t over-press; you want saturation, not compression.
– Keep it chilled until you’re ready to bake for the ideal custard set
Don’t bring it to room temperature for long—custard is egg-based, and long warming can affect texture. Instead, bake straight from the fridge. If your kitchen is cool, allow 5–10 minutes of dish sit time while the oven preheats.
Analytical takeaway: the refrigerator step reduces variability. It standardizes the soak so your bake time produces predictable browning, set custard, and clean slicing.
Bake Until Golden and Set
Baking is the moment the custard transitions from liquid to set—your job is to manage browning while allowing internal structure to firm up.
– Bake covered at first to prevent over-browning, then uncover to crisp
Start with coverage (foil or a lid) so the top doesn’t brown before the center sets. Then uncover for the final portion to develop a golden crust. This two-stage bake is especially important when using richer breads like brioche, which brown quickly.
– Look for bubbling around edges and a lightly golden top
Visual cues matter because ovens vary. When the casserole bakes correctly, you’ll see bubbling around the perimeter, and the center should look set rather than sloshy. The top should be lightly golden, not deep brown.
– Rest 5–10 minutes before serving for cleaner slices and better texture
Resting allows the custard to finish setting and redistributes moisture, preventing watery pooling when you cut slices. If you serve immediately, the casserole may taste great but won’t slice as cleanly.
If you want a more precise quality check for business-like consistency: use a thermometer. The center should reach roughly 160°F (71°C) for a fully set egg custard.
Serve With Toppings and Storage Tips
Serving and storage protect the quality you achieved during soaking and baking. French toast casserole is forgiving, but toppings and reheating can change texture quickly.
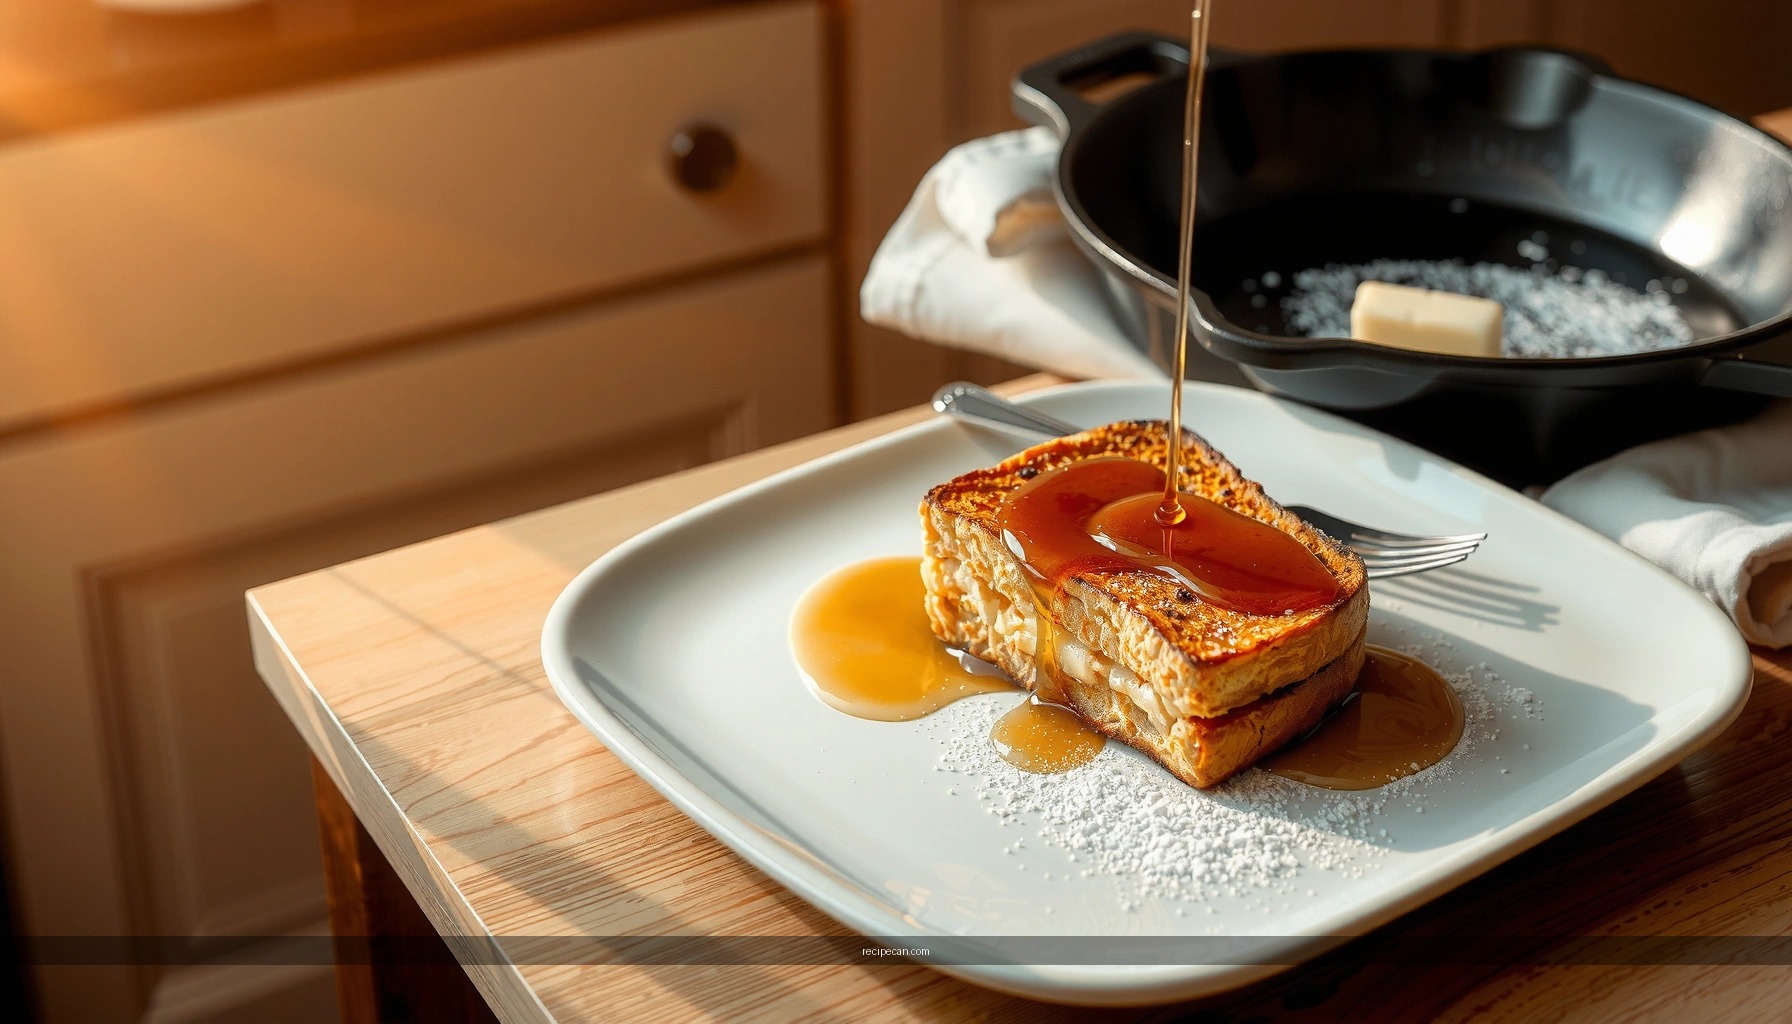
– Top with maple syrup, powdered sugar, fresh fruit, or whipped cream
Choose toppings that match your flavor direction:
– Maple syrup emphasizes classic French toast sweetness
– Powdered sugar adds a bakery finish and balances berries
– Fresh fruit (strawberries, blueberries, bananas) refreshes richness
– Whipped cream turns it dessert-like—excellent for brunch events
– Store leftovers covered in the fridge up to 3 days
Cool the casserole first, then refrigerate in an airtight container or tightly covered pan. Overnight French toast casserole can improve slightly the next day as custard continues to set, but the crust will soften over time.
– Reheat in the oven or toaster oven to keep the casserole from getting soggy
Microwave reheating is fast but often makes bread chewy and can loosen crispness. For best texture, reheat at 300–325°F (150–165°C) until warmed through. Cover loosely with foil if the top browns too quickly.
Operational best practice: reheat in portion sizes if possible, so you don’t warm the whole pan longer than necessary.
Easy Customization Ideas
Customization is where you align the casserole with your audience—whether it’s family brunch, a holiday morning, or a workplace event. The base remains stable; the flavor components shift.
– Swap milk/cream options (dairy-free or half-and-half) to match your taste
For dairy-free versions, use a high-quality unsweetened plant milk and consider a slightly thicker alternative (some cooks prefer oat milk for richness). If using half-and-half, expect a more decadent, custard-forward result.
– Add nutty flavor with pecans or toasted almonds
Nuts add crunch and deepen aroma. Toast pecans or almonds briefly before adding to the casserole or reserve some for topping after baking. This prevents nuts from softening too much.
– Make it savory-sweet with a pinch of salt and a drizzle of butter
A small amount of salt sharpens sweetness and helps the vanilla and cinnamon stand out. If you’re serving with fruit and syrup, a light butter drizzle right before serving adds fragrance and perceived richness without making it heavy.
Design for success: if you add chocolate chips, keep the sugar slightly controlled in the custard (or use dark chocolate chips) so the overall sweetness doesn’t become cloying.
Overnight French toast casserole is the easiest make-ahead breakfast: soak bread overnight in a well-balanced egg-and-milk custard, then bake until golden and set. Focus on sturdy bread, consistent soaking time (typically 8–12 hours), and a two-stage bake to protect the top while fully setting the center. With simple topping options and practical reheating/storage guidance, this recipe reliably delivers a crowd-pleasing brunch centerpiece you can customize to match any taste.
Frequently Asked Questions
What is the best overnight French toast casserole recipe for beginners?
Start with day-before-friendly ingredients: cubed bread (brioche or challah work best), eggs, milk, vanilla, cinnamon, and a pinch of salt. Assemble the casserole in a greased baking dish, pour the custard over the bread, press lightly to soak, cover, and refrigerate overnight. In the morning, bake until puffed and golden, then serve with maple syrup. This recipe-style approach is simple, forgiving, and consistently produces a tender, custardy overnight French toast casserole.
How do you make overnight French toast casserole without soggy bread?
Use sturdy bread like brioche or French bread so it absorbs the custard without collapsing. Cut bread into even cubes, and let it soak in the refrigerator (usually 8–12 hours) rather than at room temperature, which can lead to excess moisture. For best texture, use the right custard ratio (about 1 egg per 1/2 to 3/4 cup milk), and bake at a higher temperature long enough to set the center. You can also lightly blot very fresh bread cubes before assembling if you notice they’re already soft.
Why do you need to refrigerate an overnight French toast casserole before baking?
Refrigeration helps the bread fully absorb the egg-milk mixture, which creates the “custard-soaked” texture French toast casserole is known for. It also lets the flavors—vanilla, cinnamon, and any add-ins—meld, so the casserole tastes richer when baked. Skipping the overnight chill can result in uneven soaking, with some bread dry and other areas too wet.
Which toppings and add-ins work best for an overnight French toast casserole?
Classic options include fresh berries, sliced bananas, chocolate chips, and chopped nuts like pecans. You can also fold in shredded cinnamon swirl bread or add a layer of cream cheese for extra creaminess. For a bakery-style finish, sprinkle a cinnamon-sugar topping before baking and drizzle maple syrup right after the casserole comes out. If you add juicy fruit, toss it lightly with a bit of sugar and let it drain briefly to prevent extra sogginess.
What’s the ideal baking time and temperature for overnight French toast casserole?
Bake at 350°F (175°C) for about 35–50 minutes, depending on dish size and thickness, until the top is golden and the center is set. If the casserole is very cold from the fridge, you can bake slightly longer or start with a brief cover for the first 10–15 minutes to prevent over-browning. To confirm doneness, insert a knife near the center—there should be no liquid custard remaining, and the bread should feel tender throughout. Resting the casserole 5–10 minutes after baking helps it set so you get clean slices instead of runny portions.
References
- Google Scholar Google Scholar
https://scholar.google.com/scholar?q=overnight+french+toast+casserole+recipe - Google Scholar Google Scholar
https://scholar.google.com/scholar?q=french+toast+casserole+soaking+time+egg+custard+bread - Google Scholar Google Scholar
https://scholar.google.com/scholar?q=overnight+baked+egg+casserole+food+safety+refrigeration - French toast
https://en.wikipedia.org/wiki/French_toast - Bread pudding
https://en.wikipedia.org/wiki/Bread_pudding - https://www.britannica.com/topic/French-toast
https://www.britannica.com/topic/French-toast - Educational Materials and Videos | Food Safety | CDC
https://www.cdc.gov/foodsafety/communication/eggs.html - https://www.foodsafety.gov/food-safety-charts/cooking-eggs
https://www.foodsafety.gov/food-safety-charts/cooking-eggs - https://www.foodsafety.gov/keep-food-safe/food-safety-basics/food-safety-time-temperature
https://www.foodsafety.gov/keep-food-safe/food-safety-basics/food-safety-time-temperature - https://www.fsis.usda.gov/food-safety/safe-food-handling-and-preparation/keeping-food-safe-after-cooking
https://www.fsis.usda.gov/food-safety/safe-food-handling-and-preparation/keeping-food-safe-after-cooking