Get the no bake cannoli delight recipe that delivers a true, creamy cannoli-style dessert without turning on the oven. This easy, no-bake method answers whether you can achieve rich, sweet filling and crisp bite in one chill-and-serve process—faster than traditional cannoli. If you want maximum flavor with minimal effort, this is the clear winner.
No bake cannoli delight gives you classic cannoli flavor—sweet ricotta filling, chocolate chips, and a crunchy base—without tempering pastry shells or turning on the oven. You’ll whip a smooth ricotta filling, layer it fast with cookie crumbs for cannoli-style texture, chill until it sets, and finish with toppings right before serving for the best bite.
Gather Ingredients for No Bake Cannoli Delight

To make a no-bake cannoli dessert that tastes “right,” you need two things: a balanced ricotta filling (sweet, lightly tangy, and creamy) and a crunchy component that mimics the cannoli experience of contrast—creamy filling plus snap.
Core ingredients for the classic cannoli vibe
– Ricotta cheese: the star ingredient for authentic cannoli flavor. For best texture, choose whole-milk ricotta that’s smooth and not watery.
– Powdered sugar: sweetens and dissolves easily, creating a creamy mouthfeel.
– Mini chocolate chips: distribute chocolate throughout the filling without overpowering the ricotta.
Optional additions (for a more “cannoli” profile)
– Vanilla extract: rounds out the flavor and makes the filling taste richer.
– Candied fruit (orange or citron): traditional cannoli-style add-in for bright sweetness.
– A pinch of salt: improves overall flavor balance (especially if your ricotta tastes bland).
Key tools to keep it easy
– Mixing bowl (for stirring and smoothing ricotta)
– Spoon or spatula (for gentle folding and clean mixing)
– Serving dish or small cups (for layered presentation)
– Optional: fine-mesh strainer (only if your ricotta is slightly loose)
Quick ingredient check for quality
If your ricotta looks watery, drain it for 10–15 minutes in a fine-mesh strainer before mixing. This single step is one of the highest-impact moves for a thick, spoonable no-bake dessert.
Ricotta Texture Guide for Best No-Bake Cannoli Results
| # | Ricotta Style | Typical Texture | Chill Needed | Cannoli-Delight Fit |
|---|---|---|---|---|
| 1 | Whole-Milk Ricotta (smooth) | Creamy, spoonable | 1 hour | ★★★★★ |
| 2 | Part-Skim Ricotta | Slightly firmer | 1–2 hours | ★★★★☆ |
| 3 | Low-Moisture Ricotta | Thick, stable | 45–60 minutes | ★★★★☆ |
| 4 | Ricotta with Visible Liquid | Loose, runny | 2 hours + draining | ★★★☆☆ |
| 5 | Spinach/Herb Ricotta (flavored) | Savory, aromatic | 2 hours | ★☆☆☆☆ |
| 6 | Part-Skim Ricotta, Grainy | Lumpy mouthfeel | 2 hours + straining | ★★☆☆☆ |
| 7 | Store-Bought “Ricotta-Style” Spread | Often thinner | 2–3 hours | ★★★☆☆ |
Make the Creamy Cannoli Filling

The filling is where no-bake cannoli dessert quality is won or lost. The goal is a smooth, lightly sweet ricotta with evenly distributed chocolate chips and (optionally) candied fruit.
Step 1: Smooth the ricotta base
– Add ricotta to a mixing bowl.
– Add powdered sugar and mix until creamy.
– If your ricotta has any graininess, pass it through a fine-mesh strainer first, or mash with a spoon until smooth.
Step 2: Build flavor without deflating the texture
– Stir in vanilla extract (optional) and a small pinch of salt.
– Fold in mini chocolate chips gently—overmixing can make the filling dense.
Step 3: Gentle add-ins for a classic cannoli profile
– Fold in candied fruit if you want the traditional cannoli “pop.”
– Keep add-ins measured. Too much fruit can introduce excess moisture and affect set time.
Why chilling matters (texture science, simplified)
Ricotta is mostly water bound within dairy solids. When you chill, the filling thickens slightly and becomes easier to spoon and layer. That’s why chilling for at least 20–30 minutes after mixing is a practical move—even before you assemble.
Assemble Your No Bake Cannoli Delight

Assembly should be fast and structured so your layers stay distinct and elegant. The most common problem with layered desserts is that crumbs get soggy or layers blur. Here’s how to avoid that.
Step 1: Create a crunchy base
– Choose cookie crumbs (like vanilla wafer or biscotti crumbs) or crushed graham crackers.
– Spread a thin, even layer in the bottom of your dish or cups.
Step 2: Layer the filling
– Spoon the chilled ricotta mixture over the crumbs.
– Add another thin crumb layer if you’re making a stacked presentation (dish or jar style).
Step 3: Add a controlled sweetness “accent”
– A light drizzle of honey can enhance the creamy ricotta notes.
– Or use a quick chocolate drizzle for a more decadent finish.
Tip: Drizzle sparingly—too much liquid can soften the crumb base.
Step 4: Portion for easy serving
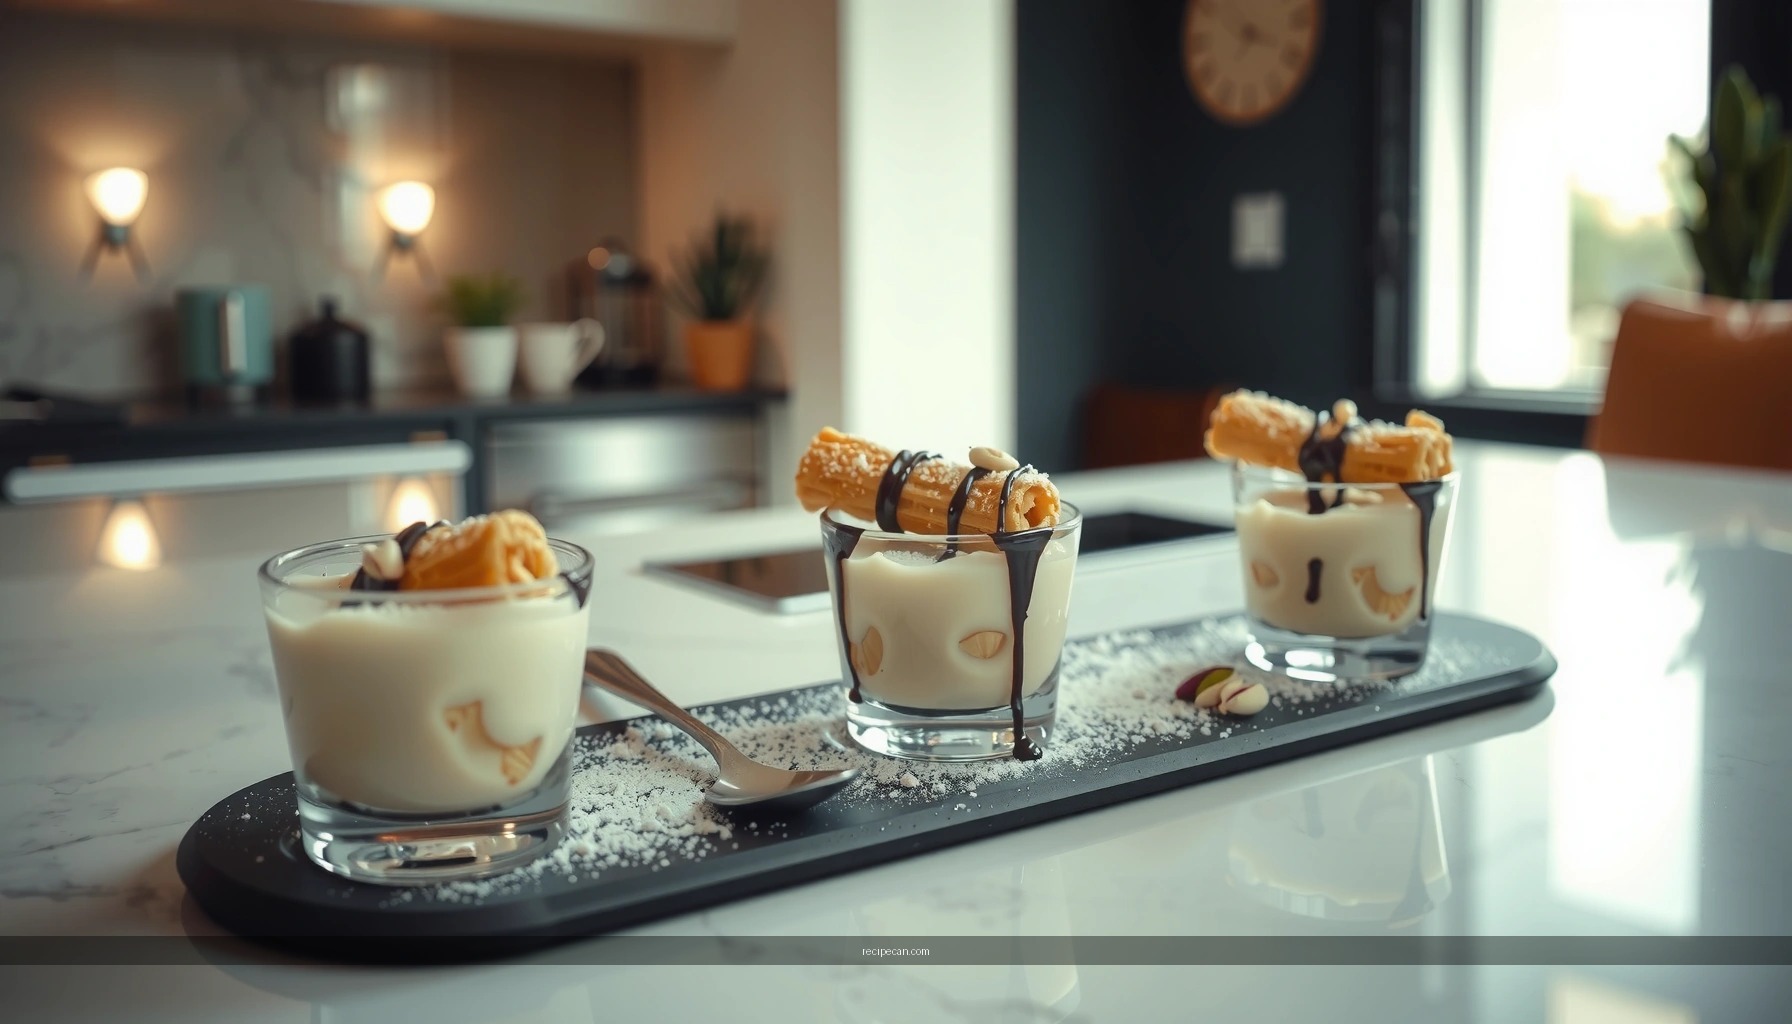
Portioning into individual servings (small glasses/cups) creates a polished look and helps you control the crumb-to-filling ratio. It’s also a strong option for entertaining because each serving maintains its own structure.
Add the Best Cannoli Crunch and Toppings
A true cannoli experience is contrast: creamy interior, crunchy exterior, and visually appealing toppings. Since you’re skipping shells, you recreate that effect with the right toppings—timed correctly.
Choose crunch that behaves like a cannoli shell
– Crushed wafers (thin, crisp, and sugar-forward)
– Cookie crumbs that stay crisp for at least a short window
– Optional: a few extra toasted crumbs for deeper flavor
Finish with cannoli-style visual cues
– Extra mini chocolate chips
– Powdered sugar dusting (lightly applied so it doesn’t melt into the cream)
– Candied fruit bits for a classic “speckled” look
Keep toppings separate until serving
To preserve crunch:
– Store crumbs/wafers and toppings in a separate container.
– Assemble and chill the base without the crunch topping.
– Add final toppings right before serving for maximum texture.
If you want maximum control, consider assembling everything up to the chilling stage, then topping each portion at the last minute.
Chill and Serve for the Right Texture
Chilling isn’t just for convenience—it’s required for the right consistency. A no-bake cannoli delight should be scoopable, creamy, and neatly layered.
Recommended chilling window
– Chill at least 1–2 hours so flavors meld and the filling sets.
– For best results, aim closer to 2 hours if your ricotta is slightly looser.
Serving temperature
Serve cold. Cold temperatures help the filling hold its shape and keep the crumbs from absorbing moisture too quickly. For a clean, professional presentation, let it sit in the fridge until plating time.
Make-ahead best practice
If you’re preparing ahead:
– Chill the layered dessert.
– Hold crunchy toppings separately.
– Add toppings at service time.
This approach yields a dessert that tastes fresh and looks like you assembled it moments ago.
Storage and Make-Ahead Tips
A practical dessert should hold up in the real world—busy schedules, last-minute guests, and partial servings. Here’s how to store your no-bake cannoli delight without sacrificing quality.
Refrigeration
– Refrigerate covered for up to 2–3 days for best freshness.
– After day three, crumbs may soften even with careful topping strategy.
Toppings strategy for best texture
– Store toppings (especially crunchy wafers/crumbs) separately.
– If you prefer powdered sugar, apply it fresh to prevent clumping.
Freezing (not recommended)
Freezing can change the texture of dairy-based fillings and may cause graininess after thawing. Chilling works reliably and keeps the creamy texture intact.
Scaling tips
If you’re making this for a group:
– Scale filling and crumbs proportionally.
– Keep layering thin for structural stability.
– Prefer individual cups for large gatherings to minimize crumb-to-cream contact.
No bake cannoli delight is a quick, no-fuss dessert that delivers that classic cannoli flavor with a creamy, layered texture. Make the filling, assemble with a crunchy base, chill until set, then add crunch and toppings right before serving for the best bite—try it this week and share your favorite variation!
Frequently Asked Questions
What is a no bake cannoli delight recipe and how is it different from traditional cannoli?
A no bake cannoli delight recipe is a simplified, dessert-style version of cannoli that skips frying shells and often skips baking the filling. It typically combines creamy ricotta (or ricotta-style filling) with sweeteners, citrus zest, and chocolate chips, then folds it into a no-bake base like whipped cream or a cookie crust. This makes it faster, easier, and less messy than traditional cannoli while still delivering the signature cannoli flavor.
How do I make a no bake cannoli delight that doesn’t turn out runny?
To prevent a runny no bake cannoli delight, start with well-drained ricotta and avoid using watery brands or low-fat ricotta without adjustments. If you’re using whipped cream, whip until you reach soft-to-medium peaks and fold gently so the mixture holds its structure. For extra stability, chill the mixture long enough (often 4+ hours) and consider adding a small amount of mascarpone or cream cheese to thicken the filling.
Why is ricotta draining important in a no bake cannoli dessert?
Ricotta draining is crucial because excess whey can break the texture of a no bake cannoli dessert and cause separation or pooling. After draining, you’ll get a thicker, creamier filling that holds its shape when spooned into serving cups or layered into a crust. This step helps the flavors—vanilla, cinnamon, and cannoli-style chocolate—taste balanced rather than watery.
What’s the best no bake cannoli delight recipe method for layering or serving?
The best method is to choose your format first—either layered cups, a no-bake crust dessert, or a tray-style filling. For layered cups, alternate crushed cookies or graham crumbs with the cannoli filling, then top with chocolate chips and a dusting of powdered sugar. Chill between layers if possible so each section sets properly, and serve cold for the most authentic “cannoli delight” experience.
Which ingredients can I swap to keep a no bake cannoli delight flavor similar?
If you can’t use traditional ricotta, you can swap in drained cottage cheese blended until smooth, or use mascarpone plus ricotta-style cream cheese for a similar creamy base. For added crunch, replace wafers with crushed biscotti, graham crackers, or vanilla cookies. You can also adjust sweetness with honey or powdered sugar, but keep the filling chilled to maintain the cannoli delight texture.
References
- Google Scholar Google Scholar
https://scholar.google.com/scholar?q=no-bake+cannoli+recipe+ricotta - Google Scholar Google Scholar
https://scholar.google.com/scholar?q=cannoli+ricotta+chocolate+chips+sugar+method - Google Scholar Google Scholar
https://scholar.google.com/scholar?q=no-bake+dessert+technique+ricotta+whipped+cream - Cannoli
https://en.wikipedia.org/wiki/Cannoli - Ricotta
https://en.wikipedia.org/wiki/Ricotta - https://en.wikipedia.org/wiki/No-bake_cooking
https://en.wikipedia.org/wiki/No-bake_cooking - Mascarpone
https://en.wikipedia.org/wiki/Mascarpone - Italian meal structure
https://en.wikipedia.org/wiki/Italian_dessert - https://www.britannica.com/topic/cannoli
https://www.britannica.com/topic/cannoli - Ricotta | Cheese, Whey, & Production | Britannica
https://www.britannica.com/topic/ricotta


