This not-your-mama’s banana pudding recipe delivers a clear winner: ultra-creamy, elevated flavor with the same cozy banana-and-vanilla comfort, minus the heaviness. It answers whether you can make banana pudding that tastes restaurant-smooth yet stays genuinely easy—using a straightforward method you’ll want to repeat. If you want the richest, most spoonable results without the fuss, this is the version to trust.
This not your mama’s banana pudding recipe delivers a visibly thicker, creamier custard-style filling with brighter banana flavor—without turning watery—by cooking the base to the right consistency and chilling before layering. You’ll learn how to build stable layers, balance sweetness with ripe bananas (and optional brown sugar/espresso), and get that perfect set so every spoonful holds its shape.
Ingredients That Make It “Not Your Mama’s”
Classic banana pudding is often delicious, but it can lean toward thin, soft layers—especially when shortcuts like instant pudding don’t get cooked long enough (or aren’t rich enough) to create a stable structure. This version keeps the nostalgic spirit while upgrading the mechanics of texture and taste.
Start with real bananas and a thicker dairy base:
– Use real bananas (ripe but not overly bruised). Starchy, under-ripe bananas read “raw,” while overly ripe bananas can make the filling feel looser and the fruit mushy.
– Choose a thicker dairy base such as:
– a custard-style cooked pudding (cornstarch/egg yolks, depending on your method), or
– extra-creamy pudding made with the full dairy recommended, not water.
Add a flavor upgrade that makes banana taste like banana—stronger:
– Vanilla bean (or high-quality vanilla extract) amplifies the dessert’s aroma.
– Brown sugar adds caramel notes that make banana flavor feel deeper and less “one-note.”
– A touch of espresso (optional) boosts perceived sweetness and roundness without tasting like coffee.
Pick cookies that won’t collapse too fast:
– Use sturdy vanilla wafers or thick vanilla cookies.
– Thin wafers soak quickly and can disappear into the custard—great for some styles, but not the layered, elegant texture you want here.
Banana Ripeness vs. Flavor & Layer Stability (Home Baking Guide)
| # | Banana Stage | Typical Visuals | Banana Flavor Intensity | Moisture Load | Layer Stability |
|---|---|---|---|---|---|
| 1 | Mostly Green | Green peel, minimal spots | ★☆☆☆☆ | Low | High |
| 2 | Green-Yellow | Yellow base, green edges | ★★☆☆☆ | Moderate | Moderate-High |
| 3 | Yellow with Light Spots | Mostly yellow, small freckles | ★★★☆☆ | Moderate | High |
| 4 | Spotty Golden (Best Overall) | Many spots, peel still firm | ★★★★☆ | Moderate-Low | Very High |
| 5 | Fully Ripe | Yellow with larger brown specks | ★★★★★ | Moderate | Moderate |
| 6 | Overripe | Mostly brown peel, soft spots | ★★★★★ | High | Low |
| 7 | Bruised/Ripe-Too-Far | Dark streaks, very soft | ★★★☆☆ | Very High | Very Low |
The Perfect Creamy Filling (No Watery Pudding)
Watery banana pudding usually comes down to one thing: the filling wasn’t thick enough (or didn’t get chilled to stabilize) before it met the bananas and wafers. To get a “sliceable” pudding texture, you need thickness during cooking and firmness during chilling.
Cook/whisk until it coats a spoon—then add precision, not more ingredients.
– If you’re making a stovetop custard or pudding from scratch, cook until the mixture reaches a nappe-like thickness—it should coat the back of a spoon and hold a line when you run a finger through it.
– For instant-style pudding, still follow the thickest option: use full-fat dairy and cook time/stir time as directed, then extend with gentle heat if your mixture seems loose.
Chill before assembling—this is non-negotiable for stable layers.
– After cooking, cover the surface (to prevent a skin) and chill until set.
– Assemble with cooled filling so bananas don’t prematurely warm it and thin it.
Adjust consistency only with a splash of milk (not a flood).
– If the filling feels too tight, add 1 teaspoon to 1 tablespoon milk at a time until silky.
– If it’s already thin, don’t “hope it sets later.” For most pudding bases, once structure is lost, chilling won’t fully rescue watery separation.
Quick diagnostic:
– Too thick while assembling → thin slightly with a splash.
– Too thin while assembling → you likely need more time on the stove next attempt; the best banana pudding texture comes from building structure early.
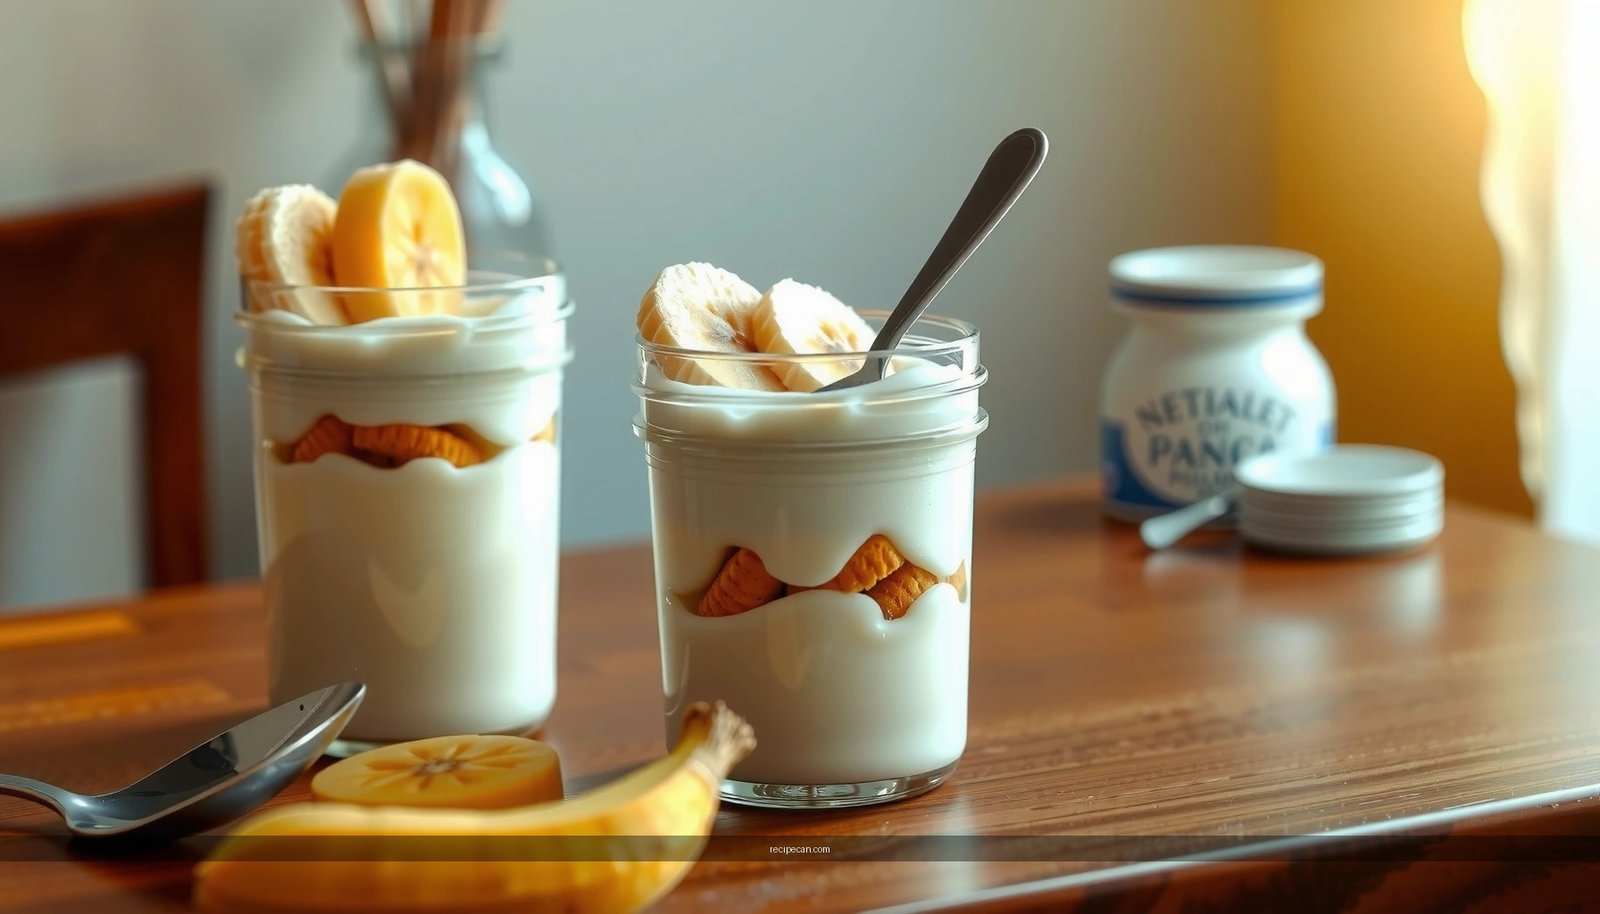
Layer Like a Pro: Texture in Every Bite
Layering isn’t just aesthetics—it’s how you control mouthfeel, banana-to-cream ratio, and how quickly wafers hydrate.
Use a repeatable layering pattern:
– Start with a thin layer of pudding at the bottom. This prevents dry cookies from sticking and creates an even hydration base.
– Add wafers/cookies in a single layer, lightly pressed.
– Spoon on pudding again, then repeat.
Repeat evenly for balance:
– Aim for an equal number of “cookie planes” so each bite includes both cookie softness and creamy custard.
– Overloading wafers increases mush; underloading wafers makes filling taste isolated.
Stop layering once you reach the top for a clean finish:
– Smooth the top with an offset spatula or spoon. A tidy surface isn’t just pretty—it helps the top set evenly while chilling.
Where most people go wrong:
They either cake on too many cookies (leading to pasty mush) or spread bananas too heavily (causing localized thinning). Use thin, even pudding layers and distribute banana in consistent amounts.
Banana Prep for Maximum Flavor
The bananas are the star, but they’re also the main source of moisture. Prepping them well preserves flavor and reduces the chance of pudding “weeping” liquid.
Slice right before assembling.
– Pre-sliced bananas brown, soften, and release more liquid into the dessert.
Toss lightly with lemon juice (optional).
– Lemon juice doesn’t “cook” the bananas; it simply slows oxidation so the banana flavor tastes fresher and looks more appetizing.
– Keep it light—too much can add a noticeable tang and thin perceived sweetness.
Layer bananas so they stay juicy—not submerged.
– Arrange banana slices in a single, gentle layer over pudding.
– Avoid piling bananas against the bowl edges where excess moisture can migrate into the pudding pocket.
Pro move for stronger banana presence (without watery risk):
– Reserve a small portion of banana slices for the top layer. They stay fresher visually and taste more intensely because they sit closer to the surface (where you taste them first).
Upgrade the Crunch and Finish
Once the structure is right, you can customize. The goal is to contrast creamy custard with a clean, fresh crunch and a lifted aroma.
Add crushed wafers on top for a quick crunch.
– Sprinkle crushed wafers as a finishing layer right before serving (or a short chill window before serving if you prefer slightly softened crunch).
Optional: fold in whipped cream for extra lightness.
– Whipping cream can make the filling feel airy, but be careful: if your pudding base is too warm or too thin, whipped cream can destabilize.
– Fold whipped cream into fully chilled, thick pudding for the best stability.
Let it chill so layers meld—then serve cold.
– Refrigeration is what turns “layers” into “dessert.” Chill at least several hours so cookies hydrate evenly and bananas integrate.
Serving tip:
If you’re serving for a crowd, set out for 10–15 minutes before scooping. Cold custard is stable, but a slightly softened temperature improves banana aroma.
Make-Ahead Tips and Storage
This recipe is built for advance planning—perfect for holidays, potlucks, and client dinners—because the best texture comes from time in the fridge.
Assemble ahead and chill:
– Chill at least 4–6 hours.
– Overnight is even better: it allows cookies to hydrate uniformly without turning uniformly mushy.
Cover well to prevent the top from drying out:
– Use a lid or cover with plastic wrap pressed gently against the surface (or parchment under plastic) to reduce skin formation.
Store leftovers correctly:
– Keep in the refrigerator and enjoy within 3 days for the best banana flavor and cookie texture.
– After that, the filling may remain delicious, but cookie softness increases and contrast decreases.
If you see slight moisture later:
That can happen with very ripe bananas. Still, it’s often salvageable—stir gently before serving (or serve from the top layers first). Next time, aim for “spotty golden” bananas for maximum set.
Conclusion
This not your mama’s banana pudding recipe upgrades flavor and structure: use real, properly ripe bananas; cook a thicker filling until it coats a spoon; chill before layering; and build even pudding-and-wafers stacks so the dessert sets without watery separation. Add optional vanilla bean, brown sugar, or a touch of espresso for deeper banana notes, finish with crunch on top, and let time in the fridge do the heavy lifting. Make it once, chill it well, and serve it cold—then tell me what flavor twist you added (vanilla bean, brown sugar, or espresso).
Frequently Asked Questions
What makes “not your mama’s banana pudding” different from traditional banana pudding?
“Not your mama’s banana pudding” recipes usually upgrade the classic by using a richer custard base, more complex flavorings (like vanilla bean, brown butter, or a hint of espresso), and a better cream layer. Many versions also include a thicker homemade pudding and a distinctive topping—sometimes whipped cream and crushed cookies, or even layers that don’t rely on boxed mix. The result is a banana dessert that tastes elevated and more “adult,” while still keeping the nostalgic banana pudding vibe.
How do you prevent banana slices from turning brown in banana pudding?
Toss your banana slices with a little lemon juice (or pineapple juice) right before assembling to slow oxidation. For best texture, add bananas closer to serving time rather than hours ahead, because they continue to soften as the pudding chills. If your recipe uses layered banana pudding, you can also pat bananas dry lightly to reduce excess liquid that could thin the custard.
Why is my banana pudding watery or runny, and how can I fix it?
Watery banana pudding usually comes from undercooking the custard or using too little thickener (like cornstarch) relative to the milk. Stir continuously while heating until the pudding thickens and reaches a gentle boil, then cook briefly to activate the starch. Also cool the pudding properly before layering—warm pudding can melt toppings and create separation, which makes the whole dessert feel runnier.
Which cookies work best in a “not your mama’s banana pudding” recipe?
The most popular choice is vanilla wafers, because they soften nicely and balance the creamy custard. For a more “not your mama’s” flavor and texture, try vanilla wafers plus a layer of crushed vanilla sandwich cookies, graham crackers, or even a buttery shortbread for a deeper, bakery-style taste. Aim for cookies that will hold up in the pudding without becoming completely mushy unless your recipe is designed to be that way.
What is the best way to assemble and chill not your mama’s banana pudding for the right texture?
For best results, layer pudding and cookies evenly, then finish with whipped topping (or stabilized whipped cream) so it doesn’t collapse as it chills. Cover the dish and refrigerate until fully set—typically 4 to 6 hours, or overnight if the recipe is built for it—so the custard thickens and the flavors meld. If you’re including fresh bananas, consider adding them in the final assembly phase or ensuring they’re layered right before chilling to maintain a better structure.
References
- Banana pudding
https://en.wikipedia.org/wiki/Banana_pudding - Custard
https://en.wikipedia.org/wiki/Custard - https://en.wikipedia.org/wiki/Tempering_(cooking
https://en.wikipedia.org/wiki/Tempering_(cooking - Pudding
https://en.wikipedia.org/wiki/Pudding - Pudding | Definition, Types, & Ingredients | Britannica
https://www.britannica.com/topic/pudding - https://www.fsis.usda.gov/food-safety/safe-food-handling-and-preparation/eggs-and-food-safety
https://www.fsis.usda.gov/food-safety/safe-food-handling-and-preparation/eggs-and-food-safety - https://pubmed.ncbi.nlm.nih.gov/?term=salmonella+eggs+food+safety
https://pubmed.ncbi.nlm.nih.gov/?term=salmonella+eggs+food+safety - Google Scholar Google Scholar
https://scholar.google.com/scholar?q=banana+pudding+recipe+history - Google Scholar Google Scholar
https://scholar.google.com/scholar?q=banana+custard+pudding+food+science+starch+thickening - Google Scholar Google Scholar
https://scholar.google.com/scholar?q=egg+custard+temperature+temper+eggs+salmonella+prevention