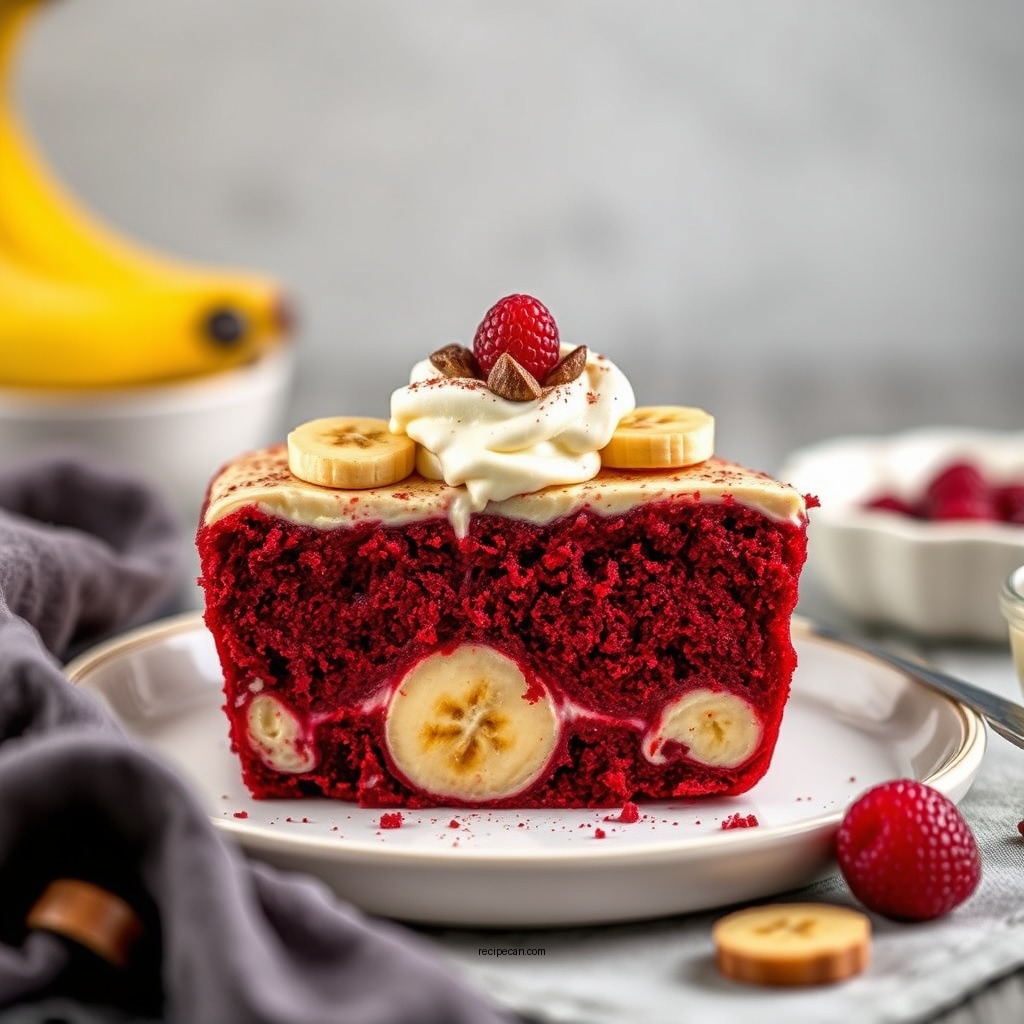
Creating a red velvet banana pudding is a simple yet rewarding endeavor that promises to delight your guests. This unique dessert harmoniously blends the rich, velvety flavors of red velvet cake with the creamy, comforting texture of banana pudding. With this recipe, you can easily impress family and friends at any gathering, whether it’s a holiday celebration or a casual get-together.
Ingredients You’ll Need

To embark on your red velvet banana pudding adventure, gather the following essential ingredients:
– Red Velvet Cake Mix: 1 box (typically 15.25 oz)
– Eggs: 3 large
– Vegetable Oil: 1/2 cup
– Water: 1 cup
– Bananas: 3 ripe, sliced
– Instant Vanilla Pudding Mix: 1 box (3.4 oz)
– Milk: 2 cups
– Whipped Cream: 2 cups (for layering and topping)
– Cream Cheese: 8 oz, softened (for added richness)
– Sugar: 1/4 cup (to sweeten the cream cheese)
– Vanilla Extract: 1 tsp
Optional garnishes include chocolate shavings, crushed nuts, or additional banana slices for a decorative touch.
Preparing the Red Velvet Base


Start by baking the red velvet cake, which serves as the foundation of your dessert.
1. Preheat your oven to 350°F (175°C).
2. In a large mixing bowl, combine the red velvet cake mix, eggs, vegetable oil, and water. Mix until smooth and well combined.
3. Grease and flour a 9×13 inch baking pan, then pour the batter into the pan.
4. Bake for 25-30 minutes or until a toothpick inserted in the center comes out clean.
5. Once baked, allow the cake to cool completely in the pan. This is crucial as it prevents the cake from becoming too crumbly when you prepare it for layering.
Tips for Crumbling the Cake: Once cooled, gently remove the cake from the pan and crumble it into bite-sized pieces. Ensure the pieces are not too fine, as larger chunks will provide a pleasing texture in the final dessert.
Making the Banana Pudding

While the cake cools, it’s time to prepare the banana pudding. You can either make it from scratch or opt for store-bought pudding if you’re pressed for time.
Step-by-Step Guide for Homemade Banana Pudding
1. In a medium saucepan, whisk together the instant vanilla pudding mix and milk.
2. Cook over medium heat, stirring continuously until the mixture thickens (about 5-7 minutes). Remove from heat.
3. In a separate bowl, beat the softened cream cheese and sugar together until smooth. Gradually add the thickened pudding mixture and vanilla extract, mixing until well combined.
4. Fold in half of the whipped cream to lighten the pudding mixture. Reserve the remaining whipped cream for topping.
Store-Bought Option: If you’re short on time, simply prepare instant vanilla pudding according to the package instructions and skip the cream cheese step for a quicker alternative.
Assembling the Layers
Now that you have both your red velvet cake and banana pudding ready, it’s time to assemble the layers:
1. In a large trifle dish or individual serving cups, start by adding a layer of crumbled red velvet cake at the bottom.
2. Follow with a layer of banana pudding, then add a layer of sliced bananas.
3. Repeat the layering process until all ingredients are used, finishing with a generous layer of whipped cream on top.
4. For a creative presentation, consider garnishing with chocolate shavings, crushed nuts, or additional banana slices.
Creative Ideas for Presentation
– Use clear glass dishes to showcase the beautiful layers.
– Top with a drizzle of chocolate sauce for an indulgent touch.
– Add edible flowers for a pop of color if serving at a formal event.
Serving Suggestions
The best way to serve red velvet banana pudding is chilled. Each serving should ideally be about one cup, but adjust according to your guests’ appetites.
Storing Leftovers
If you have any leftovers, store them in an airtight container in the refrigerator. This dessert is best enjoyed within 2-3 days, as the bananas may begin to brown and the cake could lose its texture over time.
Variations and Add-Ins
To further personalize your red velvet banana pudding, consider these variations:
– Fruit Additions: Include layers of strawberries or raspberries for added flavor and color.
– Flavor Twists: Incorporate a hint of almond extract into the pudding for a different flavor profile.
– Gluten-Free Option: Substitute the red velvet cake mix with a gluten-free version to accommodate dietary restrictions.
– Vegan Alternative: Use a vegan cake mix, almond milk, and a dairy-free whipped topping to create a plant-based version.
Common Mistakes to Avoid
When making red velvet banana pudding, be mindful of the following common pitfalls:
– Overmixing the Cake Batter: This can lead to a dense cake. Mix just until combined.
– Using Ripe Bananas: Ensure your bananas are perfectly ripe for the best flavor and texture.
– Skipping the Cooling Step: Allowing the cake to cool completely is essential for proper layering.
– Not Layering Properly: Ensure even distribution of cake, pudding, and bananas for a balanced dessert.
By avoiding these mistakes, you can ensure a delightful texture and flavor balance in your dessert.
With these steps, you can easily create a stunning red velvet banana pudding that will wow everyone at your table. Don’t hesitate to experiment with the recipe and make it your own! Enjoy this delicious treat and share it with family and friends for special occasions or casual gatherings.
Frequently Asked Questions
What ingredients are needed for a red velvet banana pudding recipe?
To make a delicious red velvet banana pudding, you will need red velvet cake mix, ripe bananas, instant vanilla pudding mix, milk, cream cheese, whipped cream, and optional toppings like chocolate shavings or extra banana slices. This combination creates a rich, velvety texture and the signature flavor profile that makes this dessert a crowd-pleaser.
How do I prepare the layers in a red velvet banana pudding?
To prepare layers in a red velvet banana pudding, start by baking the red velvet cake according to package instructions and then let it cool. Crumble the cake into small pieces, then layer them in a trifle dish with sliced bananas, prepared vanilla pudding, and whipped cream, repeating the layers until all ingredients are used, finishing with whipped cream on top.
Why should I use instant pudding for red velvet banana pudding?
Using instant pudding for red velvet banana pudding is convenient and ensures a creamy, smooth consistency without the need for cooking. It saves time and allows the flavors to meld together quickly, leading to a dessert that is both easy to prepare and deliciously satisfying.
What is the best way to store leftover red velvet banana pudding?
The best way to store leftover red velvet banana pudding is to cover it tightly with plastic wrap or transfer it to an airtight container and refrigerate. It can last up to 3 days in the fridge, but for optimal flavor and texture, it’s best enjoyed within the first 1-2 days after preparation.
Which variations can I try with a red velvet banana pudding recipe?
You can try several variations with a red velvet banana pudding recipe, such as adding chocolate chips for extra sweetness, incorporating crushed nuts for a crunchy texture, or replacing bananas with strawberries for a fruitier twist. Additionally, consider using flavored whipped toppings or adding a splash of vanilla or almond extract to enhance the overall flavor profile.
References
- Red velvet cake
https://en.wikipedia.org/wiki/Red_velvet_cake - https://www.bbc.co.uk/food/recipes/red_velvet_cake_68118
https://www.bbc.co.uk/food/recipes/red_velvet_cake_68118 - Rice Pilaf With Pumpkin, Currants and Pine Nuts Recipe
https://www.nytimes.com/recipes/1020584/red-velvet-cake.html - https://www.cdc.gov/healthyweight/healthy_eating/recipes.html
https://www.cdc.gov/healthyweight/healthy_eating/recipes.html - https://www.sciencedirect.com/topics/food-science/red-velvet-cake
https://www.sciencedirect.com/topics/food-science/red-velvet-cake - https://pubmed.ncbi.nlm.nih.gov/30518496/
https://pubmed.ncbi.nlm.nih.gov/30518496/ - https://www.foodnetwork.com/recipes/food-network-kitchen/red-velvet-cake-recipe-2108599
https://www.foodnetwork.com/recipes/food-network-kitchen/red-velvet-cake-recipe-2108599 - Google Scholar Google Scholar
https://scholar.google.com/scholar?q=red+velvet+banana+pudding+recipe - Google Scholar Google Scholar
https://scholar.google.com/scholar?q=red+velvet+cake - Google Scholar Google Scholar
https://scholar.google.com/scholar?q=banana+pudding+recipe