Creating mini fruit tarts is an enjoyable and rewarding experience, perfect for impressing guests or treating yourself at home. These delightful pastries combine a buttery crust, a creamy filling, and a colorful array of fresh fruits, making them a visually stunning and delicious dessert choice. In this article, you will learn how to make mini fruit tarts from scratch, covering each component in detail, including the crust, filling, and topping with fresh fruits. Let’s dive into this delightful recipe!
Crafting the Perfect Tart Crust

The crust is where the magic begins. A well-made tart crust should be flaky and buttery, providing the perfect foundation for the creamy filling and fresh toppings. To achieve this, a simple combination of all-purpose flour, unsalted butter, granulated sugar, and a pinch of salt is essential.
1. Ingredients:
– 1 ½ cups all-purpose flour
– ½ cup unsalted butter, chilled and cubed
– ¼ cup granulated sugar
– ¼ teaspoon salt
– 1 egg yolk
– 2-4 tablespoons cold water
2. Preparation:
– In a large mixing bowl, combine the flour, sugar, and salt. Add the chilled butter and use a pastry cutter or your fingers to mix until the mixture resembles coarse crumbs.
– Incorporate the egg yolk and add cold water, one tablespoon at a time, until the dough holds together without being sticky.
– Form the dough into a disk, wrap it in plastic wrap, and refrigerate for at least 30 minutes. This chilling step is crucial as it prevents the dough from shrinking during baking.
3. Baking:
– Preheat the oven to 375°F (190°C). On a floured surface, roll out the dough to about 1/8 inch thick. Cut out rounds that fit your mini tart pans.
– Transfer the dough circles into the pans, pressing gently into the edges. Poke holes with a fork to prevent bubbling.
– Bake for 15-20 minutes or until golden brown. Allow the crusts to cool completely before filling.
Preparing the Creamy Filling

The filling is where you can truly customize your mini fruit tarts. A classic filling combines cream cheese, powdered sugar, and vanilla extract for a rich and creamy texture.
1. Ingredients:
– 8 ounces cream cheese, softened
– ½ cup powdered sugar
– 1 teaspoon vanilla extract
– Optional: 1 tablespoon lemon juice for brightness
2. Preparation:
– In a mixing bowl, beat the softened cream cheese until smooth. Gradually add powdered sugar and vanilla extract, mixing well until creamy.
– For a refreshing twist, add a tablespoon of lemon juice to enhance the flavor profile. This tangy addition helps balance the sweetness of the fruit and filling.
3. Chilling:
– Once combined, chill the filling in the refrigerator for about 30 minutes. This helps it firm up slightly, making it easier to pipe into the tart shells.
Selecting the Best Fresh Fruits
The beauty of mini fruit tarts lies in their vibrant toppings. Selecting a variety of fresh, colorful fruits not only enhances visual appeal but also contributes different flavors and textures.
1. Best Fruit Choices:
– Strawberries: Sweet and juicy, they add a bright red color.
– Blueberries: Their deep blue color and burst of flavor offer a lovely contrast.
– Kiwi: The bright green adds a tropical flair and tangy taste.
– Raspberries: These delicate fruits add a pop of color and tartness.
– Banana slices: For a creamy texture and subtle sweetness.
2. Ripeness and Quality:
– Ensure that the fruits are ripe but not overripe to maintain texture and flavor. Fresh, seasonal fruits will provide the best taste, as well as the most appealing appearance.
Top 5 Fruits for Mini Tarts (2023)
| # | Fruit | Color | Flavor | Texture |
|---|---|---|---|---|
| 1 | Strawberry | Red | Sweet | Juicy |
| 2 | Blueberry | Blue | Sweet | Firm |
| 3 | Kiwi | Green | Tart | Creamy |
| 4 | Raspberry | Red | Tart | Soft |
| 5 | Banana | Yellow | Sweet | Soft |
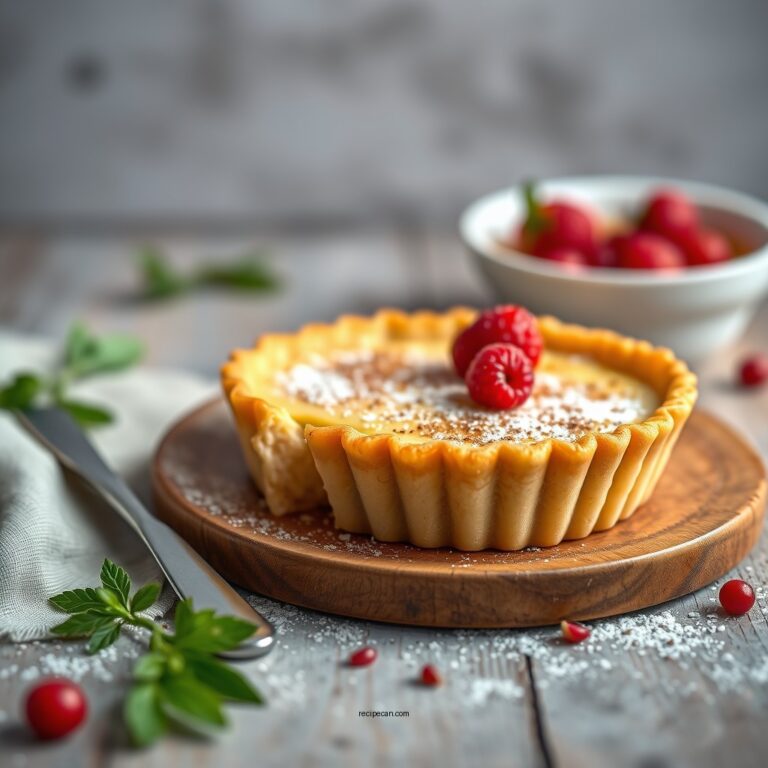
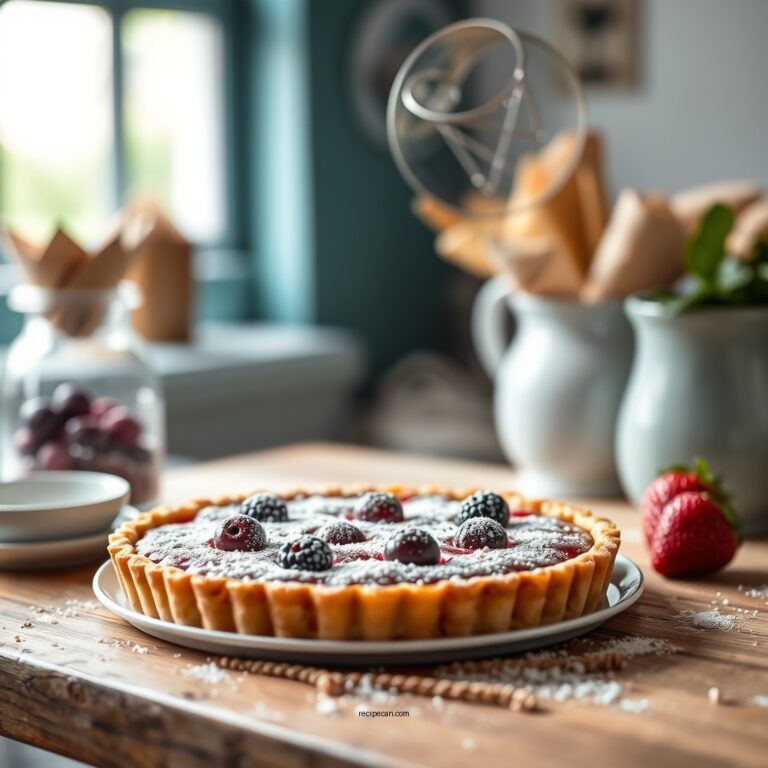
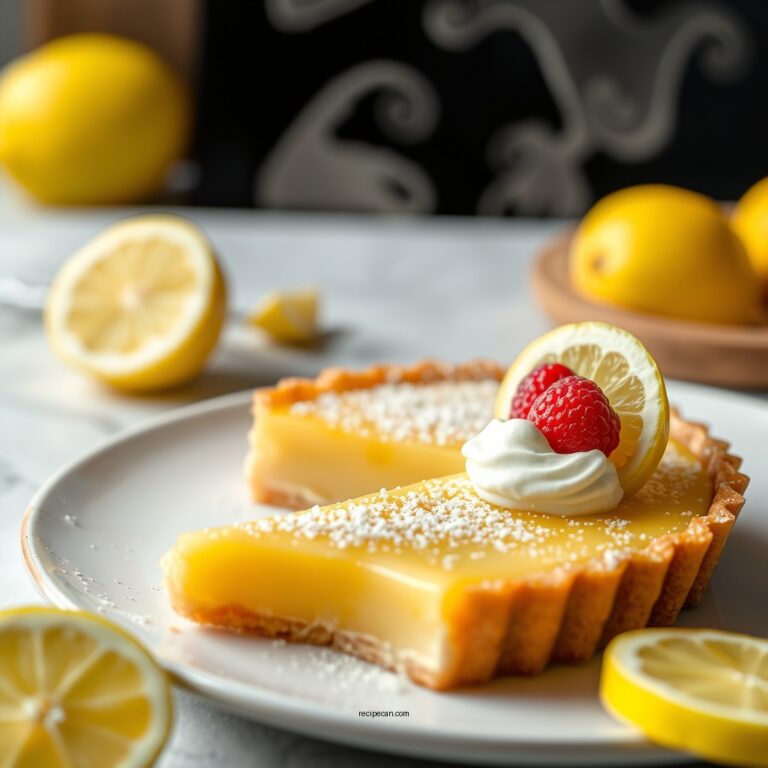
Assembling Your Mini Fruit Tarts
With the tart crusts and filling ready, it’s time to assemble your mini fruit tarts. This step is where your creativity can shine.
1. Filling the Tarts:
– Once the tart shells have cooled completely, use a piping bag or a spoon to fill each shell generously with the creamy filling. Aim for a smooth and even layer that fills the shell without overflowing.
2. Topping with Fruits:
– Arrange your selected fruits on top of the filled tarts. You can create patterns or simply pile them on for a more casual look. The key is to use a variety of colors and shapes to make each tart visually appealing.
3. Final Touch:
– For an added touch of elegance, consider mixing some fruits to create a colorful medley on each tart.
Adding a Glaze for Shine
To enhance the appearance and flavor of your mini fruit tarts, a glaze can be applied over the fruits. This not only gives them a beautiful shine but also adds a layer of sweetness.
1. Glaze Ingredients:
– ¼ cup apricot jam
– 1 tablespoon water
2. Preparation:
– In a small saucepan, combine the apricot jam and water. Heat over low heat until the jam melts and combines with the water into a smooth mixture.
– Allow the glaze to cool slightly before using it.
3. Application:
– Use a pastry brush to gently apply the glaze over the arranged fruits on the tarts. This will create a glossy finish that enhances the visual appeal.
Tips for Serving and Presentation
Presentation is key when serving mini fruit tarts. Here are some tips to elevate your serving experience:
1. Plating:
– Arrange the tarts on a decorative platter, alternating colors and shapes for an elegant display. Fresh mint leaves can be added for an extra pop of color.
2. Serving Temperature:
– Serve the tarts chilled for the best flavor and texture. This not only makes them refreshing but also ensures that the cream filling remains firm.
3. Garnishing:
– Consider dusting the tarts with powdered sugar or adding a dollop of whipped cream beside the tarts for an indulgent touch.
Storing Leftover Tarts
If you happen to have any leftover mini fruit tarts, proper storage is essential to maintain their freshness.
1. Storage Method:
– Place any uneaten tarts in an airtight container and store them in the refrigerator. This will help preserve the crust’s texture and keep the filling fresh.
2. Shelf Life:
– For optimal freshness, consume the tarts within 2-3 days. The fruit will start to lose its quality after this period.
3. Freezing:
– If you want to prepare in advance, consider freezing the tart shells without the filling. Once baked and cooled, they can be frozen for up to a month. When ready to serve, simply thaw and fill with the creamy mixture and fresh fruits.
Mini Fruit Tart Preparation Steps
Creating mini fruit tarts is an enjoyable process that yields a delightful dessert perfect for any gathering. Each step, from crafting the flaky crust to selecting the freshest fruits, plays a crucial role in the overall outcome. By following these steps, you’ll impress your family and friends with your culinary skills. Gather your ingredients, unleash your creativity, and start baking your own mini fruit tarts today!
Frequently Asked Questions
What ingredients do I need for a mini fruit tart recipe?
To make a delicious mini fruit tart, you will need a basic tart dough made from flour, butter, sugar, and eggs. Additionally, you’ll need a filling such as pastry cream or whipped cream and an assortment of fresh fruits like strawberries, blueberries, kiwi, and raspberries for topping. Using high-quality ingredients will enhance the flavor and presentation of your mini fruit tarts.
How do I make the tart crust for mini fruit tarts?
To create the tart crust, combine flour, sugar, and cold butter in a bowl, mixing until it resembles coarse crumbs. Add a beaten egg and mix until the dough comes together. Chill the dough for at least 30 minutes, then roll it out and cut it into small circles to fit your tartlet pans before baking until golden brown. This simple process yields a flaky and buttery crust that perfectly complements the fruit filling.
Why is my mini fruit tart filling runny, and how can I fix it?
A runny filling in mini fruit tarts can occur if you don’t cook the pastry cream long enough or if the fruit releases excess moisture. To fix this, ensure you cook the filling until it thickens properly, and consider using a layer of melted chocolate or a thin layer of apricot glaze on the crust to create a moisture barrier. Additionally, patting the fruit dry before adding it to the tart can help prevent excess liquid.
What is the best way to arrange fruit on mini tarts for presentation?
For an eye-catching presentation, start by placing larger fruit pieces, like halved strawberries or kiwi slices, in the center of the mini tarts and then fill in with smaller fruits like blueberries and raspberries around them. Overlap the fruit slightly for a layered effect and consider adding a sprig of mint or a dusting of powdered sugar for an extra touch. This method not only enhances visual appeal but also ensures a delightful mix of flavors in every bite.
Which fruits are best for decorating mini fruit tarts?
The best fruits for decorating mini fruit tarts are those that are vibrant and have a variety of textures and flavors. Berries like strawberries, blueberries, and blackberries are popular choices due to their color and sweetness. Other excellent options include kiwi, mango, and orange slices, which add a tropical flair. Choose seasonal fruits for the freshest taste and most appealing presentation.
References
- Tart
https://en.wikipedia.org/wiki/Tart - https://www.foodnetwork.com/recipes/food-network-kitchen/mini-fruit-tarts-recipe-2119904
https://www.foodnetwork.com/recipes/food-network-kitchen/mini-fruit-tarts-recipe-2119904 - https://www.thekitchn.com/how-to-make-mini-fruit-tarts-227689
https://www.thekitchn.com/how-to-make-mini-fruit-tarts-227689 - Google Scholar Google Scholar
https://scholar.google.com/scholar?q=mini+fruit+tart+recipe - Google Scholar Google Scholar
https://scholar.google.com/scholar?q=fruit+tart+baking+techniques - Google Scholar Google Scholar
https://scholar.google.com/scholar?q=dessert+recipes+mini+tart - https://www.ncbi.nlm.nih.gov/pmc/articles/PMC5012306/
https://www.ncbi.nlm.nih.gov/pmc/articles/PMC5012306/ - https://www.sciencedirect.com/science/article/pii/S2351978915000086
https://www.sciencedirect.com/science/article/pii/S2351978915000086 - mini fruit tart recipe – Search results
https://en.wikipedia.org/wiki/Special:Search?search=mini+fruit+tart+recipe - https://www.ncbi.nlm.nih.gov/search/research-articles/?term=mini+fruit+tart+recipe
https://www.ncbi.nlm.nih.gov/search/research-articles/?term=mini+fruit+tart+recipe