Craving a milkshake ninja recipe that delivers a perfect milkshake every time? This article answers how to make a perfectly blended, restaurant-smooth milkshake with the right ingredients, ratios, and ninja-level technique for thick texture and bold flavor. Follow the steps, and you’ll get a consistently smooth result—no icy, watery shakes.
Make a perfect milkshake by building the right base (cold milk + creamy ice cream), blending briefly but thoroughly, and finishing with targeted flavor add-ins; do this and you’ll get a consistently silky texture without the “melty” disappointment. In this milkshake ninja recipe, you’ll master simple ingredient ratios, practical technique cues, and smart customization so every shake you make tastes restaurant-quality—fast.
Ninja Milkshake Ingredients

– Use cold milk and your favorite ice cream as the core base
– Pick one flavor booster (vanilla, cocoa, coffee, or fruit)
– Choose mix-ins like chocolate chips, cookie pieces, or caramel
A great milkshake starts with a reliable foundation: cold milk for smooth blending and ice cream for body, sweetness, and dairy fat—the elements that create that signature “creamy mouthfeel.” While you can technically make a milkshake with any ice cream, the texture outcome depends on fat level and how quickly the ice cream melts once blended.
Think of your milkshake like a flavor stack:
1. Base (structure): milk + ice cream
2. Booster (theme): vanilla, cocoa, coffee, or fruit flavor
3. Mix-ins (texture + pops): chips, cookie crumbs, caramel bits, or chopped fruit
For the booster, you can choose either:
– Extracts and powders (vanilla extract, cocoa powder, espresso powder) for even flavor distribution, or
– Syrups (chocolate syrup, caramel sauce, fruit sauce) for a more intense, dessert-shop taste.
When selecting mix-ins, aim for pieces that are either:
– Small enough to blend partway (chips, cookie crumbs), or
– Intentionally “chunky” (cookie chunks, brownie bites) if you prefer thicker sips.
Quality tip: For the smoothest “ninja” texture, keep mix-ins from being too large. Big chunks can create a gritty or uneven blend unless you slow down and blend longer.
Ninja-Style Flavor Ratios

– Start with 2–3 scoops of ice cream per cup of milk (adjust thickness to taste)
– Keep mix-ins measured so the shake stays smooth
– Add sweeteners only if your base isn’t already flavorful
Precise ratio control is the difference between a milkshake that drinks like silk and one that tastes diluted or overly heavy. Use this framework:
1) Choose your thickness target
– Thick shake (classic, spoon-able): ~2.5–3 scoops ice cream per cup of milk
– Medium shake (straw-friendly): ~2–2.5 scoops per cup
– Light shake (more like a shake “drink”): ~1.5–2 scoops per cup
If you’re following a typical “1 cup milk” measurement, you’re basically operating a “thickness knob.” Want to feel in control? Start with 2.25–2.5 scoops, blend, taste, then adjust in small increments (a splash of milk or a half-scoop of ice cream).
2) Keep mix-ins proportional to prevent graininess
A good rule: mix-ins should be noticeable, but not dominant. For every cup of milk and 2–3 scoops of ice cream, use approximately:
– 2–4 tablespoons mix-ins (chips, cookie pieces, crushed brownies), or
– ~1/4 cup maximum if they’re fairly fine (like cookie crumbs).
Too many mix-ins can trap unmixed solids and make the shake taste “stuck” instead of creamy.
3) Sweeten selectively
Most ice cream is already sweet, so additional sugar often pushes the shake into cloying territory. Consider sweeteners only when:
– You use low-sugar ice cream,
– Your booster is unsweetened (cocoa powder without syrup), or
– You’re using tart fruit (e.g., raspberries).
Instead of dumping extra sugar, start with small amounts—then taste and adjust.
Practical ratio map (to support decision-making)
Milkshake Base Ratios by Texture Goal (Homemade, 1 Cup Milk)
| # | Texture Goal | Ice Cream Scoops | Milk Amount | Blend Success Likelihood |
|---|---|---|---|---|
| 1 | Thick & spoonable | 2.8–3.0 | 1 cup | High |
| 2 | Classic creamy | 2.4–2.6 | 1 cup | High |
| 3 | Straw-friendly | 2.0–2.3 | 1 cup | Very High |
| 4 | Lighter shake | 1.6–1.9 | 1 cup | Medium |
| 5 | Ultra-thick (slow pour) | 3.2–3.5 | 1 cup | Low |
| 6 | Low-dilution, high-fat | 2.5–3.0 | 0.75 cup | High |
| 7 | Bonus smooth (less ice melt) | 2.2–2.6 | 1 cup (very cold) | Very High |
Blend for the Perfect Texture

– Blend 30–45 seconds for thick, smooth consistency
– Scrape down the sides once to prevent icy lumps
– Serve immediately for the best mouthfeel
Blending is where “good” becomes “legendary.” Most milkshake texture problems come from two issues: blending too briefly or not accounting for ingredient temperature.
Use time and technique, not guesses
A strong baseline for most blenders is:
– Start at low speed for 10 seconds to break up ice cream smoothly, then
– Blend on medium-high for 20–35 seconds, and
– Blend for a final 5–10 seconds after scraping down the sides.
Why scrape once? Because ice cream clings to blender walls and creates pockets of partially blended dairy that later show up as:
– tiny icy granules,
– uneven sweetness, or
– a “chalky” mouthfeel from unmixed cocoa or fruit puree.
Keep ingredients cold for consistent results
If milk is warm, you lose thick body quickly. If ice cream is rock-solid, some blenders may struggle to circulate. The sweet spot is:
– milk chilled from the refrigerator, and
– ice cream just soft enough to scoop cleanly (not fully melted).
Serve immediately (don’t let physics win)
Milkshakes naturally separate as fat and water phases re-balance once blending stops. Serving right away ensures:
– maximum creaminess,
– best foam stability, and
– fewer texture shifts over time.
If you’re serving multiple people, pre-measure ingredients and blend in sequence rather than mixing everything and waiting.
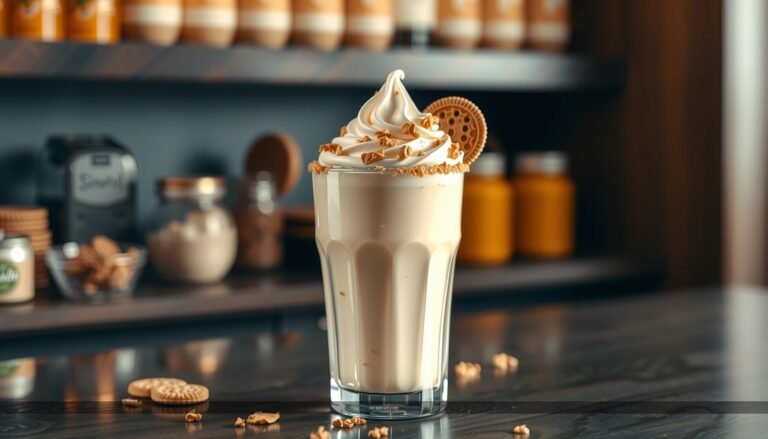
Easy Custom Toppings

– Add whipped cream, sprinkles, or crushed cookies for texture
– Drizzle with chocolate syrup, caramel, or fruit sauce
– Finish with a pinch of salt to enhance sweetness
Toppings are not just decoration—they’re a strategic flavor and texture layer. A milkshake ninja approach means choosing toppings that complement the booster and don’t overwhelm the base.
Smart topping pairings
– Chocolate or cocoa booster: chocolate drizzle + crushed chocolate wafer cookies, or mini chocolate chips
– Vanilla booster: caramel drizzle + flaky salt + shortbread crumble
– Coffee booster: cocoa dust + toffee bits (or chocolate shavings)
– Fruit booster (berry): fruit sauce swirl + whipped cream + crushed freeze-dried fruit
The “pinch of salt” trick
A small pinch of salt can make sweetness taste more “rounded” and less flat. Use it like seasoning, not like a savory ingredient:
– Start with a micro-pin (literally a few grains) on the finished surface, then adjust next time.
Texture design: choose one “crunch” and one “sauce”
To keep the shake balanced:
– Choose one crunchy element (sprinkles, cookie crumbs, toasted nuts), and
– Choose one sauce element (caramel, chocolate syrup, berry compote).
Too many textures can make each sip inconsistent.
Troubleshooting Common Milkshake Problems
– Too thick? Add a splash of milk and blend again
– Too thin? Add more ice cream or a few ice cubes
– Grainy or icy? Blend longer and start with colder ingredients
Even with a great ratio, variables happen: blender power, ingredient temperature, ice cream hardness, and mix-in size. Here’s how to fix issues quickly—without starting over.
Too thick
Symptoms: hard to drink, “gloopy” texture, spoon sticks too much.
Fix:
– Add 1–2 tablespoons milk, blend 10–15 seconds, then reassess.
– Repeat in small increments so you don’t overshoot into thin territory.
Too thin
Symptoms: watery mouthfeel, weak flavor impact, fast separation.
Fix:
– Add 1/2 scoop ice cream, blend 15–20 seconds.
– If needed, add 1–2 ice cubes for extra thickness—but note that some ice cubes can create icy texture if blended insufficiently.
Grainy or icy
Symptoms: visible granules, “frosted” bite, cocoa or fruit feels uneven.
Fix:
– Blend longer: 45–60 seconds total, scraping once mid-way.
– Start with colder ingredients next time. Chilled milk and scoopable (not melting) ice cream reduce ice formation.
A key lens: graininess often comes from ingredient temperature differences and insufficient blend time, not from your chosen flavor booster.
Serving & Make-Ahead Tips
– Chill glasses (optional) for extra cold, thick results
– Use fresh mix-ins for the best flavor and crunch
– If storing, stir before serving since it can separate
Milkshakes are best “right now,” but planning can still make them excellent for parties, meal prep, or busy schedules.
Serving upgrades that take seconds
– Chill your glasses: Rinse with cold water and refrigerate 10 minutes, or use a quick freezer chill for sturdier cold retention.
– Pre-stage toppings: Portion sprinkles and crushed cookies in small bowls so assembly stays smooth.
– Use consistent garnish placement: A controlled swirl of sauce makes the shake look premium—and prevents topping from sinking immediately.
Make-ahead reality (and how to handle it)
Milkshakes can separate after storage. That doesn’t mean they’ve “failed”—it means the emulsion shifts.
If you store a milkshake:
– Transfer to an airtight container,
– Refrigerate promptly,
– When ready, stir or re-blend for 10–20 seconds to restore consistency.
Best practice: prepare the base close to serving time, and add toppings just before drinking for maximum texture.
Workflow tip for repeatable results
If you’re making multiple shakes:
1. Pre-measure ice cream scoops and mix-ins into separate containers,
2. Keep milk refrigerated,
3. Blend one shake at a time to preserve temperature and texture.
That process is how you keep the “milkshake ninja” consistency even under pressure.
A great milkshake ninja recipe is all about the right ratio, a fast high-quality blend, and a tailored finishing touch. Follow the ingredient guide, blend smart, then top it your way—try one flavor combo today and tweak the ratios next time for your perfect shake.
References
- Milkshake
https://en.wikipedia.org/wiki/Milkshake - https://www.britannica.com/topic/milkshake
https://www.britannica.com/topic/milkshake - Emulsion
https://en.wikipedia.org/wiki/Emulsion - Ice cream
https://en.wikipedia.org/wiki/Ice_cream - https://www.fda.gov/food/buy-store-serve-safe-food/raw-milk-and-raw-milk-products
https://www.fda.gov/food/buy-store-serve-safe-food/raw-milk-and-raw-milk-products - Calcium – Health Professional Fact Sheet
https://ods.od.nih.gov/factsheets/Calcium-HealthProfessional/ - USDA FoodData Central
https://fdc.nal.usda.gov/ - https://pubmed.ncbi.nlm.nih.gov/?term=milkshake
https://pubmed.ncbi.nlm.nih.gov/?term=milkshake - Google Scholar Google Scholar
https://scholar.google.com/scholar?q=milkshake+recipe+emulsion+science - Google Scholar Google Scholar
https://scholar.google.com/scholar?q=milkshake+nutrition+study+dairy+dessert