Get the classic Italian cannoli cream recipe for a sweet ricotta filling that’s smooth, thick, and pipe-ready—without grainy texture or bland flavor. This winner recipe answers whether you can reliably make cannoli cream at home and still taste the real Sicilian-style balance of ricotta, sugar, and citrus. Follow these steps and you’ll end up with the exact consistency you need to fill cannoli immediately.
Make authentic Italian cannoli cream by sweetening well-drained ricotta and folding it with citrus zest (and optional chocolate) until it’s smooth, airy, and pipeable. With a quick chill and the right mixing technique, you’ll get a classic ricotta filling that holds its shape in cannoli shells without turning watery.
Choose the Right Ricotta

The foundation of any classic sweet ricotta filling is the ricotta itself. In Italian cannoli, the goal isn’t just “creamy”—it’s stable cream that can be piped cleanly and tastes fresh rather than bland or watery.
What to look for
– Well-drained ricotta (often sold as “whole milk ricotta” or “fiore di ricotta” in specialty markets) tends to be thicker and produces a cannoli cream with body.
– If your ricotta is the kind that releases whey (liquid) or looks loose when you open the tub, you’ll need to drain it first to avoid a thin filling.
Practical ways to fix extra-wet ricotta
– Strain before mixing: Line a fine-mesh sieve or colander with cheesecloth, then let ricotta drain in the refrigerator for 1–4 hours (overnight is fine).
– How much difference it makes: Even a small amount of whey can weaken emulsification, causing the cream to separate slightly or become harder to pipe.
Why drainage matters scientifically
Ricotta is a curd-based dairy product. When excess liquid remains, it dilutes fat and protein concentration, so the filling won’t set properly after chilling. A thicker ricotta creates a better network of proteins and fat that traps air during brief beating—exactly what you want for a silky, spoonable, pipeable cannoli cream.
Ricotta Choices for Cannoli Cream (Practical Bench Guide)
| # | Ricotta Type | Drain Time (Chill) | Texture Outcome | Best Use |
|---|---|---|---|---|
| 1 | Well-Drained Whole-Milk Ricotta | 0–60 min | Thick, stable, easy to pipe | Classic cannoli cream |
| 2 | Part-Skim Ricotta | 2–4 hrs | Slightly firmer, less silky | Lower-fat variation |
| 3 | Store Ricotta (Loose/Wet) | 4–12 hrs | Can thin unless drained | Only if pre-strained |
| 4 | Homemade Drained Ricotta | As needed | Often very fresh and rich | Best flavor payoff |
| 5 | Ricotta Sold “StraIata/Set” | 0–2 hrs | Good body, consistent texture | Reliable batch results |
| 6 | Low-Moisture Ricotta | 0–60 min | Thick; may need slight loosening | High-volume prep |
| 7 | “Whipped”/Aerated Ricotta | Not recommended | Texture can deflate after chilling | Use only in emergencies |
Sweeten and Flavor the Cannoli Cream

Once you have ricotta with the right moisture level, you’re ready to season it like a traditional Italian filling. The key is balancing sweetness with brightness—cannoli cream should taste rich, not cloying.
Sweetness: powdered sugar over granulated
– Use powdered sugar to dissolve smoothly and avoid a grainy mouthfeel.
– Add it gradually (or mix at medium-low speed briefly) so the sugar integrates without over-aerating.
Citrus zest: the “classic Italian” signature
– Add orange or lemon zest for a fragrant aroma that lifts the dairy richness.
– Zest is high in essential oils; only the colored outer layer matters. Grate carefully to avoid the bitter white pith.
Vanilla for depth
– A small amount of vanilla extract or vanilla paste rounds out the flavor.
– Think of vanilla as a supporting note: it shouldn’t overpower the ricotta or citrus.
Analytical tip: target balance
If your ricotta tastes mildly sweet already, you may need less sugar. If it’s very mild and creamy (common with lower-fat styles), slightly more sugar can restore classic cannoli flavor.
Add Chocolate (Optional)

Chocolate is common in many cannoli variations, especially when you want a richer contrast to citrus. Done correctly, it adds bursts of flavor without making the cream heavy.
How to add chocolate
– Fold in mini chocolate chips so they distribute evenly and stay bite-sized.
– Incorporate gently to avoid breaking down the cream’s texture.
Choose the right chocolate
– Milk chocolate chips: sweeter, softer, more kid-friendly.
– Dark chocolate chips (e.g., 60–70%): more pronounced bitterness that pairs beautifully with orange zest.
– Traditional-style cannoli sometimes uses finely chopped chocolate; mini chips are more consistent for filling and piping.
Sweetness adjustment
If you add chocolate, taste the cream before chilling:
– If it already tastes sweet, reduce sugar slightly next batch.
– If your chocolate is on the sweeter side (milk chocolate), consider leaning on zest and vanilla instead of adding extra sugar.
Get the Perfect Texture
Cannoli cream is all about texture control. Overmixing can make the filling too loose, while undermixing leaves lumps and a less luxurious mouthfeel.
Beat briefly—don’t whip
– Mix until uniform and creamy, typically 30–90 seconds depending on ricotta starting texture and your mixing method.
– The goal is to integrate air and sugar, not transform ricotta into a mousse that collapses later.
Chilling is not optional
– Chill the cannoli cream for at least 1–2 hours, or up to 24 hours for deeper flavor cohesion.
– Cold temperature firms the fat and improves pipeability, so your filling holds shape in the shells.
What “right texture” looks like
– It should be thick enough that it holds a peak when piped.
– It should not weep liquid at the edges.
– It should feel smooth and cohesive, not gritty or grainy.
Troubleshooting
– Too runny after chilling: Your ricotta likely needed more draining. Next time strain longer; this batch can be rescued by chilling longer and adding a small amount of additional drained ricotta.
– Too stiff: Let it sit at room temperature for 5–10 minutes, then mix just until workable.
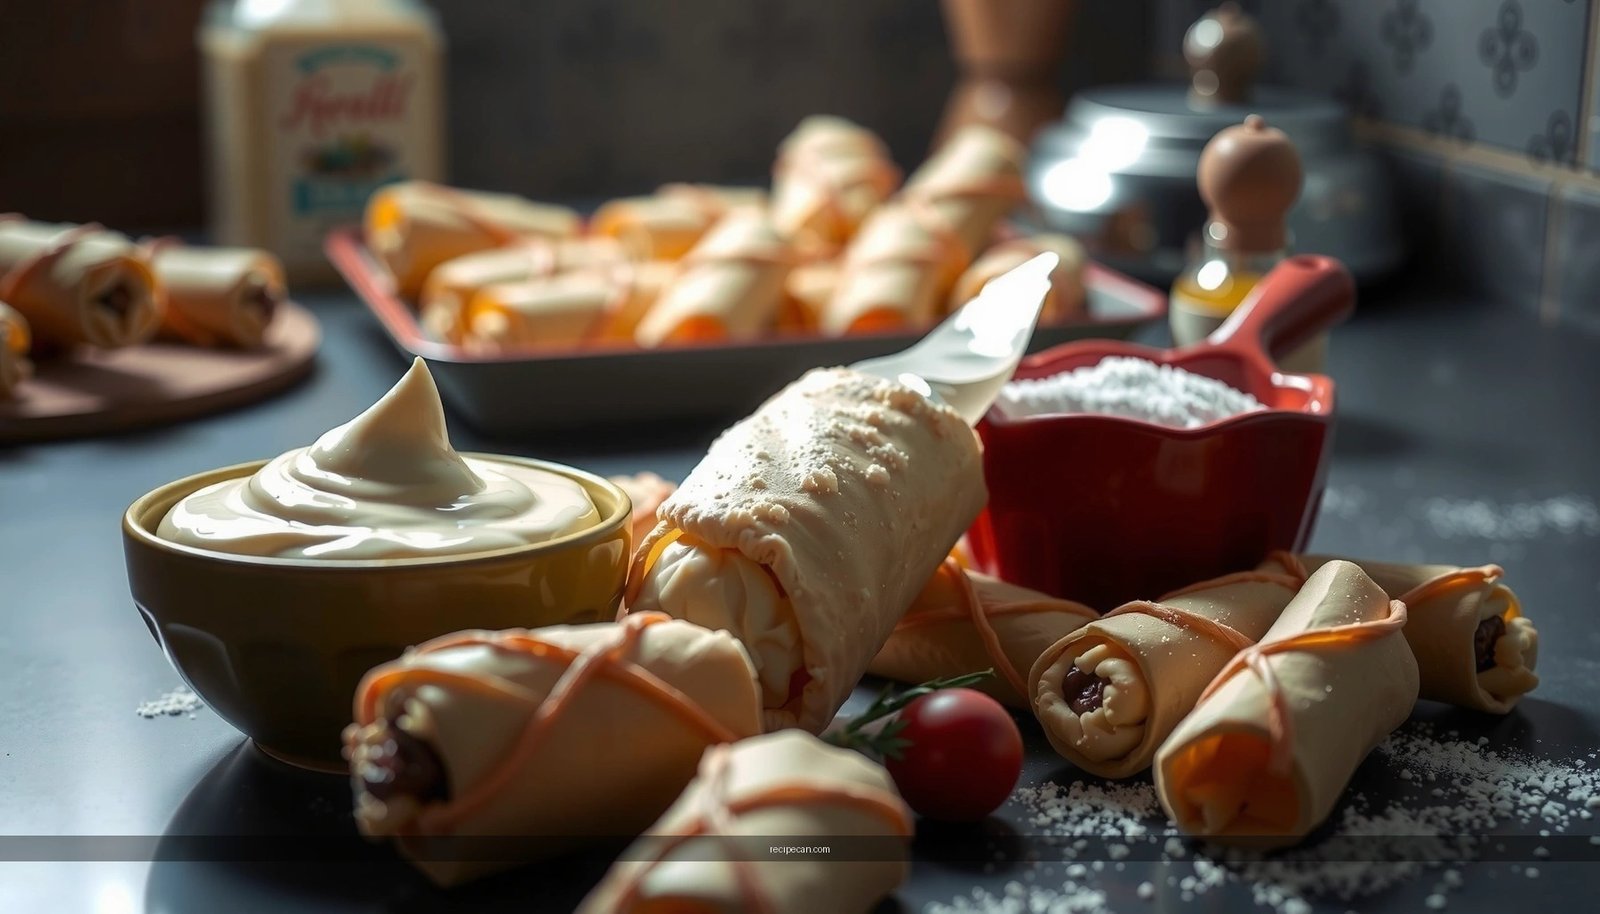
How to Fill Cannoli Shells
The best cannoli cream is only half the job—timing matters just as much as flavor. Cannoli shells are typically crisp, and they soften when filled.
Fill just before serving
– Pipe or spoon filling into shells as close to serving as possible to maintain crisp texture.
– If you’re hosting, stage shells and filling near the final service window.
Piping technique
– Fit a piping bag with a medium tip (or a plain round tip for classic control).
– Fill gently, squeezing evenly so the cream distributes without tearing the shell.
Operational best practices
– Hold the shells upright or set them in a tray to prevent filling from pooling.
– If you’re making for multiple servings, consider assembling in waves (e.g., fill 8–12 at a time).
Storage and Make-Ahead Tips
Planning ahead can improve workflow and consistency—especially if you’re preparing for an event. The main rule: separate the moisture-sensitive components.
Refrigerate the cream properly
– Store cannoli cream in an airtight container in the refrigerator.
– Press plastic wrap directly against the surface (optional, but it helps reduce moisture loss and odor absorption).
Shell strategy for best crunch
– Store unfilled shells separately in a cool, dry place.
– Assemble when ready so the shells remain crisp rather than soggy.
How long it keeps
– Cannoli cream typically stays best for up to 2–3 days refrigerated (flavor remains excellent, texture may soften slightly over time).
– Shells remain crisp longer when stored unfilled; exposure to humidity is the enemy.
Flavor improvement with time
Interestingly, cannoli cream can taste even better after chilling because citrus oils and vanilla distribute more evenly through the ricotta matrix. Just don’t wait too long to fill your shells.
—
Italian cannoli cream comes down to well-drained ricotta, balanced sweetness, and a short chill that turns the mixture into a smooth, pipeable filling. Follow the steps above—especially the ricotta drainage and brief mixing—and you’ll get a classic, creamy ricotta filling with bright citrus notes (and optional chocolate) that’s best enjoyed right after you fill your cannoli shells. Try it today, and adjust the zest and chocolate to match the exact flavor profile you love.
Frequently Asked Questions
What is the traditional Italian cannoli cream recipe?
Traditional Italian cannoli cream is made with sweetened ricotta (or drained ricotta), sugar, vanilla, and often a touch of cinnamon, mixed until smooth and thick. Many home bakers also add mini chocolate chips (or chopped candied fruit) to create the classic cannoli filling. The key is using properly drained ricotta so the cream has a rich, creamy texture that doesn’t run inside the shell.
How do I make cannoli cream thick and not runny?
To thicken Italian cannoli cream, drain ricotta thoroughly by pressing it in cheesecloth for several hours (or overnight in the refrigerator). Use full-fat ricotta and mix it until smooth, breaking up any grains, then add sugar gradually so it fully incorporates without watering down the filling. If you need extra stability, chill the cannoli filling before piping it into shells, and avoid assembling too far ahead of time.
Why does my cannoli cream taste grainy or watery?
Graininess usually comes from ricotta that wasn’t drained enough or wasn’t blended properly. Watery cannoli cream is often caused by over-sugaring, using low-fat ricotta, or letting the mixture sit warm before filling. For the best result, choose high-quality ricotta, drain well, and chill the finished cream so it thickens and the flavors meld.
Which ingredients make the best cannoli cream flavor—vanilla or chocolate?
Vanilla is the classic aromatic that gives Italian cannoli cream its warm, bakery-style flavor, so it’s a common go-to for authentic taste. Chocolate chips add sweetness and texture, making the filling feel more like traditional cannoli filling you’d find in Italian pastry shops. For balance, use vanilla in the base and fold in chocolate only after the ricotta mixture is smooth, so the flavors stay distinct.
What’s the best way to store and use cannoli cream before filling shells?
Store Italian cannoli cream in an airtight container in the refrigerator, ideally with plastic wrap pressed directly onto the surface to prevent moisture loss. It’s best to fill cannoli shells shortly before serving, since the shells can soften when they sit with the filling. If you prepare ahead, keep the cream chilled and pipe or spoon it into shells right before serving for the crispiest texture and best flavor.
References
- Google Scholar Google Scholar
https://scholar.google.com/scholar?q=italian+cannoli+cream+recipe+ricotta+sugar+vanilla - Google Scholar Google Scholar
https://scholar.google.com/scholar?q=cannoli+filling+ricotta+candied+orange+chocolate+chip+mascarpone - Google Scholar Google Scholar
https://scholar.google.com/scholar?q=authentic+sicilian+cannoli+filling+ingredients+technique - Cannoli
https://en.wikipedia.org/wiki/Cannoli - Ricotta
https://en.wikipedia.org/wiki/Ricotta - Candied fruit
https://en.wikipedia.org/wiki/Candied_fruit - Vanilla
https://en.wikipedia.org/wiki/Vanilla - Cinnamon
https://en.wikipedia.org/wiki/Cinnamon - https://www.britannica.com/topic/cannoli
https://www.britannica.com/topic/cannoli - Ricotta | Cheese, Whey, & Production | Britannica
https://www.britannica.com/topic/ricotta


