Want a good milkshake recipe that’s creamy, thick, and actually easy to make? This guide delivers the winning formula—exact ratios, simple steps, and the one key technique that keeps your shake rich and spoon-thick instead of icy. Whether you’re using vanilla, chocolate, or strawberry, you’ll get a consistently smooth result in minutes.
You can make a creamy, thick milkshake at home by blending cold milk with ice cream (start with a thicker base), adding your flavor boost, then adjusting the texture with small increments of milk or ice cream. In the steps below, you’ll get dependable ratios, practical troubleshooting tips, and fast flavor variations so you can consistently nail that “restaurant-thick” milkshake.
A good milkshake recipe is simple: blend cold milk with ice cream and a flavor boost, then adjust thickness with more milk or ice cream. In this guide, you’ll learn how to make a creamy, thick milkshake at home with easy add-ins and reliable ratios.
What Makes a Good Milkshake Recipe

A “good” milkshake is less about a complicated ingredient list and more about texture control. The goal is a smooth, spoonable, shake that holds its shape for a few minutes rather than turning into a drink. That outcome is driven by three variables: temperature, fat content (from ice cream), and how much liquid flavoring you introduce.
– Use cold ingredients (especially milk and ice cream) for the best texture
Cold ingredients increase viscosity and help the blender create tiny ice crystals instead of a watery suspension. If your ice cream is already soft-melted, your shake will be runnier and will separate faster.
– Choose a thick base (vanilla ice cream works as the foundation)
Vanilla ice cream is ideal because it’s neutral—your add-ins (cocoa, fruit, syrup) can clearly show up without tasting muddy. Also, most vanilla ice creams are formulated to be thick and creamy, which gives you a stronger starting point.
– Sweetness and flavor come from add-ins like syrup, cocoa, or fruit
Add-ins are where you “engineer” flavor. But they also change liquid content. For example, fruit can add water; syrups add sugar (and a little viscosity); cocoa adds flavor with minimal added liquid. A thick shake is easiest when you think in terms of flavor intensity vs. added moisture.
Essential Ingredients and Ratios

Milkshake recipes succeed when the base ingredients are proportioned correctly and flavor is added in a controlled way. A simple approach is to treat ice cream as the “structure” and milk as the “adjuster.” Once you understand that, you can repeat the results every time.
– Start with ice cream as the main ingredient, then add milk gradually
A reliable starting point for a thick milkshake is:
2–3 scoops ice cream + 1/4 to 1/2 cup cold milk (depending on how thick you want it).
If you blend and it’s too thick, add milk 1 tablespoon at a time. If it’s too thin, add more ice cream in small portions.
– Flavor options: chocolate syrup, vanilla extract, cocoa powder, or fruit
Use a flavor system that fits your pantry and your timeline:
– Chocolate syrup for classic dessert-shop richness
– Cocoa powder for deeper chocolate flavor (use enough to be noticeable, and blend thoroughly to avoid grittiness)
– Vanilla extract to round out sweetness and make flavors taste more “complete”
– Fruit for bright, refreshing shakes (fresh or frozen)
– Add a pinch of salt to make flavors taste richer
Salt is a “professional” shortcut. A tiny pinch makes chocolate taste more chocolatey and helps fruit flavor pop without adding sweetness. It doesn’t make the shake taste salty—used lightly, it improves perception of all other flavors.
To make ratio planning easier, here’s a practical guide you can use as a baseline for thick, classic, and drinkable milkshakes:
Milkshake Base Ratios for Different Thickness Levels
| # | Milkshake Style | Ice Cream (Scoops) | Cold Milk (Cup) | Expected Texture | Recommended Adjustments |
|---|---|---|---|---|---|
| 1 | Extra-Thick (Spoon-Ready) | 3 | 1/4 | Holds peaks briefly | Add milk 1 Tbsp at a time |
| 2 | Thick & Creamy | 2.5 | 1/3 | Spoonable, smooth | If too thick: +1 Tbsp milk |
| 3 | Classic Milkshake | 2 | 3/8 | Drinkable but dense | If too thin: +1/2 scoop ice cream |
| 4 | Medium (All-Around) | 1.75 | 1/2 | Smooth, pourable | Add milk or ice cream in 1 Tbsp steps |
| 5 | Light Milkshake (Less Ice Cream) | 1.5 | 5/8 | More like a dessert shake | For thicker: swap in 1/4 scoop more ice cream |
| 6 | Chocolate-Rich (Thick Baseline) | 2.5 | 1/3 | Extra body with cocoa | Add 1–2 tsp cocoa, blend 20–30 sec |
| 7 | Fruit-Thick (Frozen Fruit Added) | 2 | 1/3 | Dense despite fruit | Use 1/2 cup frozen fruit; reduce milk if needed |
Step-by-Step Mixing Instructions

A thick milkshake recipe is mostly technique: order of operations, blending time, and incremental adjustments. If you follow a consistent workflow, you’ll get repeatable results even with different flavors.
– Blend milk and ice cream first until smooth before adding flavor
Start by combining your base first (ice cream + cold milk). Once the mixture is smooth, add flavoring—this prevents syrup/cocoa from sticking to the sides and improves overall texture.
– Stop and scrape the blender sides to keep it creamy and even
Scraping isn’t optional if you want a uniform shake. Flavors like cocoa powder and thick syrups can cling to the container, creating streaks. Scrape once around the middle of blending.
– For thicker shakes, add more ice cream; for thinner shakes, add milk
Think of thickness adjustments like a “thermostat”:
– If it’s too thick: add milk 1 tablespoon at a time
– If it’s too thin: add ice cream a small scoop or 2–3 spoonfuls at a time
Blend 10–15 seconds between adjustments so you can accurately judge texture.
Pro workflow (works for most flavors):
1. Add 2–3 scoops ice cream + 1/4 to 1/3 cup cold milk to the blender
2. Blend 20–30 seconds (pause if needed to prevent overheating)
3. Scrape sides, blend another 10–20 seconds
4. Add flavor boost (cocoa, syrup, vanilla, fruit) and a pinch of salt
5. Blend 10–20 seconds until uniform
Flavor Variations You Can Make Fast

Once your base is dialed in, flavor variation becomes simple. The key is to match the flavor add-in with the right texture strategy—especially for fruit, which can introduce extra liquid.
– Classic chocolate: cocoa powder or chocolate syrup + vanilla ice cream
For a classic thick chocolate milkshake, choose one:
– Chocolate syrup (about 1–3 tablespoons, to taste), or
– Cocoa powder (about 1–2 teaspoons), plus vanilla for depth
If using cocoa powder, blend a touch longer to fully hydrate the powder.
– Strawberry: fresh or frozen strawberries + a touch of sugar if needed
Use frozen strawberries for thickness—fresh strawberries can make the shake thinner if they’re juicy. If your berries are tart, add sugar in small increments (even 1/2 teaspoon can make a noticeable difference).
– Banana: banana slices + vanilla for a smooth, naturally sweet shake
Bananas are naturally thickening when blended properly. Start with 1/2 medium banana, and blend until silky. If it tastes too strong or dense, loosen with a small amount of milk.
A practical decision rule: if your add-in is watery (fruit), reduce milk slightly. If your add-in is thick (syrup), you may be able to keep milk at your thick baseline.
Tips for Extra-Thick, No-Lumps Milkshakes
If you’ve ever ended up with a runny shake or a gritty cocoa mouthfeel, the fix is usually straightforward. Below are the most reliable levers for a thick, lump-free finish.
– Use thick milk (or reduce milk slightly) to prevent a runny texture
Whole milk naturally provides more fat and body than lower-fat options. If you’re using a thinner milk, start with less milk and increase only if blending demands it.– Let ice cream soften just 2–3 minutes for easier blending
You want the ice cream flexible enough for the blender blades to work, but not melted. Two or three minutes is typically enough to improve blendability while preserving thickness.
– Avoid over-blending fruit (can add excess liquid) and add flavors gradually
Fruit breaks down into smaller pieces quickly—over-blending can increase perceived looseness as cellular water disperses. Blend to smooth consistency, then stop. Also, add flavor in steps so you can correct texture before it drifts too thin.
Troubleshooting quick fixes
– Lumps from cocoa powder: sift cocoa first or blend an extra 10–15 seconds after adding it.
– Runny shake: add 1–2 spoonfuls of ice cream, blend 10 seconds, reassess.
– Too thick to blend: add milk 1 tablespoon, blend again.
Make-Ahead, Storage, and Serving Ideas
Milkshakes are best served immediately, but you can still plan ahead with minimal compromise. The main issue with storage is melting and separation as ice cream warms.
– Serve right away for the thickest consistency
Thickness is highest right after blending. If you’re serving multiple people, consider batching: blend and pour, then repeat rather than mixing everything at once and waiting.
– If needed, chill briefly and re-stir or re-blend for best results
If your shake thins while you’re waiting, refrigerate it briefly (10–20 minutes), then re-stir and blend for 5–10 seconds to restore texture.
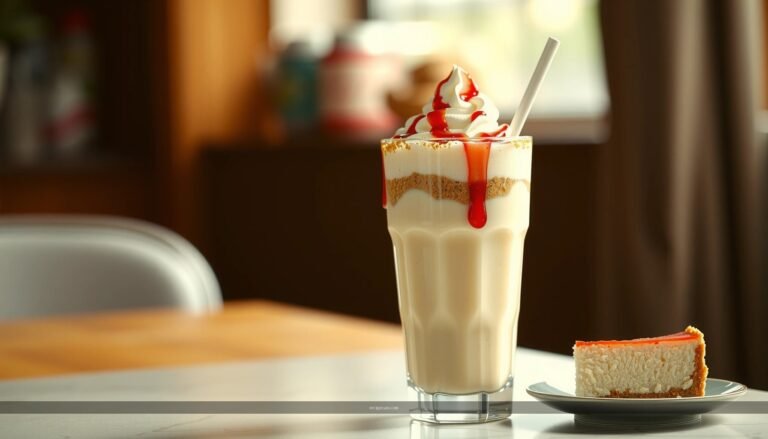
– Top ideas: whipped cream, sprinkles, crushed cookies, or a drizzle of syrup
Toppings add both visual appeal and texture contrast. Keep in mind that crunchy toppings can soften quickly, so add delicate items (like sprinkles) right before serving.
Serving temperature tip: even a slightly cooler shake tastes “thicker” because colder desserts feel more viscous on the tongue. If you want that thick, premium mouthfeel, keep ingredients cold and serve promptly.
A good milkshake recipe comes down to the right blend of cold milk, ice cream, and flavor—then adjusting thickness to your taste. Try one of the quick variations above, follow the simple ratios, and make your next shake thick, creamy, and ready to enjoy right away.
References
- Milkshake
https://en.wikipedia.org/wiki/Milkshake - Milk
https://en.wikipedia.org/wiki/Milk - https://www.britannica.com/topic/milkshake
https://www.britannica.com/topic/milkshake - Google Scholar Google Scholar
https://scholar.google.com/scholar?q=good+milkshake+recipe - Google Scholar Google Scholar
https://scholar.google.com/scholar?q=milkshake+recipe+technique+blending+temperature - Google Scholar Google Scholar
https://scholar.google.com/scholar?q=dairy+milkshake+food+safety+handling - https://pubmed.ncbi.nlm.nih.gov/?term=milkshake
https://pubmed.ncbi.nlm.nih.gov/?term=milkshake - https://www.cdc.gov/foodsafety/food-handling/index.html
https://www.cdc.gov/foodsafety/food-handling/index.html - https://www.foodsafety.gov/food-safety-charts.html
https://www.foodsafety.gov/food-safety-charts.html - Food Search | USDA FoodData Central
https://fdc.nal.usda.gov/food-search?query=milk