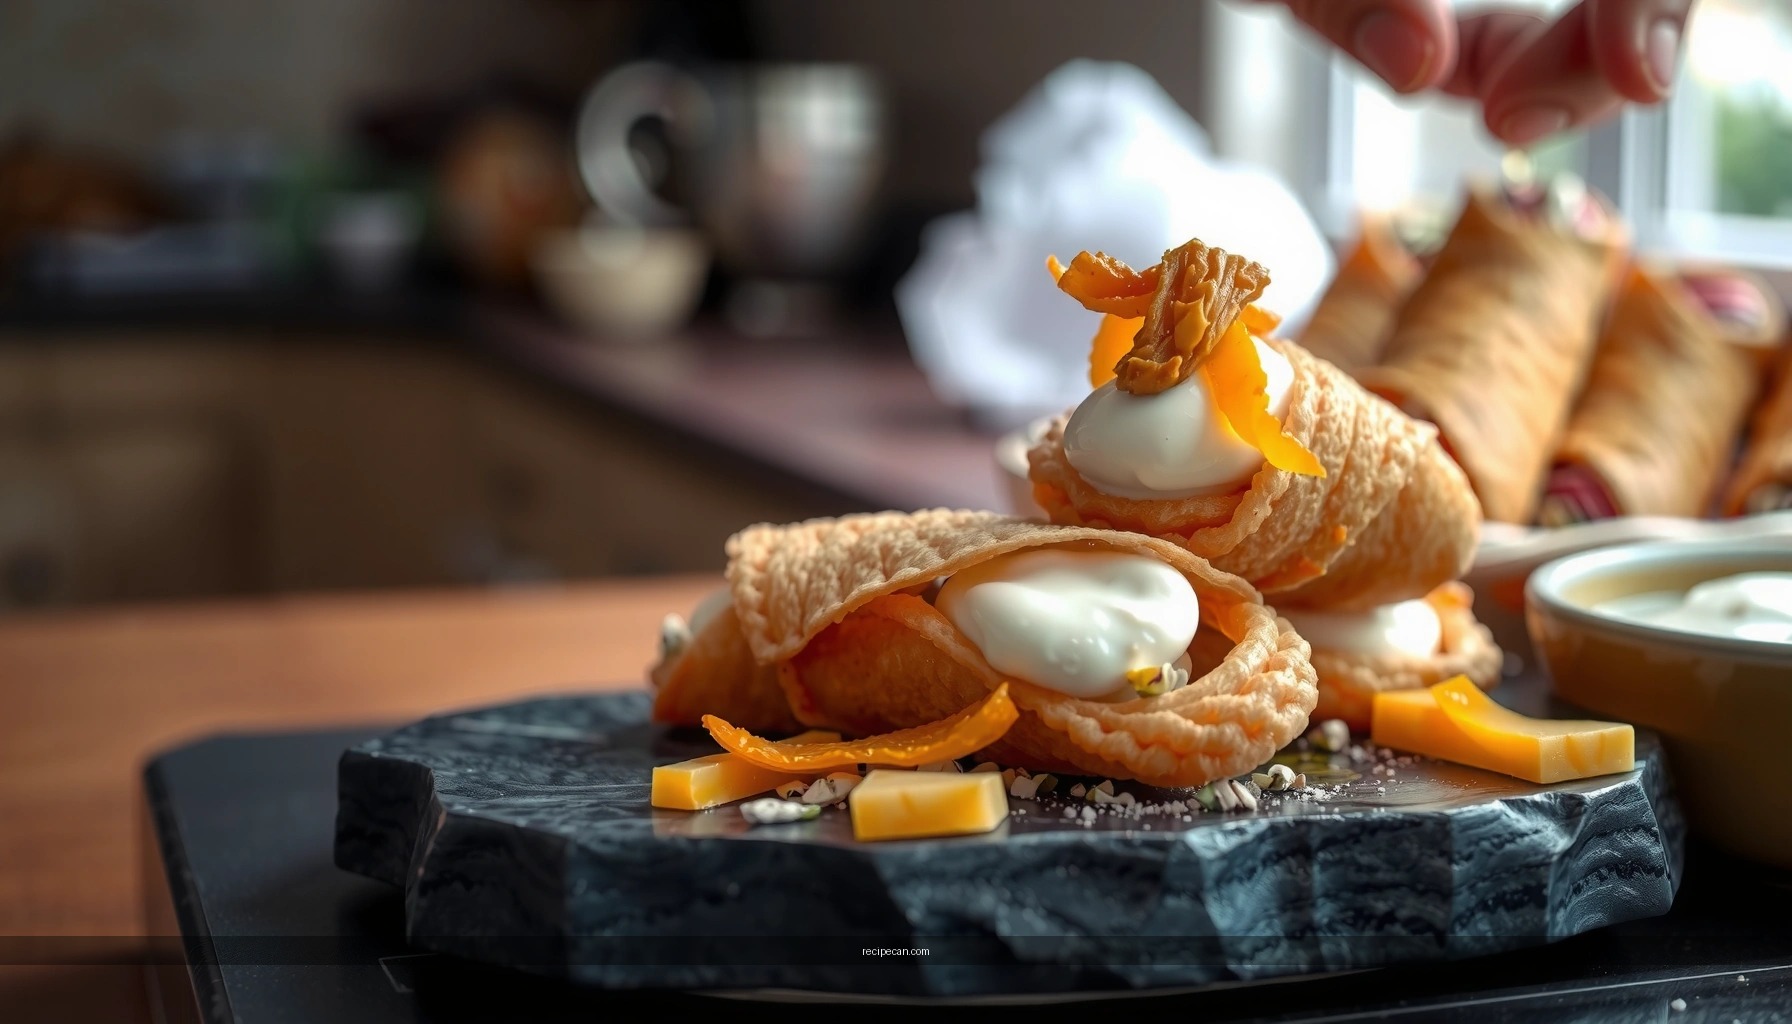
Looking for a good cannoli recipe that delivers classic crispy shells and a rich, creamy filling? This is the best winner when you want the traditional crunch that stays crisp and the cannoli cream that pipes smoothly and tastes unmistakably homemade. Follow this method for the right dough texture, perfect frying, and a filling that’s balanced, not runny.
A good cannoli recipe delivers two things at once: thin, crisp, golden shells and a ricotta filling that’s sweet, smooth, and not watery. Below, you’ll learn how to make the cannoli shells, properly drain and season ricotta for a stable creamy texture, and assemble them right before serving so you get the signature crunch.
A true classic is less about “secret ingredients” and more about process control—dough rest time, frying temperature, ricotta moisture management, and timing of filling. Treat this as an operations checklist: when each step is engineered correctly, the final cannoli tastes balanced, not greasy, and stays structurally sound long enough to serve.
Choosing the Right Ingredients

The foundation of great cannoli is ingredient selection done with texture in mind. Crisp cannoli shells depend on dough composition and frying fat behavior, while the creamy ricotta filling depends on moisture content, sweetness control, and flavor layering.
– Use fresh ricotta and quality sugar for a balanced filling.
Choose whole-milk ricotta (not “low moisture” marketing labels that can still vary). Fresh ricotta typically drains more predictably, which helps you avoid separation. For sweetness, use fine granulated sugar so it dissolves quickly and doesn’t create a grainy mouthfeel.
– Add mini chocolate chips and candied fruit for classic flavor.
Mini chocolate chips distribute chocolate notes evenly, reducing the risk of pockets that become too intense. Candied fruit (or orange peel/citron) adds a citrus-like sweetness that complements ricotta’s mild dairy profile—key in classic cannoli flavor.
– Select reliable cannoli shell materials (flour, wine, and fat) for crispness.
Cannoli dough commonly uses flour + a little wine (often Marsala or dry white wine) + fat. The wine contributes flavor and helps tenderness without requiring chemical leaveners. Use high-quality neutral oil or lard/butter/shortening depending on your tradition—fat choice affects crispness and how long the shells hold.
Key ingredient targets (what to look for)
A useful way to think about “quality” is how each ingredient behaves:
– Ricotta moisture level: higher moisture → runnier filling
– Sugar grind: coarser sugar → graininess
– Dough elasticity from wine/fat: affects how cleanly the shell forms and bubbles during frying
– Chocolate size: mini chips melt less aggressively, staying suspended in the filling
Making Crispy Cannoli Shells

Crisp cannoli shells come from three levers: rested dough, correct rolling thickness, and frying at the right temperature. If any one lever is off, the shell can become tough, pale, or greasy—three classic failures.
– Rest the dough before rolling to improve texture.
Resting (typically 30–60 minutes) relaxes gluten so the dough rolls thinner without shrinking back. That matters because thin dough equals faster crisping and better blister formation. Cover the dough to prevent surface drying, which can cause uneven rolling and bubbles.
– Fry at the right temperature for bubbles and crisp edges.
The dough should sizzle immediately but not darken instantly. If oil is too cool, shells absorb more oil and become soft. If too hot, the exterior sets before the center cooks, leaving brittle shells that can crack rather than crisp. Use a thermometer if possible; otherwise, test with a small scrap—proper frying bubbles appear quickly and the shell color moves to a warm golden shade without burning.
– Shape shells on forms and cool fully before filling.
Wrap dough around cannoli tubes or molds snugly and fry until blistered and golden. Remove carefully, then let shells cool completely. Warm shells steam as they cool, which can soften the filling later and shorten the crunch window.
Ingredient-to-process consistency
To build a “business-quality” repeatable outcome, standardize your workflow:
1. Rest dough (timer on).
2. Roll to consistent thickness (visual check: you want “thin but not transparent”).
3. Fry in batches that preserve oil temperature.
4. Cool shells on a rack (avoid trapping steam like you would on a flat plate).
Recommended equipment and role in texture
Cannoli Shell Variables That Control Crispness
| # | Process Variable | Target | Why It Matters | Impact Score |
|---|---|---|---|---|
| 1 | Oil temperature | 350–365°F (177–185°C) | Sets shell quickly; reduces oil absorption | High |
| 2 | Dough rest | 40–60 minutes | Improves stretch and thin rolling | High |
| 3 | Shell thickness (rolled) | ~1.5–2.0 mm | Balances bubble formation and structural strength | Med-High |
| 4 | Fry time per shell | 45–75 seconds | Achieves golden color without burning edges | Med |
| 5 | Cooling method | Wire rack 10–15 min | Prevents steam softening and keeps shell crisp | Med |
| 6 | Drain time after frying | 30–60 seconds on rack | Reduces excess surface oil without trapping steam | Med |
| 7 | Frying batch size | 2–4 shells per batch | Maintains oil temperature for consistent crispness | Low-Med |
Preparing the Ricotta Filling

Most “bad cannoli” complaints come from ricotta that wasn’t managed. The goal is ricotta that behaves like a cohesive cream—spoonable, thick, and able to hold inside a fried shell without weeping.
– Drain ricotta well to prevent a runny filling.
Drain ricotta in a fine-mesh strainer for at least 2–4 hours (or overnight in the refrigerator). For maximum reliability, press gently in cheesecloth. If you see excess whey pooling, the filling will eventually seep into the shell and soften it.
– Sweeten and flavor with sugar, vanilla, and citrus zest.
Sweeten with sugar to taste, then add vanilla for roundness and citrus zest (orange or lemon) for classic brightness. Zest also helps flavors pop against the mildness of ricotta without adding more liquid.
– Fold gently to keep the filling light and creamy.
Overmixing can make ricotta feel dense or slightly broken. Fold in additions—like chocolate chips and candied fruit—using a spatula until evenly distributed.
Ricotta texture troubleshooting (what “good” looks like)
A well-prepared filling should:
– hold soft peaks when piped,
– spread slowly rather than pour,
– feel creamy rather than grainy or watery.
If it’s too thick, mix in a teaspoon of cream or a spoonful of drained ricotta water substitute (not the whey); if too thin, drain longer—watering it down rarely improves flavor.
Mixing and Assembling for Best Texture
Assembly timing is the difference between “chef-level cannoli” and “dessert that loses its signature crunch.” The standard approach is: fill near serving.
– Combine ricotta with chocolate chips and optional candied fruit.
Use mini chocolate chips for even distribution. Candied fruit should be chopped if large pieces threaten uneven bite and texture.
– Fill shells right before serving for maximum crunch.
Cannoli shells absorb moisture over time. Even a well-drained filling contains humidity that will soften the shell. Plan your bake/fry schedule so shells cool while filling firms slightly in the fridge, then pipe and serve.
– Pipe filling generously and finish with extra chocolate or zest.
A piping bag gives consistency and prevents tearing the shell. For a polished finish, sprinkle extra mini chocolate chips and a touch more citrus zest on top.
Practical workflow:
1. Fry shells → cool completely on rack.
2. Prepare filling → chill until ready to pipe.
3. Assemble in small batches (for example, 6–10 cannoli at a time).
4. Garnish and plate immediately.
Serving, Storage, and Make-Ahead Tips
Cannoli is best treated like a fresh product with short “optimal eating” time. Storage guidance should focus on preserving texture and preventing the inevitable shell-softening.
– Keep filled cannoli refrigerated briefly, but expect softer shells.
If you must store assembled cannoli, refrigerate in a covered container to prevent drying, but understand the crunch will diminish faster. For best results, aim for same-day consumption.
– Store shells separately from filling for best results.
Keep shells at room temperature in an airtight container (or lined with paper towels if they’re still slightly warm earlier). Store filling separately in the refrigerator in an airtight container.
– Make filling ahead and assemble closer to serving time.
You can make the filling a day ahead; it often tastes even better after flavors meld. Keep it chilled, then pipe into shells right before guests arrive.
Serving best practices
For events and hospitality settings:
– Plate cannoli in a single layer to reduce crushing.
– Provide napkins—chocolate and zest are delicious but can be messy.
– Consider offering a “last-minute filling station” if you’re scaling production.
Common Mistakes (and How to Fix Them)
Even experienced cooks run into issues. The good news: most cannoli problems are diagnosable and fixable.
– Watery ricotta: drain longer and use a finer blend if needed.
If your filling is loose, it’s usually insufficient draining or ricotta that separates. Drain longer (overnight is common), and blend briefly until smooth—then recheck thickness before sweetening adjustments.
– Tough shells: check dough resting time and frying temperature.
Toughness often comes from under-rested dough or oil temperature that’s too low. Rest longer and verify oil temperature with a thermometer. Properly fried shells should be blistered and crisp, not chewy.
– Soggy cannoli: fill last minute and avoid long storage.
If shells soften, shorten the time between filling and serving. Also ensure you didn’t add overly wet ingredients (extra syrupy candied fruit or un-drained ricotta).
A final, operational tip: if you’re testing a new batch, don’t wait for a full production run—fry one shell, pipe a small portion of filling, and evaluate texture after 5–10 minutes. You’ll learn whether your moisture and timing controls are correct.
A good cannoli recipe comes down to drained, flavorful ricotta and perfectly fried shells. Follow these steps, assemble close to serving, and adjust sweetness to your taste—then make a batch and share them while they’re at their crispest. When you treat crispness and creaminess as measurable outcomes rather than guesses, your cannoli will consistently deliver that classic snap and creamy richness every time.
Frequently Asked Questions
What makes a cannoli recipe “good” instead of just okay?
A good cannoli recipe balances crisp, flaky shell texture with a creamy ricotta filling that isn’t watery or grainy. The shells should fry to a golden color and hold crunch long enough for serving, while the filling should be well-drained and sweetened to taste. Many classic results come from proper ricotta salting/draining, correctly flavored filling (vanilla, citrus zest, or chocolate), and using the right frying temperature for consistent shell crispness.
How do I prevent my cannoli filling from turning runny?
Runny cannoli filling usually happens when ricotta isn’t drained well or is too wet. For best results, strain the ricotta in a fine-mesh sieve (or cheesecloth) for several hours, then mix until smooth and fold in flavorings carefully so the texture stays thick. If needed, add small amounts of sifted powdered sugar gradually and taste as you go to keep the filling thick without becoming overly sweet.
How can I get crisp cannoli shells without them softening too quickly?
Crispness depends on the dough hydration, frying temperature, and handling after frying. Use a hot oil temperature (often around 350°F/175°C), fry until evenly golden, and drain well on a rack instead of paper towels to reduce steam-softening. Fill the cannoli shells right before serving, and if possible, cool shells fully before storing so your cannoli recipe maintains that fresh, crunchy bite.
Which ricotta is best for a classic cannoli recipe?
For a classic cannoli recipe, use high-quality whole-milk ricotta with a thick, creamy consistency rather than watery varieties. Look for ricotta labeled “whole milk” and avoid brands that come pre-loose or overly liquid. Even with good ricotta, always strain it—this step is what helps achieve the silky, thick cannoli filling that holds shape.
What’s the best way to make cannoli ahead of time for a party?
The best approach is to prepare components separately: make and store shells at room temperature in an airtight container, and keep the filling chilled in a covered bowl. Fill the cannoli just before serving to prevent sogginess, since shells soften when they absorb moisture from the filling. If you must assemble early, keep assembled cannoli chilled briefly and serve promptly for the best texture and presentation.
References
- Cannoli
https://en.wikipedia.org/wiki/Cannoli - https://www.britannica.com/topic/cannoli
https://www.britannica.com/topic/cannoli - Google Scholar Google Scholar
https://scholar.google.com/scholar?q=cannoli+recipe+ricotta+shell+deep+frying - Google Scholar Google Scholar
https://scholar.google.com/scholar?q=cannoli+shell+dough+crispness+deep+frying - Google Scholar Google Scholar
https://scholar.google.com/scholar?q=italian+pastry+shell+frying+technique+cannoli - https://pubmed.ncbi.nlm.nih.gov/?term=cannoli
https://pubmed.ncbi.nlm.nih.gov/?term=cannoli - https://pubmed.ncbi.nlm.nih.gov/?term=deep+fat+frying+texture+pastry
https://pubmed.ncbi.nlm.nih.gov/?term=deep+fat+frying+texture+pastry - https://www.sciencedirect.com/search?qs=cannoli
https://www.sciencedirect.com/search?qs=cannoli - https://www.sciencedirect.com/search?qs=deep+fat+frying+crisp+texture
https://www.sciencedirect.com/search?qs=deep+fat+frying+crisp+texture - https://www.fda.gov/food/consumers/food-safety-basics
https://www.fda.gov/food/consumers/food-safety-basics


