To make a delicious chocolate Swiss roll, start with a light and fluffy chocolate sponge cake filled with rich cream. This recipe will guide you through each step, ensuring your Swiss roll turns out perfect every time. Whether you’re a baking novice or a seasoned pro, you’ll learn how to create this delightful dessert that’s sure to impress. From the ingredients to the rolling techniques, this comprehensive guide will help you master this classic treat.
Ingredients You’ll Need

To create the perfect chocolate Swiss roll, gather the following essential ingredients:
For the Chocolate Sponge Cake:
– 3 large eggs: Room temperature for better aeration.
– 75g granulated sugar: To sweeten and stabilize the egg foam.
– 50g all-purpose flour: Provides the structure for the sponge.
– 25g cocoa powder: For that rich chocolate flavor.
– 1/2 teaspoon baking powder: To add lift.
– Pinch of salt: Enhances the sweetness.
For the Cream Filling:
– 200ml heavy cream: Whipped to a soft peak.
– 40g icing sugar: To sweeten the cream without adding graininess.
– 1 teaspoon vanilla extract: For flavor enhancement.
Optional Ingredients:
– Chocolate ganache: For a rich topping.
– Fresh berries: Such as raspberries or strawberries for garnish.
– Powdered sugar or cocoa powder: For dusting.
This combination of ingredients will yield a rich, indulgent dessert that is perfect for any occasion.
Preparing the Chocolate Sponge Cake

The preparation of the sponge cake is crucial to achieving the perfect texture. Start by preheating your oven to 180°C (350°F) and lining a baking tray (approximately 30×40 cm) with parchment paper.
1. Whisking Eggs and Sugar: In a mixing bowl, whisk the eggs and granulated sugar together until the mixture is pale and thick. This process, known as the ribbon stage, should take about 5-7 minutes. The mixture should hold a ribbon-like trail when the whisk is lifted.
2. Sifting Dry Ingredients: Sift together the flour, cocoa powder, baking powder, and salt. This step is essential as it aerates the dry ingredients and prevents lumps.
3. Folding the Mixture: Gently fold the dry ingredients into the egg mixture using a spatula. Be careful not to deflate the air bubbles; this is what makes the sponge light and fluffy. Use a figure-eight motion to incorporate the flour mixture evenly.
4. Baking the Sponge: Pour the batter into the prepared tray and gently spread it out. Bake for 10-12 minutes or until the sponge springs back when lightly touched.
Achieving the perfect texture for the sponge is all about aeration. The more air you can incorporate during the whisking stage, the lighter your cake will be.
Baking the Sponge Cake

Baking the sponge cake correctly is vital to ensure it remains moist and fluffy. Set your oven to 180°C (350°F) and bake the sponge for approximately 10-12 minutes.
To check for doneness, gently press the center of the cake; if it springs back, it’s ready. Avoid opening the oven door frequently as this can cause the sponge to collapse. Overbaking can lead to a dry cake, so timing is crucial.
Preparing the Filling
While your sponge cake is cooling, it’s time to prepare the filling. Follow these steps to create a luscious cream filling:
1. Whipping the Cream: In a mixing bowl, add the heavy cream and start whipping it on medium speed until it begins to thicken.
2. Adding Sugar and Vanilla: Once the cream is slightly thickened, gradually add the icing sugar and vanilla extract while continuing to whip until soft peaks form. Be careful not to over-whip, which can turn the cream into butter.
3. Flavor Variations: Consider adding a touch of espresso powder for a mocha flavor or a splash of orange zest for a citrus twist.
For those with dietary restrictions, you can substitute heavy cream with coconut cream for a dairy-free option, ensuring the texture remains creamy and rich.
Rolling the Cake
Rolling the cake without cracking is an essential skill for successful Swiss rolls. Here’s how to do it:
1. Cooling the Cake: Once out of the oven, let the sponge cool in the tray for about 5 minutes. Then, carefully lift the sponge out using the edges of the parchment paper and place it on a clean kitchen towel dusted with icing sugar.
2. Peeling off the Parchment: Gently peel away the parchment paper from the back of the sponge. This should be done while the sponge is still warm to prevent cracking.
3. Rolling: Starting from one end, roll the sponge tightly using the towel to guide it. Make sure to roll it up with the towel to create a tight spiral. Once rolled, let it cool completely in this position.
Utilizing parchment paper for easier handling is key; it helps prevent the sponge from sticking and makes the rolling process smoother.
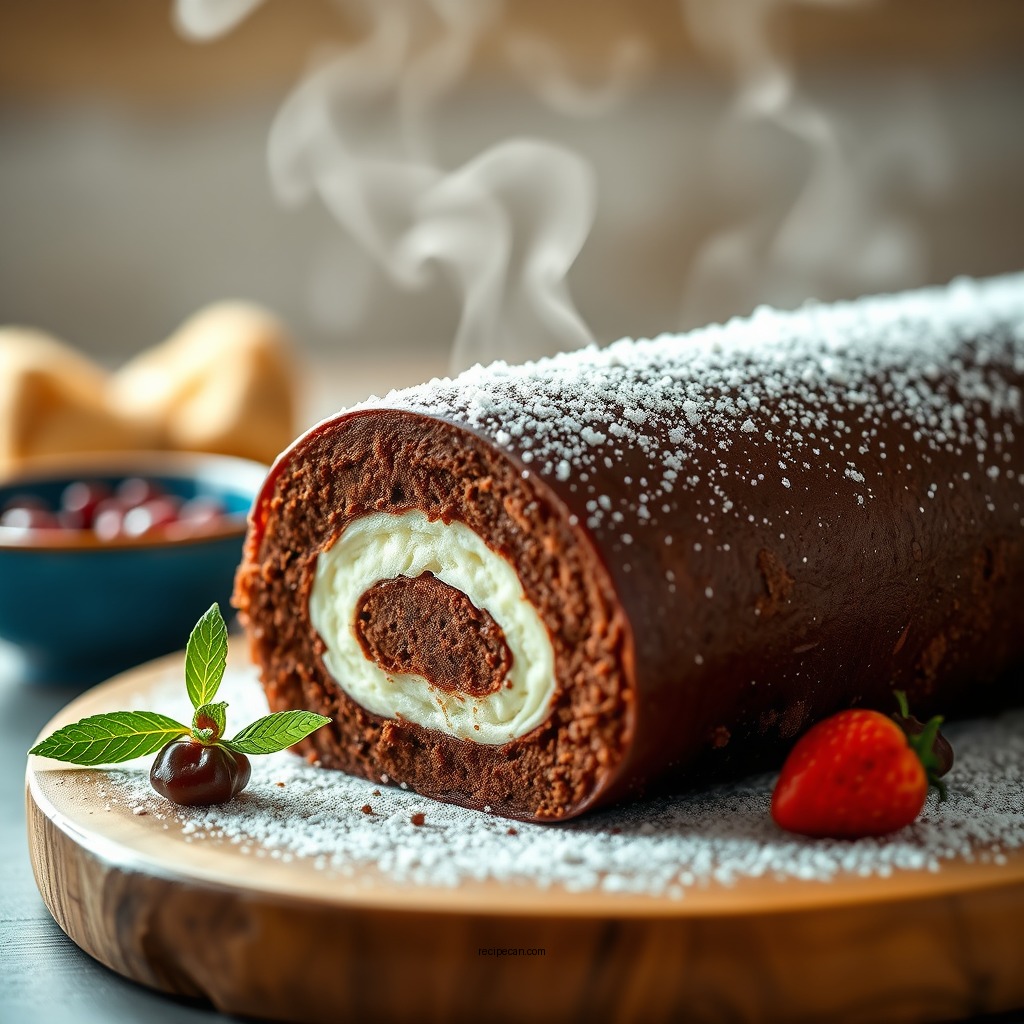
Decorating the Swiss Roll
After rolling, it’s time to decorate your Swiss roll:
1. Dusting: After unrolling and filling, dust the top of the roll with cocoa powder or icing sugar for a professional finish.
2. Toppings: Consider drizzling chocolate ganache over the top or adding fresh berries for a pop of color and flavor. Sliced strawberries or raspberries can enhance the dessert’s presentation.
3. Presentation: Place the Swiss roll on a serving platter and slice it into rounds for a beautiful display.
These garnishes not only enhance the visual appeal but also add delightful flavors that complement the chocolate sponge.
Serving Suggestions
To serve your chocolate Swiss roll, consider the following suggestions to elevate your presentation:
1. Special Occasions: For birthdays or celebrations, present the roll on a decorative cake stand, perhaps accompanied by a scoop of vanilla ice cream or a drizzle of chocolate or raspberry sauce.
2. Pairing Options: Complement the rich flavors of the chocolate roll with a light, fruity sauce or a cup of coffee. The bitterness of coffee balances the sweetness of the roll beautifully.
3. Garnishing: Adding mint leaves or edible flowers can provide a fresh contrast and enhance the overall presentation.
By implementing these serving suggestions, you can turn a simple dessert into a stunning centerpiece that impresses guests.
Summarizing the key steps in preparing a chocolate Swiss roll, this recipe ensures you can create a delightful dessert with ease. From the light sponge to the luscious filling, each element contributes to a dessert that’s both visually appealing and delicious. Don’t hesitate to try this recipe, and share your delicious results with friends and family! Happy baking!
Frequently Asked Questions
What are the key ingredients for a classic chocolate Swiss roll recipe?
The key ingredients for a classic chocolate Swiss roll recipe include all-purpose flour, cocoa powder, eggs, granulated sugar, baking powder, and vanilla extract. For the filling, whipped cream or chocolate ganache is commonly used, providing a rich and creamy texture that complements the light sponge.
How do I prevent my chocolate Swiss roll from cracking?
To prevent your chocolate Swiss roll from cracking, ensure that you do not overbake the sponge; it should be just set and springy to the touch. Additionally, when rolling the sponge, start from the shorter end and roll it gently while it is still warm, using a clean kitchen towel to help with the process.
Why is it important to use a jelly roll pan for making a chocolate Swiss roll?
Using a jelly roll pan is important for making a chocolate Swiss roll because its shallow sides allow for even baking and easy rolling of the sponge. This specific size helps ensure that the cake bakes evenly and maintains the right thickness, which is crucial for achieving that perfect roll without tearing.
What is the best way to store a chocolate Swiss roll after baking?
The best way to store a chocolate Swiss roll after baking is to wrap it tightly in plastic wrap and keep it in the refrigerator if you plan to eat it within a few days. For longer storage, you can freeze the roll wrapped in foil or plastic wrap, and it will maintain its flavor and texture for up to three months.
Which variations can I try for a chocolate Swiss roll recipe?
You can try several delicious variations for a chocolate Swiss roll recipe, such as adding espresso powder to the cake batter for a mocha flavor or incorporating fruit fillings like raspberry or strawberry puree. Additionally, consider experimenting with different types of fillings, such as cream cheese frosting or flavored whipped cream, to create a unique twist on this classic dessert.
References
- Swiss roll
https://en.wikipedia.org/wiki/Swiss_roll - https://www.bbc.co.uk/food/recipes/chocolate_swiss_roll_25425
https://www.bbc.co.uk/food/recipes/chocolate_swiss_roll_25425 - https://www.nytimes.com/recipes/1019818/chocolate-swiss-roll.html
https://www.nytimes.com/recipes/1019818/chocolate-swiss-roll.html - https://www.theguardian.com/food/2020/nov/12/swiss-roll-recipe-chocolate
https://www.theguardian.com/food/2020/nov/12/swiss-roll-recipe-chocolate - https://www.cooking.nytimes.com/recipes/1019818-chocolate-swiss-roll
https://www.cooking.nytimes.com/recipes/1019818-chocolate-swiss-roll - Google Scholar Google Scholar
https://scholar.google.com/scholar?q=chocolate+swiss+roll+recipe - Google Scholar Google Scholar
https://scholar.google.com/scholar?q=swiss+roll+dessert+recipes - Google Scholar Google Scholar
https://scholar.google.com/scholar?q=chocolate+baking+techniques - https://www.britannica.com/topic/swiss-roll
https://www.britannica.com/topic/swiss-roll - chocolate swiss roll recipe – Search results
https://en.wikipedia.org/wiki/Special:Search?search=chocolate+swiss+roll+recipe