Looking for the best cannolis recipes? This guide picks the single classic sweet filling that delivers the trademark creamy bite and pairs it with foolproof shell tips for crisp cannoli every time. You’ll learn exactly how to mix, pipe, and prevent soggy shells so your cannolis taste restaurant-authentic, not just homemade.
Homemade cannolis are at their best when you produce crisp, bubbly shells and a ricotta filling that’s thoroughly drained, properly sweetened, and flavorful but not heavy. Use the shell and filling methods below to prevent the two most common failures—soft shells and watery filling—then assemble right before serving for maximum crunch-to-cream contrast.
Choose the Right Cannoli Shell Recipe

A great cannoli shell is not just “thin dough”—it’s thin dough that fries quickly, balloons slightly, and sets into a sturdy cylinder that can hold filling without turning greasy. For a reliable cannoli dough method, prioritize three technical goals: (1) elasticity for rolling, (2) thinness for crispness, and (3) controlled frying so the exterior cooks before the shell over-browns.
Focus on a dough that’s rolled thin for crisp, bubbly shells
Cannoli dough behaves best when it’s rolled to a uniform thinness (typically around 1.5–2 mm) so steam formed during frying can create those characteristic blistered bubbles. Uneven thickness causes inconsistent frying: thicker spots remain pale and chewy while thin areas brown too fast and become fragile. If you’re aiming for crisp shells, avoid the temptation to “rest” dough too long in a humid environment—dough that dries out can crack; dough that absorbs too much ambient moisture can fry less crisply. Practical approach: roll in batches, keep unused dough covered (not sealed airtight), and keep your rolling area dry.
Fry at the right heat so shells turn golden and stay sturdy
Heat management is the difference between “shatter-crisp” and “soft and greasy.” If oil is too cool, shells absorb more oil and lose structural crispness; if too hot, they brown before the dough is cooked through, making them brittle. A useful target for frying cannoli shells is 175–185°C (350–365°F), adjusting based on your stove and oil volume. Watch the bubbles: they should appear quickly and intensify as the shell fries, then slow as the shell fully sets. Drain shells briefly on a rack (not just paper towels) so steam can escape—this helps maintain crispness.
Oil Temperature vs. Cannoli Shell Outcome
| # | Oil Temp | Shell Color | Texture | Risk of Sogginess | Fit for Filling |
|---|---|---|---|---|---|
| 1 | 160°C (320°F) | Pale to light gold | Soft, oil-prone | High | ★★☆☆☆ |
| 2 | 168°C (334°F) | Light gold | Less crisp, chewy edges | Medium-High | ★★★☆☆ |
| 3 | 175°C (350°F) | Golden | Crisp with some flexibility | Medium | ★★★★☆ |
| 4 | 182°C (360°F) | Deep golden, even | Bubbly, sturdy, crisp | Low | ★★★★★ |
| 5 | 190°C (374°F) | Brown fast | Can be brittle, slightly dark | Low-to-Medium | ★★★☆☆ |
| 6 | 200°C (392°F) | Over-browned | Dry, fragile | Low (but breakage high) | ★★☆☆☆ |
| 7 | No thermometer | Inconsistent | Mixed results batch to batch | High | ★★☆☆☆ |
Make the Classic Ricotta Cannoli Filling

Classic cannoli filling is all about balance: creamy texture from ricotta and cheese fat, sweetness that isn’t cloying, and aromatics that read as “fresh” rather than artificial. The most important variable is ricotta moisture. If your ricotta isn’t drained, you’ll end up with filling that collapses, weeps, and softens the shell.
Use well-drained ricotta to avoid a runny texture
Start with whole milk ricotta (higher fat generally yields a smoother, richer filling). Then drain it thoroughly. Best practice is to press ricotta in cheesecloth and refrigerate while it drains; 1–24 hours depending on brand and moisture level is common for consistent results. If you need a faster method, drain in a fine-mesh strainer and press gently, then test: lift a spoonful—if it drips, drain longer. Your target consistency should be thick enough to mound slightly, not spread.
Flavor with sugar, vanilla, and citrus zest for a balanced sweetness
After draining, sweeten gradually so you don’t accidentally mask the subtle dairy flavor that makes cannoli addictive. Many classic profiles use granulated sugar plus vanilla extract and citrus zest (often orange and/or lemon). Citrus zest contributes volatile oils that brighten the ricotta’s richness, but use restraint; overly zesty filling can taste soapy or sharp. For a more “traditional bakery” effect, mix zest into sugar first to help release aromatics before it hits ricotta.
Actionable workflow:
1. Whip ricotta until smooth (use a hand mixer or processor).
2. Add sugar in stages, tasting as you go.
3. Incorporate vanilla and zest.
4. Fold in any optional add-ins only after the base is balanced.
Add Classic Mix-Ins and Texture

While “plain ricotta” cannoli filling exists, many classic cannolis rely on add-ins to introduce contrasting textures and flavors. This is where recipes become personal—yet the same technical rules apply: fold gently, and taste before you fill the shells.
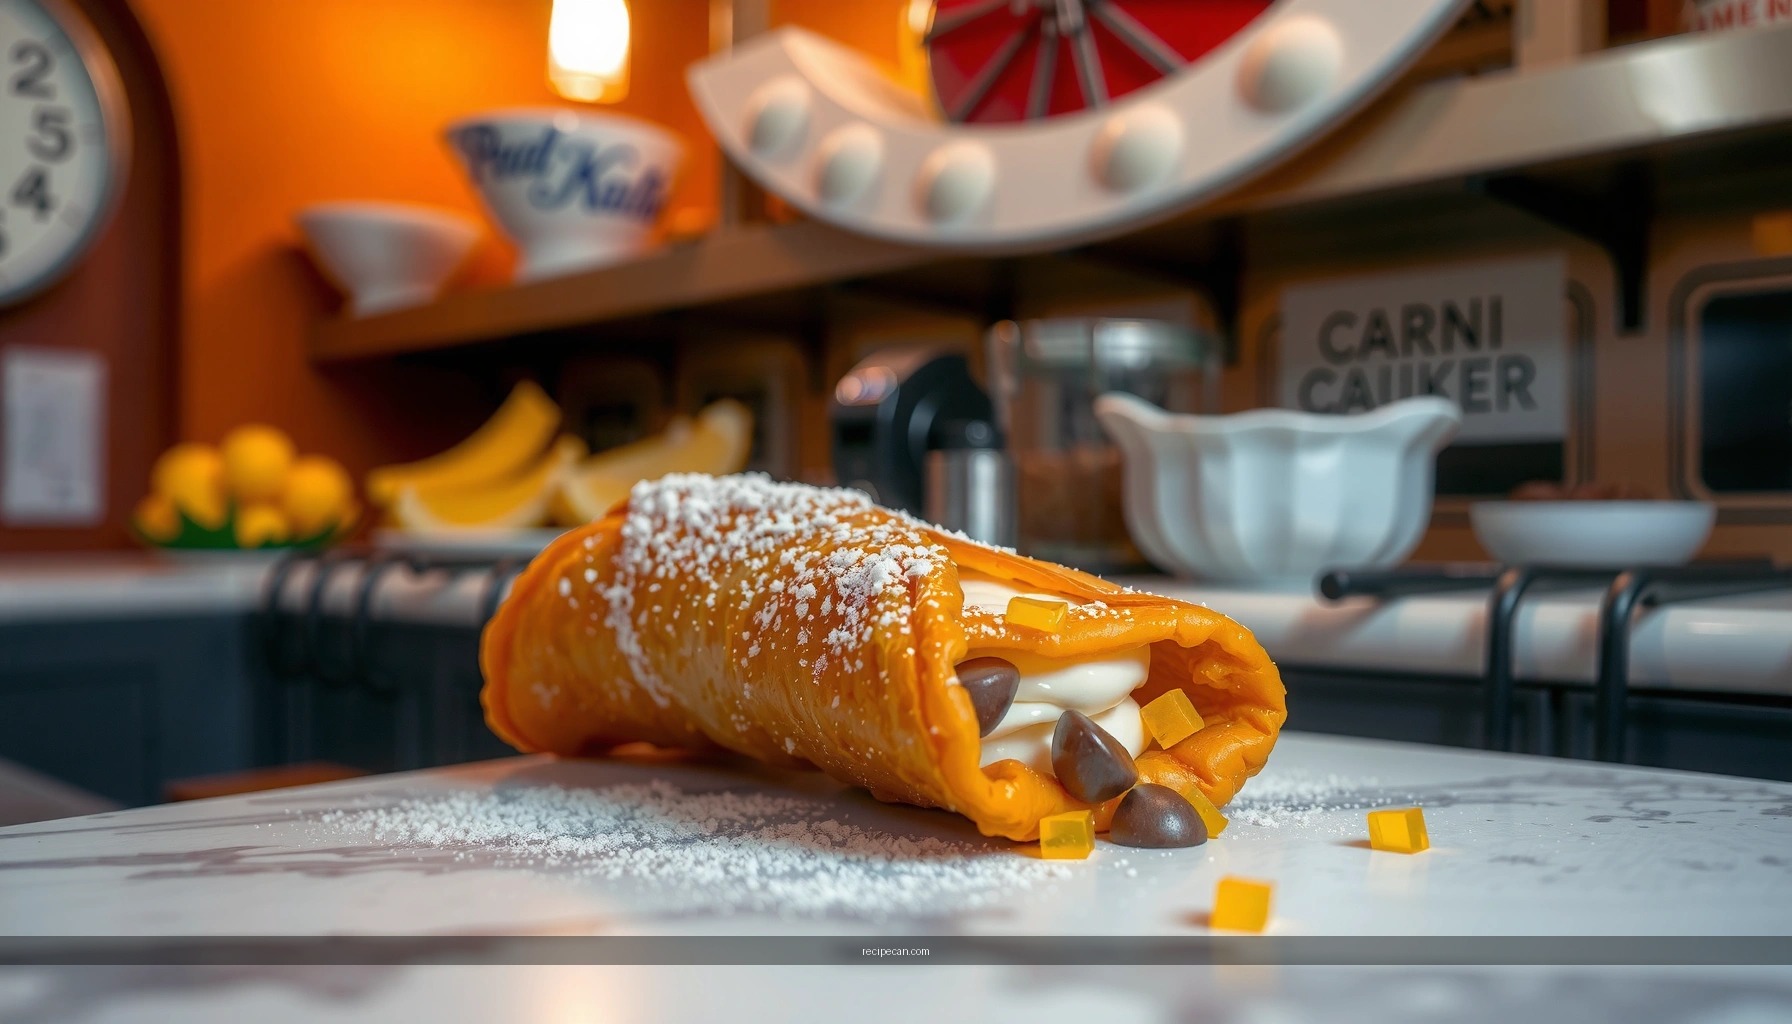
Fold in chocolate chips and candied fruit (optional but traditional)
Classic mix-ins typically include mini chocolate chips and candied citrus peel. The chocolate provides sweetness and a slight snap, while candied fruit adds chew and aromatic fruit notes. If using candied fruit, chop it finely enough that pieces distribute evenly—large chunks can tear the filling or create uneven sweetness hotspots. For chocolate, mini chips melt slightly against warm filling; if your filling is very cold, they may stay firmer, which is also acceptable—just keep expectations consistent.
Taste and adjust sweetness before filling the shells
A professional rule of thumb: cannolis taste sweeter in the finished, assembled form because the shell is crisp and slightly neutral while the filling carries concentrated sweetness. If you taste filling straight from the bowl, adjust conservatively; you can always add a little more sugar, but you can’t “subtract” once it’s mixed. If you’re uncertain, aim for a filling that tastes mildly under-sweet on its own—after assembly, it should read balanced.
Mini quality check: use a spoon to sample. It should coat the spoon thickly, taste creamy, and hold aromatics (vanilla + zest) in the background rather than dominating.
Assemble Cannolis Without Sogginess
Sogginess is rarely caused by one factor; it’s usually a timing and moisture-management issue. The solution is straightforward: fill at the last responsible moment, and use controlled portioning.
Fill shells just before serving for the best crunch-to-cream contrast
If shells sit filled for too long, the filling’s moisture migrates and the shell’s crisp structure collapses. The best strategy is to prepare shells and filling separately, then assemble in waves (e.g., fill for a tasting table, then refill as needed). For parties, consider building a small “assembly window” rather than trying to fill everything an hour+ in advance.
Use a piping bag for clean, even filling
A piping bag is more than convenience—it helps control filling volume and keeps the shell edges clean. Aim for filling that reaches near the ends without overflowing. Overfilling increases the surface area where moisture contacts the shell and can cause seepage onto the tray. If you want a uniform bakery look, squeeze gently and stop when the filling slightly domes at the opening before capping with a small twist of extra filling or a decorative finish.
Practical tip: if your filling is very thick, use a wider tip (or thin slightly with a teaspoon of ricotta whipped smooth). If it’s too soft, you’ll struggle with doming and may get leakage—better to drain or chill longer.
Popular Variations on Cannolis Recipes
Once the classic baseline is correct, variations become relatively easy. The key is to change flavor while keeping the “technical skeleton” intact: drained dairy, balanced sweetness, and a shell that stays crisp.
Try pistachio, almond, or cocoa coatings for different flavors
Instead of (or in addition to) dusting with powdered sugar, many cooks coat the shell ends or dip the ends in chopped nuts or cocoa. This is easiest when you assemble fresh:
– Pistachio: finely chopped pistachios for a fragrant, slightly savory note.
– Almond: toasted almond powder for a smooth finish.
– Cocoa: cocoa powder (or cacao nibs) for a deeper, “chocolate-forward” profile.
Coating works best on the ends where filling is most exposed; it visually signals where the cream is.
Swap fillings (e.g., mascarpone) while keeping the same drained texture
Mascarpone can elevate the creaminess, but it’s richer and can feel heavier. If you use a mascarpone blend, still drain any dairy components as needed and maintain a thick, spoonable consistency. A common approach is to blend mascarpone with whipped ricotta in measured ratios so the flavor remains classic rather than purely “dessert-cheese.” No matter the dairy mix, keep the filling cold until assembly, and never sacrifice drainage to chase softness.
Storage and Serving Tips for Cannolis Recipes
Storage is where many home cooks lose the crispness they worked hard to achieve. Treat cannoli components as separate products—shells as dry structures, filling as chilled cream.
Store components separately (shells dry, filling chilled)
– Shells: store fully cooled shells in an airtight container with a paper towel or dry liner to absorb residual humidity. Keep them away from steam and fruit-based ingredients.
– Filling: store covered in the refrigerator. If it has softened significantly, stir and check consistency—drain time or chilling may be required before filling.
– Do not combine early unless you’re serving them immediately; even well-made fillings will soften shells over time.
Serve soon after filling for optimal crunch and flavor
Cannolis are best when the shell’s crispness is still intact and the filling hasn’t warmed enough to increase moisture transfer. For best results, assemble close to serving time and serve within a short window—typically the same meal or within a couple of hours for most home kitchens, depending on humidity.
Conclusion paragraph: Homemade cannolis come down to two things: crisp shells and a creamy, well-drained ricotta filling. Use the sections above to nail dough, filling, and assembly—then try a variation or topping, and share your results by making your next batch for friends or family.
Frequently Asked Questions
What are the best cannolis recipes for beginners?
A beginner-friendly cannolis recipe usually uses a simple filling like sweetened ricotta with powdered sugar and mini chocolate chips. Look for a method that includes clear steps for frying or baking the shells, because shell texture matters most for a good cannoli. For easiest results, choose a recipe with either pre-made cannoli forms or detailed instructions for rolling dough and frying to the right color.
How do I make authentic cannolis filling without watery ricotta?
To avoid watery cannolis filling, drain ricotta thoroughly—many home cooks use cheesecloth and refrigerate it for a few hours (or overnight) before mixing. Whip or strain the ricotta until smooth, then combine it with powdered sugar and flavorings like vanilla or orange zest. Adding chocolate chips and a small amount of citrus can help the filling hold flavor without loosening the texture.
How can I get crispy cannoli shells that don’t soften too fast?
Crispy cannoli shells depend on frying temperature and proper cooling before filling. Fry until the shells are evenly golden, then let them cool completely on a rack so steam can escape rather than soaking into the dough. For best results, fill cannolis close to serving time and store shells and filling separately to prevent sogginess.
Why do my cannoli shells crack or burst when I fry them?
Cannolis shells may crack if the dough is too dry, overworked, or not rolled evenly to the right thickness. They can also burst if oil temperature is too high or if the dough is not wrapped tightly around the forms. Using a well-tested cannoli dough recipe with correct flour-to-fat ratios and maintaining steady frying heat helps keep shells intact.
Which cannolis recipe is best for baking instead of frying?
If you want a lighter option, choose a baked cannolis recipe that’s designed to crisp in the oven and doesn’t rely on deep-frying. Typically, the dough is thinner and requires silicone or metal forms plus careful oven timing to avoid dryness. After baking, cool completely and fill just before serving to keep the baked cannoli shell crisp and flavorful.
References
- Cannoli
https://en.wikipedia.org/wiki/Cannoli - https://www.britannica.com/topic/cannoli
https://www.britannica.com/topic/cannoli - Google Scholar Google Scholar
https://scholar.google.com/scholar?q=cannoli+recipe - Google Scholar Google Scholar
https://scholar.google.com/scholar?q=Sicilian+cannoli+ricotta+filling+recipe - Google Scholar Google Scholar
https://scholar.google.com/scholar?q=cannoli+shell+frying+recipe - https://cooking.nytimes.com/recipes/1020649-cannoli
https://cooking.nytimes.com/recipes/1020649-cannoli - Cannoli recipe | Good Food
https://www.bbcgoodfood.com/recipes/cannoli - https://www.theguardian.com/food/2010/sep/18/cannoli-recipe
https://www.theguardian.com/food/2010/sep/18/cannoli-recipe - https://www.bbc.co.uk/food/recipes/cannoli_77790
https://www.bbc.co.uk/food/recipes/cannoli_77790 - Google Scholar Google Scholar
https://scholar.google.com/scholar?q=cannolis+recipes


