Get a classic cannoli recipe Italian-style with crisp shells and a creamy ricotta filling that tastes unmistakably Sicilian. This recipe answers the real question—how to make authentic cannoli with the right ricotta texture, sweet balance, and filling that pipes cleanly. Follow the steps exactly and you’ll get cannoli that actually hold their shape and deliver that signature cannoli bite.
Make classic Italian cannoli by frying crisp pastry shells and filling them with a sweet, well-drained ricotta cream—then assembling right before serving. In this recipe, you’ll learn how to build crunchy shells, prepare a stable traditional cannoli filling (often with chocolate chips), and assemble cannoli so the shell stays crisp while the ricotta stays creamy.
Cannoli are deceptively simple: the “classic cannoli recipe Italian” experience depends less on fancy ingredients and more on execution—especially dough thickness, frying temperature, ricotta drainage, and timing. Get those variables right, and the contrast between shattery shell and smooth filling delivers the signature bite people associate with Italian bakeries in Sicily and beyond.
—
Classic Italian Cannoli Ingredients

– Choose high-quality ricotta and classic flavor add-ins like vanilla and sugar
– Prepare for traditional shell ingredients: flour, sugar, wine (or Marsala), egg, and oil for frying
The ingredient strategy is what separates average cannoli from authentic cannoli. For the shells, you want a dough that fries into delicate, crisp layers without toughening—so you use a small amount of sugar and fat in a flour-and-liquid base, plus a little wine (or Marsala) to help with tenderness and browning.
For the filling, the critical variable is ricotta quality and preparation. “Creamy ricotta cannoli filling” must be thick enough to hold shape when piped. That means choosing ricotta that’s naturally smooth and draining it thoroughly to prevent a watery cannoli cream that can soak the shell.
Below is a practical view of ingredients by function—use it to plan efficiently and reduce execution errors.
Cannoli Ingredient Roles & What They Control
| # | Ingredient | Primary Function | Typical Amount (for ~18–24 shells) | Impact Rating |
|---|---|---|---|---|
| 1 | Whole-milk ricotta (drained) | Cream structure | 900–1000 g | ★★★★★ |
| 2 | Instant sugar +/or powdered sugar | Sweetness + texture | 120–180 g | ★★★★☆ |
| 3 | Cinnamon-free vanilla extract | Classic aromatics | 1–2 tsp | ★★★☆☆ |
| 4 | Chocolate chips (mini) | Signature bursts | 120–160 g | ★★★★☆ |
| 5 | Flour (all-purpose) | Shell strength + crispness | 300–340 g | ★★★★☆ |
| 6 | Egg + egg yolk | Tender structure | 1 whole + 1 yolk | ★★★☆☆ |
| 7 | Marsala (or dry white wine) | Frying texture + color | 2–3 tbsp | ★★★★☆ |
—
How to Make Italian Cannoli Shells

– Roll dough thin, cut into shapes, and wrap around cannoli forms
– Fry until golden, then cool completely before filling for best crunch
Shell quality is the hallmark of a true classic cannoli recipe Italian. The dough should be rolled thin enough to blister slightly during frying—yet not so thin that it tears when wrapped or fried.
Step-by-step shell approach (actionable method):
1. Mix dough to a smooth, elastic consistency. Combine flour with sugar, salt, and a fat source (often a small amount of neutral oil). Add egg and wine/Marsala, then knead until cohesive.
2. Rest the dough. Resting relaxes gluten and makes rolling easier, improving uniformity—uniform shells fry more evenly.
3. Roll thin and wrap. Cut dough into strips or circles, depending on your method, then wrap around lightly oiled cannoli tubes (forms). Seal the overlap with a dab of egg white or water.
4. Fry in stable oil at the right temperature. If oil is too cool, shells absorb oil and lose crispness; too hot, shells brown too quickly outside while staying undercooked inside.
5. Cool fully before filling. Cooling sets the structure. Filling warm shells traps steam and softens the exterior immediately.
Professional texture control tip: aim for deep golden rather than pale yellow. Cannoli shells should look crisp and slightly blistered, not merely fried.
—
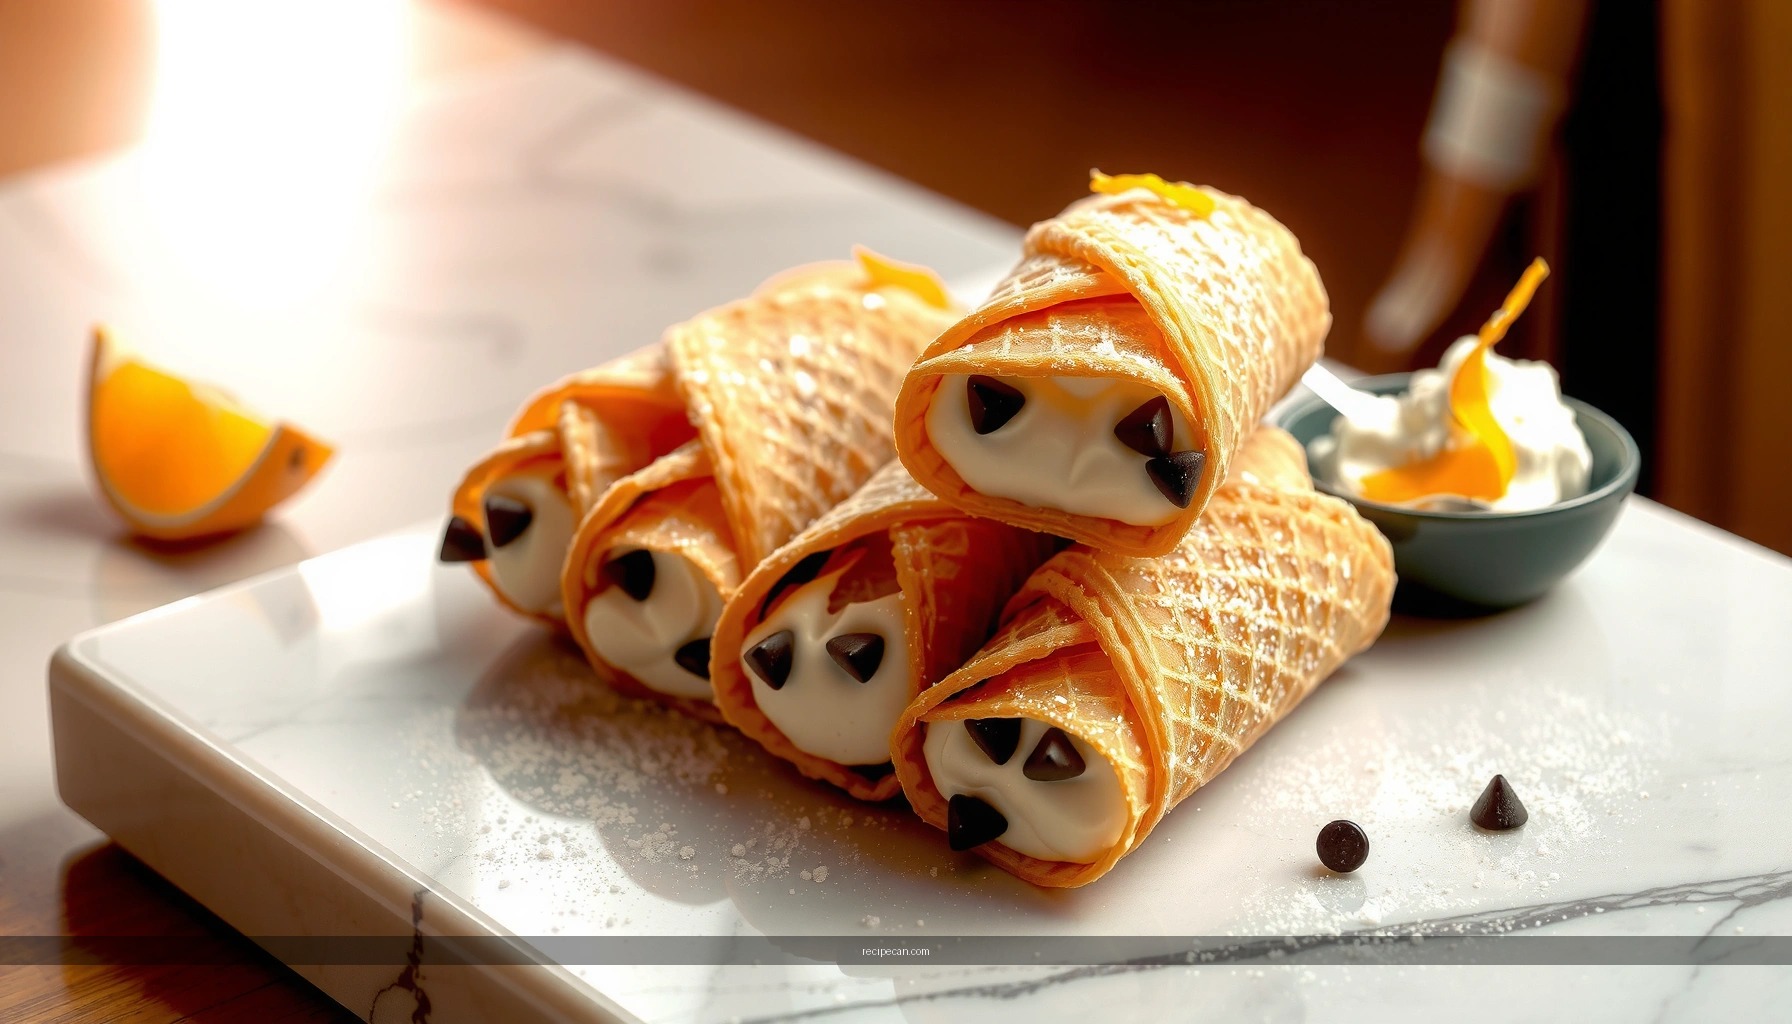
Ricotta Filling (Traditional Cannoli Cream)

– Drain ricotta well, then sweeten and flavor it to avoid a watery filling
– Fold in chocolate chips (and optional candied fruit) for authentic texture and taste
The traditional cannoli cream is simple but unforgiving. Watery filling is the most common failure because ricotta can vary widely by brand, moisture level, and even packaging freshness.
How to get the correct cannoli cream consistency:
1. Drain ricotta thoroughly. Use a fine-mesh sieve or cheesecloth and drain in the fridge for several hours. If time is short, press gently and drain longer rather than shorter.
2. Sweeten gradually. Mix in sugar until dissolved and evenly distributed. If using powdered sugar, you’ll sometimes get faster incorporation and a smoother mouthfeel.
3. Flavor with vanilla (and optionally citrus). A small amount of vanilla extract complements dairy sweetness. Optional additions—like orange zest—should be restrained to avoid overpowering the shell.
4. Fold in chocolate chips late. Folding at the end prevents over-mixing and keeps chips intact for classic pockets of sweetness.
5. Chill briefly for stability. Cooling thickens the mixture slightly and helps it hold its shape while piping.
Authentic mix-ins: Many bakery-style cannoli include either chocolate chips or chopped candied fruit (or both). If you choose candied fruit, chop it small enough that each bite gets a balanced distribution.
—
Assemble Cannoli Like an Italian Bakery
– Fill shells right before serving to maintain crispness
– Use a piping bag for clean, even filling and a classic presentation
Assembly is where “made at home” meets “Italian bakery.” The key rule is timing: cannoli shells soften when exposed to moisture, and the filling inevitably releases a bit of humidity. The solution is to fill right before serving and keep the rest components separated.
Clean, bakery-style filling method:
1. Load a piping bag fitted with a medium tip. This gives you consistent pressure and clean edges.
2. Pipe from one end to the other. Fill until you see gentle resistance or hear a subtle change in piping flow—overfilling can split shells.
3. Wipe excess at the ends. A quick clean keeps presentation crisp and professional.
4. Optionally dust with powdered sugar just before serving.
Portioning insight: If you’re serving at an event, assemble in batches—small groups every few minutes—so each cannolo arrives at peak crunch.
—
Tips for Perfect Texture and Flavor
– Chill filling briefly to thicken it and improve hold
– Balance sweetness and flavor so the filling doesn’t overwhelm the shells
Achieving the classic cannoli texture is largely about balance: crisp exterior, creamy interior, and flavors that harmonize rather than compete.
Texture tips that matter:
– Chill the filling briefly (even 15–30 minutes) before piping to improve firmness and reduce leakage.
– Do not fill ahead. If you must pre-prepare, keep shells airtight and store filling separately—then assemble close to service.
Flavor balance strategies:
– Taste the ricotta base before adding chips. If ricotta is already slightly salty or tangy, reduce added sugar slightly. The goal is sweetness that matches fried pastry, not sweetness that masks the dairy.
– Use vanilla thoughtfully. Vanilla should support classic aroma, not dominate. If you add zest, keep it minimal.
– Match the chocolate style. Mini chips distribute evenly; larger chunks deliver bigger “bursts” but may require more controlled piping to avoid clusters.
Analytical perspective: Think of cannoli as a system of contrasts. Shell crunch comes from low residual moisture and correct frying temperature; filling creaminess comes from drained ricotta and controlled sweetness. When one component is off—especially moisture—both sensations degrade.
—
Storing and Serving Cannoli
– Serve soon after assembling for the crunchiest results
– If storing, keep shells separate from filling to prevent sogginess
Cannoli are best understood as “assembly-dependent.” The shells are designed to be crisp, but they cannot remain crisp indefinitely once filled.
Best practice for serving:
– Assemble right before serving, ideally within 10–30 minutes for maximum crunch.
If you need to store:
– Store shells separately in an airtight container at room temperature (cool, dry location).
– Store filling covered in the refrigerator. When ready, pipe and fill shells fresh.
– Avoid refrigerating filled cannoli for long periods; cold can mask aroma and increased condensation can soften shells.
Practical scheduling: For a party, fry shells earlier the same day, drain and prepare filling beforehand, then assemble in waves. This approach mirrors how many Italian bakeries operate for freshness.
—
These steps will help you make authentic Italian cannoli with crisp shells and a creamy ricotta filling. Try the recipe today, and once you nail the shell-filling timing, you can personalize with chocolate chips or citrus zest for your perfect version.
When done correctly, classic cannoli deliver a precise sensory balance: fragile crunch from the fried shell, rich cream from properly drained ricotta, and controlled sweetness with chocolate accents. Focus on moisture management (especially ricotta drainage and assembly timing), and you’ll consistently produce cannoli that taste authentically Italian—whether for a family dessert table or a more formal service setting.
Frequently Asked Questions
What is the classic Italian cannoli recipe using ricotta?
A classic cannoli recipe Italian starts with crisp fried pastry shells and a filling made from sweetened ricotta, often enriched with powdered sugar and vanilla. Many traditional versions also include hints of citrus zest (like orange or lemon) for a bright Italian flavor. After filling the cannoli, you typically garnish with mini chocolate chips and sometimes candied fruit for a classic look and taste.
How do I prevent cannoli shells from getting soggy?
To avoid sogginess, fry the cannoli shells (or bake, if using an alternative) until fully crisp and let them cool completely before filling. Use a well-drained ricotta—if it’s watery, mix it with a bit more powdered sugar or strain it through cheesecloth before using. Fill cannoli right before serving and, for best results, store shells and filling separately until you’re ready to eat.
Why is my ricotta filling watery, and how can I fix it?
Watery cannoli filling usually happens when the ricotta isn’t drained well or is too soft from excess moisture. For a quick fix, strain ricotta for a few hours (or overnight) and then mix with powdered sugar until smooth and thick. You can also fold in chocolate chips only after the filling reaches the right consistency so the texture stays creamy and stable.
Best type of chocolate chips and garnishes for an authentic cannoli recipe Italian?
For an authentic cannoli recipe Italian, use mini chocolate chips because they distribute evenly in the ricotta filling and hold their shape. Traditional cannoli often include candied orange peel or citron, plus a dusting of powdered sugar on top. If you want a classic pastry-shop finish, garnish immediately after filling so the shells stay crisp and the chocolate looks freshly set.
Which tools and ingredients do I need to make homemade cannoli at home?
To make homemade cannoli, you’ll want cannoli forms (tubes) for shaping the dough while frying, plus a rolling pin and a mixing bowl for the ricotta filling. Key ingredients include ricotta (drained), powdered sugar, vanilla, citrus zest, and a cannoli recipe Italian dough made with flour, fat (like butter or lard), and wine vinegar or Marsala for tenderness. For serving, keep ingredients for garnishing—mini chocolate chips and optional candied fruit—ready so you can fill and finish cannoli quickly.
References
- Cannoli
https://en.wikipedia.org/wiki/Cannoli - Ricotta
https://en.wikipedia.org/wiki/Ricotta - https://en.wikipedia.org/wiki/Cannoli_siciliani
https://en.wikipedia.org/wiki/Cannoli_siciliani - Pastry
https://en.wikipedia.org/wiki/Pastry - Deep frying
https://en.wikipedia.org/wiki/Deep_frying - Candied fruit
https://en.wikipedia.org/wiki/Candied_fruit - Sicilian cuisine
https://en.wikipedia.org/wiki/Sicilian_cuisine - Google Scholar Google Scholar
https://scholar.google.com/scholar?q=cannoli+recipe+Italian - Google Scholar Google Scholar
https://scholar.google.com/scholar?q=cannoli+Sicilian+ricotta+chocolate+orange+candied+researched - Google Scholar Google Scholar
https://scholar.google.com/scholar?q=Italian+pastry+shell+deep+frying+cannoli+molds


