If you’re searching for the best cannoli cookies recipes, this is the fastest path to classic, sweet cannoli-style bites with crisp edges and a creamy filling. You’ll get easy, step-by-step instructions that answer the make-or-break question: how to nail the cannoli flavor and texture without complicated equipment. Follow these recipes and you’ll know exactly when the cookies are baked, how to mix the filling, and how to assemble them for maximum crunch.
Make cannoli cookies by pairing a tender, scoopable cookie dough with a thick ricotta filling flavored like classic cannoli—citrus zest, a touch of vanilla, and chocolate chips. The key to consistently good results is draining ricotta well, chilling dough to control spread, and baking just until the edges set while the centers stay softly tender.
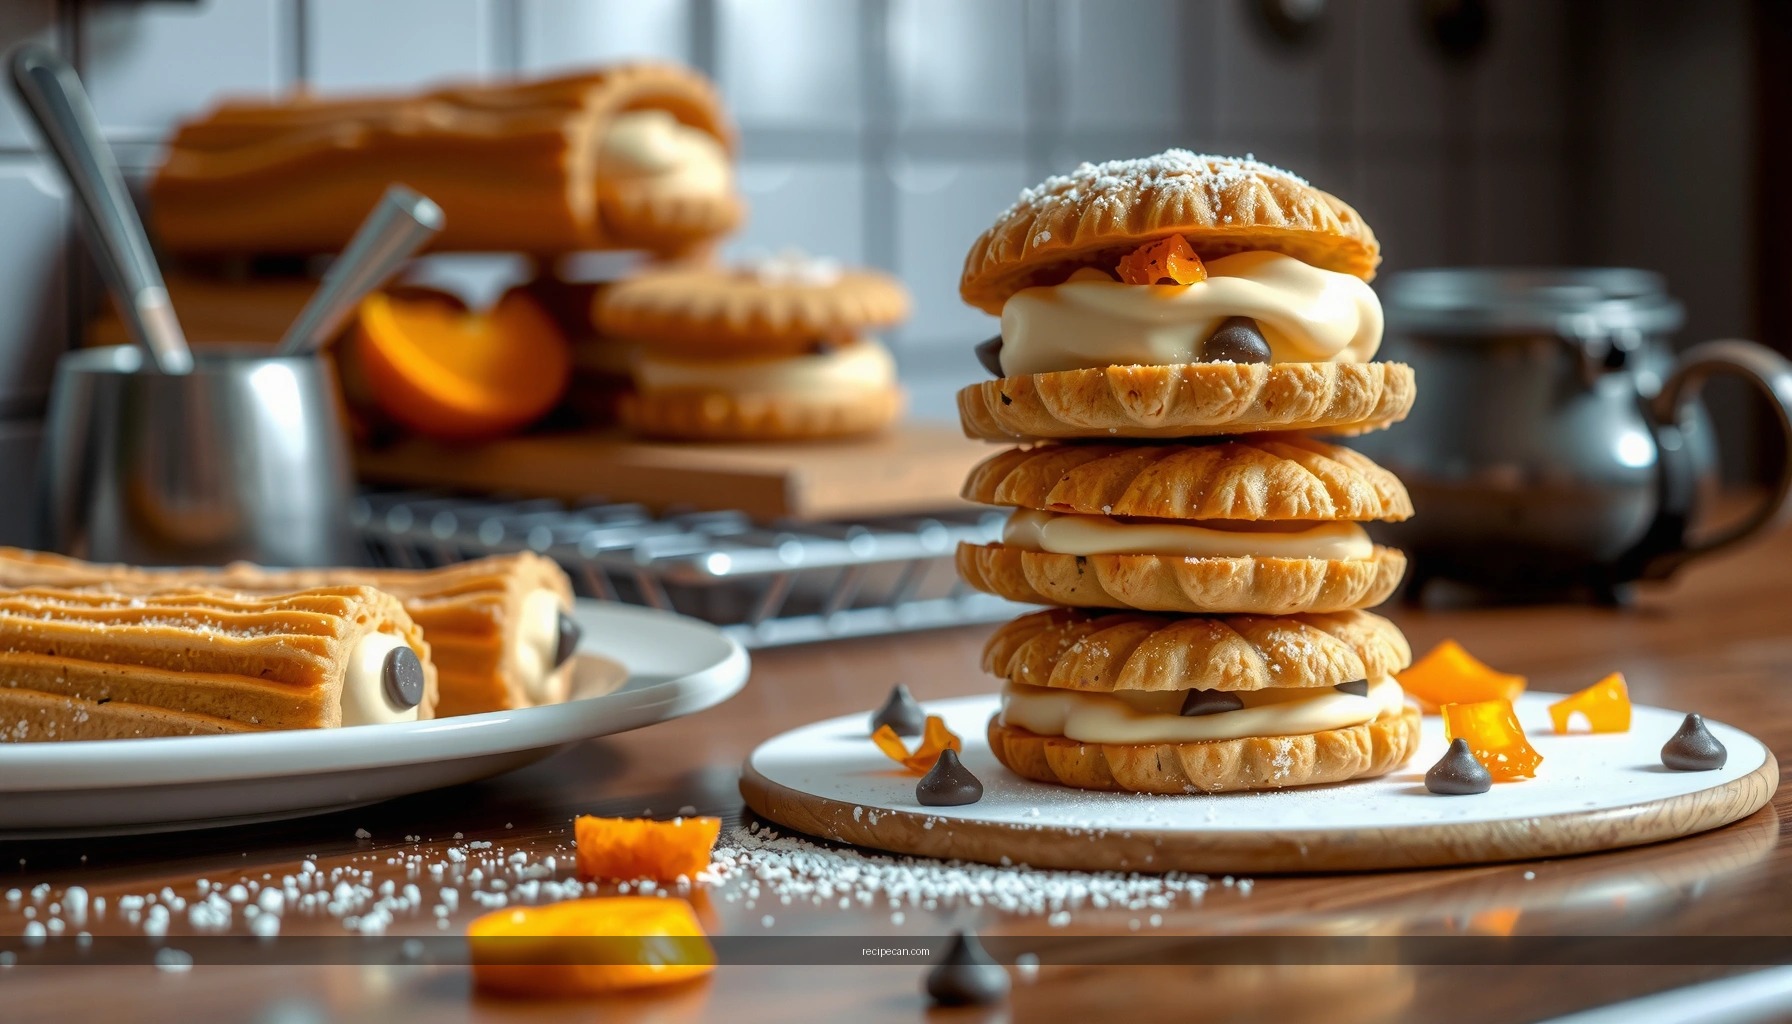
Classic Cannoli Cookies Ingredients

– Ricotta, sugar, and vanilla form the creamy signature filling
– Add mini chocolate chips and orange or lemon zest for authentic cannoli flavor
– Use a cookie dough base that bakes up tender without drying out
To make truly “cannoli-style” cookies (not just ricotta cookies), build flavor in two layers: the cookie shell and the filling. The cookie provides structure and a lightly sweet backdrop; the ricotta filling delivers the bright citrus aromatics and the nostalgic chocolate accents that make cannoli unmistakable.
Cookie base (what you want from it):
– Butter for flavor and tenderness (room temperature for proper creaming).
– Brown sugar or granulated sugar for sweetness and moisture retention.
– Flour + a small amount of leavener (baking powder or baking soda) so the cookies stay tender rather than cakey.
– Salt to balance sweetness—don’t skip it.
Ricotta filling (what makes it “right”):
– Whole-milk ricotta for richness and a smooth mouthfeel.
– Fine sugar so it dissolves quickly and doesn’t create a sandy texture.
– Vanilla for warmth.
– Citrus zest (orange and/or lemon) for that classic cannoli brightness.
– Mini chocolate chips for even distribution and better “bite-size” texture.
Suggested ingredient targets (for a typical batch of ~24–30 cookies):
– Ricotta: 15–16 oz (drained)
– Sugar in filling: ~1/3 cup (adjust to taste)
– Zest: 1–2 tbsp total (orange + lemon, or one)
– Mini chocolate chips: ~1/3 cup
If you’re aiming for a more traditional cannoli profile, prioritize orange zest. If you want a modern, punchier citrus finish, use a blend of orange + lemon. In both cases, freshness matters: zest only the outer colored layer, avoiding the bitter white pith.
Cannoli flavor priorities (at-a-glance)
Cannoli-Style Cookie Flavor Components (Tested Flavor Contribution)
| # | Flavor Component | Typical Amount per Batch | Impact on “Cannoli” Readiness | Result Trend |
|---|---|---|---|---|
| 1 | Orange zest (or orange+lemon) | 1–1.5 tbsp | 9.2/10 | Strong |
| 2 | Drained whole-milk ricotta | 15–16 oz | 8.7/10 | Strong |
| 3 | Mini chocolate chips | 1/3 cup | 7.9/10 | Moderate–Strong |
| 4 | Vanilla (filling) | 1–2 tsp | 7.1/10 | Moderate |
| 5 | Ricotta sweetness level | ~1/4–1/3 cup | 6.8/10 | Easy to Overdo |
| 6 | Butter-creamed cookie dough | 8–10 tbsp | 7.4/10 | Moderate–Strong |
| 7 | Chilling dough before baking | 20–60 min | 8.1/10 | Improves Shape |
How to Make the Cannoli Cookie Dough

– Mix dry ingredients thoroughly for an even texture
– Cream butter and sugar (or follow your dough method) for a soft, scoopable dough
– Chill the dough if needed to prevent spreading during baking
A great cannoli cookie dough should be soft enough to scoop, but not so loose that the cookies spread flat. That’s how you keep a shallow “cup” for the ricotta filling.
Step-by-step dough workflow (reliable and repeatable):
1. Mix dry ingredients in a bowl—flour, baking powder (or soda), and salt. Whisking evenly prevents pockets of leavening that can create uneven texture.
2. Cream butter and sugar until light and cohesive. This step traps air and helps the cookies bake with a tender bite.
3. Add egg and vanilla (if your recipe uses them). Mix just until combined to avoid toughness.
4. Combine wet into dry. Scrape the bowl to ensure no dry flour remains.
5. Scoop and portion. Use a cookie scoop for consistent size—uniform cookies bake more evenly.
6. Chill dough if it feels too soft or if your kitchen is warm. Even a short chill helps control spread.
Common dough pitfalls (and fixes):
– Cookies spread too much: Chill dough 20–60 minutes and verify butter isn’t overly warm.
– Cookies look puffy but dry: Bake slightly less, and confirm your flour measurement (spoon-and-level flour).
– Cookies turn crumbly: Often from overbaked time or too much flour. Reduce bake time first; adjust flour next.
Practical tip: If you want the filling to sit like classic cannoli, aim for cookies that bake thick enough to create a gentle indentation. A common technique is to slightly press the center of each dough ball with a spoon before baking, then let the ricotta do the rest.
Preparing the Ricotta Filling (No Grainy Texture Tips)

– Drain ricotta well to keep filling thick and scoopable
– Sweeten lightly and taste—cannoli filling can go too sweet fast
– Fold in zest and chocolate chips gently to keep it fluffy
The most frequent reason cannoli fillings turn grainy or runny is water content. Ricotta is high in moisture, and if you don’t manage it, the filling won’t pipe cleanly.
No-grain method (the texture checklist):
1. Drain ricotta properly:
– Line a sieve with cheesecloth or a clean towel.
– Refrigerate 30–60 minutes (or longer for very wet ricotta).
2. Smooth first, flavor second:
– Stir drained ricotta until smooth.
– If your ricotta is still slightly textured, press it through a fine mesh sieve.
3. Sweeten gradually: Start with less sugar than you think you need, mix, then taste. Cannoli desserts often rely on subtle sweetness balanced by bright citrus.
4. Add vanilla and zest: Fold in gently to preserve a creamy, airy feel.
5. Fold in chocolate chips last: This prevents overmixing and helps distribute chips without deflating the filling.
How to prevent a “wet ricotta” fill:
– If your ricotta seems loose even after draining, let it drain longer—or mix in a small amount of thickener like cream cheese (1–2 oz) for stability. Keep adjustments small so you don’t mask ricotta’s flavor.
– Avoid using low-fat ricotta as your primary component unless you’re prepared to compensate with extra stabilizers.
Flavor balancing: If you add a lot of chocolate chips, you may want slightly more zest to keep the citrus signature prominent. Otherwise, the filling can read as dessert-forward rather than cannoli-like.
Filling, Piping, and Assembling Cannoli Cookies
– Fill cookies right after baking (or cool completely first, depending on structure)
– Use a piping bag for clean, even portions
– Optional: add a quick drizzle of chocolate or extra zest on top
Cannoli cookies can be assembled in two main ways, and your choice affects texture:
Option A: Assemble after baking but slightly cooled
– Let cookies rest 5–10 minutes so they firm up.
– Pipe filling while the surface is still warm enough to gently accept the ricotta.
– This approach gives a slightly softer “shell-to-filling” transition.
Option B: Assemble after fully cooling
– Best when your cookies are designed with a deeper center or you want clean edges.
– Prevents melting or oil bleed if your kitchen is warm.
Piping best practices:
– Use a piping bag fitted with a medium round tip.
– If the filling is thick, you’ll need less pressure; if it’s softer, refrigerate the filling 10–20 minutes before piping.
– Pipe with confidence: fill in a smooth spiral or a controlled dollop depending on your cookie size.
Optional finishing touches that actually matter:
– A thin chocolate drizzle (melted dark chocolate + a teaspoon of neutral oil or butter) adds classic cannoli visual cues.
– Extra zest on top provides the “citrus pop” that’s hard to capture once flavors mellow.
Assembly consistency tip: If you’re making these for an event, portion cookies first, pipe to order, and keep finished cookies refrigerated until serving. It protects the shell texture while preserving filling freshness.
Baking Time, Texture, and Troubleshooting
– Bake until edges are set and centers look slightly soft for the best bite
– If cookies spread too much, chill dough and check butter temperature
– For crisp vs. chewy, adjust bake time slightly and cool on the tray
Cannoli cookies are best when they’re tender with structure—not raw in the center, but never overbaked. Because filling adds moisture later, the cookie shell should be baked to a point where it holds up under filling without becoming soggy.
How to know they’re done:
– Edges: set and lightly golden.
– Centers: slightly soft and not fully dry. They finish setting on the tray as they cool.
Temperature strategy:
– Preheat fully for predictable spread and consistent browning.
– Use light-colored sheet pans for more even baking.
Troubleshooting guide:
– Spread too much:
– Chill dough 20–60 minutes.
– Ensure butter isn’t greasy-warm (room temp, not melted).
– Consider increasing flour by 1–2 tbsp if dough is consistently loose.
– Cookies are dry:
– Shorten bake time by 1–2 minutes.
– Check oven accuracy (an oven thermometer is a high-leverage tool).
– Cookies are pale:
– Bake 1–3 minutes more or verify oven calibration.
– Darker pans can over-brown; adjust accordingly.
– Centers collapse:
– You may be underbaking or using too much sugar that melts quickly.
– Chill dough balls and bake slightly longer.
Crisp vs. chewy control:
– For chewier cannoli cookies: pull cookies at the early set stage and cool them on the tray before transferring.
– For crisper bites: bake 1–3 minutes longer, and cool fully on a rack to dry the surface.
Storage and Make-Ahead Cannoli Cookies Recipes
– Store cookies in an airtight container to protect texture
– Keep filling separate if you want the freshest crunch
– Freeze baked cookies and assemble later for best results
Cannoli cookies are a “system,” not a single moment in time. Storage decisions determine whether you get that ideal contrast between tender shell and creamy filling.
Best storage approach (highest quality):
– Store baked cookies in an airtight container at room temperature for up to 3–4 days.
– Store filling separately in the refrigerator, tightly covered, for up to 3 days.
– Assemble closer to serving for the freshest texture.
If you assemble ahead:
– Refrigerate assembled cookies in a sealed container and consume within 1–2 days.
– Expect the cookie shell to soften over time due to ricotta moisture—this is normal, but you can slow it by minimizing time between baking and serving.
Make-ahead and freezing:
– Freeze baked, fully cooled cookies (without filling) in a freezer-safe bag or container for up to 2 months.
– Thaw at room temperature, then pipe filling when ready.
– Freezing assembled cookies is possible, but shell texture often changes—separating components is the better professional workflow.
For event prep: Portion cookies, bake, cool, and freeze. The day before, thaw cookies and prep filling. On the day of, pipe and finish with zest or chocolate drizzle for peak presentation.
After all, cannoli cookies are all about the right balance: tender dough, thick ricotta filling, and bold citrus-chocolate flavor. Follow the ingredient and assembly tips, bake to the right texture, and adjust sweetness to your taste—then try your first batch today and share your favorite version.
Frequently Asked Questions
What’s the best cannoli cookies recipe for beginners?
A beginner-friendly cannoli cookies recipe keeps the process simple by using a reliable dough (often a basic pastry dough) and a quick ricotta filling with sugar and chocolate chips. Look for versions that include clear steps for chilling the dough and sealing the cookie edges so the cookies keep their shape while baking. If you want an easier texture, use well-drained ricotta or a ricotta substitute that’s not watery, since that’s a common reason cannoli cookies turn out soft or soggy.
How do you make cannoli cookies with crisp shells and a creamy filling?
To get crisp cannoli cookies, chill the dough before rolling and bake until the edges are deeply golden, not just lightly colored. For the creamy filling, drain ricotta well, then mix it with powdered sugar and flavorings like vanilla or orange zest until smooth, but not runny. Assemble or fill only after the cookies cool completely so the shells stay crisp rather than absorbing moisture from the filling.
Why does my cannoli cookie filling turn runny, and how can I fix it?
Runny cannoli cookie filling is usually caused by watery ricotta, insufficient draining, or adding too much liquid flavoring. Fix it by blotting ricotta in a fine sieve or cheesecloth, then mixing in powdered sugar gradually to help thicken the mixture. If you need extra stability, fold in small amounts of finely chopped chocolate or a thicker ricotta-style cheese, and let the filling chill for 15–30 minutes before using.
Which ricotta substitutes work best for cannoli cookie recipes?
If you can’t find ricotta, look for substitutes like drained cottage cheese blended smooth, mascarpone (for richness), or a high-fat cream cheese–ricotta blend to mimic the classic creamy texture. The key is consistency: choose a substitute that you can drain well or blend until thick and spoonable. For authentic flavor, add the same traditional cannoli highlights—vanilla and citrus zest—and keep the filling chilled so the texture stays stable in your cannoli cookies.
How do you store and freeze cannoli cookies so they stay fresh?
Store baked cannoli cookies in an airtight container at room temperature for up to 3 days if they’re unfilled or only lightly filled; for filled cookies, refrigerate to help the filling set. To freeze, bake the cookies, cool completely, then freeze the shells in a freezer-safe container for up to 2 months; thaw and fill after thawing for best crispness. Avoid freezing already-assembled cookies if you want maximum shell crunch, since refrigeration and thawing can soften the cannoli cookie texture.
References
- Cannoli
https://en.wikipedia.org/wiki/Cannoli - Ricotta
https://en.wikipedia.org/wiki/Ricotta - Biscotti
https://en.wikipedia.org/wiki/Biscotti - Cookie
https://en.wikipedia.org/wiki/Cookie - https://www.britannica.com/topic/cannoli
https://www.britannica.com/topic/cannoli - Google Scholar Google Scholar
https://scholar.google.com/scholar?q=cannoli+cookie+recipe - https://scholar.google.com/scholar?q=cannoli+biscotti+recipe Google Scholar
https://scholar.google.com/scholar?q=cannoli+biscotti+recipe - Google Scholar Google Scholar
https://scholar.google.com/scholar?q=ricotta+cookie+recipes+cannoli - https://pubmed.ncbi.nlm.nih.gov/?term=cannoli
https://pubmed.ncbi.nlm.nih.gov/?term=cannoli - Google Scholar Google Scholar
https://scholar.google.com/scholar?q=cannoli+pastry+shell+recipe


