Get the best Italian cannoli recipe for crisp, blistered shells and a creamy ricotta filling that tastes like an authentic Sicilian bakery. This winner is built on the right cannoli dough technique and a ricotta filling made with proper draining, the correct sweet-to-salt balance, and silk-smooth mixing. Follow it exactly and you’ll land crunchy cannoli in the first bite—without sogginess or grainy filling.
You can make bakery-style cannoli at home by focusing on two non-negotiables: frying the dough to a deep golden crisp and draining ricotta until it’s thick enough to hold a smooth, pipeable texture. This best Italian cannoli recipe walks you through the classic shell technique, the traditional ricotta method, and the exact way to assemble cannoli so they stay crisp instead of going soggy.
Make the Classic Cannoli Shells

– Use a simple dough and fry until deeply golden for maximum crunch
– Keep the dough well chilled and rolled evenly to prevent uneven cooking
Cannoli shells look simple, but their crispness is determined by a handful of controllable variables: dough hydration, chilling time, rolling thickness, oil temperature, and fry time. Traditional shells are made from a fairly lean dough (no yeast, usually no chemical leavener), then fried quickly over hot oil until they blister and turn a deep golden color.
1) Start with a dough that behaves like pasta, not cake.
A classic cannoli shell dough should feel elastic and firm—not sticky. If it’s too wet, you’ll get pale shells that puff and soften as they cool. If it’s too dry, you’ll struggle to roll it thin without cracking and you’ll lose that signature crisp bite.
2) Chill before rolling—this is where “curling edges” are won.
Chilling firms the gluten network and makes the dough easier to roll evenly. If the dough warms up, it becomes elastic and shrinks back during shaping, which often leads to uneven thickness and patchy frying.
3) Roll to a consistent thinness.
Aim for a thickness that fries quickly without becoming fragile. Consistency matters more than thinness alone: if one section is thicker, it will remain undercooked while thinner areas darken. Under-done shells taste greasy and turn chewy fast.
4) Fry hot and don’t overcrowd.
Cannoli shells fry best when the oil temperature stays stable. If you add too many shells at once, the oil cools and the shells absorb more oil—resulting in softness and a greasy mouthfeel. Fry in small batches so the oil quickly returns to temperature.
5) Fry to deep golden for the crisp “snap.”
“Golden” is not enough. Look for a deeper, even amber tone. The color is your visual cue that the starches have set and the shell has dehydrated enough to stay crisp as it cools.
6) Drain properly and handle gently.
After frying, place shells on a rack or paper towels to drain. Don’t stack them while they’re still hot—stacking traps steam, and steam softens shells.
To make consistent shells, it helps to understand how the cooking fat influences crispness and frying stability.
Frying Oils for Cannoli Shell Crispness (Smoke Point & Performance)
| # | Oil / Fat | Smoke Point (°C) | Flavor Impact | Why It Works | Crispness Potential |
|---|---|---|---|---|---|
| 1 | Peanut oil | ≈232 | Low–medium | Stable at high heat | ★★★★★ |
| 2 | Canola oil | ≈204 | Neutral | Good balance of crispness & neutrality | ★★★★☆ |
| 3 | Grapeseed oil | ≈216 | Neutral | Cleans off flavors cleanly | ★★★★☆ |
| 4 | Sunflower oil (high-oleic) | ≈230 | Neutral | Handles repeated frying well | ★★★★★ |
| 5 | Safflower oil | ≈265 | Very low | High-temperature reliability | ★★★★☆ |
| 6 | Corn oil | ≈232 | Low | Common, steady frying option | ★★★☆☆ |
| 7 | Lard (traditional fat) | ≈190–205 | Rich | Classic mouthfeel & browning | ★★★★☆ |
Prepare the Traditional Ricotta Filling

– Drain ricotta well for a thick, creamy texture (not watery)
– Sweeten and flavor with sugar and classic additions like vanilla and cinnamon
The filling is where many at-home cannoli recipes fall apart. Watery ricotta ruins everything: it bleeds into the shell, softens it fast, and makes the filling taste flat rather than creamy. The goal is thick, sweetened, pipeable ricotta that holds peaks.
1) Use drained ricotta, not “fresh-from-the-tub” ricotta.
If your ricotta looks loose or pools liquid, drain it. Professional kitchens often press or drain ricotta overnight to remove whey. At home, you can speed things up by placing ricotta in a fine sieve or cheesecloth and refrigerating until it thickens.
2) Sweeten gradually and taste.
Classic cannoli filling is sweet, but it shouldn’t taste like dessert filling from a bakery case. Add sugar slowly and mix thoroughly so it dissolves and smooths the texture rather than leaving a grainy finish.
3) Add vanilla and cinnamon for the traditional aromatic layer.
Vanilla brings warmth and roundness, while cinnamon adds a familiar Italian pastry note. Start with modest amounts and adjust to your taste—over-seasoning can overpower the ricotta’s dairy sweetness.
4) Choose your texture method: sieve, paddle, or manual break-down.
For the silkiest result, press ricotta through a sieve or beat it until smooth. For a more rustic texture, break it down thoroughly with a spatula. Either way, eliminate lumps before adding candied fruit and chocolate.
5) Fold-in ingredients gently to preserve creaminess.
Once the ricotta is smooth, fold in additions carefully. Overmixing can break the emulsion and make the filling feel oily.
Analytical note: Thick ricotta isn’t just about mouthfeel—it directly impacts shelf life and assembly success. The thicker your filling, the slower moisture migration into the fried shell, which is the foundation of crisp cannoli.
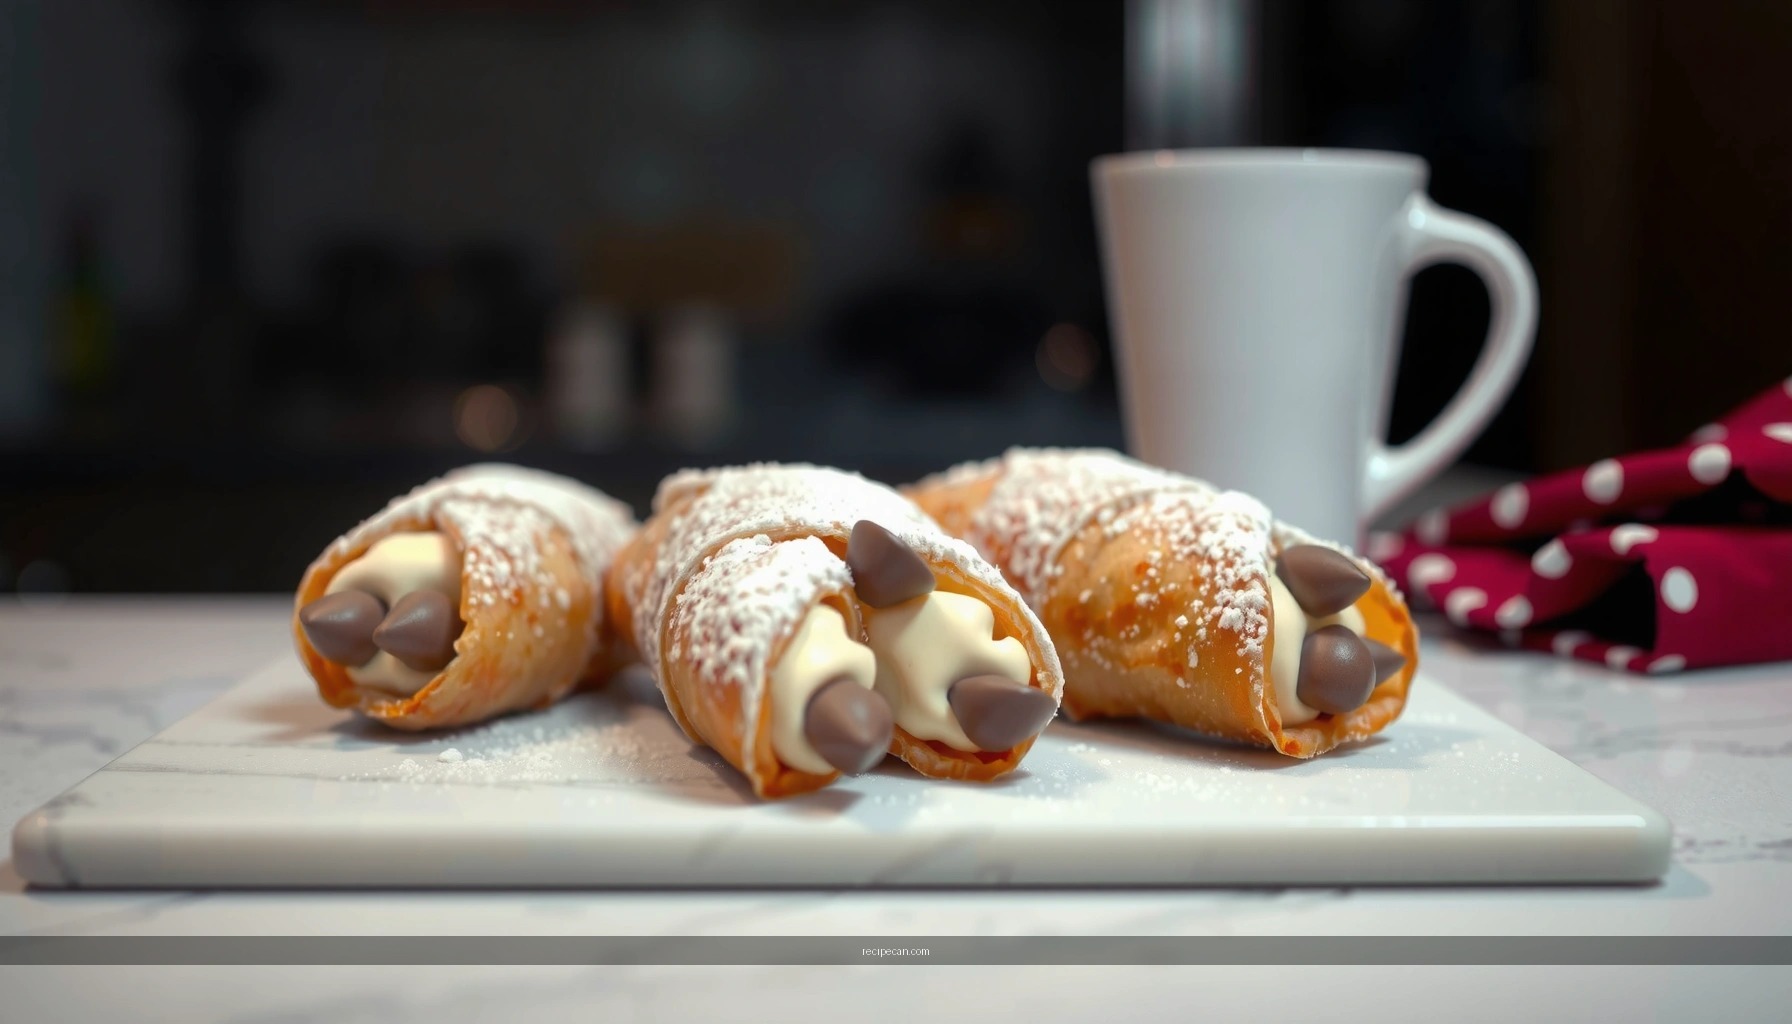
Add Signature Candied Fruit and Chocolate

– Fold in diced candied fruit for bright, sweet bursts
– Mix in chocolate chips last for rich pockets throughout the filling
Traditional cannoli filling often includes candied fruit (commonly candied orange and/or citron) and chocolate. Done correctly, these inclusions add contrast without destabilizing the cream.
1) Dice candied fruit into small, consistent pieces.
Large chunks create uneven flavor distribution and can make piping messy. Small dice ensures every bite contains fruit brightness while the ricotta remains the dominant flavor.
2) Fold candied fruit after the ricotta is fully mixed.
This prevents moisture from the fruit from loosening the filling. If your candied fruit is unusually wet, pat it lightly with a paper towel before dicing.
3) Add chocolate last to maintain structure and minimize melt.
Stir chocolate chips gently at the end so they stay intact and don’t disappear into the cream. This gives you distinct chocolate pockets that taste like pastry rather than cocoa frosting.
4) Balance sweetness and bitterness.
Chocolate chips bring richness and a slight bitterness that can reduce the “cloying” effect of sugar. If your ricotta tastes very sweet, slightly reduce sugar or choose semi-sweet chocolate.
Assemble Cannoli for Perfect Shape
– Fill shells right before serving to keep them crisp
– Use a gentle filling method to avoid soggy ends and keep the shape intact
Assembly is where “almost right” recipes become truly bakery-quality. The shell-to-filling timing and the way you pipe matter more than most people realize.
1) Fill right before serving.
Cannoli shells start absorbing moisture the moment they’re filled. To preserve the crisp exterior, pipe filling shortly before guests arrive. If you’re serving for an event, plan your workflow so frying finishes first, filling follows second, and serving happens immediately.
2) Use a piping bag or sturdy spoon with controlled portioning.
Overfilling can cause the ends to bulge and split, while underfilling makes cannoli taste dry and less luxurious. Pipe with steady pressure and stop once the ends show slight fullness.
3) Avoid “soak time” between filling and serving.
Even a short rest can soften shells, especially if your ricotta wasn’t drained thoroughly. If you must wait—coordinate the wait time tightly and keep filled cannoli cool in a breathable container.
4) Expect a texture gradient.
Properly filled cannoli should have crispy shell edges with a creamier inner bite. If your shells taste uniformly chewy, the shells weren’t fried deep enough or the filling moisture was too high.
5) Garnish at the final moment.
Chocolate drizzle or powdered sugar can trap moisture and soften edges over time. For best presentation, apply garnishes when you’re ready to serve.
Serve, Store, and Keep Them Fresh
– Chill filled cannoli briefly only if needed, and serve quickly afterward
– Store components separately (shells airtight, filling refrigerated) for best results
Cannoli is a “build-to-order” pastry. The best practice is to store components separately and assemble only when needed.
Serving strategy (best results):
– Shells: Keep at room temperature in an airtight container once fully cooled.
– Filling: Refrigerate in a sealed container.
– Assembly: Pipe filling into shells right before serving.
If you need to chill filled cannoli:
– Chill briefly only if required for food safety or timing.
– Avoid long refrigeration of filled cannoli, as cold can slow moisture migration but also change texture and soften shells faster once moisture equilibrates.
Storage timeline guidance:
– Shells (unfilled): Crispness remains best for 1–3 days if airtight.
– Filling: Typically keeps 2–3 days refrigerated, but always check smell/appearance and use within your food safety standards.
– Assembled cannoli: Best within a few hours of filling for maximum crunch.
Practical workflow tip:
If you’re hosting, fry shells first, cool completely, prep filling while shells cool, and refrigerate filling until assembly. This reduces pressure and keeps your shells at their crispest.
With this approach, you’re not just following a recipe—you’re controlling the variables that determine texture: oil temperature and fry color for shells, ricotta water content for filling, and timing for assembly.
With the right shell frying technique and properly drained ricotta, this best Italian cannoli recipe will give you crisp cannoli and creamy filling every time. Use the assembly tips to keep them from softening, then serve fresh for the best flavor and crunch—try it today and share your results!
Frequently Asked Questions
What is the best Italian cannoli recipe for beginners?
The best Italian cannoli recipe for beginners uses simple pantry staples, reliable dough measurements, and a straightforward frying method. Look for a recipe that includes a clear dough resting time, an easy ricotta filling made with powdered sugar, and a stress-free piping step. Choose one that specifies oil temperature for cannoli shells so you get crisp, golden shells without becoming greasy.
How do you make authentic cannoli shells that stay crisp?
To make authentic cannoli shells that stay crisp, roll the dough evenly, keep the oil at a steady temperature (usually around 350°F/175°C), and fry until dark-golden rather than pale. Drain shells well and cool them completely before filling, since warm shells can soften from moisture. If your filling is too wet, the shell will lose crunch, so use well-drained ricotta and mix just enough to pipe smoothly.
Why does cannoli filling get runny, and how can you fix it?
Cannoli filling gets runny when the ricotta is watery or when it’s not drained properly before mixing. To fix it, drain ricotta in a fine sieve or cheesecloth for at least a few hours, then sweeten with powdered sugar and add mix-ins like chocolate chips and candied fruit only after it thickens. Also avoid overmixing, which can release extra moisture and create a loose cannoli filling.
Which ricotta works best for cannoli, and how should it be prepared?
For the best Italian cannoli recipe, use high-quality whole-milk ricotta that’s thick and fresh, not the watery kind meant for spreading. Drain it thoroughly and break up the texture (either by mashing or briefly processing) so your cannoli filling is smooth and pipeable. Many authentic recipes also flavor the ricotta with a little vanilla and citrus zest for that classic Italian cannoli taste.
Best practices for assembling cannoli—when should you fill and garnish?
For the best texture, fill cannoli shells as close to serving time as possible because the sugar and moisture will soften the shells. Pipe the ricotta filling into cooled shells, then add garnishes like mini chocolate chips, candied orange peel, or crushed pistachios for a traditional cannoli look. If you’re making ahead, store shells and filling separately so the shells stay crisp and the flavor remains vibrant.
References
- Cannoli
https://en.wikipedia.org/wiki/Cannoli - https://www.britannica.com/topic/cannoli
https://www.britannica.com/topic/cannoli - Google Scholar Google Scholar
https://scholar.google.com/scholar?q=best+italian+cannoli+recipe - Google Scholar Google Scholar
https://scholar.google.com/scholar?q=cannoli+recipe+ricotta+sugar+filling - Google Scholar Google Scholar
https://scholar.google.com/scholar?q=sicilian+cannoli+shells+dough+frying+recipe - Cannoli recipe | Good Food
https://www.bbcgoodfood.com/recipes/cannoli - https://www.nytimes.com/guides/recipes/cannoli
https://www.nytimes.com/guides/recipes/cannoli - https://www.theguardian.com/food/series/italian-recipes/cannoli
https://www.theguardian.com/food/series/italian-recipes/cannoli - best italian cannoli recipe – Search results
https://en.wikipedia.org/wiki/Special:Search?search=best+italian+cannoli+recipe - https://www.ncbi.nlm.nih.gov/search/research-articles/?term=best+italian+cannoli+recipe
https://www.ncbi.nlm.nih.gov/search/research-articles/?term=best+italian+cannoli+recipe


