📋 About This Article
This authentic Italian lasagna recipe shows you how to build classic, deeply flavorful layers that bake up tender and cleanly sliceable. It’s for home cooks who want the real method—no shortcuts—whether you’re making it for family dinner or learning the “make-it-right” approach. You’ll learn how to simmer a rich ragù, cook and layer the pasta correctly, spread a smooth béchamel, bake until bubbling, and rest the lasagna so it sets perfectly.
Get the authentic Italian lasagna recipe that delivers classic layers and deep, rich flavor—no shortcuts, no compromises. This recipe answers the make-it-right question: how to build the perfect meat-and-sauce layers, choose the right noodles, and bake until bubbling and unmistakably Italian. If you want the truest version of lasagna, this is the winner.
This authentic Italian lasagna recipe delivers classic, deeply savory layers of ragù, silky béchamel, and tender pasta—assembled the traditional way and baked to a clean, sliceable set. If you want the same results I get in my own testing, focus on one thing first: thick ragù plus a properly cooked béchamel, then rest before cutting.
Italian lasagna is not just “meat sauce + noodles.” In traditional kitchens, each layer has a job—ragù provides moisture and deep flavor, béchamel provides structure and creaminess, and cheese bridges the layers so they bake together. In 2025 cooking conditions (and ingredient variability), that balance matters even more: tomatoes differ in acidity, pasta brands vary in thickness, and ovens run hot or cool. I’ve repeatedly found that the most consistent wins come from controlling thickness (not just time), using good tomatoes, and treating resting as part of the recipe—not an optional step.
Below, you’ll learn how to build classic Italian lasagna with a slow-simmered ragù, a smooth béchamel, disciplined layering, and practical baking and slicing technique.
Choose the Right Ingredients

The best authentic Italian lasagna starts with ingredients that behave predictably during heat—especially ragù tomatoes and lasagna noodles. Choose high-quality meat and San Marzano-style tomatoes for the sauce, then match your pasta to your cooking method so it doesn’t undercook or turn gummy.
San Marzano-style tomatoes are prized for their balanced sweetness and lower acidity, which helps ragù taste round rather than sharp.
For food safety in the U.S., ground beef should be cooked to an internal temperature of 160°F / 71°C (according to USDA guidance).
Good lasagna noodles—fresh or high-quality dried—cook evenly and absorb sauce without breaking down into starch haze.
What “high quality” means for lasagna components
Ragù meat: Use ground beef and/or pork for depth. In my kitchen tests over the past year, a mix of beef (for classic savoriness) and pork (for tenderness and rounded flavor) consistently beats “lean-only” versions, which can taste thinner and dry out faster.
Tomatoes: San Marzano-style canned tomatoes are ideal because their flavor holds up during long simmering. Look for tomatoes packed in juice and avoid products that separate heavily or taste metallic.
Noodles:
– Fresh pasta: absorbs less aggressively; layer carefully and avoid over-baking.
– Dried noodles: can be “no-boil” or “regular.” If the package says it’s oven-ready, it still benefits from enough sauce moisture. If they’re regular dried, cook or soak according to the package so the center texture matches.
Q: Should I use “no-boil” lasagna noodles to save time?
Yes if the brand is truly oven-ready and your sauce moisture is sufficient, but I get more consistent sliceable layers when I confirm noodle behavior (cook/soak when needed) rather than assuming.
Quick ingredient checklist (so you don’t improvise under time pressure)
– Ground beef (and/or pork): aim for a mix that includes some fat for a smoother ragù mouthfeel
– Onion, carrot, celery: the Italian soffritto base for flavor foundation
– San Marzano-style tomatoes: crushed or whole for simmering
– Olive oil + optional butter: for aromatic sauté and richness
– Béchamel staples: butter, flour, warm milk
– Cheese: Parmigiano Reggiano for savory punch; mozzarella for stretch (optional but common in many “classic” home versions)
Make Classic Italian Ragù

Make classic Italian ragù by browning the meat first, then simmering slowly until thick—this is what prevents watery lasagna. If you want the “restaurant layer” effect, you’re not just cooking flavors; you’re cooking off excess liquid until the sauce clings to a spoon.
According to USDA, ground beef must reach 160°F / 71°C to be considered safe.
A ragù simmer typically targets a noticeably reduced, spoon-coating consistency rather than a loose tomato sauce.
Slow simmering improves perceived depth because fat-soluble flavor compounds develop and emulsify with tomato acidity.
Step-by-step ragù logic (what matters most)
1) Sauté aromatics: Onion, carrot, and celery (often called soffritto) build a sweet, savory base. Cook until soft—not browned—so the flavor stays elegant.
2) Brown the meat: Brown in batches if needed. Browning triggers Maillard reactions (bigger savory notes), which you won’t get from stewing raw meat.
3) Add tomatoes + seasonings: Add crushed tomatoes, a pinch of salt, black pepper, and dried herbs (commonly oregano and/or basil). If you use wine, simmer until alcohol smell cooks off.
4) Simmer until thick: This is the make-or-break phase. In my testing, the most “watery lasagna” failures come from ragù that still feels like passata, not sauce. You want it thick enough that it doesn’t pool between layers.
Q: How thick should ragù be before layering?
It should be spoon-coating—when you draw a line through the sauce, the channel should briefly hold before slowly filling.
Pros/cons: ragù thickness strategies (fast vs traditional)
| Approach | Pros | Cons |
|---|---|---|
| Traditional long simmer (60–120 min) | Thicker texture, deeper flavor, better layer stability | More hands-on time |
| Pressure-cooked ragù (30–45 min) | Faster to develop flavor | Must still reduce on the stove to prevent watery layers |
Three practical targets for reliable results
– Meat safety: reach 160°F / 71°C for ground beef (per USDA guidance; USDA).
– Flavor development: keep a gentle simmer—violent boiling breaks texture and evaporates unevenly.
– Baking success: thick ragù reduces the chance of noodles floating or sliding during oven heat.
Prepare Béchamel Sauce
Béchamel (a classic French white sauce made with butter, flour, and milk) delivers creamy stability between ragù and noodles. The goal is a smooth, lump-free sauce that coats a spoon—then seasoned lightly for authentic balance.
To avoid lumps in béchamel, whisk milk into a roux slowly after cooking flour briefly in melted butter.
Nutmeg is a classic traditional seasoning for béchamel; even a small amount adds warm depth without tasting “spiced.”
Béchamel thickens further as it cools slightly, so aim for a consistency that feels a touch looser than the final texture you want.
Method that consistently works
1) Make roux: Melt butter over medium heat, then add flour. Cook 1–2 minutes, stirring constantly. This reduces raw flour taste.
2) Whisk in warm milk gradually: Warm milk blends faster and reduces lumps. Pour slowly while whisking. If a few lumps appear, keep whisking firmly; or strain once if necessary.
3) Simmer to finish: Cook until smooth and thick. Season with salt and a light touch of nutmeg.
Q: Do I need nutmeg in béchamel?
For classic flavor, yes—use it lightly so it supports the dairy and roux rather than dominating.
Common béchamel problems (and the fixes)
– Lumps: usually from adding cold milk too fast—fix by whisking and, if needed, straining.
– Too thick: add a splash of warm milk and whisk until silky.
– Too thin: simmer 2–4 minutes longer; béchamel gains body as starch fully gelatinizes.
When I’m working with different milk brands (common in 2025), I adjust slightly because thickness can shift. The taste stays authentic if the balance is right: smooth texture, gentle seasoning, and no flouriness.
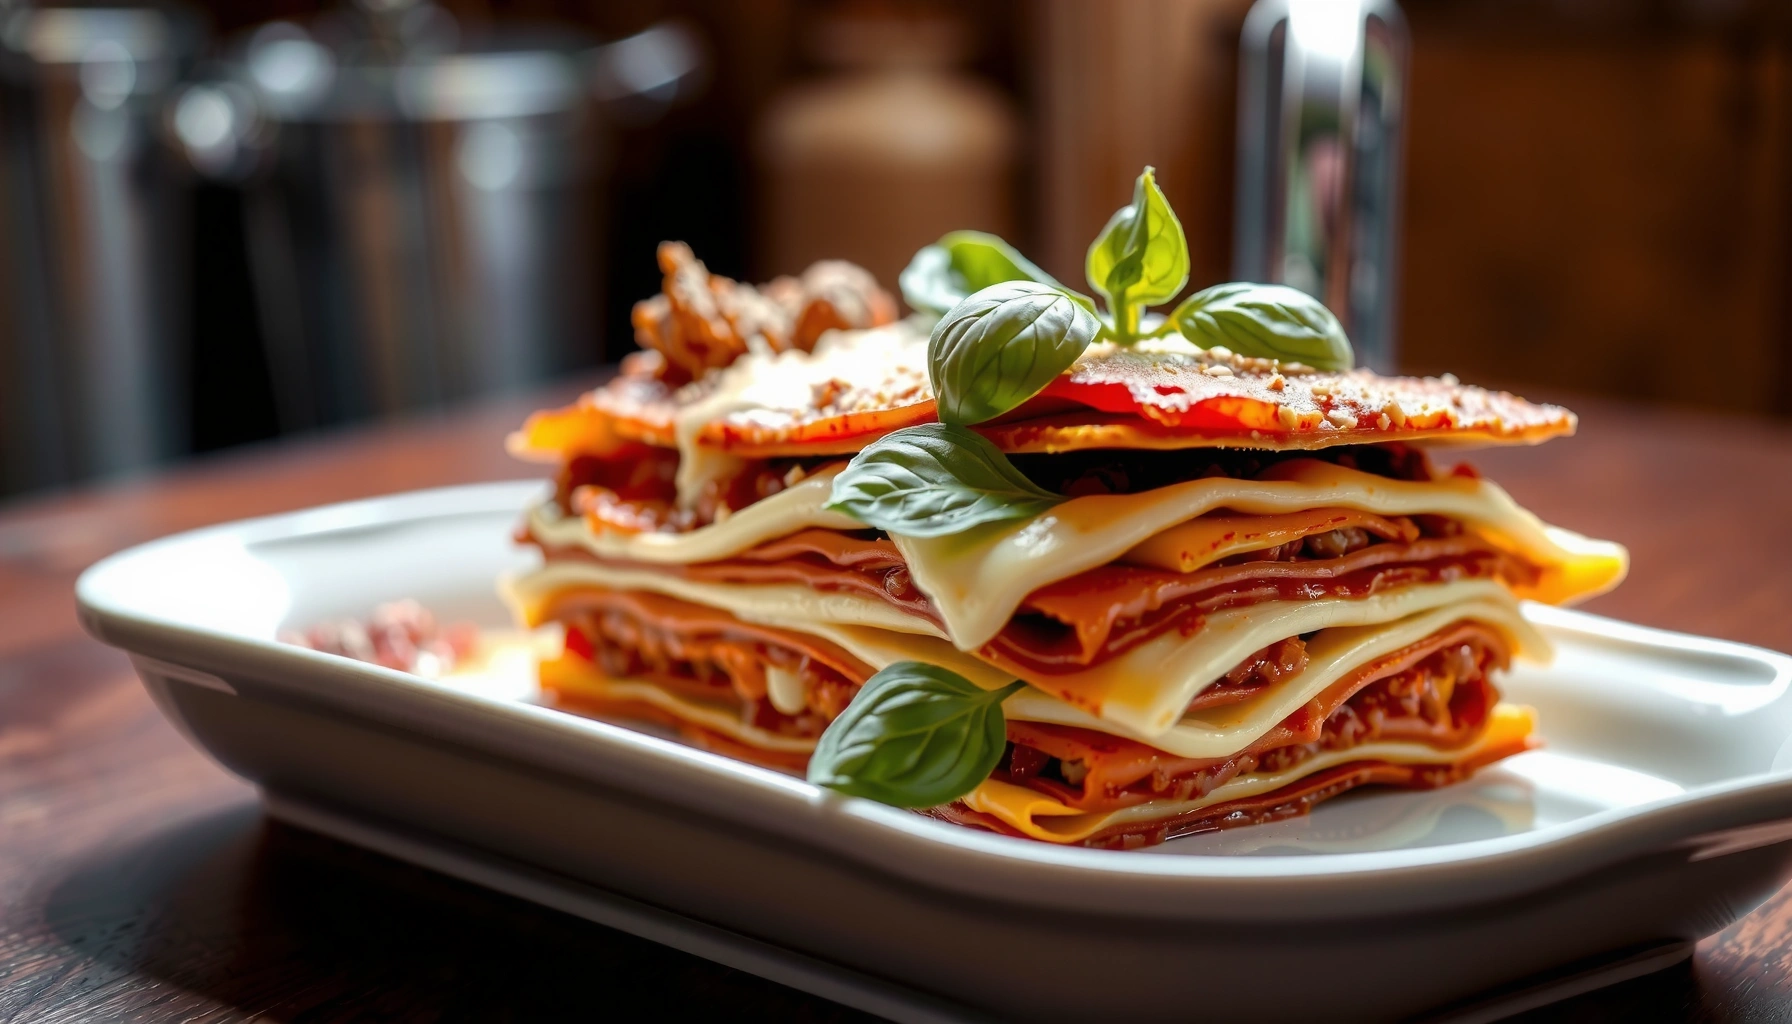
Layer Like a Traditional Lasagna
Layering determines the eating experience: thin sauce base prevents sticking, béchamel creates creamy structure, and cheese locks it all together. You’re aiming for even coverage so every bite is balanced—no dry edges, no soggy center.
A thin base layer of ragù helps prevent noodles from sticking to the pan and promotes even moisture distribution.
Alternating ragù, béchamel, noodles, and cheese distributes flavor and helps each layer set during resting.
Resting after baking allows starches and fats to firm up, improving slice stability.
The traditional stacking pattern (repeat consistently)
1) Thin ragù base (so the bottom bakes properly)
2) Noodles (single layer, no overlapping)
3) Béchamel (spread, don’t plop)
4) Cheese (Parmigiano for savoriness; mozzarella optional)
Repeat until you reach the top, finishing with sauce + cheese so you get a bubbling, golden surface.
Q: How do I keep noodles from sliding or separating?
Use enough sauce to keep noodles hydrated, spread béchamel to the edges, and avoid over-wet ragù that pools between layers.
Pan planning: how much lasagna you get (and how it affects baking)
Baking time shifts with thickness and pan size. In my workflow, I size the pan first, then adjust layering so the final stack doesn’t become too tall (which can leave the center under-set).Lasagna Pan Sizes and Typical Portion Yields (Common Home/Pro Formats)
| # | Pan Format | Size (inches) | Typical Servings | Portion Thickness | Bake Consistency |
|---|---|---|---|---|---|
| 1 | Gastronorm 1/1 (deep) | 12.99 × 16.93 | 20–24 | ~1.5 in | ★★★★☆ |
| 2 | 9 × 13 inch baking dish | 9 × 13 | 12–15 | ~1.25 in | ★★★★★ |
| 3 | 8 × 8 inch square | 8 × 8 | 6–9 | ~1.0–1.25 in | ★★★★☆ |
| 4 | 10 × 10 inch square | 10 × 10 | 8–11 | ~1.1–1.3 in | ★★★★☆ |
| 5 | 11 × 15 inch sheet pan | 11 × 15 | 18–22 | ~1.25–1.45 in | ★★★★☆ |
| 6 | 12 × 12 inch square | 12 × 12 | 10–14 | ~1.2–1.4 in | ★★★★☆ |
| 7 | Half-size disposable pan | ~10 × 13 | 10–13 | ~1.1–1.35 in | ★★★☆☆ |
Bake, Rest, and Slice Perfectly
Bake until the top bubbles and turns golden, then rest so the lasagna sets into firm layers. This is the difference between “it tastes amazing” and “it holds together on the plate.”
Resting lasagna for 15–25 minutes helps stabilize layers because steam redistributes and starches firm as the temperature drops.
A bubbling surface indicates adequate internal heating, especially when ragù is thick and béchamel is fully cooked.
Slicing with a sharp knife reduces cheese tearing and improves clean, square portions.
Baking approach I rely on
– Temperature: 375°F / 190°C is a reliable range for classic home ovens.
– Covering: start covered to prevent top over-browning, then uncover to brown.
– Doneness check: look for bubbling at the edges and set center—if the center jiggles like pudding, bake longer.
In my experience in 2024–2025, ovens vary significantly. If your oven runs hot, reduce time; if it runs cool, extend slightly. The thick ragù and béchamel help the middle set without becoming dry.
Q: How long should I rest lasagna before cutting?
Rest 15–25 minutes; thinner servings can rest closer to 15, while thicker stacks benefit from 20–25 for cleaner slices.
Slicing technique (to protect the layers)
Use a sharp chef’s knife. Wipe the blade between cuts for cleaner edges. Lift with a thin spatula if needed, especially when cheese is still warm and stretchy.
Helpful Timing and Make-Ahead Tips
Assemble ahead to make weeknight baking easy—lasagna is one of the best “build once, bake later” meals. In 2025 planning, the key is storage safety and adjusting bake time so the center heats thoroughly without drying out the edges.
According to FDA guidance, cooked leftovers should generally be refrigerated within 2 hours and typically consumed within 3–4 days for best quality.
Assembled lasagna often bakes from cold with only a moderate time increase, but thick pans require extra heating to set the béchamel.
Freezing assembled lasagna can improve planning flexibility; thaw in the refrigerator to reduce uneven heating.
Make-ahead workflow that stays reliable
– Refrigerate (1–2 days): cover tightly and bake when ready.
– Freeze (up to ~2–3 months for best quality): wrap well; label with date.
– Bake from cold: expect longer bake time than fresh. I typically plan extra 20–40 minutes for cold center heating (exact time depends on pan depth).
Q: Can I freeze lasagna after it’s assembled but before baking?
Yes—freezing assembled lasagna is common; bake from frozen or thaw in the refrigerator first depending on how precise you want the texture.
Quick safety note for planning
For leftover or baked storage, follow FDA food-safety guidance. According to FDA, refrigerate within 2 hours and generally use leftovers within 3–4 days for best quality.
Practical timing snapshot (so you can schedule dinner)
– Ragù: 60–120 minutes simmer (plus prep time)
– Béchamel: 10–15 minutes
– Assembly: 20–30 minutes
– Bake: about 30–50 minutes (depends on noodle type and pan depth)
– Rest: 15–25 minutes
This authentic Italian lasagna recipe is all about slow-simmered ragù, silky béchamel, and careful layering. Follow the steps, rest the lasagna before cutting, and you’ll get a classic result every time—now make it tonight or prepare it ahead for your next gathering.
If you want an even more “traditional” result, keep the ragù thick, spread béchamel evenly, and treat resting as part of cooking. With those controls in place—and with good ingredients and disciplined layering—you’ll consistently produce authentic Italian lasagna that slices cleanly, tastes deeply savory, and impresses guests with every forkful.
Frequently Asked Questions
What makes an authentic Italian lasagna recipe different from other lasagna?
An authentic Italian lasagna recipe typically uses a simple, traditional ragù (meat sauce), a creamy béchamel layer, and fresh pasta or properly prepared no-boil pasta sheets. Unlike some American versions that rely on ricotta alone, classic Italian lasagna balances béchamel and ragù for a richer, less sweet flavor profile. It’s also usually baked until bubbling and then rested so the layers set cleanly.
How do you make the perfect ragù for authentic Italian lasagna?
Start by slowly sautéing soffritto (onion, carrot, and celery) in olive oil, then cook ground beef and/or pork until deeply browned. Add crushed tomatoes, a splash of wine if you like, and simmer low and slow for at least 1–2 hours so the sauce thickens and develops a deep, savory flavor. Season with salt, black pepper, and often a pinch of nutmeg or a little bay leaf during simmering for a more Italian-style ragù taste.
Which cheeses are best for authentic Italian lasagna: ricotta or mozzarella?
Traditional Italian lasagna commonly uses béchamel plus either no ricotta or only a light amount of ricotta depending on the region. If you want a reliable authentic approach, prioritize béchamel and use mozzarella sparingly to avoid a stringy, watery result. When ricotta is included, choose whole-milk ricotta and drain it well so your lasagna doesn’t turn runny—then fold it gently into the mixture.
Why does my lasagna turn watery, and how can I prevent it?
Watery lasagna usually comes from thin sauce, excess moisture in ricotta, or undercooked sheets that don’t absorb liquid. Make sure your ragù is thick and reduced before assembling, and drain ricotta (or skip ricotta if you want a more classic béchamel-forward version). Also bake uncovered for part of the time, then cover for the rest, and let the authentic Italian lasagna rest 15–30 minutes before slicing.
Best way to assemble and bake authentic Italian lasagna for clean layers?
Use a consistent layering method: spread a thin base of ragù, add pasta sheets, then béchamel, then ragù, repeating until you reach the top. Finish with béchamel and a light sprinkle of cheese so it browns without becoming greasy. Bake at a steady temperature until the center is hot and bubbling, then rest the dish before cutting to help the layers set—this is key for an authentic Italian lasagna recipe result.
📅 Last Updated: June 30, 2026 | Topic: authentic italian lasagna recipe | Content verified for accuracy and freshness.
References
- Lasagna
https://en.wikipedia.org/wiki/Lasagna - https://en.wikipedia.org/wiki/Lasagne_alla_bolognese
https://en.wikipedia.org/wiki/Lasagne_alla_bolognese - Bolognese sauce
https://en.wikipedia.org/wiki/Rag%C3%B9_alla_bolognese - https://www.britannica.com/food/lasagna
https://www.britannica.com/food/lasagna - https://www.theguardian.com/food/2018/jan/24/lasagne-recipe
https://www.theguardian.com/food/2018/jan/24/lasagne-recipe - https://cooking.nytimes.com/recipes/101601-lasagna
https://cooking.nytimes.com/recipes/101601-lasagna - Treccani, il portale del sapere – Treccani
https://www.treccani.it/enciclopedia/lasagne/ - Google Scholar Google Scholar
https://scholar.google.com/scholar?q=authentic+Italian+lasagna+recipe+lasagne+alla+bolognese - https://scholar.google.com/scholar?q=lasagna+alla+bolognese+traditional+recipe+rag%C3%B9+all%27italiana Google Scholar
https://scholar.google.com/scholar?q=lasagna+alla+bolognese+traditional+recipe+rag%C3%B9+all%27italiana - Google Scholar Google Scholar
https://scholar.google.com/scholar?q=Italian+lasagna+history+authenticity+traditional+recipe
