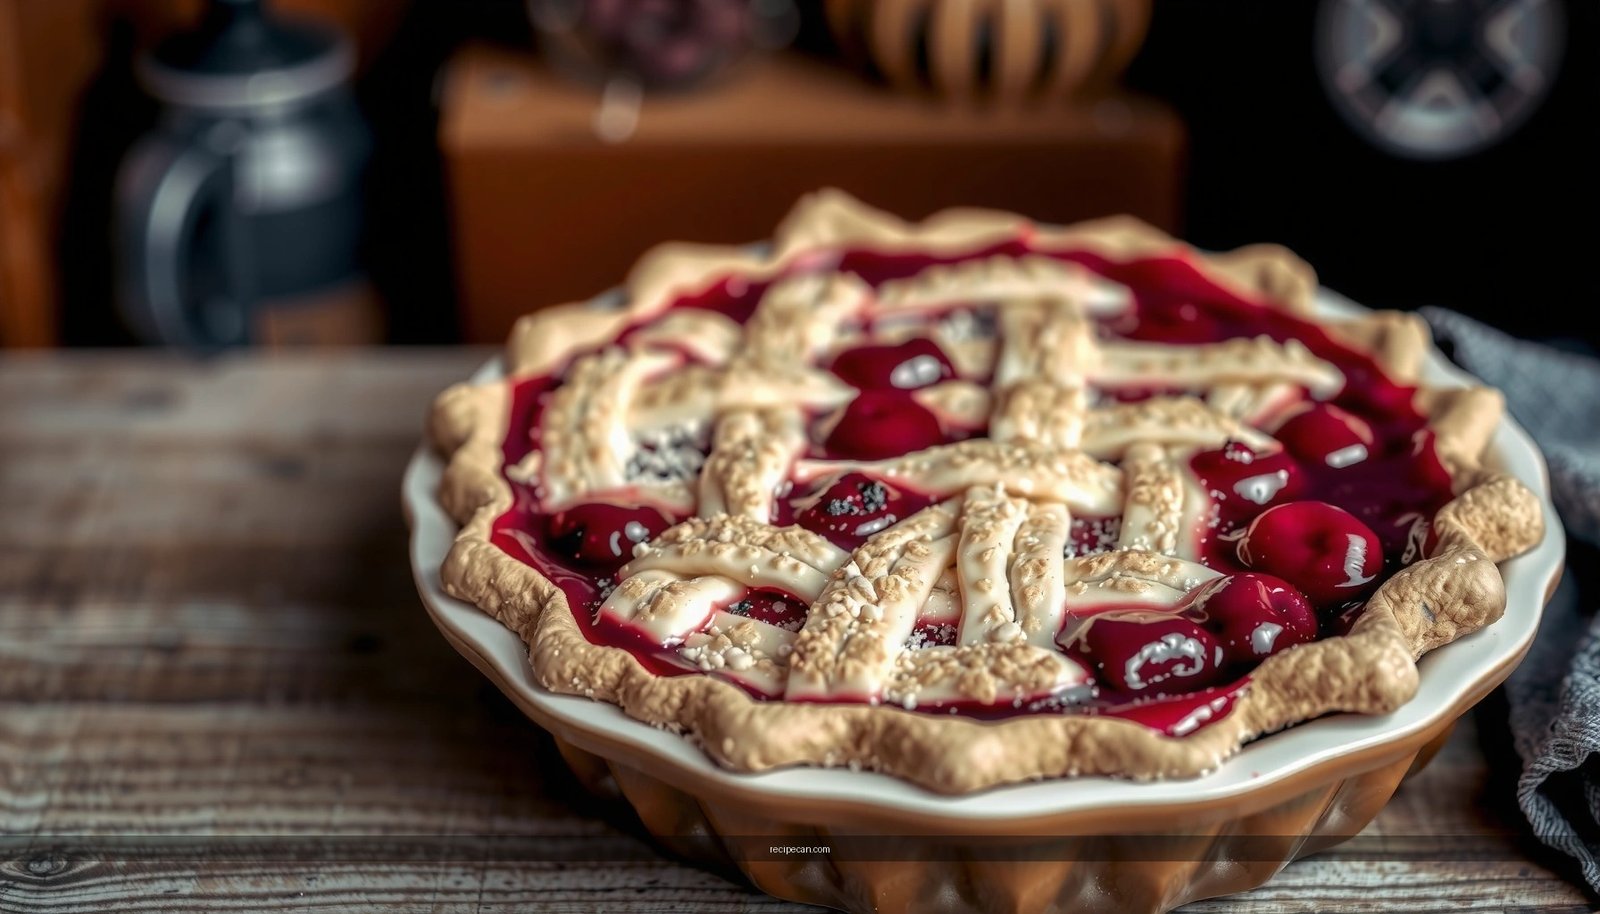
This cherry crumble pie recipe delivers the easiest route to a bakery-style homemade dessert—crisp, buttery crumble over a juicy cherry filling. You’ll get clear, step-by-step instructions that answer whether your pie can be reliably made at home without complicated techniques. Follow it once, and you’ll know exactly how to bake a cherry crumble pie that slices cleanly and tastes like it came from a favorite bakery.
This cherry crumble pie recipe delivers a juicy, thickened cherry filling topped with a crisp, buttery crumble—so you get both fruit-forward flavor and a golden, bakery-style crust at home. In the sections below, you’ll learn exactly how to simmer the cherries to the right thickness, build a proper crumble texture (pea-sized crumbs), assemble cleanly, and bake until the filling bubbles and the top turns deep golden.
Ingredients for Cherry Crumble Pie

A great cherry crumble pie starts with two things: a reliable cherry filling base and a crumble topping that stays crisp. You can use fresh or frozen cherries; the method focuses on getting the filling saucy but not runny and the topping deeply golden.
Main ingredients (cherries + flavor)
– Pitted cherries (fresh or frozen): about 4 to 4½ cups (roughly 2 lbs/900 g if frozen and not yet pitted)
– Granulated sugar: ¾ cup (adjust slightly based on cherry sweetness)
– Lemon juice: 1 to 2 tbsp (to brighten flavor)
– Salt: ¼ tsp (balances sweetness)
Thickener (choose one)
– Cornstarch: 3 tbsp for a glossy, scoopable filling
*Optional alternative:* Tapioca starch (3 tbsp) for a slightly more elastic “pie-like” set.
Pantry staples (cooking + baking)
– All-purpose flour: ½ cup (for crumble)
– Unsalted butter: ½ cup (1 stick / 113 g), cold and cubed
– Brown sugar or extra granulated sugar: ¼ cup (adds caramel notes)
– Ground cinnamon: 1 tsp
– Nutmeg (optional): ¼ tsp
– Vanilla extract (optional): 1 tsp
– Almond extract (optional): ¼ to ½ tsp (pairs extremely well with cherry)
Pie base / crust (two options)
– No-bake crumble-only filling: use a 9-inch baking dish (simplifies the recipe)
– Traditional pie: use a 9-inch pie crust (homemade or store-bought)
If you’re aiming for “classic pie” structure, a crust helps with slicing and presentation. If you want maximum ease, a baking dish is faster and still delivers the same crisp crumble top.
Cherry Filling Thickeners Compared (For 4–4½ Cups Cherries)
| # | Thickener | Recommended Amount | Set After Cooling | Best For | Practical Rating |
|---|---|---|---|---|---|
| 1 | Cornstarch | 3 tbsp | Firm in 30–60 min | Glossy, spoonable filling | ★★★★★ |
| 2 | Tapioca starch | 3 tbsp | Set in 45–75 min | More elastic “pie” slice | ★★★★☆ |
| 3 | All-purpose flour | 4–5 tbsp | Sets slower than starch | Subtle “homestyle” texture | ★★★☆☆ |
| 4 | Arrowroot | 2½–3 tbsp | Quick set, glossy finish | Clearer, silkier sauce | ★★★★☆ |
| 5 | Instant tapioca | 3 tbsp | Sets reliably with simmer | Even thickening, minimal grittiness | ★★★★☆ |
| 6 | Reduce-only (no thickener) | Not recommended | Often runny | Dessert spooning, not slices | ★☆☆☆☆ |
| 7 | Jelly/jam (thinned) | Varies | Inconsistent | Flavoring more than structure | ★★☆☆☆ |
How to Make the Cherry Filling

The cherry filling is where this pie earns its “easy but impressive” status. The goal is to simmer just until the cherries break down and the sauce thickens to a consistency that will hold its shape after baking.
1) Combine cherries, sugar, and thickener correctly
– Place cherries in a saucepan with sugar and lemon juice.
– For best results, whisk cornstarch with a small amount of cold water first (about 2–3 tbsp). This prevents lumps and creates a smooth gel.
– Stir in the cornstarch slurry, then bring the mixture to a gentle boil while stirring.
What you’re looking for: bubbles that are active and glossy, not watery. Once thickened, stir for 30–60 seconds to ensure the starch is fully cooked.
2) Balance flavor: sweetness, acidity, and salt
Cherries can vary dramatically in sweetness. Instead of overcorrecting with extra sugar, adjust with:
– Lemon juice for brightness (start with 1 tbsp; add another teaspoon if the cherries taste flat)
– Salt to round out flavor (¼ tsp is a reliable baseline)
Optional extracts:
– Add vanilla for warmth (1 tsp)
– Add almond extract if you want a more classic cherry-pie profile (¼–½ tsp; start small to avoid overpowering)
3) Cool slightly before assembling
Let the filling cool for 10–15 minutes. If you pour it in piping hot, it can:
– Soften the base/crust prematurely
– Slightly melt butter in the crumble top (reducing crispness)
Cool enough to be pourable and stable, but not cold enough to become thick like jam.
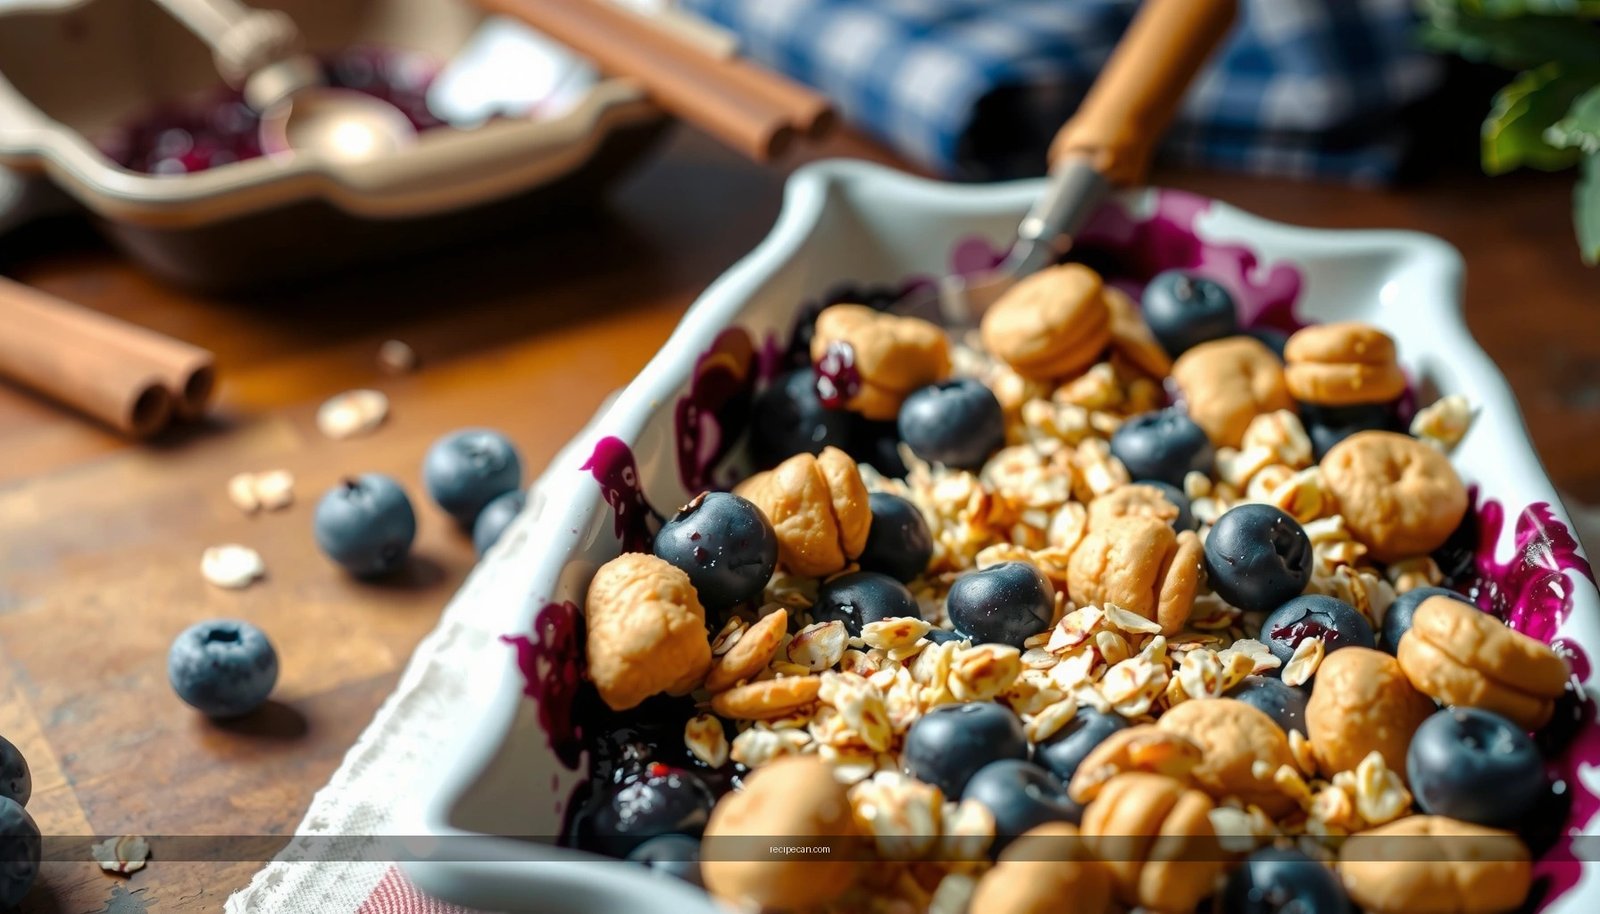
Make the Crumble Topping
Crumble topping texture comes from crumb size and butter temperature. “Pea-sized crumbs” is more than a phrase—it’s a practical target that promotes even browning and a crunchy finish.
1) Cut butter into dry ingredients
– In a bowl, combine flour, sugar, cinnamon, and nutmeg (optional).
– Add cold, cubed butter.
– Rub or pinch the mixture together until it forms pea-sized crumbs and a few smaller bits.
This creates pockets where butter melts in the oven, steaming fruit juices into the surface while the dry components crisp up.
2) Chill for extra crunch (optional but effective)
If your kitchen is warm, refrigerate the crumble 20–30 minutes before sprinkling. Cold crumble maintains defined crumb edges, resulting in:
– Better crunch
– Less “melted” topping that can feel sandy
3) Don’t overmix
Overmixing makes the topping dense and can cause it to form larger clumps that bake unevenly. Aim for crumb texture that looks consistently broken, not uniform dough.
Crumble Doneness Targets (So It’s Golden, Not Burnt)
| Step | Bake Stage | Visual Cue | What to Do |
|---|---|---|---|
| 1 | Initial set | Edges start bubbling | Bake 10–15 min before checking |
| 2 | Active bubbling | Center bubbles + syrup sheen | Continue baking 15–25 min |
| 3 | Deep golden top | Top is golden brown, not pale | Start watching closely at ~35 min |
| 4 | Edge protection | Crust edges browning fast | Cover edges with foil |
| 5 | Final bake | Bubbles look thick, top crisp | Cool 30–60 min before slicing |
Assemble and Bake
Once your filling has thickened and your crumble is ready, assembly is straightforward—and the bake timing is what converts “ingredients” into a finished homemade dessert.
1) Preheat and prepare your dish
– Preheat oven to 375°F (190°C)
– If using a pie crust, place it in a 9-inch pie plate and trim/smooth edges.
– If using a baking dish instead, lightly grease for clean serving.
2) Spread filling evenly
– Spoon the slightly cooled cherry filling into the crust or dish.
– Spread to an even layer so the bake time stays consistent and bubbles reach the center.
Tip: avoid leaving large air gaps—uneven filling can lead to a pale top and under-set center.
3) Sprinkle crumble generously
Sprinkle crumble evenly over the entire surface. For best crispness:
– Leave some visibility of filling at the edges
– Use a slightly thick crumble layer rather than a sparse scatter
4) Bake until golden and bubbling
Bake until:
– The center bubbles (not just the edges)
– The topping is deep golden brown
– The filling looks active and slightly syrupy
Typical bake time is 35–50 minutes, depending on your dish depth and whether you started with a crust (pie) or a bare dish (cobbler style).
Tips for the Best Texture
Texture problems usually come from preventable factors: thickener choice, timing, and crust protection.
1) Use the right thickener so the filling doesn’t turn runny
Runny cherry filling is rarely “user error” in measuring—it’s often a thickener issue or under-cooking the starch.
– If using cornstarch, bring to a boil and stir briefly to cook it through.
– If using frozen cherries, ensure you still simmer to thickened consistency because water content can be higher.
2) Let the pie rest before slicing
This is the easiest improvement with the biggest payoff:
– Rest 30–60 minutes before slicing.
– During rest, the thickened filling sets as it cools.
If you cut too soon, the filling may look set but will release syrup when sliced.
3) Cover edges with foil if the crust browns too fast
Ovens run hot at the edges. If the pie crust begins browning before the center is bubbling:
– Tent a piece of foil over the edges (avoid covering the crumble)
This prevents burnt crust while letting the top continue crisping.
Storage and Serving Ideas
Cherry crumble pie tastes best slightly warm, but it also holds up well for leftovers—especially because the crumble can re-crisp with gentle reheating.
Storage
– Store covered in the refrigerator for up to 4 days
– Reheat individual slices at 325°F (165°C) for 10–15 minutes, or until warmed through
Avoid microwaving whenever possible; microwaves soften crumble and can make the filling looser.
Serving suggestions
– Serve warm with vanilla ice cream for classic contrast
– Or add whipped cream for a lighter finish
– For extra aroma, sprinkle a pinch of cinnamon on top right before serving
Make-ahead option (efficient for hosting)
You can prepare both components separately:
1. Make the cherry filling and cool it completely.
2. Make the crumble and keep it chilled.
3. Assemble and bake when ready, adding 5–10 minutes if components were chilled from the fridge.
This approach improves timing for gatherings and reduces last-minute stress.
No matter what cherries you use, this cherry crumble pie recipe delivers a flavorful filling and a crisp topping with simple steps. Gather your ingredients, follow the filling and crumble instructions, bake until bubbling, and let it cool briefly—then slice and serve right away.
Frequently Asked Questions
What is the best cherry crumble pie recipe for a flaky crust?
A great cherry crumble pie recipe usually starts with a homemade pie crust or a high-quality store-bought crust for reliable flakiness. Use a balanced filling of cherries plus a thickener like cornstarch or tapioca so the pie slices cleanly after baking. For the crumble topping, combine flour, oats, sugar, and cold butter until it looks like coarse crumbs, then bake until golden and bubbling.
How do I prevent cherry pie filling from becoming runny in a crumble pie?
Runny filling is often caused by too little thickener or cherries that release extra liquid without enough support. Toss your cherries with cornstarch (or quick-cooking tapioca) and sugar, then let it sit briefly so juices combine with the thickener. Bake until you see clear bubbling in the center, and let the pie cool fully—at least a few hours—so the cherry crumble pie filling sets.
Why does my crumble topping turn soggy, and how can I fix it?
Crumble topping can get soggy when the pie isn’t baked long enough or when the topping is too fine and butter-heavy. Make sure you use cold butter and mix just until the topping forms crumbs, then bake until the crumble is crisp and deeply golden. If your crust browns too quickly, cover the edges with foil while the center continues to bake so the topping stays crunchy.
Which cherries are best for a cherry crumble pie—fresh, frozen, or canned?
Fresh cherries are ideal for flavor and texture when they’re in season, but frozen cherries work just as well if they’re not thawed too much beforehand. If using frozen cherries, drain excess liquid or reduce added liquid in the recipe to avoid a watery cherry pie filling. Canned cherries can be used, but choose ones packed in juice (not syrup) and adjust sweetness and thickener accordingly for the best results.
How long do I bake a cherry crumble pie, and what doneness signs should I look for?
Most cherry crumble pie recipes bake around 350–375°F (175–190°C) for about 45–65 minutes, depending on your crust thickness and whether your cherries are fresh or frozen. Look for bubbling filling around the edges and an evenly golden crumble topping as key doneness signs. For best sliceable texture, cool the pie before cutting—this helps the thickened cherry filling firm up and prevents messy servings.