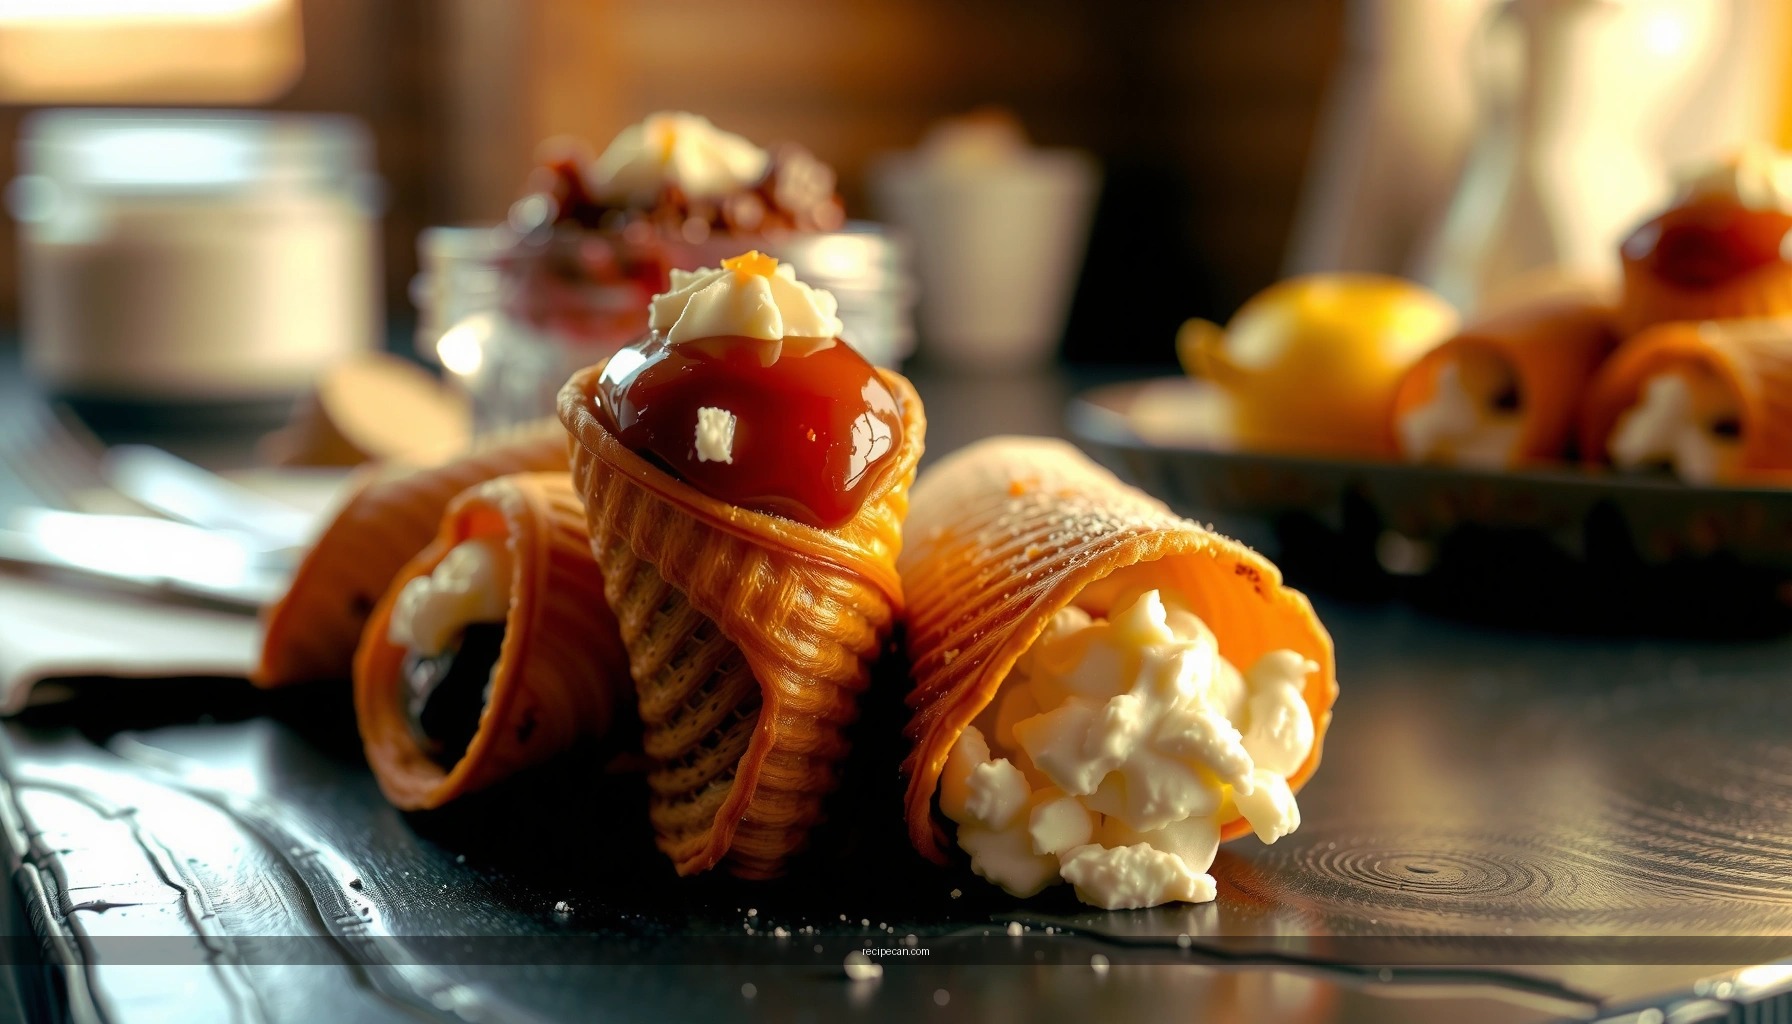
This cannoli shell recipe shows you how to make crisp homemade cannoli shells that stay crunchy instead of turning soft. You’ll follow the exact dough mix, rolling and frying steps, and timing that produce thin, blistered shells with the right snap. If you want the best results for homemade cannoli shells, this method is the clear winner—simple, repeatable, and built for crunch.
Make crisp homemade cannoli shells by using a manageable dough, frying at the correct temperature, and letting the shells cool fully before filling. This cannoli shell recipe walks you through mixing, rolling, frying, and shaping so your shells stay crunchy and don’t crack—whether you’re making them for a dinner party or building a consistent workflow for large batches.
Ingredients for Cannoli Shells

– Use flour, sugar, salt, and egg for a workable, crisp dough
– Add a touch of fat (like butter or lard) and optional Marsala for flavor
– Have canola/neutral oil ready for frying
A crisp cannoli shell starts with dough that fries fast and evenly. You’re balancing three functions: structure (flour and a small amount of sugar), tenderness and blistering (fat), and binding (egg). The fat matters because it slows excessive gluten development and helps the shell turn crisp rather than bready. If you use Marsala, it contributes gentle aromatic depth and can also slightly improve browning, but it’s optional—water or a splash of white wine can substitute in a pinch.
For frying, use a neutral oil with high heat tolerance. Canola is the classic choice because it stays stable at typical deep-frying temperatures and doesn’t dominate the flavor profile. If you’re aiming for a consistent, restaurant-style texture, measure ingredients by weight when possible and keep your dough covered to prevent surface drying.
Here’s a quick “ingredient-to-performance” reference to help you troubleshoot while cooking:
Crisp Cannoli Shell Parameters & Expected Results (Homemade Workflow)
| # | Control Point | Target Range | Why It Matters | Outcome Signal |
|---|---|---|---|---|
| 1 | Dough rest | 20–40 min | Relaxes gluten for thin rolling | ↑ uniform thinness |
| 2 | Rolling thickness | ~1.0–1.5 mm | Enables blistering without toughness | ★ crisp snap |
| 3 | Oil temperature | 175–185°C / 350–365°F | Quick set prevents soggy shell | low temp → soft shells |
| 4 | Frying time (per shell) | 30–70 sec | Short fry preserves thin, crisp structure | even golden blistering |
| 5 | Drain method | Rack/liner 1–2 min | Removes surface oil for less softening | dry exterior, light sheen |
| 6 | Cooling before sliding off forms | 1–3 min warm set | Prevents breakage from premature handling | too hot → cracks; too soon → collapse |
| 7 | Filling timing | Fill within 0–2 hrs | Moisture migration is the main culprit | keeps ★ crunch at serve |
Make the Cannoli Dough

– Mix until smooth, then rest the dough for better texture
– Roll thin for classic crispness and even frying
– Keep dough covered to prevent drying and cracking
Start by combining flour, sugar, and salt, then add egg and fat. Mix until the dough comes together; at first it may look shaggy, but it should become smooth as you knead briefly. The goal isn’t to overwork it like bread dough—cannoli dough benefits from controlled development. Once mixed, rest the dough. This matters because it hydrates the flour and relaxes the gluten so you can roll very thin without shrinking back.
When rolling, aim for a consistent thinness—think nearly translucent edge areas (not literally see-through, but thin enough that the dough isn’t bulky). Uneven thickness leads to uneven blistering: thin spots brown too quickly and thicker spots remain pale and soften after cooling. If the dough tears or won’t stretch, it usually needs more rest or a lighter touch.
Because dough dries quickly, especially thin sheets, keep it covered with plastic wrap or a clean towel. A dry surface can cause micro-cracks during frying, which then widen into visible splits on the final shell.
Actionable workflow tip: If you’re making multiple batches, portion the dough and roll one batch at a time. The less time the dough spends exposed, the fewer cracks you’ll get.
Shape the Shells on Forms

– Cut dough into strips or circles for easier rolling
– Wrap dough tightly around cannoli forms without stretching
– Seal edges with a little water or egg wash
Cannoli shells are shaped around metal forms (often called “cannoli tubes” or “forms”), and that wrapping technique is a major determinant of crispness and appearance. After rolling your dough thin, cut it into strips or circles sized for your forms. Strips are often the easiest for beginners because you can control overlap and tension.
Wrap the dough tightly without stretching it. Stretching thins the dough unevenly and increases the chance of cracking during frying. Instead, let the form’s diameter dictate the final shape. Overlapping edges slightly is normal; the key is that overlap thickness is consistent so the shell fries uniformly.
To seal, brush a small amount of water or egg wash along the seam. Use just enough to create adhesion—excess liquid can cause bubbling at the seam and weaken the shell structure. Press the seam gently so it adheres as the dough heats.
If you want a professional look, keep the seam aligned and avoid wrinkles. Wrinkles fry into bubbled ridges that can trap oil, affecting the shell’s crispness. Smooth wrapping plus proper sealing is one of the most reliable ways to prevent leaks in the finished dessert.
Fry Until Golden and Crisp
– Fry in hot oil until shells blister and turn deep golden
– Turn as needed for even browning
– Drain well to remove excess oil
Frying is where the recipe “locks in” texture. Heat your neutral oil until it’s in the 175–185°C (350–365°F) range. Too cool and the shell absorbs oil and turns soft. Too hot and the exterior can brown before the interior sets, leading to a fragile shell that cracks when cooled.
Lower the wrapped shells carefully and fry until they blister and turn deep golden. Typically this is quick—on the order of seconds to under a minute depending on thickness and oil temperature. Turn as needed for even browning. If you notice pale patches, you can rotate the shell, but avoid over-handling since repeated contact can deform the dough while it’s still setting.
Drain effectively. Place shells on a rack or absorbent liner and let excess oil escape. Residual oil on the surface can soften shells during cooling, particularly in humid environments. Professional kitchens often drain on racks for that reason: gravity removes oil without trapping it in pooled paper.
Visual cues matter. You should see an even golden color with fine blistering, not heavy puffiness. When shells are ready, they should feel light and crisp; if they seem heavy or oily, fry slightly longer or check temperature.
Cool and Store for Best Crunch
– Let shells cool completely before sliding off forms
– Avoid filling until the last moment to prevent sogginess
– Store airtight briefly, and re-crisp if needed
Cooling is not optional if you want cannoli shells that actually stay crisp. The shell continues to set as it cools, and rushing that step can cause cracks or deformation when you remove the forms. A practical approach is to let shells cool briefly on the forms (just until they’re safe to handle and set), then slide them off gently and place them on a rack to cool fully.
Once fully cooled, store shells airtight if you’ll fill them later. However, remember that cannoli shells are inherently at risk of absorbing moisture from the filling and from ambient humidity. The most effective strategy is to bake/fry ahead, but fill right before serving.
If your shells lose some crunch before you fill or serve—common in humid climates—you can re-crisp them briefly. A short warm re-toast (low oven or quick air-fry) can restore texture, but don’t overdo it. Overheating can darken the shell too much or make it brittle.
A note for event planning: If you’re producing for 30–60 guests, consider a production schedule where you fry and cool shells in one wave, fill in a second wave, and plate in a third. This keeps service consistent and protects the “crunch moment” consumers expect.
Common Troubleshooting Tips
– If shells are soft: dough may be too thick or oil not hot enough
– If shells crack: dough may be dry or wrapped too loosely
– If shells blister unevenly: adjust thickness and frying time
Even with good technique, small variables can affect crispness and integrity. Here are the most common failure points and what they usually mean:
Soft shells (not crisp after cooling):
– Likely causes: oil temperature too low, dough rolled too thick, or insufficient frying time.
– Fixes: confirm oil temperature with a thermometer, roll thinner, and aim for golden blistering. Also drain longer on a rack to remove oil.
Shells crack or split when sliding off forms:
– Likely causes: dough dried out before frying (surface cracks), insufficient seam sealing, or the shell being handled while still too hot and fragile.
– Fixes: keep dough covered; seal seams with minimal water/egg wash; allow the shell to rest on the forms long enough to set before removal.
Blistering is uneven (dark spots and pale areas):
– Likely causes: uneven thickness during rolling or inconsistent oil temperature across batches.
– Fixes: roll to a consistent thickness, cut and wrap evenly, and avoid crowding the oil (which cools the oil). Adjust frying time slightly if you see fast browning on some shells.
Brittle shells that shatter easily:
– Likely causes: frying too hot, over-frying, or dough too dry/overworked.
– Fixes: reduce frying time and verify temperature stability. Make sure dough is well-rested and not exposed to air for long periods.
Seams open during frying:
– Likely causes: inadequate sealing or stretched dough that relaxes.
– Fixes: use a light brush of egg wash/water and press seam gently without stretching the sheet.
If you want to systematize this process, test one or two shells first. Use those “pilot fries” to dial in thickness and oil temperature before committing to a full batch—this approach is how you protect texture at scale.
Once you follow this cannoli shell recipe—thin dough, hot oil, and full cooling—you’ll get crunchy shells that hold up to filling. Make a batch, prep your cannoli filling, and fill right before serving for the best texture—then enjoy your homemade cannoli.
Frequently Asked Questions
What is the best cannoli shell recipe for a crisp, non-greasy crunch?
A classic cannoli shell recipe uses a simple dough made from flour, sugar, egg, white wine (or vinegar), and a small amount of fat, rolled thin and fried quickly. For maximum crispness, keep the oil at a steady temperature (typically around 350–375°F / 175–190°C) and fry until shells are light golden. Drain shells briefly on a rack, not paper towels, to prevent sogginess and keep them crisp.
How do I make cannoli shells from scratch without bubbles or uneven frying?
Make sure your dough is smooth, well-rested, and rolled evenly—uneven thickness is one of the most common reasons for blistering or uneven frying. When frying, don’t overcrowd the pot, and keep the oil temperature consistent so shells rise and crisp at the same rate. If bubbles form, they can come from wet dough or insufficient resting; letting the dough rest and drying off any excess moisture helps.
Why do cannoli shells get soggy, and how can I prevent it?
Cannoli shells absorb moisture from the filling, so they soften as soon as the filling is piped in. To prevent sogginess, make shells ahead and store them completely cooled in an airtight container, and fill them only shortly before serving. If you need to hold them longer, pipe filling into shells just before serving or use a drier filling consistency.
Which tools and ingredients are essential for shaping authentic cannoli shell tubes?
Authentic cannoli shells are typically wrapped around metal cannoli forms or tubes, which help create the signature crisp cylinder shape. You’ll also want a rolling pin for thin dough, a spider or tongs for lifting shells safely, and a thermometer to maintain frying temperature. For flavor and texture, use a traditional binder like egg and a splash of white wine or vinegar to help develop a crisp, blistered shell.
How do I store homemade cannoli shells so they stay crisp for longer?
After frying, cool shells fully on a rack so steam can escape, then store in an airtight container at room temperature. For best results, keep shells unfilled and separated (or layer with parchment) to prevent sticking and breakage. While crispness gradually declines over time, properly stored cannoli shell recipe results can remain crunchy for several days.
References
- Google Scholar Google Scholar
https://scholar.google.com/scholar?q=cannoli+shell+recipe - Google Scholar Google Scholar
https://scholar.google.com/scholar?q=cannoli+shell+fried+dough+recipe - Google Scholar Google Scholar
https://scholar.google.com/scholar?q=cannoncini+shell+recipe - Cannoli
https://en.wikipedia.org/wiki/Cannoli - https://www.britannica.com/topic/cannoli
https://www.britannica.com/topic/cannoli - https://en.wikipedia.org/wiki/Cannoncini
https://en.wikipedia.org/wiki/Cannoncini - Fried dough
https://en.wikipedia.org/wiki/Fried_dough - Frying
https://en.wikipedia.org/wiki/Frying - Pastry
https://en.wikipedia.org/wiki/Pastry - Italian cuisine
https://en.wikipedia.org/wiki/Italian_cuisine


