Want a cannoli filling recipe that delivers a classic, creamy ricotta center? This recipe gives you the best-method ricotta filling—silky, sweet, and pipeable—so your cannoli tastes like it came from an Italian bakery. Follow the steps and you’ll get the right thickness and flavor balance every time, whether you’re making cannoli for a crowd or for one perfect batch.
This cannoli filling recipe delivers a light, creamy ricotta mixture that pipes cleanly into cannoli shells—without being watery or grainy. The key is draining ricotta properly, mixing with minimal handling, and chilling until the filling is thick and stable for piping and serving.
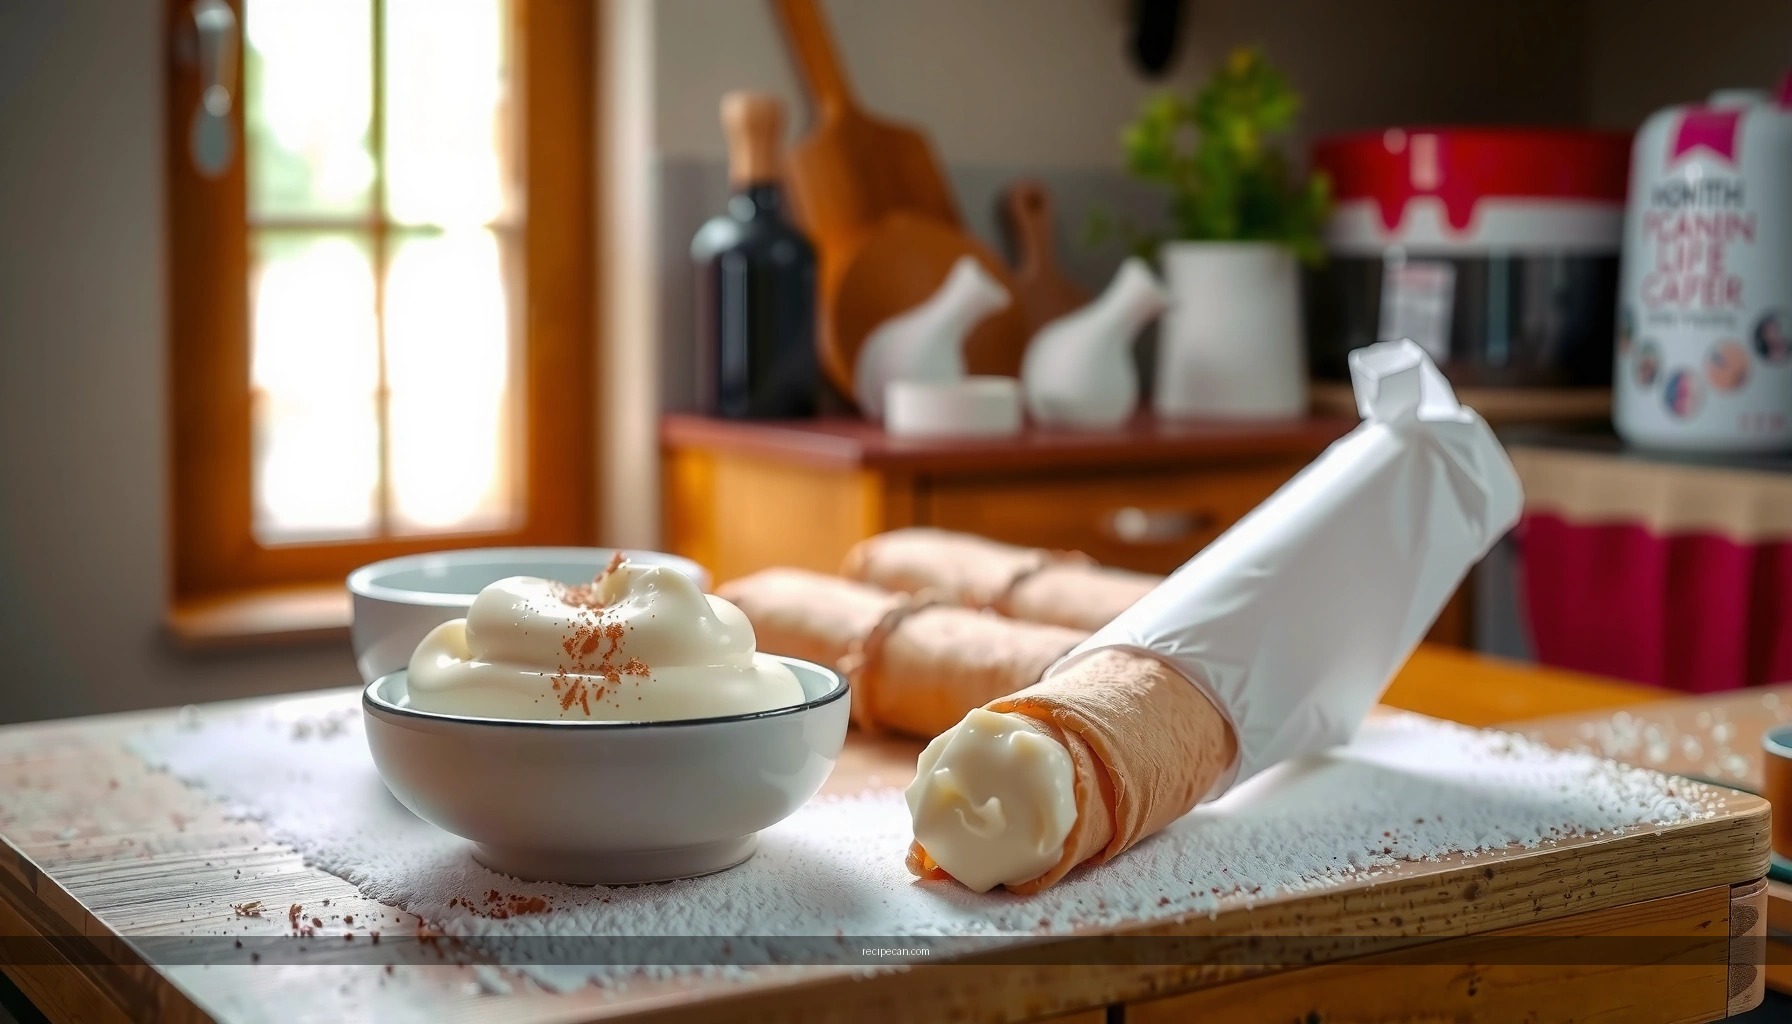
Gather Ingredients for Cannoli Filling

Start with ingredients that influence texture as much as flavor. Classic cannoli filling is essentially sweetened ricotta enriched with vanilla (and often citrus), then finished with chocolate chips for contrast.
– Use high-quality ricotta (and consider straining for best texture)
– Whole-milk ricotta is the most forgiving for a creamy, stable filling. If your ricotta is watery, strain it to avoid thinning the final mix and to prevent shells from softening too quickly.
– Include sugar, vanilla, and optional citrus zest for flavor
– Granulated sugar dissolves best when you mix thoroughly after draining. Vanilla provides the familiar “bakery” aroma, while zest (orange or lemon) adds brightness that complements the dairy richness.
– Add mini chocolate chips for the classic cannoli finish
– Mini chips distribute more evenly and help maintain a consistent piped shape. Choose semi-sweet for a balanced, not cloying, sweetness.
Pro baseline (makes ~12–16 cannoli, depending on shell size):
– Ricotta, well-drained: 2 cups (about 1 lb / 454 g fresh weight before draining varies by brand)
– Sugar: 1/3 to 1/2 cup (to taste)
– Vanilla extract: 1–2 tsp
– Orange or lemon zest: 1–2 tsp (optional)
– Mini chocolate chips: 1/3–1/2 cup
– Pinch of salt: 1/8 tsp (optional but recommended)
Prepare Ricotta for the Best Texture

Ricotta preparation is the single biggest determinant of whether your cannoli filling is luxurious or disappointing. For a classic, pipeable ricotta filling, moisture must be managed before you add sugar or flavorings.
– Drain ricotta to remove excess moisture before mixing
– Transfer ricotta to a fine-mesh sieve lined with cheesecloth and refrigerate for 1–4 hours (or up to overnight for very wet brands).
– If you’re short on time, you can press gently with a spoon or spatula to encourage drainage—but avoid squeezing aggressively, which can force dense curds into a less creamy texture.
– Mix until smooth, avoiding any grainy texture
– Once drained, stir ricotta until homogeneous. If you notice graininess, pass ricotta through a sieve or gently blend in short bursts.
– The goal is a smooth body that will hold shape when piped.
– Taste and adjust sweetness before adding chocolate
– Sugar can mute certain flavors once it hydrates the dairy. Taste your ricotta after mixing with sugar (before adding chips) so you can correct sweetness early. Adjust gradually—especially if your shells and chocolate chips add additional sweetness.
Texture guidance (why it matters):
Water content affects viscosity. If ricotta is too wet, sugar dissolves and creates a thinner syrupy mix, which leaks from shells and makes the cannoli soft. Proper drainage gives you the thickness needed for clean piped edges and a controlled bite.
Cannoli-Ready Ricotta: Drain Time vs. Typical Consistency (Commercial Branded Ricotta, 2 cups)
| # | Ricotta Moisture Level | Suggested Drain Time | Piping Stability | Risk of Watery Filling |
|---|---|---|---|---|
| 1 | Lower moisture (drier curds) | 45–90 min | High | Low |
| 2 | Balanced moisture | 1.5–2.5 hours | Medium-High | Moderate |
| 3 | Moderately watery | 3–4 hours | Medium | High |
| 4 | Very watery (brand-dependent) | Overnight (8–12 hours) | High (after straining) | Very High |
| 5 | Fresh homemade (often creamier) | 1–2 hours | High | Low |
| 6 | Frozen & thawed (sometimes releases whey) | 4–6 hours | Medium-High | Moderate-High |
| 7 | Low-fat ricotta (thinner by nature) | 2–4 hours | Medium | High |
Make the Cannoli Filling Mixture

Once ricotta is drained and smooth, mixing becomes a control problem: you want even sweetness without collapsing structure. Overmixing isn’t dangerous in a safety sense, but it can change texture, warm dairy, and make the filling harder to pipe.
– Fold in sugar and flavorings gently for a creamy consistency
– Stir sugar into drained ricotta until it dissolves. Add vanilla and citrus zest next. Work at a steady pace to avoid warming the mixture.
– Combine ricotta with any added ingredients without overmixing
– If you’re using a sieve or brief blending, keep it short and deliberate. Afterward, mix by hand to keep the filling airy and creamy rather than overly emulsified.
– Ensure the filling is thick enough to hold shape
– A well-made cannoli filling should move slowly off a spoon and form a soft peak when piped. If it looks runny, it usually needs more chilling or additional draining (rather than more chocolate chips).
Pipe test (fast, practical):
Spoon filling into a piping bag fitted with a medium tip. Pipe a 2-inch “line” onto a plate. It should keep its shape for 10–15 seconds without spreading into a puddle.
Add Chocolate Chips and Optional Flavor Boosts
Chocolate chips are more than decoration—they add classic contrast and improve perceived flavor complexity. The best approach is to fold them in last, once the base is smooth and sweetened.
– Fold in mini chocolate chips evenly
– Add chips gradually and fold just until distributed. This helps chips stay intact and prevents “streaking” where some shells get more chips than others.
– Add orange or lemon zest if you want a brighter, traditional flavor
– Citrus zest is particularly helpful if your ricotta is bland or your shells taste neutral. Keep it modest: zest should lift the filling, not dominate it.
– Consider a pinch of salt to enhance sweetness
– Salt sharpens sweetness and helps chocolate taste more vivid. Use a small pinch; you’re aiming for balance, not a savory profile.
Flavor calibration tip:
If your ricotta is tangy, increase vanilla and zest slightly rather than adding more sugar right away. If it’s already mild and sweet, hold sugar steady and focus on zest for lift.
Pipe and Store Cannoli Filling
Cannoli are best when filled close to serving. Storage is still possible, but the filling must be chilled to firm up while maintaining a creamy, pipeable body.
– Fill cannoli shells right before serving for maximum crunch
– If you fill too early, the shells will absorb moisture and lose crispness. For events, shell and filling can be prepared separately, then assembled at the last moment.
– Chill the filling to help it firm up and taste fully developed
– Refrigerate the finished filling for at least 1–2 hours. Chilling also helps sugar fully integrate and makes piping easier.
– Store covered in the refrigerator and use within a few days
– Keep filling sealed to prevent fridge odors and dryness. Typically, use within 2–3 days for the best texture and flavor.
Operational workflow for tastier results:
1) Drain ricotta early (same day or prior evening)
2) Mix base + taste + chill
3) Fold in chocolate chips right before piping
4) Fill shells close to service
Troubleshooting Common Cannoli Filling Issues
Even experienced cooks run into texture problems. The good news: most issues have straightforward fixes that restore pipeability and flavor balance.
– If it’s watery, drain ricotta again or chill longer
– Start by chilling for 30–60 minutes—cold thickens dairy. If it still feels loose, strain again (even a 30–60 minute pass can help significantly).
– If it’s grainy, blend ricotta more thoroughly
– Pass the ricotta through a fine sieve or blend briefly until smooth. Then mix by hand again to return to a creamy consistency.
– If it’s too thick, mix in a small amount of ricotta or a teaspoon of cream
– Add one teaspoon at a time until it reaches the right pipeable thickness. Avoid large additions quickly; you can always thin slightly but you can’t “re-thicken” without more draining.
Common root causes (so you can prevent repeats):
– Not draining long enough for your specific ricotta brand
– Adding sugar before ricotta is smooth (graininess becomes more noticeable)
– Overheating the mixture while mixing or during transport
This cannoli filling recipe delivers a creamy, pipeable ricotta mixture with classic chocolate chip goodness. Follow the ricotta-draining steps, mix gently, and chill before filling shells—then pipe and serve for the best texture. Try it next time you make cannoli, and adjust sweetness or zest to match your taste.
Frequently Asked Questions
What is the best cannoli filling recipe for a classic ricotta flavor?
A classic cannoli filling recipe typically uses drained ricotta, powdered sugar, vanilla extract, and mini chocolate chips for a balanced sweet-cream texture. Many traditional versions also include a touch of cinnamon or orange zest to deepen the flavor without overpowering the ricotta. For the most authentic taste, choose high-quality whole-milk ricotta and drain it well to avoid a runny cannoli filling.
How do I keep my cannoli filling from getting watery or runny?
The key is properly draining ricotta before mixing your cannoli filling. Use cheesecloth (or a fine-mesh strainer) and let it drain in the refrigerator for several hours, or overnight, then pat it gently if needed. If your filling still seems loose, stir in a little more powdered sugar or fold in extra ricotta slowly until you reach a thick, pipeable consistency.
Why does my cannoli filling turn grainy, and how can I make it smooth?
Graininess usually comes from ricotta that’s not fully smooth or not drained enough, leading to a thick but uneven texture. To fix this, press the drained ricotta through a fine sieve or blend it briefly until creamy, then mix with powdered sugar gradually. Using room-temperature ingredients also helps the cannoli filling emulsify evenly for a smoother result.
Which cheeses work best besides ricotta for a cannoli filling recipe?
While ricotta is the most common base, some recipes blend ricotta with mascarpone or cream cheese for a richer, thicker cannoli filling. If you use mascarpone, keep the mixture thick by draining well and using less added liquid, since mascarpone can loosen the texture. Choose mild, fresh cheeses to maintain the traditional cannoli filling flavor and avoid tanginess that can overpower the chocolate chips and vanilla.
How far ahead can I make cannoli filling, and what’s the best way to store it?
Cannoli filling can typically be made 1–2 days ahead, as the flavors improve slightly after resting. Store it in an airtight container in the refrigerator and give it a quick stir before piping to maintain a smooth texture. For best results, fill the cannoli shells shortly before serving, since the crisp shells can soften when they’re exposed to moisture.
References
- Cannoli
https://en.wikipedia.org/wiki/Cannoli - Ricotta
https://en.wikipedia.org/wiki/Ricotta - https://www.britannica.com/topic/cannoli
https://www.britannica.com/topic/cannoli - https://www.britannica.com/topic/ricotta
https://www.britannica.com/topic/ricotta - https://www.bbc.co.uk/food/recipes/cannoli_89410
https://www.bbc.co.uk/food/recipes/cannoli_89410 - https://www.theguardian.com/lifeandstyle/2017/dec/18/cannoli-recipe
https://www.theguardian.com/lifeandstyle/2017/dec/18/cannoli-recipe - https://cooking.nytimes.com/recipes/1018709-cannoli
https://cooking.nytimes.com/recipes/1018709-cannoli - Google Scholar Google Scholar
https://scholar.google.com/scholar?q=cannoli+filling+ricotta+recipe - Google Scholar Google Scholar
https://scholar.google.com/scholar?q=cannoli+ricotta+filling+sugar+chocolate+chip - Google Scholar Google Scholar
https://scholar.google.com/scholar?q=ricotta+cheesemaking+for+desserts+cannoli


