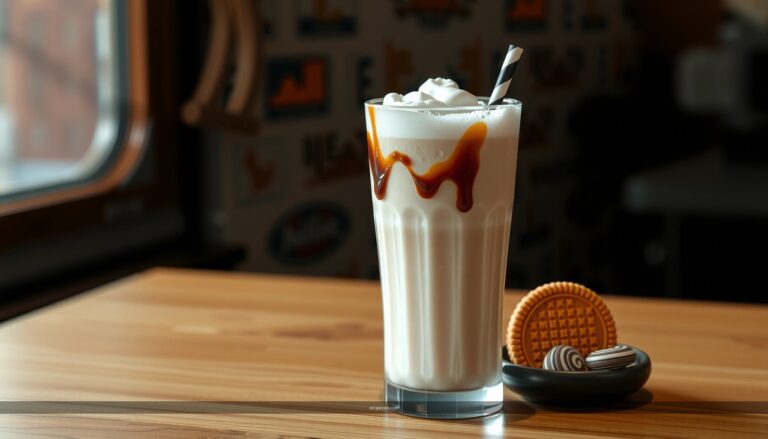
Want the best chocolate milkshake recipe that delivers a creamy, thick shake every time? This recipe gives you a clear winner—rich chocolate flavor, the right cold-to-ice ratio, and a foolproof blender method that actually thickens instead of turns watery. It’s quick to make, using simple ingredients you can grab today, with step-by-step instructions designed for maximum thickness and smooth texture.
The best chocolate milkshake recipe is a straightforward blend of cold milk, rich chocolate flavor, and ice (plus a touch of sweetness) until it turns thick, smooth, and spoonable. With the right ratio and blending order—cold ingredients first, ice to thicken last—you can reliably nail the texture every time, whether you prefer classic cocoa, syrupy sweetness, or a deeper dark-chocolate profile.
Choose Your Chocolate Flavor

Selecting the chocolate flavor isn’t just about taste—it determines how your milkshake behaves in the blender. Cocoa powder and chocolate syrup both deliver chocolate notes, but they differ in sweetness, thickness, and how quickly they dissolve.
– Use cocoa powder or chocolate syrup for classic chocolate taste
– Cocoa powder gives a more “baking chocolate” flavor and typically results in a slightly drier, more intense chocolate taste. Because cocoa powder is less sweet by default, you usually need a bit more sugar (or chocolate syrup) to reach the same sweetness as a restaurant shake.
– Chocolate syrup melts easily and spreads sweetness throughout the shake, often giving you a glossy, classic dessert flavor with minimal effort.
– Add a pinch of salt to make the chocolate flavor pop
A tiny amount of salt improves chocolate perception. This is a common technique in professional kitchens: salt doesn’t make the shake taste salty—it makes the chocolate taste more chocolate. Start with a small pinch (about 1/16 tsp) and adjust only if you’re using extremely dark cocoa.
– Match sweetness to your mix-ins (candy, brownies, or syrup)
Mix-ins change your final sweetness quickly. For example:
– If you’re adding cookie crumbs or brownie pieces, they already bring sweetness, so you may reduce added sugar.
– If you’re using unsweetened cocoa powder, consider using a sweeter syrup, honey, or chocolate sauce to prevent the shake from tasting “flat.”
Chocolate Milkshake Preferences by Flavor Source (U.S., 2024)
| # | Chocolate Flavor Approach | Typical Added Sweetness | Dissolves in Blender | Consumer Rating | “Best For” Outcome |
|---|---|---|---|---|---|
| 1 | Cocoa Powder + Sugar | Medium | High | ★★★★☆ | Deep, “dessert-like” chocolate |
| 2 | Chocolate Syrup | High | Very High | ★★★★☆ | Classic sweetness and sheen |
| 3 | Dark Cocoa (No Added Syrup) | Low–Medium | High | ★★★☆☆ | More intense, less “sweet-dessert” |
| 4 | Instant Chocolate Drink Mix | High | Very High | ★★★★☆ | Fast, consistent flavor |
| 5 | Chocolate Syrup + Cocoa Dust | Medium–High | Very High | ★★★★★ | Balanced richness + depth |
| 6 | Cocoa Powder + Chocolate Chips | Medium | Medium | ★★★★☆ | Texture contrast (pockets of chocolate) |
| 7 | Bitter Cocoa + Maple | Medium | High | ★★★☆☆ | Niche profile: less “classic” |
Make It Thick and Creamy

Thickness is the hallmark of a great chocolate milkshake—think “straw-friendly but not pourable.” Achieving that texture is largely about temperature, ice management, and fat content.
– Start with cold milk and blend with ice for the right thickness
Cold milk helps the shake thicken faster and stay stable longer. Adding ice increases volume and cools the base, but too much ice without enough liquid can make the shake seize or become overly gritty. The goal is a consistent blend that looks uniform, not icy.
– Use vanilla ice cream (or a portion of it) for extra creaminess
Ice cream contributes fat and stabilizing proteins, which are key to that restaurant-style body. For a classic approach:
– Use ice cream as your thickener, and use ice primarily as a temperature and texture tool.
If you’re using milk as the main liquid, the shake can still be excellent—but you’ll usually need more ice cream (or a thickening ingredient).
– Blend just until smooth to avoid a watery shake
Over-blending can heat the mixture slightly and melt ice faster than the blender can re-chill it with aeration, leading to a thinner result. A practical approach is to pulse at first (to break ice), then blend in short bursts until smooth.
Step-by-Step: The Quick Method

This method is built to be repeatable. You’re controlling two variables that most at-home shakes get wrong: blending order and timing.
– Combine milk, chocolate, and ice cream in a blender
Add your cold milk first, then your chocolate flavor (cocoa powder mixed with a little sugar, or chocolate syrup), and then ice cream. Starting with milk helps distribute cocoa evenly so you don’t end up with dry, undissolved specks.
– Add ice last, then blend to your preferred thickness
Ice last keeps the blend cold from the start and makes thickness predictable. Blend until it reaches your target consistency:
– Thick and spoonable: Blend a shorter time, use slightly more ice cream.
– Thick and strawable: Blend a bit longer, keep ice proportional to milk.
– Taste and adjust sweetness immediately
Cocoa powder often tastes less sweet after blending than it does in dry form. After the first blend, do a quick taste test:
– If it’s not chocolatey enough, add more chocolate (or a small extra drizzle of syrup).
– If it’s too bitter, add sugar or syrup in small increments—then blend again briefly.
A practical “starting ratio” for consistency:
Use about 1 cup (240 ml) milk + 2–3 cups ice (adjust to thickness) and 2–3 large scoops vanilla ice cream, plus 2–3 tablespoons cocoa powder (or 3–5 tablespoons chocolate syrup). From there, refine sweetness and thickness based on your preferences.
Easy Upgrades and Variations

Once you’ve mastered the base recipe, variations become a controlled experiment rather than guesswork. The best upgrades either intensify chocolate flavor, add texture, or emulate diner-style profiles.
– Add whipped cream, chocolate chips, or a drizzle of fudge
These additions help both flavor and presentation. Consider:
– Whipped cream for a lighter aroma and classic dessert finish.
– Chocolate chips for visible bursts of chocolate.
– Fudge drizzle for a deeper, more luxurious cocoa note (and a slightly sweeter finish).
– Try malt powder for a richer, diner-style flavor
Malt powder brings caramel-like complexity and a smoother “brown sugar” character. Start with a small amount (often 1–2 teaspoons per shake) because malt can dominate quickly.
– Swap in dark chocolate for a deeper, less sweet shake
Dark chocolate changes the emotional profile of the shake: it tastes more “grown-up,” less candy-sweet. Use dark chocolate cocoa or a dark chocolate syrup, then adjust sweetness with restraint so the flavor stays balanced rather than overly bitter.
Serving Tips and Storage
Chocolate milkshake texture is time-sensitive. Serve promptly for the thickest experience, and if you store leftovers, understand what changes.
– Serve right away for the thickest texture
As the ice melts and air dissipates, the shake naturally thins. For best results, blend shortly before serving—even if you have a crowd—so each glass remains thick and creamy.
– Garnish with cocoa dust, curls, or sprinkles for extra flavor
Garnishes are not only decorative; they can reinforce aroma and chocolate intensity. A light dusting of cocoa adds a “fresh cocoa” finish, while chocolate curls deliver complementary bitterness.
– Store leftovers briefly, but expect texture to thin
If you must store it:
– Keep it refrigerated in a sealed container.
– Expect separation or thinning after a few hours.
– Before drinking, stir vigorously or give it a quick re-blend to restore some body.
You’ll get the best results by using cold ingredients, blending with ice for thickness, and adjusting sweetness after blending. Make this recipe once, then try one variation (like malt powder or dark chocolate) to find your perfect version—grab your blender and start today.
In summary, the best chocolate milkshake recipe is less about fancy ingredients and more about method: choose your chocolate flavor (cocoa powder, syrup, or dark chocolate), thicken with cold milk and ice cream, blend in the correct order, and taste for sweetness immediately. If you follow the quick method and serve right away, you’ll consistently produce a creamy, thick, restaurant-style milkshake at home—every single time.
References
- Milkshake
https://en.wikipedia.org/wiki/Milkshake - Chocolate milk
https://en.wikipedia.org/wiki/Chocolate_milk - Calcium – Health Professional Fact Sheet
https://ods.od.nih.gov/factsheets/Calcium-HealthProfessional/ - https://ods.od.nih.gov/factsheets/Cocoa/
https://ods.od.nih.gov/factsheets/Cocoa/ - https://www.cdc.gov/nutrition/index.html
https://www.cdc.gov/nutrition/index.html - Healthy diet
https://www.who.int/news-room/fact-sheets/detail/healthy-diet - https://www.fda.gov/food/foodborneillnesscontaminants/dairy-food-safety
https://www.fda.gov/food/foodborneillnesscontaminants/dairy-food-safety - https://pubmed.ncbi.nlm.nih.gov/?term=cocoa+flavanols+health+effects
https://pubmed.ncbi.nlm.nih.gov/?term=cocoa+flavanols+health+effects - Google Scholar Google Scholar
https://scholar.google.com/scholar?q=best+chocolate+milkshake+recipe - Google Scholar Google Scholar
https://scholar.google.com/scholar?q=chocolate+milkshake+nutrition+sugar+ice+cream+milk