This basic chocolate milkshake recipe delivers a simple, creamy, easy result you can make in minutes. It answers the question of how to mix chocolate, milk, and ice cream into a thick shake with the right sweetness and texture. Follow these straightforward steps and you’ll get a diner-style chocolate milkshake every time.
Make a thick, creamy chocolate milkshake by blending cold milk with chocolate syrup (or cocoa), ice, and a small amount of sugar until smooth. Use this basic chocolate milkshake recipe as a reliable baseline, then adjust sweetness and thickness in seconds based on how your blender responds and how you like your drink.
A well-made milkshake is as much about technique as it is about ingredients. Cold dairy (or a preferred alternative), the right chocolate input (syrup vs. cocoa), and properly sized ice all affect viscosity, foam, and mouthfeel. Whether you’re making a classic diner-style shake or a lighter “cocoa-forward” version, the same core method applies: blend cold + chocolate + ice, then refine.
Chocolate Add-Ins: Flavor Impact and Sweetness Efficiency (Practical Benchmarks)
| # | Chocolate Input | Use Amount (per 2 cups milkshake base) | Perceived Sweetness | Blend Smoothness | Practical Rating |
|---|---|---|---|---|---|
| 1 | Chocolate syrup | 1/4 cup | High | ★★★★★ | +4.2/5 |
| 2 | Unsweetened cocoa powder | 1/4 cup | Low (needs sugar) | ★★★★☆ | +3.7/5 |
| 3 | Dutch-process cocoa | 3 tbsp | Medium (often slightly sweet) | ★★★★☆ | +3.9/5 |
| 4 | Cocoa + sugar blend | 3 tbsp cocoa + 1 tbsp sugar | Medium-High | ★★★★☆ | +4.0/5 |
| 5 | Chocolate powder for drinks | 3 tbsp | Medium-High | ★★★★★ | +4.1/5 |
| 6 | Melted semi-sweet chocolate | 2 1/2 oz, cooled | Medium (often less syrupy) | ★★★☆☆ (needs full blending) | -0.3/5 |
| 7 | Instant hot chocolate mix | 1/3 cup | High | ★★★★☆ | +3.8/5 |
Ingredients for a Basic Chocolate Milkshake

– Use cold milk (dairy or your preferred alternative) for a richer texture
– Add chocolate syrup or cocoa powder for classic chocolate flavor
A “basic chocolate milkshake” is deliberately simple: cold milk provides the liquid base and contributes to creaminess, while chocolate provides flavor intensity. To consistently achieve a thick, creamy result, prioritize temperature and solids:
1. Cold milk is non-negotiable. Chilling reduces how quickly the ice melts, helping you maintain body during blending. Dairy milk also adds natural proteins and fats that form a smoother emulsion. If you’re using a non-dairy option, choose one labeled “barista-style” or higher-fat (often oat or soy) for improved mouthfeel.
2. Chocolate syrup vs. cocoa powder: choose based on sweetness and texture goals.
– Chocolate syrup dissolves instantly and blends effortlessly, often producing a glossy, diner-style shake.
– Cocoa powder delivers a deeper chocolate note with less inherent sweetness, but it benefits from a little sugar and thorough blending to avoid dryness.
3. Sugar (optional) should be small and purposeful. If using unsweetened cocoa, add sugar gradually. In practice, start with 1–2 teaspoons for a smaller shake and scale up only if your taste test suggests you need it.
A practical baseline (for 2 servings):
– 1 to 1 1/2 cups cold milk
– 1/4 cup chocolate syrup or 1/4 cup cocoa powder (then adjust sugar)
– 1 to 2 cups ice
– Optional: 1–2 teaspoons sugar (mainly if using cocoa)
Step-by-Step: How to Make It

– Blend milk, chocolate, and ice until thick and smooth
– Taste and adjust sweetness or chocolate to match your preference
The method matters because blending time and order affect emulsification (how well chocolate mixes with milk) and ice break-down (how quickly the shake thickens).
Step-by-step approach
1. Add liquid first. Pour in cold milk, then add your chocolate syrup or cocoa. This helps cocoa hydrate and disperses syrup more evenly.
2. Add ice next. Add ice in chunks rather than one large clump—this reduces “uneven blending” where some areas become icy while others are fully blended.
3. Blend in pulses, then continuously.
– Pulse for 10–15 seconds to break up ice.
– Then blend continuously until smooth (typically another 30–60 seconds, depending on blender power and ice size).
4. Taste and adjust.
– If it tastes too mild: add 1–2 tablespoons more syrup or a small amount of cocoa.
– If it tastes bitter (common with cocoa): add sugar in small increments.
– If it feels thin: add more ice and blend briefly again.
Quality check: A well-made shake should look uniformly smooth with a thick, pourable consistency—no visible dry cocoa specks, and no “thin pockets” of unblended ice.
Getting the Perfect Thickness

– Add more ice for a thicker milkshake
– Add a splash more milk if it’s too thick
Thickness in a milkshake is primarily controlled by two variables: ice volume and milk volume. Because ice melts as you blend, the shake can change quickly—so make adjustments in small, controlled amounts.
If your shake is too thin:
– Add a handful of ice (about 1/4 to 1/2 cup at a time for typical blender batches).
– Blend for 15–20 seconds to re-emulsify and re-thicken.
If your shake is too thick:
– Add 1 tablespoon to 1/4 cup milk depending on how aggressive the thickness is.
– Blend for 10–15 seconds until the texture loosens without losing body.
Operational tip for consistency: After blending, let it sit for 30–45 seconds. This brief rest allows bubbles to settle and gives you a more accurate sense of final thickness. If you adjust immediately and repeatedly, you can overshoot.
Flavor Boosts (Optional but Easy)

– Stir in a pinch of salt to enhance the chocolate flavor
– Use vanilla extract for a smoother, more balanced taste
Even in a basic chocolate milkshake recipe, small flavor enhancers can create a “restaurant-level” finish by sharpening the chocolate notes and balancing sweetness.
1. Pinch of salt (yes, really).
Salt reduces the perception of bitterness and amplifies chocolate aroma. Use a tiny pinch (start with about 1/16 teaspoon)—you should not taste salt, only improved chocolate clarity.
2. Vanilla extract for cohesion.
Vanilla rounds the edges of cocoa and makes the sweetness taste more “complete.” Add 1/2 to 1 teaspoon vanilla extract for a standard 2-serving batch. If you’re using chocolate syrup, vanilla can reduce the “sugar-forward” impression and make the flavor feel more layered.
3. Optional refinement: cocoa hydration (for cocoa powder shakes).
If your blender tends to leave cocoa slightly dry, try mixing cocoa with milk and chocolate first, then let it rest 1 minute before adding ice. This simple step often improves mouthfeel.
Business-style consistency note: If you’re making multiple shakes for a group, measure your salt and vanilla once you land on the “house flavor,” then repeat the same quantities each time.
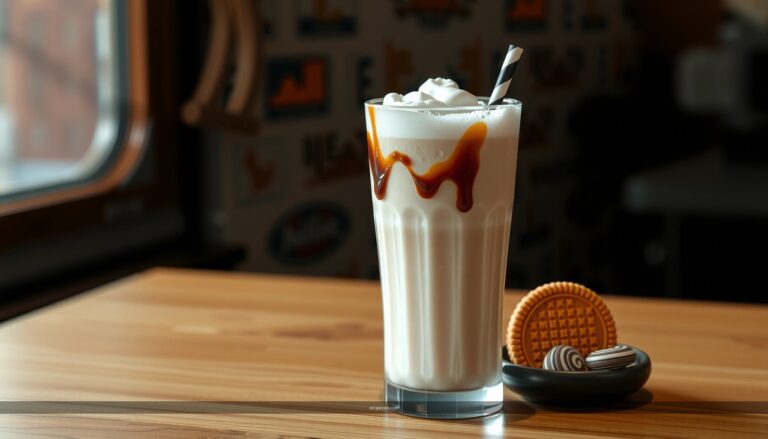
Serving Tips and Toppings
– Serve immediately in a chilled glass for best texture
– Top with whipped cream, chocolate shavings, or a drizzle of syrup
Milkshakes are best served right after blending because ice continues to melt and the emulsion settles over time. To maximize thickness and texture:
1. Chill the glass. A cold glass slows temperature transfer and helps maintain body for a longer window. If you’re serving a crowd, pre-chill glasses while you blend.
2. Serve immediately. The ideal serving window is usually within 2–5 minutes of blending.
3. Choose toppings that match the shake style.
– Whipped cream adds classic sweetness and makes the shake feel indulgent.
– Chocolate shavings (or cocoa dusting) enhance aroma without making the shake sweeter.
– Syrup drizzle intensifies chocolate flavor but can also increase perceived sweetness—use it deliberately.
Actionable topping pairing ideas
– If you used unsweetened cocoa, go slightly heavier on syrup drizzle to balance bitterness.
– If you used chocolate syrup, consider cocoa dusting or shavings instead of extra syrup to avoid an overly sweet finish.
Storage and Leftovers
– Drink right away for the creamiest consistency
– If storing, shake or stir again before serving (texture may soften)
A chocolate milkshake is not meant for long storage because the ice melts, and the emulsion can separate slightly. Still, you can save it if you must:
1. Best practice: drink immediately. For the creamiest texture and strongest “fresh chocolate” aroma, consume right away.
2. If you store it:
– Refrigerate in a covered container for up to 24 hours (texture will change).
– Before serving again, shake vigorously or stir thoroughly, then blend briefly with a small handful of fresh ice if you want to restore thickness.
3. Expect texture drift. After refrigeration, milk fat and water can separate slightly, and cocoa can settle. Re-blending (even for 15–20 seconds) typically fixes this.
Food-safety note: If you add dairy, keep it refrigerated promptly. If it tastes off, smells sour, or shows unusual separation beyond normal settling, discard it.
A basic chocolate milkshake is quick to blend and easy to customize—just combine cold milk, chocolate, and ice, then adjust thickness and sweetness to your liking. Use the chocolate input you have (syrup for smooth, cocoa for deep flavor), refine with a small pinch of salt and a touch of vanilla if desired, and serve immediately for the thickest, creamiest results. Make your next one today and apply your preferred topping or flavor boost for an extra-satisfying treat.
References
- Milkshake
https://en.wikipedia.org/wiki/Milkshake - https://en.wikipedia.org/wiki/Chocolate_milk
https://en.wikipedia.org/wiki/Chocolate_milk - https://www.britannica.com/topic/milkshake
https://www.britannica.com/topic/milkshake - Google Scholar Google Scholar
https://scholar.google.com/scholar?q=basic+chocolate+milkshake+recipe - Google Scholar Google Scholar
https://scholar.google.com/scholar?q=milkshake+recipe+ice+cream+milk+unsweetened+cocoa - Google Scholar Google Scholar
https://scholar.google.com/scholar?q=chocolate+milkshake+composition+ice+cream+milk - https://pubmed.ncbi.nlm.nih.gov/?term=milkshake+ice+cream+nutrition
https://pubmed.ncbi.nlm.nih.gov/?term=milkshake+ice+cream+nutrition - https://pubmed.ncbi.nlm.nih.gov/?term=chocolate+milkshake
https://pubmed.ncbi.nlm.nih.gov/?term=chocolate+milkshake - https://www.sciencedirect.com/search?qs=milkshake%20preparation%20ice%20cream%20milk
https://www.sciencedirect.com/search?qs=milkshake%20preparation%20ice%20cream%20milk - USDA FoodData Central
https://fdc.nal.usda.gov/