Want the tiramisu recipe Italian grandma would swear by—classic, creamy, and built with easy steps? This guide delivers the winner for no-fuss results: layered mascarpone cream, espresso-soaked ladyfingers, and a cocoa finish that tastes unmistakably authentic. Follow the method exactly and you’ll get a stable, spoonable tiramisu that holds its shape and flavor instead of turning runny.
This classic tiramisu recipe delivers that “Italian grandma” standard—velvety mascarpone cream, bold espresso depth, and cocoa-dusted layers—by focusing on three controllable variables: cream texture, quick espresso dipping, and proper chilling. Follow these step-by-step guidelines and you’ll get clean slices, balanced sweetness, and an old-world flavor profile that tastes handcrafted, not improvised.
Essential Ingredients for Grandma-Style Tiramisu

Grandma-style tiramisu isn’t about complicated techniques—it’s about choosing the right fundamentals and respecting their roles. In Italian home kitchens, the ingredients stay classic because the flavor balance depends on them.
– Mascarpone: The star of the dessert; it provides the creamy body and “luxe” mouthfeel.
– Eggs (or pasteurized egg alternatives): Traditionally used to build a stable, airy mascarpone cream. If you’re concerned about raw eggs, use pasteurized whole eggs or a reliable pasteurized egg product and follow label instructions.
– Sugar: Sweetens and helps create a smoother mixture when combined properly with eggs.
– Espresso: Strong coffee is non-negotiable for the signature tiramisu flavor—think bittersweet, not bland.
– Ladyfingers (savoiardi): The structure. They’re designed to absorb espresso quickly while maintaining layered definition.
Pro tip for consistency: If you want bakery-like stability, weigh your ingredients. Variations in mascarpone brand density or ladyfinger size can subtly affect thickness and slice cleanly.
To support the “right ingredients” approach, here’s a practical comparison of key espresso choices and how they impact tiramisu flavor intensity:
Espresso Strength & Expected Tiramisu Flavor (Practical Guide)
| # | Coffee Choice | Typical Brew Ratio | Bitterness/Body | Best for Tiramisu? |
|---|---|---|---|---|
| 1 | Traditional espresso (machine) | 1:2 (coffee:liquid) | High | Yes |
| 2 | Strong stovetop moka (reduced time) | 2–4 min cook | Medium–High | Yes |
| 3 | AeroPress “espresso style” | 1:8 concentrate (then use as-is) | High | Yes |
| 4 | Instant espresso concentrate | Used at label ratio | High | Yes |
| 5 | Americano from standard strength | 1:3 to 1:4 | Medium | Usually |
| 6 | Brewed coffee (light roast) | 1:16–1:18 | Low–Medium | Not ideal |
| 7 | Decaf (standard) | 1:2–1:8 concentrate | Medium | Mixed results |
Make the Perfect Mascarpone Cream

The mascarpone cream is where most “imitation” tiramisu goes wrong—either it’s too runny, too airy to hold layers, or overly sweet. The grandma approach is controlled blending: smooth texture, gentle folding, and no frantic mixing.
Traditional method (eggs + sugar):
1. Separate or temper eggs (depending on your preferred method). Many Italian home cooks whip yolks with sugar until pale and thick, then incorporate mascarpone.
2. Whip mascarpone briefly to loosen it—stop as soon as it becomes smooth. Over-whipping can make it grainy.
3. Combine with egg mixture gradually. Mix just enough to unify, then switch to gentler technique.
4. Fold carefully if you’re incorporating whipped components (some households whip whites separately). Folding preserves air without collapsing.
Target texture: thick, spoonable, and able to spread without sagging. If you lift a spoon, it should hold a slow ribbon—think “spreadable” not “pourable.”
Quality check before assembly:
– If the cream droops immediately when you spread it, it needs more stability (usually chill time or slightly more mascarpone consistency).
– If it looks stiff and curdled, you may have overmixed or used ingredients that were too cold.
Brew and Soak: Espresso Flavor the Right Way

The espresso layer is the heart of tiramisu’s flavor—deep, bittersweet, and aromatic. But the soak technique determines whether your dessert eats like a creamy classic or turns watery.
– Use strong espresso (or a very concentrated coffee). The goal is flavor, not caffeine volume.
– Cool the espresso slightly before dipping ladyfingers. Warm espresso can soften them unevenly.
– Dip quickly: In most kitchens, ladyfingers are dipped just long enough to moisten the surface (often about 1 second per side, depending on brand thickness).
Avoid sogginess: Ladyfingers should look lightly darkened, not flooded or collapsing. If you press them into the dish and they immediately break apart, the dip time was too long.
Actionable dipping workflow:
– Prepare a tray with ladyfingers ready.
– Dip one side, flip, dip the other side.
– Immediately place into the dish and continue layering.
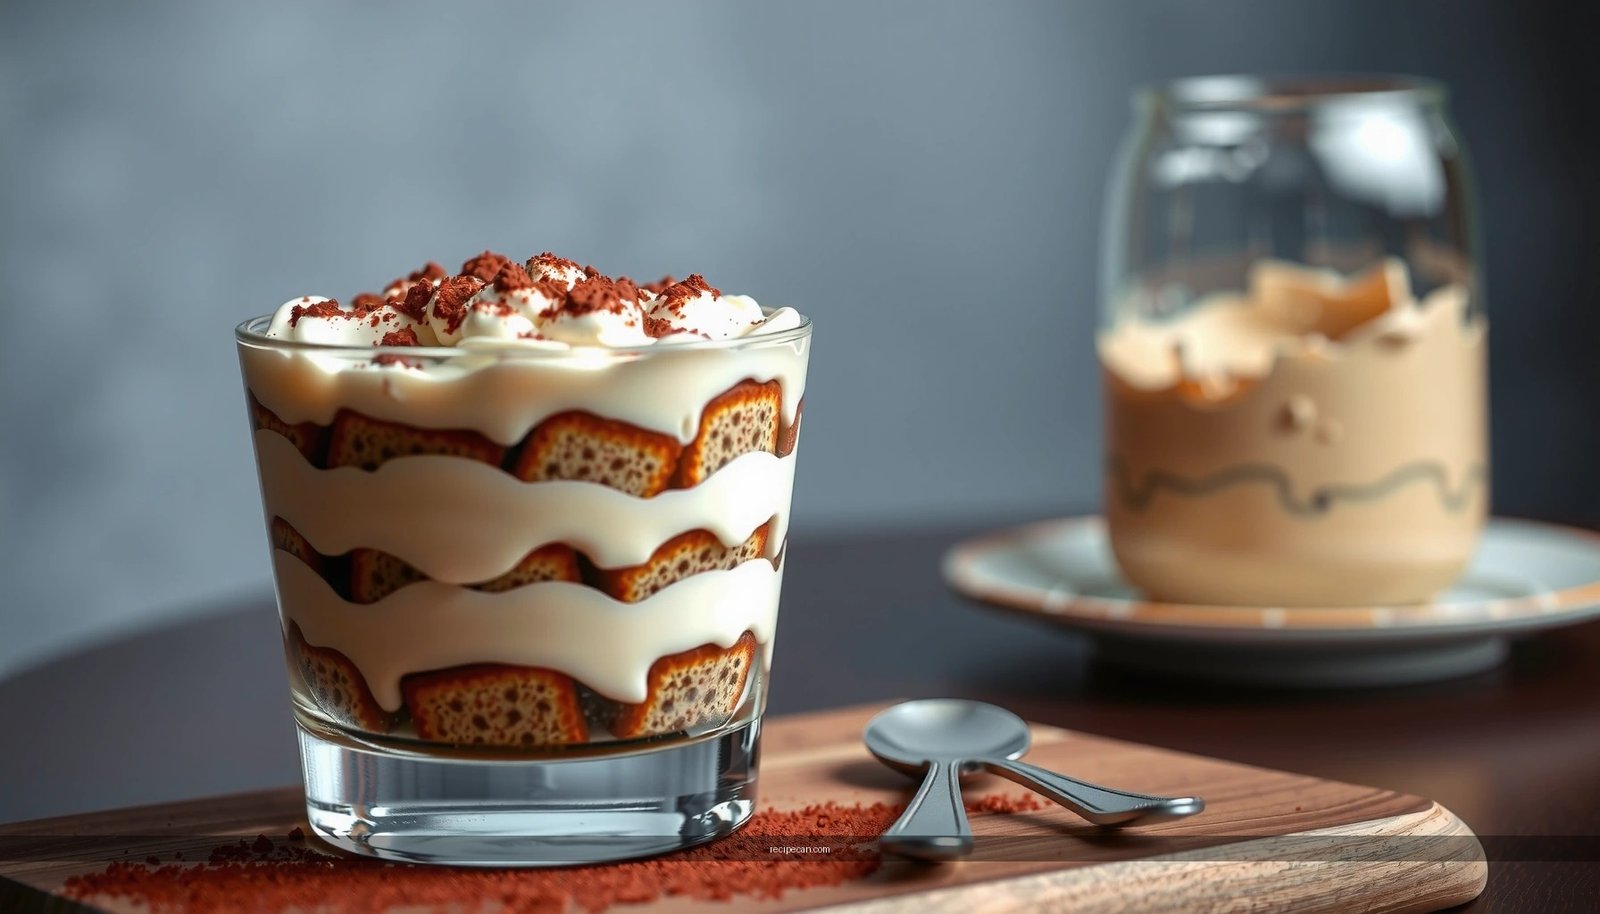
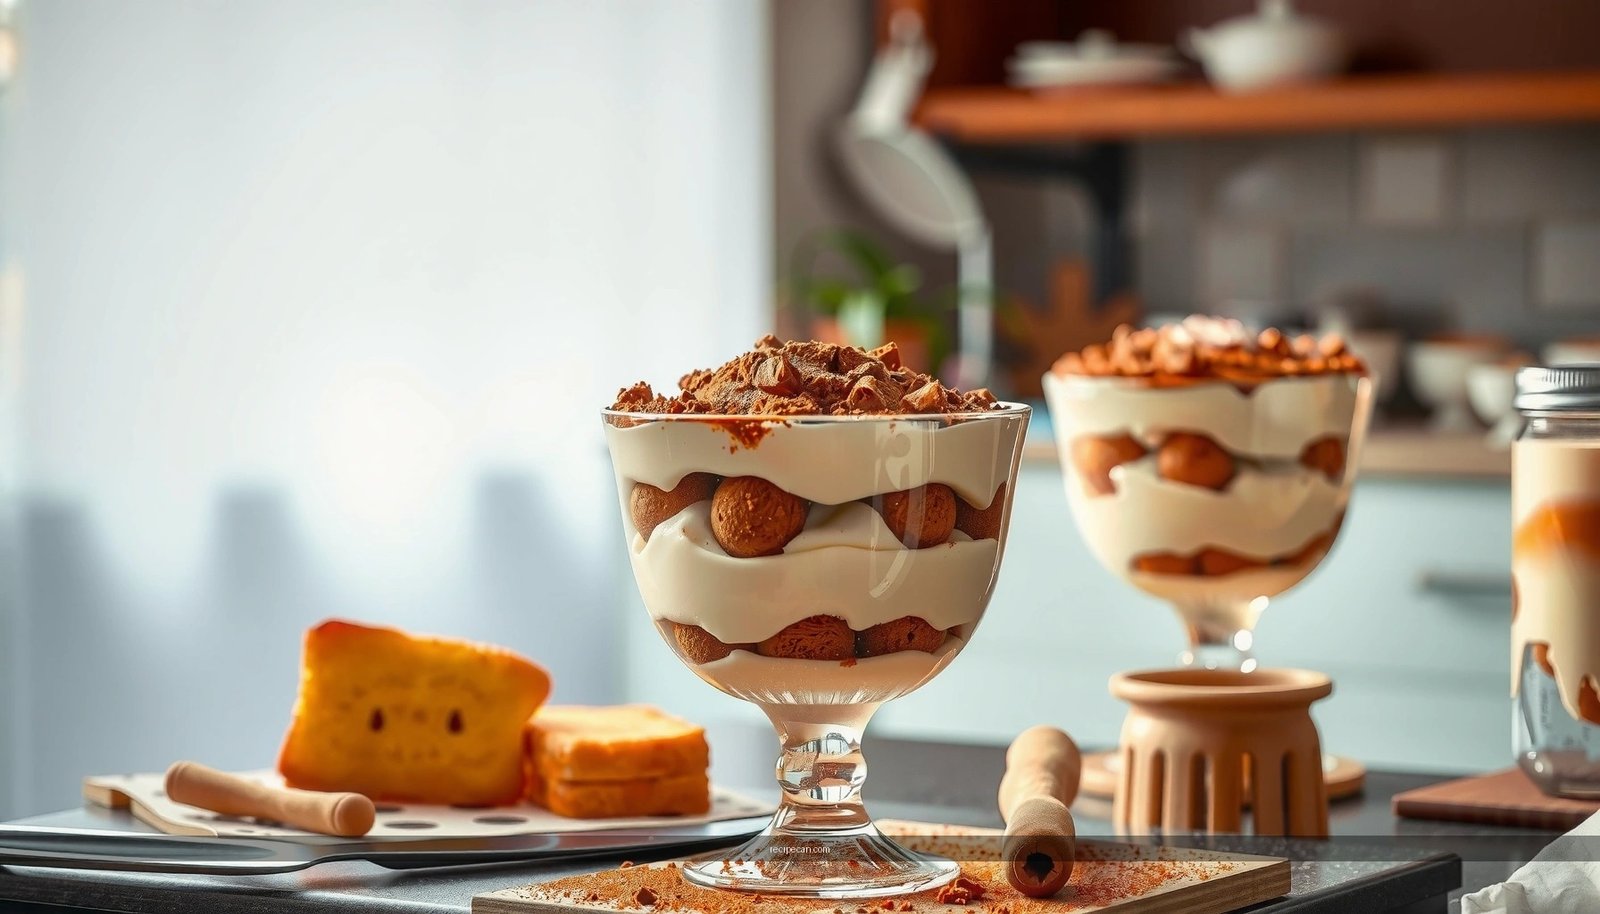
Assemble the Layers Like an Italian Nonna
Assembly is simple, but order and coverage are critical to that iconic layered slice.
1. Start with a base layer of quickly soaked ladyfingers.
2. Spread mascarpone cream evenly to the edges. Thin edges become gaps in the final presentation.
3. Repeat: ladyfingers, cream, then one more layer if your pan size allows.
4. Finish with cocoa dusting—not cocoa “plop,” but a light, even veil.
How thick should each layer be?
– Ladyfingers should form a consistent foundation without thick clumps.
– Cream should be generous enough to balance espresso bitterness and support clean slicing.
Presentation note: Classic tiramisu looks best with cocoa dusted on top right before serving (or shortly before) so it doesn’t fully dissolve into the cream.
Chill Time for the Best Texture
Tiramisu improves as it rests. The chilling period hydrates the structure, melds flavors, and firms the cream.
– Refrigerate at least 4–6 hours
– Overnight is even better for deeper espresso integration and smoother slice quality
– Cover the dish to prevent fridge odors from affecting the mascarpone
What chilling does (analytically):
– The cream firms and stabilizes due to mascarpone fat and overall matrix cooling.
– Ladyfingers continue absorbing espresso in a controlled way—especially if soaked briefly.
– Flavors equilibrate so you don’t get sharp “coffee hits” followed by sweet, separate bites.
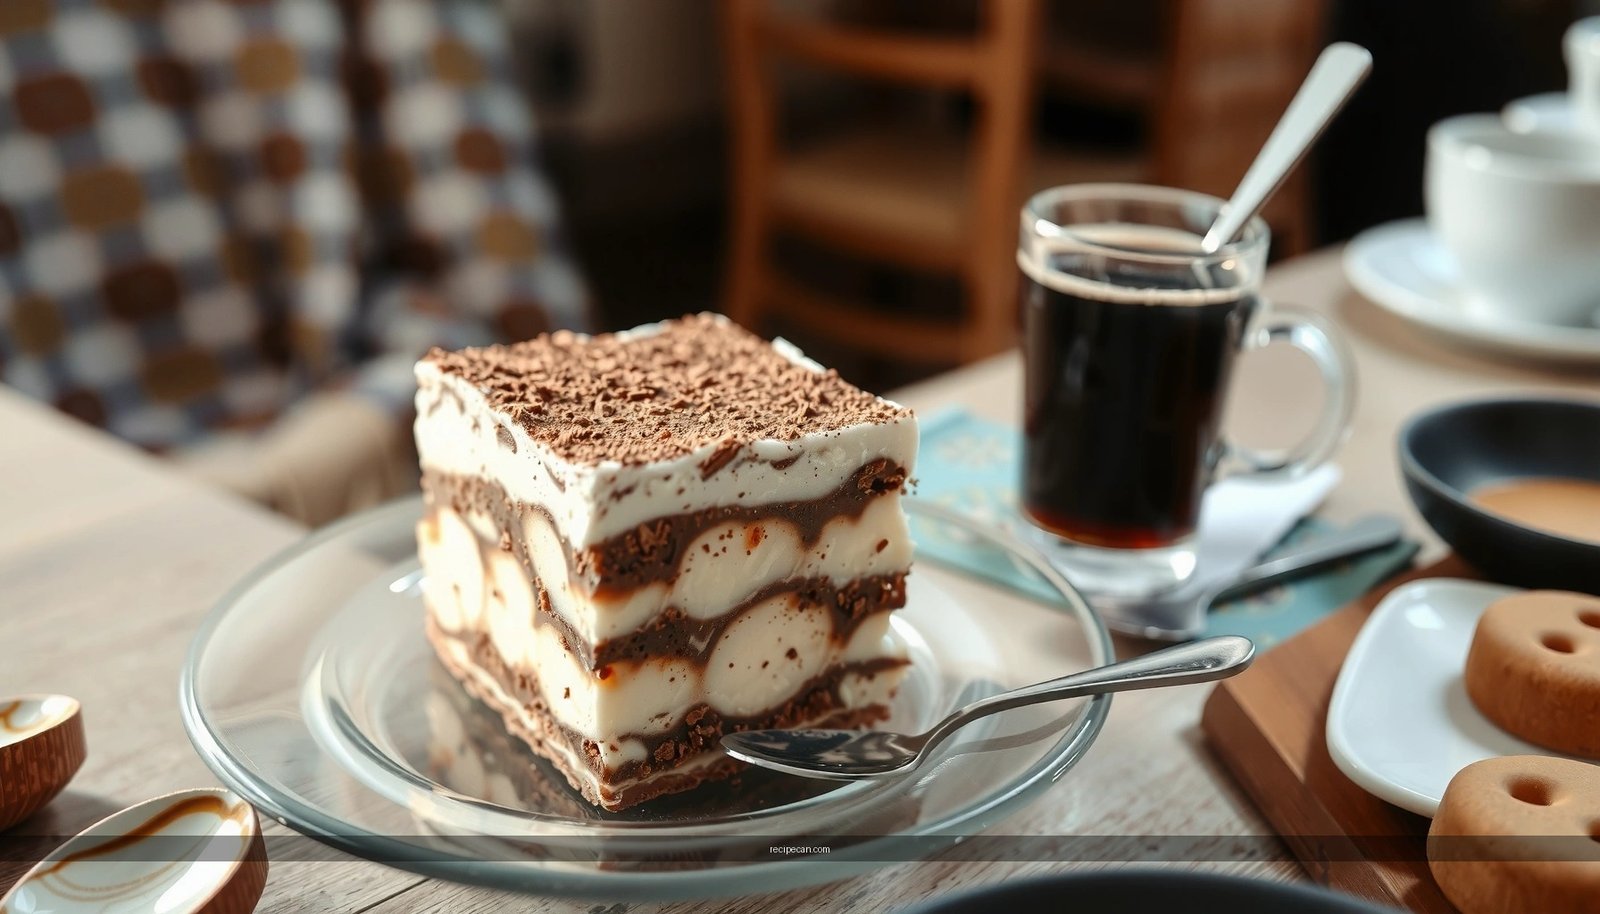
Slicing tip: Use a sharp knife, wipe between slices, and return to the fridge if needed. This helps maintain the layered structure.
Common Mistakes (and How to Avoid Them)
Even when people follow the recipe, texture and flavor issues usually trace back to a few predictable errors.
– Over-soaking ladyfingers → watery tiramisu
– Fix: Dip briefly, work quickly, and assemble immediately.
– Overmixing/rushing the cream → grainy or unstable texture
– Fix: Mix only until smooth and fold gently; don’t “power-whip” mascarpone.
– Using weak or thin coffee → flat flavor
– Fix: Use espresso or concentrated coffee and keep it strong enough to taste bold.
– Under-chilling → loose layers
– Fix: Refrigerate 4–6 hours minimum, overnight preferred.
From a process standpoint, think of tiramisu as a “timed system”: soaking time affects water absorption, mixing time affects cream structure, and chilling time affects final firmness.
This Italian grandma tiramisu recipe comes together quickly, but the magic is in the cream texture, quick espresso dipping, and proper chilling. Make it today, refrigerate it long enough for best results, and serve it to get that unmistakably classic tiramisu flavor everyone remembers.
In conclusion, the most authentic tiramisu—reliable, classic, and creamy—comes from disciplined technique, not guesswork. Use high-quality mascarpone, build a thick spreadable cream, dip ladyfingers just long enough to moisten without collapsing, and chill long enough to let layers stabilize and flavors meld. Follow these steps and you’ll consistently earn the same reaction every Italian grandma aims for: “How did you make it taste exactly like that?”
Frequently Asked Questions
What is the classic Italian grandma tiramisu recipe?
A classic Italian grandma tiramisu recipe typically uses espresso-soaked ladyfingers layered with mascarpone cream made from mascarpone, egg yolks, sugar, and sometimes a touch of vanilla. Many grandmas keep it simple: no baking, just careful layering and a good chill time. Finish with a generous dusting of cocoa powder and let it rest so the tiramisu becomes creamy and sliceable.
How do you make tiramisu like an Italian nonna with perfect mascarpone cream?
To get that authentic Italian grandma tiramisu texture, whisk mascarpone until smooth first, then combine it with sweetened egg yolks (and optionally lightly whipped whites for extra fluff). Avoid overmixing once the cream is combined, because it can turn loose or grainy. If you’re using raw egg in your tiramisu, temper the yolks gently and keep everything cold for the best results.
Why does tiramisu get watery, and how can you prevent it?
Watery tiramisu usually comes from soaking the ladyfingers too long or using a cream that’s too runny. Italian grandmas typically dip each ladyfinger quickly in espresso—just enough to coat—then layer immediately so it holds its shape. Also ensure mascarpone is at cool room temperature and that your egg mixture is properly incorporated to keep the tiramisu set after chilling.
Which espresso should you use for the best tiramisu flavor?
For authentic Italian grandma tiramisu flavor, use strong, freshly brewed espresso (or an espresso-style coffee) so the taste stands up against the mascarpone cream. Many people prefer a slightly bitter roast to balance the sweetness of the sugar and cream. If your coffee is too weak, the flavor can disappear and the classic tiramisu “coffee-kick” won’t come through.
What’s the best way to serve and store tiramisu after making it?
The best results come from chilling tiramisu for at least 4–6 hours, or overnight, so the ladyfingers fully absorb the espresso while staying tender. For serving, use a sharp knife and wipe between cuts to get clean slices, since mascarpone tiramisu can be soft. Store covered in the refrigerator for up to 2–3 days for best quality, and dust with cocoa right before serving if you want it to look fresh.
References
- Tiramisu
https://en.wikipedia.org/wiki/Tiramisu - Tiramisu | Meaning, Ingredients, Origin, Desserts, & Taste | Britannica
https://www.britannica.com/topic/tiramisu - Google Scholar Google Scholar
https://scholar.google.com/scholar?q=tiramisu+recipe+italian+grandma - Google Scholar Google Scholar
https://scholar.google.com/scholar?q=history+of+tiramisu+italy - Google Scholar Google Scholar
https://scholar.google.com/scholar?q=mascarpone+and+egg+safety+tiramisu - https://pubmed.ncbi.nlm.nih.gov/?term=tiramisu
https://pubmed.ncbi.nlm.nih.gov/?term=tiramisu - tiramisu – Search Results – PMC
https://www.ncbi.nlm.nih.gov/pmc/?term=tiramisu - tiramisu – Books – NCBI
https://www.ncbi.nlm.nih.gov/books/?term=tiramisu - tiramisu | Nature Search Results
https://www.nature.com/search?q=tiramisu - https://www.sciencedirect.com/search?qs=tiramisu
https://www.sciencedirect.com/search?qs=tiramisu