Mastering the art of safely making raspberry jam requires adherence to expert protocols that ensure flavor and food safety. This comprehensive guide provides precise recipes and step-by-step instructions tailored for both novice and seasoned canners. Following these essential guidelines not only enhances your culinary skills but also protects against potential hazards in the preservation process. Elevate your jam-making with confidence and taste the difference.
What This Guide Covers (And What It Doesn’t)

This guide details safe protocols for making raspberry jam, offering precise ingredient measurements, cooking times, and preservation techniques. It focuses exclusively on traditional raspberry jam preparation and does not delve into other fruit jam recipes or variations. Aimed at home cooks with basic kitchen skills and access to canning supplies, this guide is centered around raspberry jam. If you seek advanced canning techniques or commercial jam production, you may find this guide lacking in that regard.
Who Should Read This

This guide is perfect for novice home canners eager to learn safe and effective methods for making raspberry jam from scratch. Intermediate cooks looking to enhance their jam-making skills, as well as those keen on preserving seasonal raspberries, will find valuable insights in the expert protocols outlined here. Additionally, individuals with dietary restrictions or specific ingredient preferences, such as low-sugar or pectin-free options, will discover tailored solutions within these pages. However, readers without prior experience in canning or food preservation might find some steps challenging and should consider consulting additional resources before proceeding.
The Step-by-Step Protocol

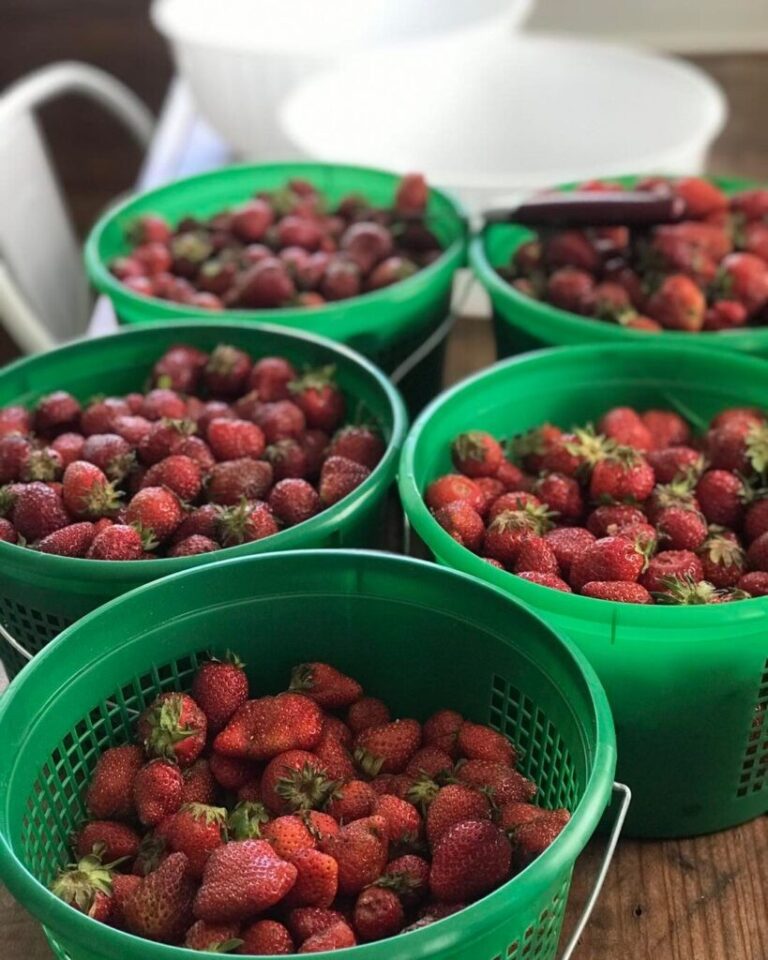
1. Select Fresh Raspberries: Choose 4 cups of ripe, unblemished raspberries; avoid any moldy or overripe fruit.
2. Prepare Your Equipment: Sterilize five 8-ounce canning jars and lids by boiling them for 10 minutes; keep them warm until ready to use.
3. Cook the Jam: In a large pot, combine the raspberries, 2 cups of granulated sugar, and 1 tablespoon of lemon juice; cook over medium heat until the mixture reaches a rolling boil, approximately 10-15 minutes.
4. Check for Doneness: Use a candy thermometer to ensure the jam reaches a temperature of 220°F (104°C) for proper gelling; this usually takes 10-20 minutes.
5. Fill and Seal Jars: Pour the hot jam into the prepared jars, leaving 1/4 inch headspace; wipe the rims with a clean cloth, place the lids on, and tighten the bands until fingertip-tight.
6. Process in a Water Bath: Process the jars in boiling water for 10 minutes to ensure a proper seal and eliminate bacteria; adjust processing time for altitude if necessary (add 5 minutes for every 1,000 feet above sea level).
7. Cool and Check Seals: After processing, let the jars cool for 24 hours; check seals by pressing the center of each lid; it should not pop back.
Nutritional Information for Raspberry Jam (Per 1 Tbsp)
| # | Nutrient | Amount | % Daily Value* |
|---|---|---|---|
| 1 | Calories | 50 | 2% |
| 2 | Total Fat | 0g | 0% |
| 3 | Sodium | 0mg | 0% |
| 4 | Total Carbohydrates | 13g | 4% |
| 5 | Sugars | 12g | N/A |
| 6 | Fiber | 0g | 0% |
| 7 | Protein | 0g | 0% |
Warning Signs: When Not to Follow This

Steer clear of making raspberry jam if the berries are overripe, moldy, or improperly stored, as this can lead to spoilage. Avoid proceeding if you cannot maintain a consistent boiling temperature during cooking; this consistency is crucial for achieving the correct texture. If you encounter equipment failure, such as a broken thermometer or malfunctioning water bath canner, hold off on making jam until these issues are resolved. Additionally, refrain from using sugar or pectin substitutions that haven’t been specifically tested for canning, as they can compromise safety and preservation.
The Most Common Mistakes (And Their Consequences)

Neglecting to properly sterilize jars can lead to bacterial contamination, resulting in spoiled jam or foodborne illness. Mismeasuring the sugar can prevent the jam from setting correctly, causing a runny consistency that fails to gel. Ignoring the headspace rule when filling jars can result in overflow during processing, jeopardizing the seal and leading to spoilage. Skipping the water bath processing step may result in unsafe preservation, as it does not eliminate harmful microorganisms that could cause foodborne illness.
Special Cases That Need a Different Approach
When using frozen raspberries, allow them to thaw completely and drain excess liquid before following the standard recipe steps, as this can affect the jam’s texture. For low-sugar raspberry jam, opt for a specific low-sugar pectin that requires different ratios of fruit and sugar; be sure to follow package instructions for optimal results. If you plan to enhance your jam with additional ingredients like herbs or spices, adjust cooking times and sugar levels accordingly to ensure safe preservation. Cooks at higher altitudes should consult altitude adjustment guidelines to confirm proper processing times and temperatures.
When You Need a Professional
Consult a food safety expert if you have concerns about the safety of your ingredients, especially if you are uncertain about the freshness of your raspberries. Seek professional guidance if you have underlying health conditions or dietary restrictions that may complicate food preservation methods. If your jam does not set after cooling and you are unsure how to address the issue, consider reaching out to a canning specialist for advice on reprocessing or repurposing the jam. Whenever you feel uncertain about the canning process or notice any unusual changes in your jam’s appearance or odor, it is wise to consult a licensed expert.
Sources and Further Reading
– National Center for Home Food Preservation: Guidelines for safe canning practices and preserving fruit jams.
– University Extension Publications: Research-based recipes and resources for canning and preserving fruits safely.
– “The Ball Complete Book of Home Preserving”: A comprehensive guide to home canning, including specific recipes for raspberry jam and preservation techniques.
– USDA Complete Guide to Home Canning: Official recommendations and safety standards for home canning procedures, including processing times and equipment usage.
Frequently Asked Questions
What are the essential ingredients for making raspberry jam?
The essential ingredients for making raspberry jam include fresh raspberries, sugar, and lemon juice. Fresh raspberries provide the fruity flavor, while sugar helps with preservation and sweetness. Lemon juice adds acidity, which is crucial for proper gel formation and enhancing the overall taste of the jam.
How do I make raspberry jam without pectin?
To make raspberry jam without pectin, combine equal parts of fresh raspberries and sugar in a pot, along with a splash of lemon juice. Cook the mixture over medium heat, stirring frequently until the raspberries break down and the mixture thickens, usually around 20-30 minutes. This method relies on the natural pectin found in the fruit to achieve the desired consistency.
Why did my raspberry jam not set properly?
If your raspberry jam did not set properly, it could be due to insufficient cooking time or not using enough sugar, which is essential for the gelling process. Additionally, using overly ripe raspberries or not including enough acidity from lemon juice can also affect the jam’s ability to set. Always ensure to follow the recipe closely and test the jam’s consistency before canning.
What is the best way to store homemade raspberry jam?
The best way to store homemade raspberry jam is to keep it in sterilized glass jars and seal them tightly. Store the jars in a cool, dark place such as a pantry for up to one year. Once opened, refrigerate the jam and consume it within a few weeks for optimal freshness and flavor.
Which raspberry jam recipe is best for beginners?
A simple raspberry jam recipe that is best for beginners involves just three ingredients: fresh raspberries, sugar, and lemon juice. Start by mashing the raspberries, then mix in the sugar and lemon juice before cooking the mixture on the stove until it thickens. This straightforward approach allows beginners to gain confidence in making jam while ensuring delicious results.
References
- Fruit preserves
https://en.wikipedia.org/wiki/Jam - https://www.ncbi.nlm.nih.gov/pmc/articles/PMC7074765/
https://www.ncbi.nlm.nih.gov/pmc/articles/PMC7074765/ - https://www.food.gov.uk/research/reports/raspberry-jam-manufacturing
https://www.food.gov.uk/research/reports/raspberry-jam-manufacturing - https://www.sciencedirect.com/science/article/pii/S2212670817300030
https://www.sciencedirect.com/science/article/pii/S2212670817300030 - https://www.extension.purdue.edu/extmedia/FS/FS-15-W.pdf
https://www.extension.purdue.edu/extmedia/FS/FS-15-W.pdf - https://www.nytimes.com/wirecutter/blog/raspberry-jam-recipe/
https://www.nytimes.com/wirecutter/blog/raspberry-jam-recipe/ - Google Scholar Google Scholar
https://scholar.google.com/scholar?q=raspberry+jam+recipes - Google Scholar Google Scholar
https://scholar.google.com/scholar?q=making+raspberry+jam - Google Scholar Google Scholar
https://scholar.google.com/scholar?q=raspberry+preservation+methods - raspberry jam recipes – Search results
https://en.wikipedia.org/wiki/Special:Search?search=raspberry+jam+recipes