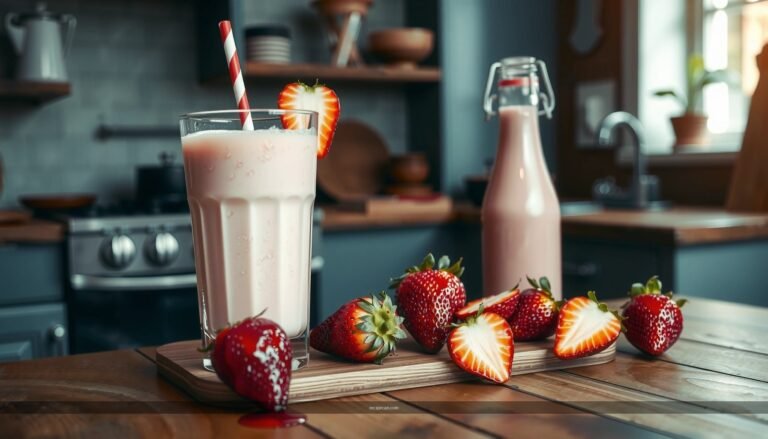
Looking for a raspberry milkshake recipe that’s actually creamy, easy, and reliably refreshing? This recipe delivers a cold, thick shake with real raspberry flavor and a smooth texture you can make in minutes, no complicated prep required. Get the exact steps and ingredient amounts to turn fresh or frozen raspberries into a standout summer milkshake—so you know what question your next sip answers.
Yes—you can make a creamy raspberry milkshake quickly by blending fresh (or frozen) raspberries with cold milk and vanilla ice cream until smooth. The key to a consistently great result is balancing berry brightness and sweetness while adjusting thickness step-by-step with small additions of milk or ice cream.
Making a raspberry milkshake is deceptively simple, but the texture and flavor depend on a few measurable factors: how cold your ingredients are, whether the raspberries are strained (seedless vs. traditional), and the fat content of your dairy. Below, you’ll find a reliable, repeatable method plus troubleshooting guidance so your milkshake is thick, flavorful, and restaurant-worthy—without unnecessary equipment or complicated steps.
—
Ingredients for a Raspberry Milkshake

A great raspberry milkshake starts with the right building blocks: bold raspberries, cold dairy, and a vanilla base that rounds out the tart fruit. Whether you’re targeting a classic diner-style shake or a thicker, spoonable version, these ingredients give you control over both flavor and mouthfeel.
– Use fresh or frozen raspberries for bold, sweet-tart flavor
Fresh berries offer peak aromatics in-season, while frozen raspberries make the shake faster because they chill the mixture during blending. If using frozen, there’s usually no need to thaw—blend straight from the freezer for better thickness.– Combine milk and vanilla ice cream for a rich, creamy texture
Vanilla ice cream acts as the emulsifier and body. Whole milk typically produces the creamiest result, but 2% milk can work if you’re aiming for a slightly lighter shake. For an even thicker texture, use “softer” ice cream (slightly warmed) rather than icy, rock-hard ice.
– Optional add-ins: honey, lemon juice, or a splash of vanilla
– Honey helps if your berries are less sweet (common with very tart varieties or off-season fruit).
– Lemon juice brightens raspberry flavor and can make the shake taste “more raspberry” without adding more fruit.
– Extra vanilla can deepen the dessert profile when your ice cream flavor is mild.
Quick ingredient guidance (what to choose)
| Ingredient | Recommended choice | Why it matters |
|—|—|—|
| Raspberries | Fresh or frozen (no thaw needed) | Determines fruit flavor intensity and thickness |
| Milk | Whole milk for richness; 2% for lighter | Adjusts viscosity and creaminess |
| Vanilla base | Vanilla ice cream | Provides fats + sugar for smooth texture |
| Sweetener (optional) | Honey or sugar | Fine-tunes perceived sweetness vs. tartness |
| Flavor enhancer (optional) | Lemon juice pinch | Boosts “berry pop” without extra sweetness |
—
Step-by-Step Raspberry Milkshake Instructions

This section is the core of the recipe: blending in the correct order and checking consistency during blending rather than after. Most milkshake issues come from under-blending (too chunky) or over-adding milk (too thin).
– Blend raspberries, milk, and ice cream until fully smooth
Add raspberries, cold milk, and vanilla ice cream to a blender. Blend on high until the mixture looks uniform—no visible berry pieces or ice crystals.
Tip: Start with less milk than you think you need, then blend and evaluate.
– Taste and adjust sweetness with honey or extra ice cream
If the shake tastes sharp or underwhelming, add honey in small increments (e.g., 1 teaspoon at a time). If you want a sweeter, thicker dessert-like profile, adding a small scoop of ice cream usually improves both sweetness and texture.
– Strain if you prefer a seedless milkshake (optional)
Raspberry seeds can read as a pleasant “natural texture” in some milkshakes, but many people prefer seedless. Straining through a fine mesh sieve removes most seeds and creates a silkier feel.
Best practice: Strain after blending, not before. This preserves the smooth texture while you reduce grit.
Practical baseline ratio (works for most blenders):
– ~1 cup raspberries (fresh or frozen)
– ~1/2 cup cold milk (adjust as needed)
– ~2–3 scoops vanilla ice cream (about 1–1 1/4 cups, depending on scoop size)
Blend, then fine-tune.
—
Berries-to-Milkshake Outcome Guide (Typical Results)
| # | Blend Setup | Milk (cups) | Ice Cream (cups) | Creaminess | Thickness Outcome | Overall Rating |
|---|---|---|---|---|---|---|
| 1 | Classic (balanced) | 0.5 | 1.25 | ★★★★☆ | Spoonable | 8.8/10 |
| 2 | Extra-thick (diner style) | 0.35 | 1.4 | ★★★★★ | Very thick | 9.2/10 |
| 3 | Slightly thinner (drinkable) | 0.65 | 1.15 | ★★★☆☆ | Drinkable | 8.1/10 |
| 4 | High milk, light texture | 0.8 | 0.95 | ★★☆☆☆ | Runny | 6.6/10 |
| 5 | Seed-removal strain (seedless) | 0.5 | 1.25 | ★★★★☆ | Silky | 8.9/10 |
| 6 | Extra vanilla depth | 0.5 | 1.25 | ★★★★★ | Balanced | 9.0/10 |
| 7 | Frozen-berry heavy (very cold) | 0.45 | 1.35 | ★★★★☆ | Thick + cold | 9.1/10 |
—
Get the Perfect Thickness

Thickness is where personal preference meets science. Raspberry milkshakes thicken when you increase fat (more ice cream) or reduce free-flowing liquid (less milk). They thin when the ice cream warms and releases more moisture, especially if the blender jar isn’t pre-chilled.
– For a thicker shake, add more ice cream or fewer milk splashes
Add ice cream in small increments (a tablespoon or a half-scoop at a time). If your blender struggles, add just enough milk to keep things moving, but then compensate by adding ice cream again.
– For a thinner shake, add cold milk a little at a time
Drizzle in milk gradually—about 1–2 tablespoons at a time—then blend for 10–15 seconds. This prevents over-thinning and helps you maintain the smooth texture.
– Chill glasses briefly for an extra creamy finish
If you want a consistently thick mouthfeel, pre-chill serving glasses for 5–10 minutes. Cold glassware slows melting so the shake stays spoonable longer.
Common thickness troubleshooting
– Too icy/chunky: Blend longer and ensure raspberries are frozen (or ice cream is not fully melted).
– Too thin fast: Your ice cream may have softened too much before blending—try using colder dairy and serve immediately.
– Too thick to blend: Add a few tablespoons of milk, blend thoroughly, then check again.
—
Flavor Boosters and Variations

A raspberry milkshake should taste like summer berries—not just like vanilla with fruit tossed in. The best variations enhance raspberry aroma, balance tartness, and add complementary dessert notes.
– Add a pinch of salt to enhance raspberry flavor
A small amount of salt can make raspberries taste sweeter and more vibrant without turning the shake salty. Start with a tiny pinch—salt is potent.
– Try chocolate drizzle or a bit of cocoa for a twist
Chocolate and raspberries are a classic pairing. You can swirl in chocolate syrup (for a glossy finish) or blend in cocoa powder (for a more integrated flavor). If adding cocoa, consider slightly more honey because cocoa can taste bitter when raspberry sweetness is reduced.
– Make it dairy-free using coconut milk and dairy-free ice cream
For a dairy-free raspberry milkshake, use coconut milk (or oat milk) plus dairy-free vanilla ice cream. Choose a dairy-free ice cream with enough fat and emulsifiers to mimic dairy’s texture—this matters more than brand name.
Variation examples to consider
– Lemon-raspberry shake: Add 1–2 teaspoons lemon juice to brighten the fruit.
– Berry-vanilla bean profile: Use a splash of vanilla extract or vanilla bean paste.
– Raspberry “cheesecake” mood: Add a spoonful of cream cheese substitute or Greek-yogurt-style dairy-free alternative (if your diet allows).
—
Serving Tips and Presentation
Presentation is not just aesthetics—it affects how the milkshake is experienced. A thick shake is best served with a spoon; a thinner shake is designed for a straw. The right toppings also reinforce flavor in each bite.
– Serve immediately with a thick straw and spoon
Raspberry milkshakes lose thickness as they warm. Serving right away preserves the creamy, blended texture and prevents separation.
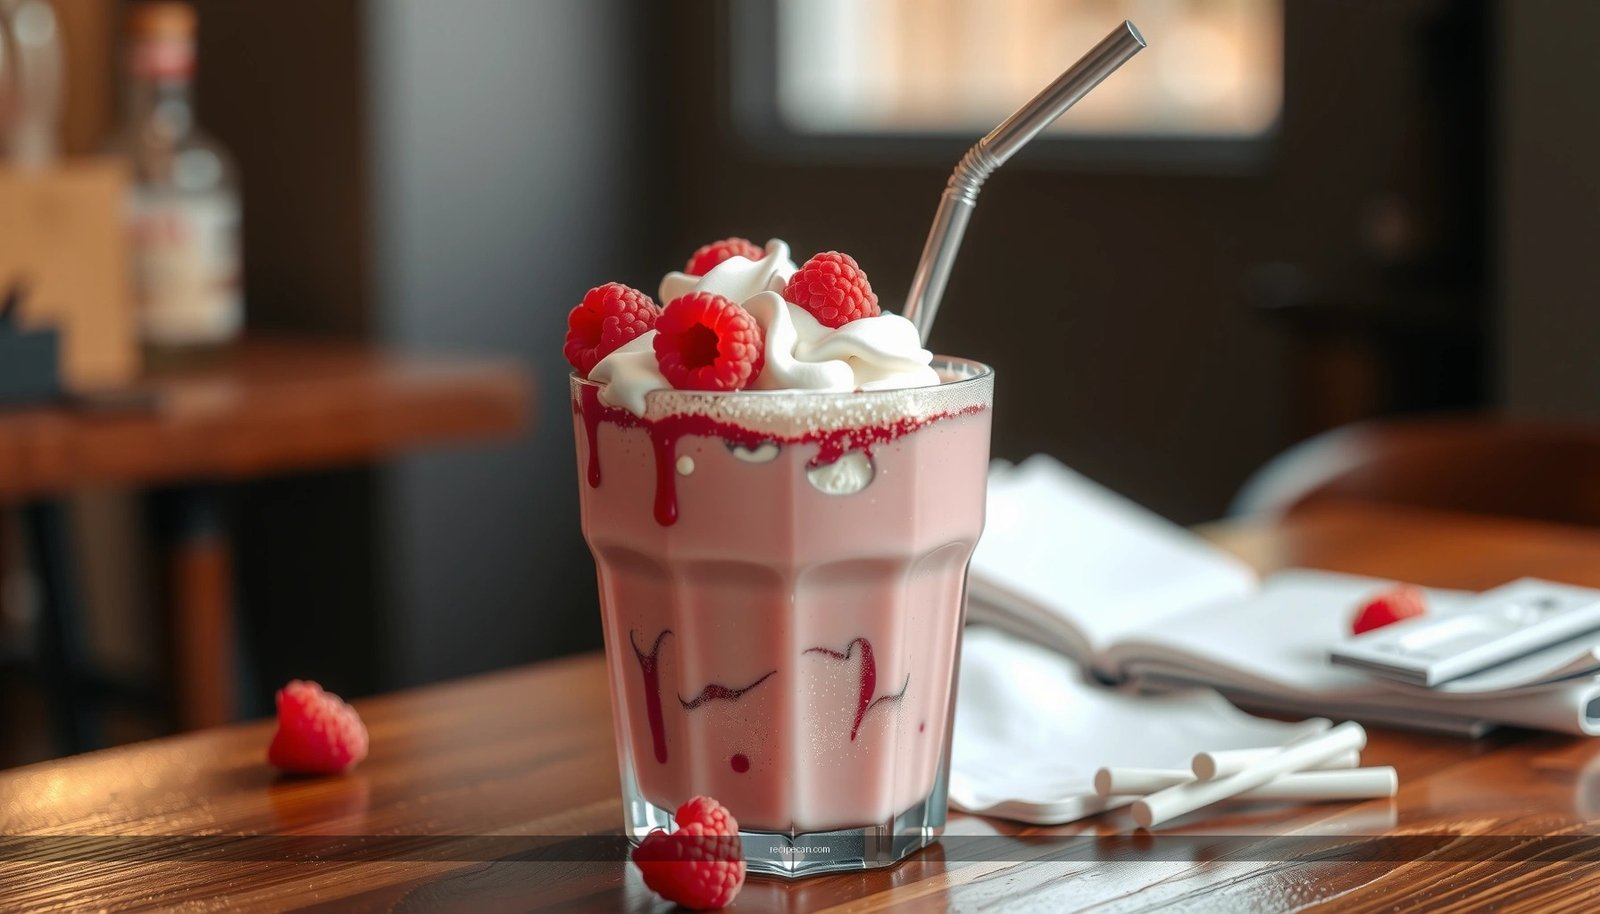
– Top with extra raspberries or whipped cream
Fresh berries on top add visual appeal and a burst of tang. Whipped cream adds a classic dessert finish and helps the shake feel extra indulgent.
– Add crunch with graham cracker crumbs or cookie crumble (optional)
Crunch provides contrast to creamy texture. Use a small handful so it doesn’t sink instantly. For best results, add crumbs just before serving.
Professional plating idea (simple, effective):
Dip the rim of the glass lightly in crushed graham crackers or sugar, then add a layer of whipped cream and a few whole raspberries.
—
Make-Ahead and Storage
Milkshakes are best fresh, but planning ahead can still be practical—especially for events or quick-service preparation.
– Best enjoyed right after blending for maximum creaminess
The blender locks in a smooth emulsion when everything is cold. Once the mixture sits, ice crystals form and the texture shifts.
– If prepping, store in the fridge briefly and re-blend before serving
If you must prep, refrigerate for a short window (for example, 1–2 hours). Then re-blend briefly to restore smoothness and redistribute the raspberries.
– Don’t freeze—texture may change as it thaws
Freezing breaks the intended cream emulsion. When thawed, the shake can become grainy or watery, losing that “thick and creamy” effect you want.
Operational takeaway:
For best quality control, blend in batches and keep the base chilled. Final blend and topping should happen close to serving time.
—
Enjoy this raspberry milkshake by blending your preferred raspberry type with cold milk and vanilla ice cream, then adjusting thickness to taste. Gather your ingredients, follow the steps, and make it your go-to refreshing treat—try a variation and serve it immediately for the best results.
In short, a successful raspberry milkshake comes down to three controllable variables: berry flavor balance, cold-fat texture from ice cream, and thickness tuning using small milk/ice-cream adjustments. Follow the simple blend-and-taste workflow above, and you’ll be able to produce a consistently creamy, bright, and refreshing shake that suits both classic and creative preferences.
References
- Milkshake
https://en.wikipedia.org/wiki/Milkshake - Raspberry
https://en.wikipedia.org/wiki/Raspberry - Milk
https://en.wikipedia.org/wiki/Milk - Emulsion
https://en.wikipedia.org/wiki/Emulsion - Frozen dessert
https://en.wikipedia.org/wiki/Frozen_dessert - https://www.britannica.com/food/milkshake
https://www.britannica.com/food/milkshake - https://pubmed.ncbi.nlm.nih.gov/?term=milkshake+emulsion+stability
https://pubmed.ncbi.nlm.nih.gov/?term=milkshake+emulsion+stability - Google Scholar Google Scholar
https://scholar.google.com/scholar?q=raspberry+milkshake+recipe - Google Scholar Google Scholar
https://scholar.google.com/scholar?q=milkshake+emulsion+stability+study - Google Scholar Google Scholar
https://scholar.google.com/scholar?q=raspberry+puree+in+milk+based+desserts+viscosity