You can whip up delicious golden waffles with just three simple steps using Bisquick. First, mix 2 cups of Bisquick, 1 1/3 cups milk, and 1 egg until smooth, adding flavors like vanilla or cinnamon if you like. Next, preheat and lightly grease your waffle maker. Finally, pour the batter in, close the lid, and cook until steam stops rising. Serving options and extra tips await if you want to elevate your waffle game.
Ingredients and Quantity
To whip up delicious waffles using Bisquick, you’ll need just a few simple ingredients that you probably already have on hand. If Bisquick isn’t your thing, there are plenty of Bisquick alternatives you can try, but the classic mix is unbeatable for quick results. Pair your waffles with your favorite waffle toppings for the perfect freedom-filled breakfast adventure.
| Ingredient | Quantity |
|---|---|
| Bisquick mix | 2 cups |
| Milk | 1 1/3 cups |
| Egg | 1 large |
| Vegetable oil | 2 tablespoons |
These essentials will get you started, and once you’re comfortable, feel free to customize with your favorite toppings like fresh fruit, syrup, or whipped cream.
Preparations

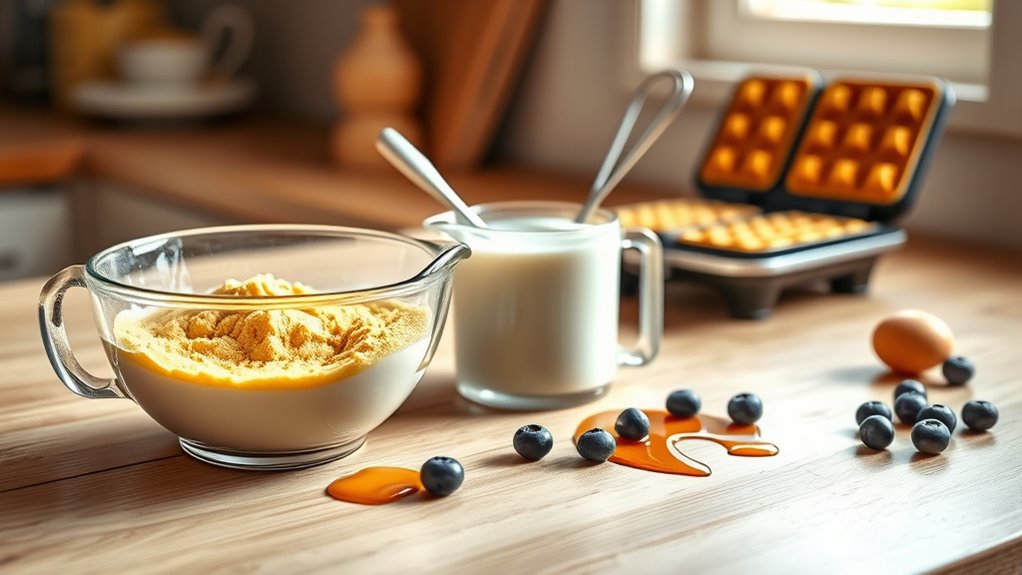
Now that you have your ingredients ready, it’s time to prepare the batter for your waffles. Getting the batter consistency just right is key to enjoying crispy, fluffy waffles every time. Here’s how you can do it:
- In a large bowl, whisk your Bisquick with milk and eggs until smooth; no lumps should remain.
- Customize your batter by adding vanilla, cinnamon, or even mashed bananas to explore exciting waffle variations.
- Let the batter rest for a few minutes—this helps the ingredients meld, improving the texture and flavor.
Tools / Kitchenware Required
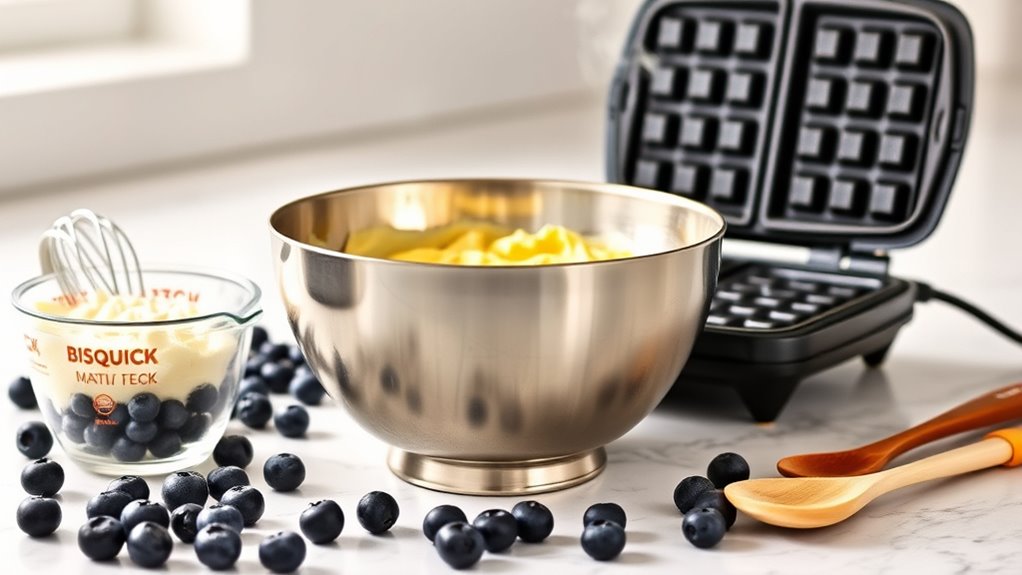
A reliable waffle iron is your best friend when it comes to turning that smooth batter into golden, crispy waffles. Alongside your waffle maker, you’ll want a sturdy mixing bowl to combine your Bisquick and other ingredients effortlessly. These essential tools free you from complicated gadgets, empowering you to whip up delicious waffles anytime.
| Tool | Purpose |
|---|---|
| Waffle maker | Cooks batter evenly into crisp waffles |
| Mixing bowl | Holds and blends ingredients smoothly |
| Measuring cups | Guarantees accurate ingredient quantities |
With these basics at hand, you’ll enjoy a straightforward, no-fuss waffle-making experience. Embrace the freedom to create breakfast magic with minimal kitchenware!
How to Cook
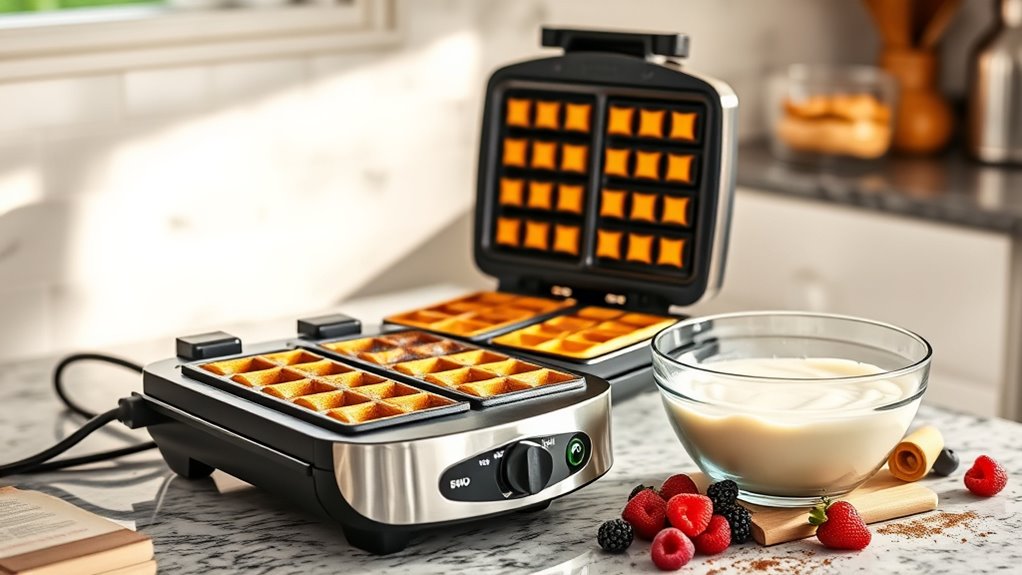
- Preheat your waffle maker until it’s hot and ready.
- Lightly grease the waffle maker with oil or cooking spray to prevent sticking.
- Pour the batter evenly onto the center of the hot plate, avoiding overloading to prevent spills.
- Close the lid and cook until steam stops rising, indicating the waffle is golden and ready.
- Experiment with variations by adding vanilla, cinnamon, or berries to the batter before cooking.
- Follow these steps to create perfect waffles every time with minimal fuss and maximum flavor.
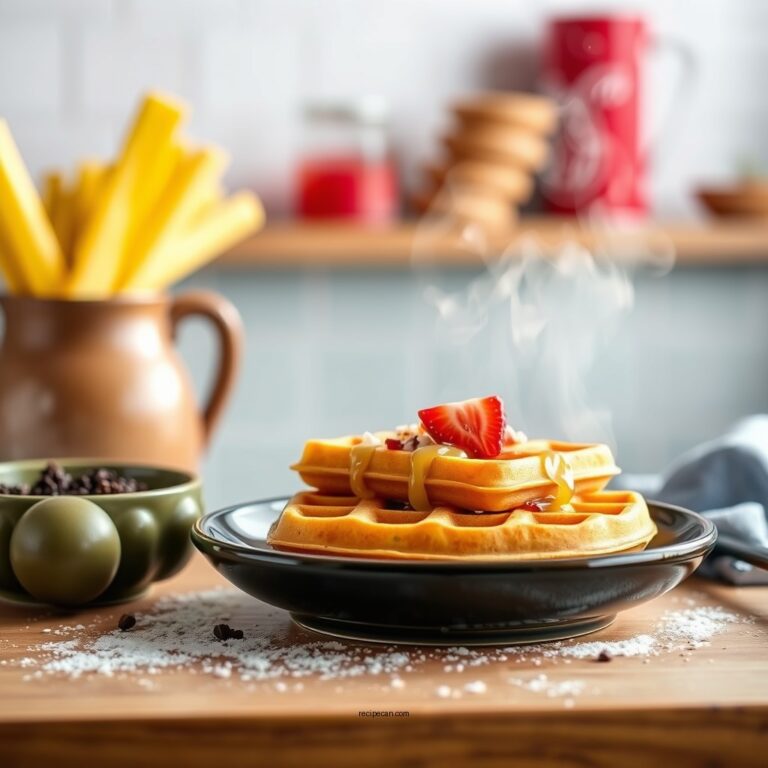
How to Serve

Once your waffles are perfectly cooked and golden brown, it’s time to think about how you’ll serve them to make every bite enjoyable. Start by exploring topping suggestions that suit your mood—classic maple syrup, fresh berries, or a dollop of whipped cream add sweetness and flair. For a savory twist, try crispy bacon, melted cheese, or avocado slices. When it comes to serving styles, stack waffles for a hearty breakfast tower, or serve them individually with a side of fruit for a lighter touch. You can even get creative by folding waffles into sandwiches or cutting them into bite-sized pieces for fun finger food. No matter your choice, these topping suggestions and serving styles let you enjoy your Bisquick waffles exactly how you want.
Tips
Many simple tweaks can make your Bisquick waffle experience even better. Here are three tips to elevate your waffles with ease:Simple tweaks can transform your Bisquick waffles into a deliciously personalized breakfast treat.
- Mix-ins: Add blueberries, chocolate chips, or chopped nuts right into the batter for a burst of flavor and texture.
- Topping Suggestions: Experiment beyond syrup—try fresh fruit, whipped cream, or a dollop of yogurt to keep things fresh and exciting.
- Serving Ideas: Serve waffles with savory sides like crispy bacon or scrambled eggs to create a balanced, satisfying meal that suits your mood.
With these tips, you’re free to customize every batch exactly how you like it. Enjoy the flexibility of Bisquick waffles and make each bite a moment of simple joy and delicious freedom.
Food Value and Benefit
Bisquick waffles provide a convenient and nutritious meal option that supports an active lifestyle. When prepared, these waffles offer a balanced combination of carbohydrates and proteins, delivering sustained energy throughout the day. This recipe contains essential vitamins and minerals such as iron and calcium, which contribute to overall health.
Benefits of eating Bisquick waffles:
- Provides steady energy from a good mix of carbohydrates and proteins
- Contains iron, which supports healthy blood function
- Supplies calcium, important for strong bones and teeth
- Easy and quick to prepare, saving time without compromising nutrition
- Can be enhanced with fresh fruit or yogurt for added vitamins and probiotics
Enjoying Bisquick waffles allows you to fuel your body efficiently while maintaining simplicity in your meal preparation.
Frequently Asked Questions
Can I Make These Waffles Gluten-Free Using Bisquick?
You can’t make these waffles gluten-free using regular Bisquick, but don’t worry! There are great Bisquick alternatives designed for gluten free options. Look for gluten-free baking mixes in your store or online—they work just as well for waffle batter. Just swap the Bisquick with one of these, follow the same simple steps, and you’ll enjoy delicious, fluffy gluten-free waffles without sacrificing taste or texture. Freedom to indulge, guaranteed!
How Long Do Bisquick Waffles Stay Fresh After Cooking?
Bisquick waffles usually stay fresh for about 1-2 days when stored properly. To keep them tasty, cool your waffles completely, then wrap them tightly or store them in an airtight container in the fridge. If you’ve got leftovers, don’t let them go to waste—try leftover recipes like waffle sandwiches or waffle breakfast casseroles. Freezing waffles is also a great option; just pop them in the toaster for a quick, fresh treat whenever you want!
Can I Freeze the Cooked Waffles for Later Use?
Absolutely, you can freeze cooked waffles—they’re like little time capsules of breakfast bliss! For best waffle storage, let them cool completely, then place them in a single layer on a baking sheet to freeze. Once solid, transfer to airtight freezer bags. When you’re ready, just toast or microwave them straight from the freezer. Freezing tips like these let you enjoy fresh waffles anytime, giving you the freedom to savor breakfast whenever you want!
What Is the Best Way to Reheat Leftover Waffles?
The best way to reheat leftover waffles depends on your time and texture preference. For a quick fix, the microwave method works great—just pop them in for 20-30 seconds. But if you want crispy edges and a warm center, the oven technique is your go-to: preheat to 350°F, place waffles on a baking sheet, and heat for about 5-10 minutes. This way, you’ll enjoy waffles just like fresh!
Can I Add Flavors Like Cinnamon or Vanilla to the Batter?
Oh, no, you definitely can’t add cinnamon or vanilla—because who wants flavor variations, right? But seriously, you’re free to jazz up your batter enhancements however you like! Just mix in a teaspoon of vanilla extract or a sprinkle of cinnamon to your batter, and you’ll transform those plain waffles into something irresistible. Embrace the freedom to experiment—your taste buds will thank you for it every single time.
References
- https://www.wikipediam.org/wiki/Waffle
- https://www.extension.purdue.edu/extmedia/FNR/FNR-226-W.pdf
- https://www.foodsafety.gov/food-safety-charts/safe-minimum-cooking-temperatures
- https://www.nutrition.gov/topics/whats-food/recipes
- https://www.cdc.gov/foodsafety/communication/food-safety-tips.html
- https://www.oregon.gov/oha/ERD/Documents/Recipe-Resources.pdf