You can make a classic tiramisu recipe step by step—no guesswork on the mascarpone, coffee-soak, or ladyfinger timing. This guide delivers the best method for building layers that set cleanly, stay creamy, and taste like traditional Italian tiramisu. Follow it through from first whip to final chill, and you’ll know you nailed the texture before serving.
Make tiramisu by layering espresso-soaked ladyfingers with a creamy mascarpone mixture, then chilling it until set—this is what creates both clean layers and the signature coffee-forward flavor. Follow the sequence below—prep the espresso, whip the cream, assemble tightly, and chill long enough—to reliably achieve a firm, sliceable dessert rather than a runny, over-soaked mess.
Ingredients for a Classic Tiramisu Recipe

– Gather mascarpone, heavy cream, eggs (or substitute), sugar, ladyfingers, and espresso
– Add cocoa powder and optional dark chocolate for finishing
For a classic tiramisu recipe, your success depends on ingredient quality and how they behave during assembly:
Core ingredients (the flavor and structure)
– Mascarpone cheese: This is the backbone of the creamy layer. Use full-fat mascarpone for the right body; low-fat versions are often thinner and can break when mixed with whipped cream.
– Heavy cream: Provides lift and a mousse-like texture. Cold cream whips faster and holds air better, which helps the tiramisu keep its shape after chilling.
– Eggs (optional but classic in many recipes): Some versions use yolks (and sometimes whites) for a custard-like richness. If you’re concerned about raw eggs, use an egg-based yolk pasteurized substitute, or switch to a method that omits eggs.
– Sugar: Sweetens and also helps stabilize emulsions (especially in mascarpone + cream mixtures).
– Ladyfingers (savoiardi): These absorb espresso quickly. Their dryness is part of the texture—aim to soak just enough to soften, not enough to dissolve.
– Espresso (or strong coffee): Freshly brewed espresso is ideal, but any very strong coffee works. The key is intensity and balance—tiramisu is meant to taste like coffee, not just be lightly “hinted.”
Finishing
– Unsweetened cocoa powder: Dust on top immediately before serving so it stays aromatic rather than turning dark and damp.
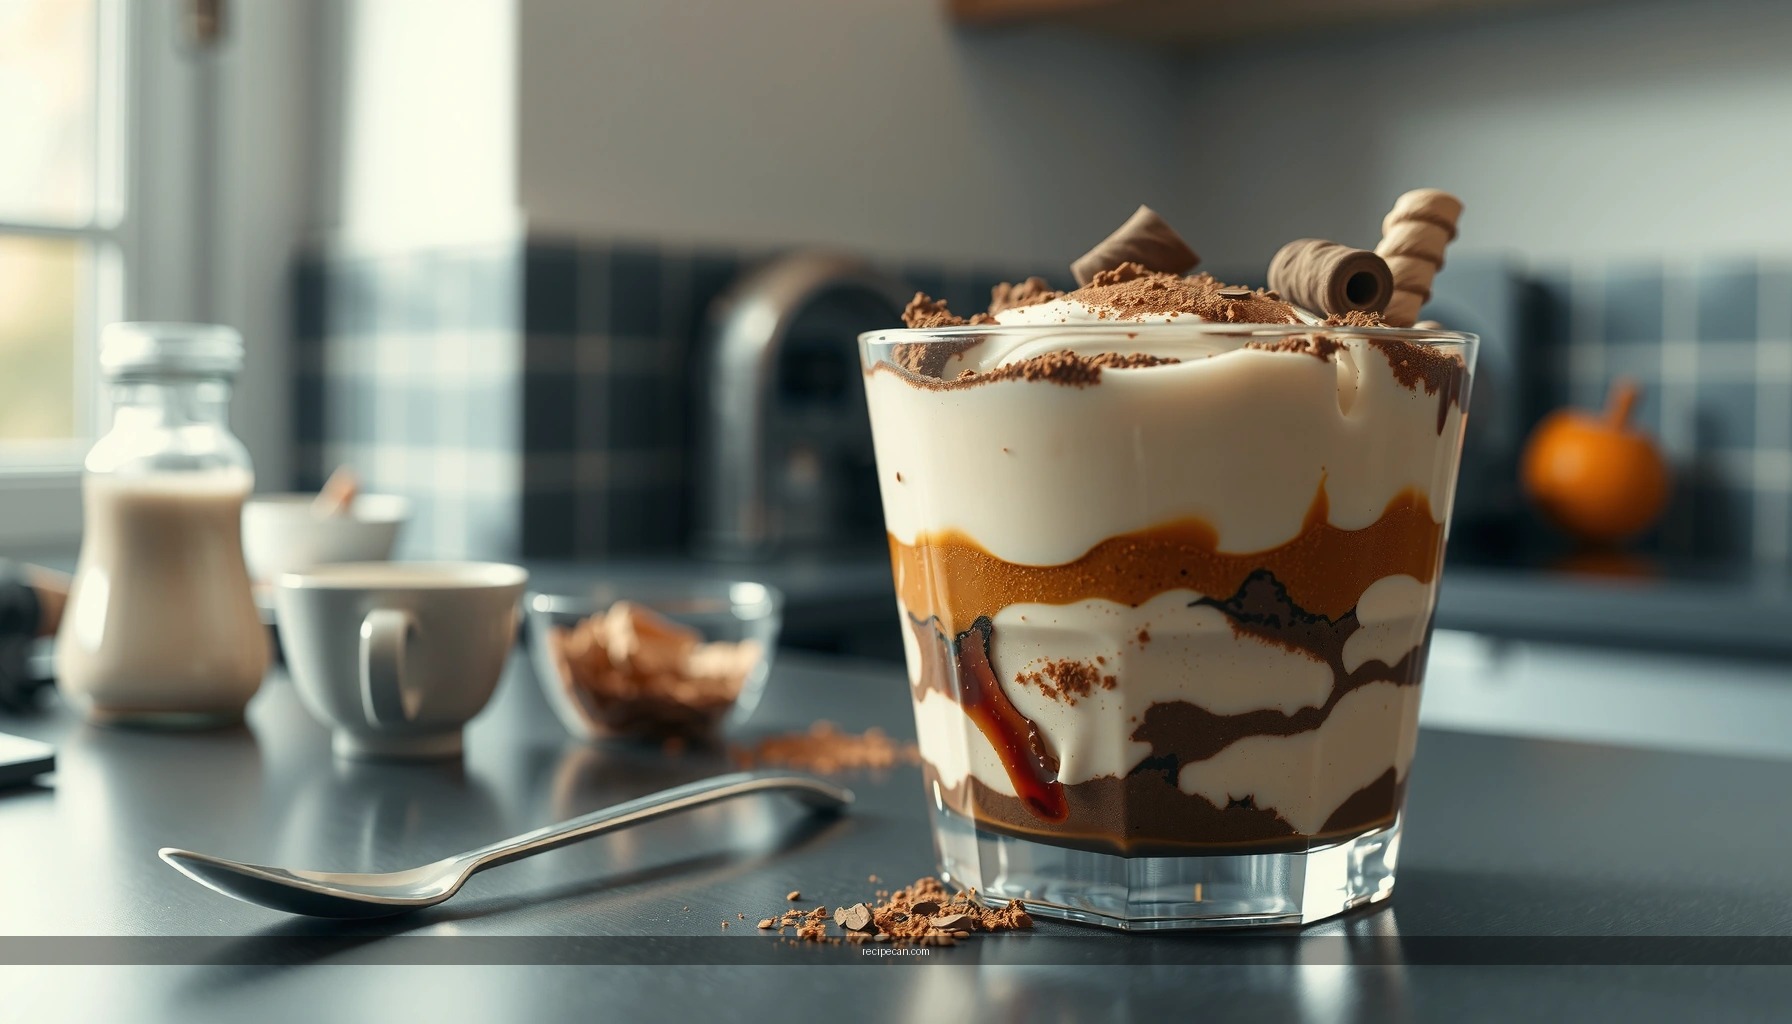
– Optional dark chocolate: Either shave or add a light sprinkling for extra depth.
Practical note on quantities and yield: A standard tiramisu recipe is typically sized for 6–8 servings. If you’re using larger cups or a wider dish, plan to add more layers (and more ladyfingers), otherwise the cream can’t fully “lock in” between strata.
What “Strong” Coffee Means for Tiramisu (Brew Strength & Flavor Target)
| # | Tiramisu Coffee Target | Brew Guide | Typical Tasting Effect | Outcome for Layers |
|---|---|---|---|---|
| 1 | Espresso (classic) | ~18 g coffee / 36 g yield in ~30 sec | Bold, roasted aroma; balanced bitterness | Best: absorbs without dissolving |
| 2 | Moka pot espresso-style | Use slightly finer grind than drip; fill basket fully | High intensity with caramel notes | Very good: quick soak, clean set |
| 3 | AeroPress (concentrated) | ~15–17 g coffee / ~60 g water, short stir | Smooth strength, less harsh edge | Good: stable texture when cooled |
| 4 | Strong drip (coffee-to-water ratio) | Use ~1:8 to 1:10 ratio vs typical 1:15 | Coffee-forward; less crema-like intensity | ★ Good if soak time is brief |
| 5 | Cold brew concentrate | Use a concentrate; dilute lightly (if needed) | Low acidity; chocolaty depth | Very good: gentle flavor, sturdy set |
| 6 | Under-extracted coffee | Too weak grind or too short brew | Thin and flat; sweetness dominates | Weak flavor; layers can taste “watery” |
| 7 | Hot coffee (not cooled) | Soak immediately after brewing, while scorching | Over-softens ladyfingers | Bad: runny layers after chilling |
Make the Espresso and Prep the Layers

– Brew strong espresso and let it cool slightly for easier soaking
– Keep soaking quick to avoid soggy ladyfingers
Start with espresso prep because it directly controls texture. If the coffee is too hot or you soak too long, ladyfingers collapse and release starch into the cream, which can blur the layered look.
How to brew for tiramisu flavor
– Brew strong coffee (espresso is best).
– Let it cool until it’s warm—not scalding. A good target is roughly room temperature to slightly warm, so the ladyfingers soften gradually.
How to soak ladyfingers (the “seconds matter” method)
– Dip each side for ~1–3 seconds, depending on thickness.
– You want the surface to darken and become pliable, but the finger should still hold its shape when placed.
– If you’re assembling in cups, place ladyfingers immediately after soaking so they don’t keep absorbing off the spoon.
Professional workaround for consistent results
– If your ladyfingers are especially dry, you may need slightly longer dips; if they’re softer or older, shorten soaking time.
– Batch control: soak one “stripe” at a time, then assemble. Avoid soaking a stack and waiting.
Whip the Mascarpone Cream

– Whisk mascarpone with sugar until smooth and lump-free
– Whip cream (and fold in egg mixture if using) for a light, airy texture
Mascarpone is forgiving, but it’s also easy to overmix. The cream should be smooth, thick, and able to hold ridges when spread.
Step 1: Smooth out mascarpone
– Beat mascarpone with sugar until fully incorporated—no lumps.
– Scrape the bowl sides and bottom. Lumps often hide there.
Step 2: Whip heavy cream to soft peaks
– Cold cream whips more reliably.
– Stop at soft-to-medium peaks. If you whip to stiff peaks, the cream can become grainy or separate slightly during folding.
Step 3: Fold gently (don’t deflate)
– If you’re using an egg mixture (commonly yolks whipped with sugar), incorporate it first into mascarpone, then fold in whipped cream.
– Folding is deliberate: use a spatula and rotate the bowl to keep air in the mixture. A light hand prevents a dense, heavy texture.
Texture troubleshooting
– If cream looks too loose: chill the bowl 10–15 minutes and continue whipping/folding carefully.
– If cream looks curdled: it may be too cold or mixed aggressively; sometimes gentle warming to room temp and re-emulsifying helps, but prevention (proper mixing speed) is the real fix.
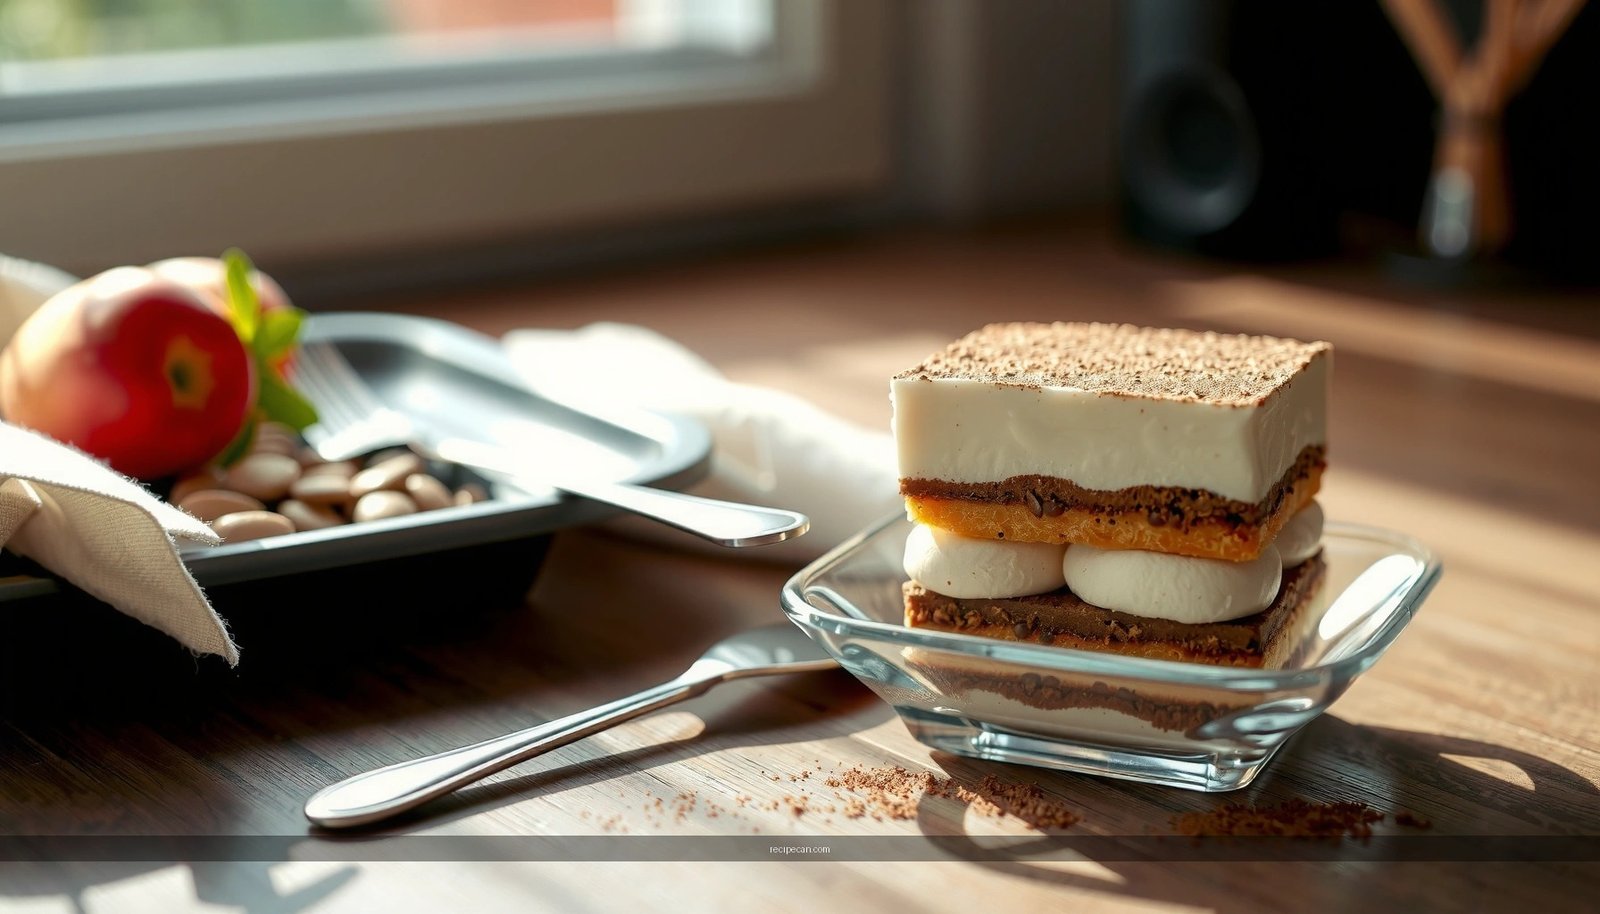
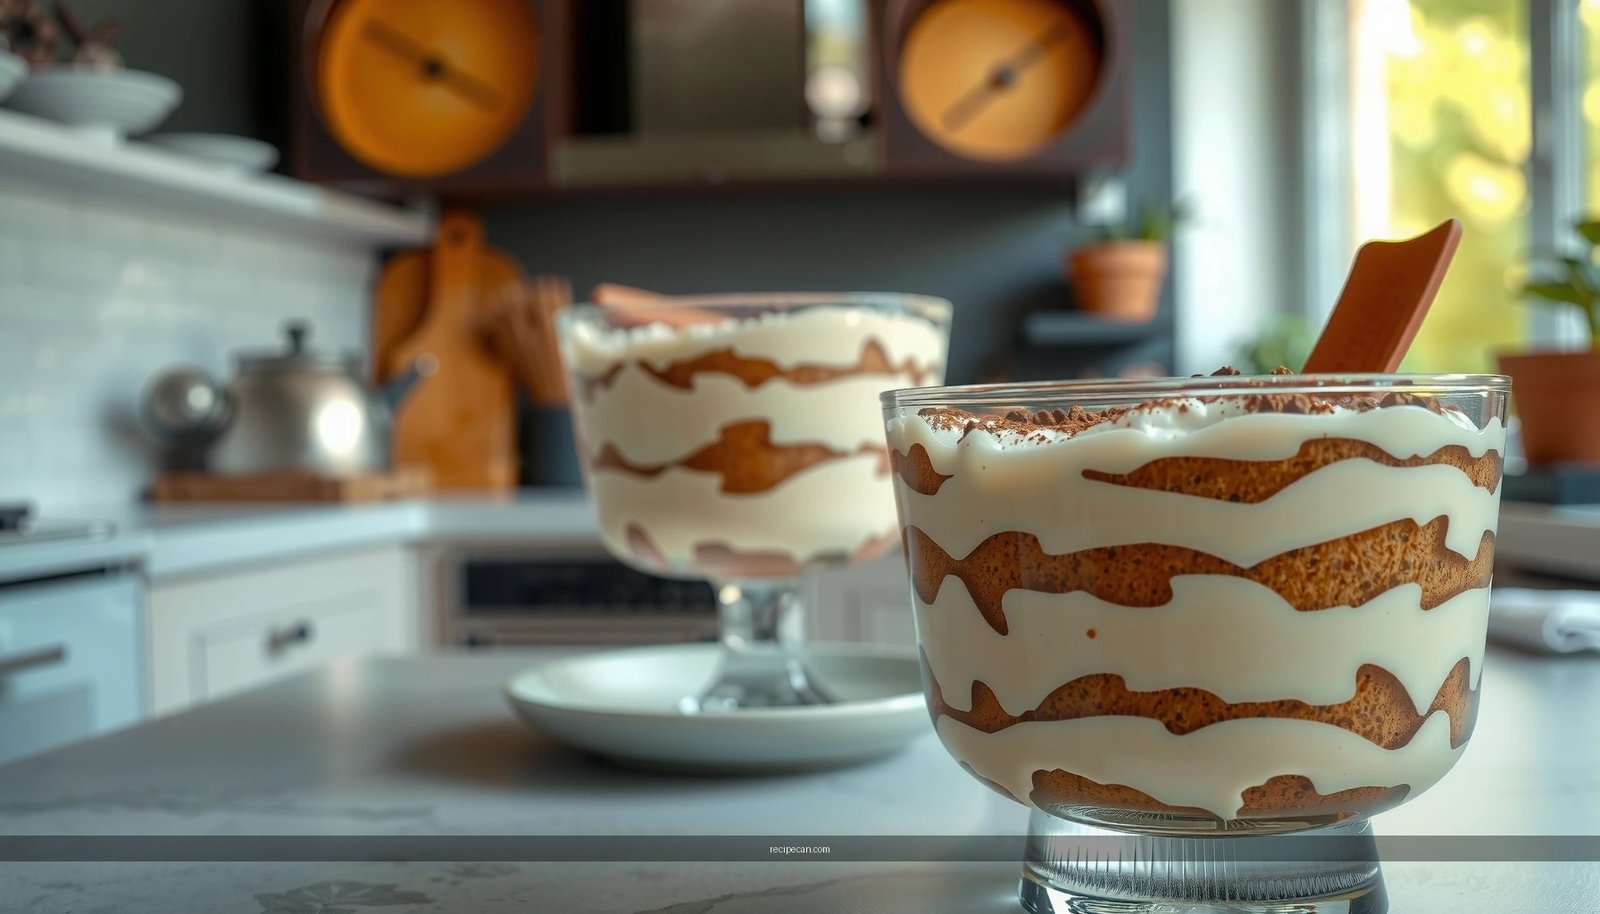
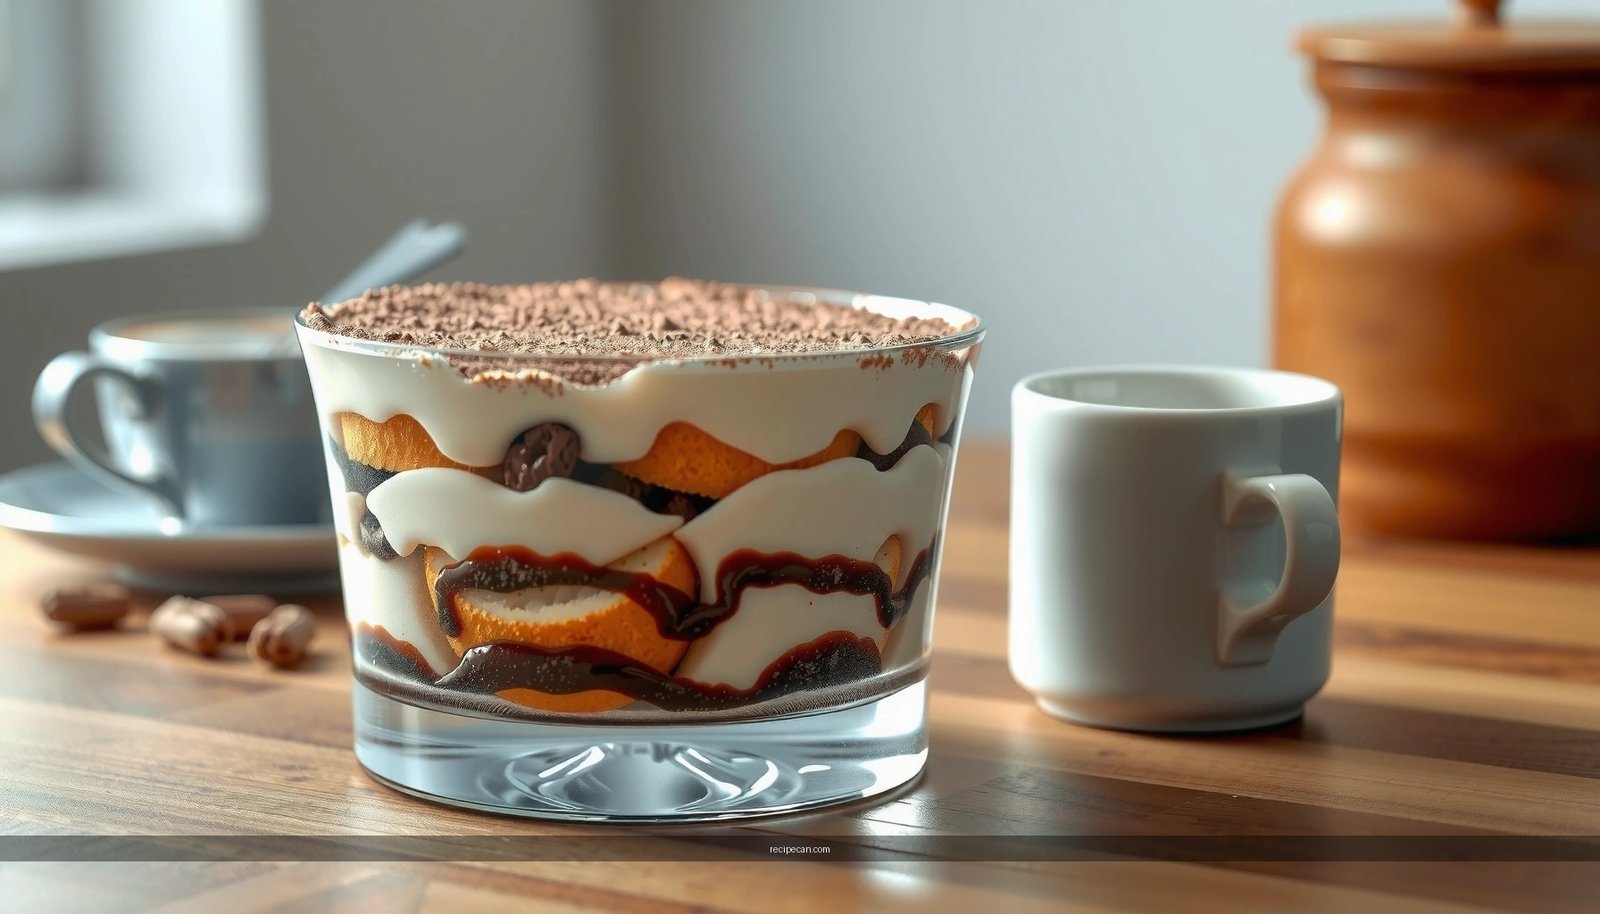
Assemble Your Tiramisu
– Layer soaked ladyfingers and mascarpone cream in a dish or individual cups
– Repeat layers, finishing with cream on top for the best presentation
Assembly is where tiramisu goes from good to “restaurant-quality.” The goal is tight layering so coffee flavor distributes while the cream sets into defined bands.
Dish vs. cups
– Large dish: easier to align layers; great for serving family-style.
– Individual cups: gives cleaner portions and a more premium presentation, but increases assembly time.
Layering strategy for clean edges
1. Add a thin base layer of mascarpone/cream to prevent ladyfingers from sticking to the bottom.
2. Arrange a single layer of quickly soaked ladyfingers, covering the surface without gaps.
3. Spread cream evenly—use an offset spatula for smooth, level layers.
4. Repeat until you reach the top, then finish with cream.
Practical ratio guidance
– If your cream is too thin relative to ladyfingers, layers slump. If cream is too thick relative to ladyfingers, you’ll get rich but under-coffee-flavored dessert.
– Aim for even coverage: ladyfingers should be mostly contained by cream, not poking through everywhere.
Serving and presentation
– For the most visually “clean” slice, keep the top cream layer thicker and smooth out edges.
– If using individual cups, ensure each cup has complete circumference coverage so the layer lines are crisp.
Chill and Set for Best Texture
– Refrigerate for at least 4 hours (overnight is ideal)
– Dust with cocoa right before serving to maintain a fresh look
Chilling is not optional—it’s what transforms the cream into a stable structure and allows moisture to equilibrate across layers.
Minimum chill time
– At least 4 hours for a firm set.
– Overnight produces the best slicing consistency and fully develops flavor integration (coffee notes mellow slightly and become rounder).
How to store while setting
– Cover tiramisu to avoid fridge odors and prevent the top from drying.
– If you’re serving later the same day, assemble in the morning and chill until after dinner.
Cocoa timing
– Dust with cocoa powder right before serving.
– Why: cocoa absorbs surface moisture over time, which dulls aroma and darkens the appearance.
Flavor optimization
– If your espresso tastes slightly too bitter, balancing sweetness in the cream usually fixes it.
– If your espresso is too mild, your tiramisu may taste “creamy but not coffee-forward.” In that case, stronger brew or a slightly reduced water amount in future batches is the most direct solution.
Egg Options for Tiramisu Cream: Practical Tradeoffs
| # | Feature | With Yolks | No Eggs (Mascarpone + Cream) |
|---|---|---|---|
| 1 | Texture density | Slightly richer, more custard feel | Lighter, mousse-like finish |
| 2 | Stability after 24 hrs | Generally very stable | Stable if cream is whipped to soft peaks |
| 3 | Coffee flavor perception | Slightly muted by richness | Coffee-forward because cream is lighter |
| 4 | Risk of egg-related texture issues | Higher if mixture is overheated or overwhipped | Lower; fewer failure points |
| 5 | Dietary and food-safety considerations | Needs careful handling; choose pasteurized egg prep | Easier for broad audiences |
| 6 | Time to make cream | Often 10–20 minutes longer | Faster and more straightforward |
| 7 | Best for slicing presentation | Yes, if chilled overnight | Yes, with proper whipped-cream texture |
| 8 | Flavor profile | More “classic” sweetness and richness | Bright, creamy, coffee-forward |
| 9 | Handling at scale (events) | More consistent if practiced | Easier batching and fewer variables |
| 10 | Cleanup and logistics | More bowls/steps | Simpler workflow |
Common Mistakes to Avoid
– Over-soaking ladyfingers (leads to watery tiramisu)
– Skipping proper chilling (results in runny layers)
Even experienced cooks run into two predictable failure points. Prevent them with the following controls:
1) Over-soaking ladyfingers
– Symptom: watery layers, muddy coffee color, and a cream that looks diluted.
– Cause: too-long dipping or soaking at too high a temperature.
– Fix: cool espresso and limit dips to seconds, not minutes. If you notice the ladyfingers breaking apart, you’ve gone too far.
2) Skipping proper chilling
– Symptom: runny texture, cream sliding, and layers blending.
– Cause: not enough time for the cream to firm and for moisture to distribute evenly.
– Fix: refrigerate at least 4 hours, and for clean slices, go overnight.
Additional quality pitfalls (worth watching)
– Overwhipping the cream: can lead to graininess or separation.
– Not scraping mascarpone properly: lumps carry through and ruin the “silky” mouthfeel.
– Dusting cocoa too early: top can become damp and visually less appealing.
After chilling, your tiramisu should hold its layers and taste rich, creamy, and coffee-forward. Use this step-by-step flow—prep, whip, layer, chill—and make your next batch for guests or a simple at-home dessert.
Tiramisu rewards precision more than complexity. If you focus on strong, cooled espresso; brief soaking; smooth mascarpone-cream whipping; tight layering; and adequate refrigeration, you’ll consistently produce a dessert that’s cleanly stacked, properly set, and unmistakably coffee-rich.
Frequently Asked Questions
What ingredients do I need to make an easy tiramisu recipe at home?
You’ll typically need ladyfingers (savoiardi), mascarpone cheese, eggs (or pasteurized eggs), strong brewed espresso, sugar, and cocoa powder. Many recipes also include a splash of vanilla and/or coffee liqueur (like Marsala) for extra flavor. For best results, use fresh mascarpone and freshly brewed espresso so your tiramisu has a rich coffee taste without tasting watery.
How do I make tiramisu without curdling the eggs?
If your tiramisu uses eggs, temper them by gradually whisking warm espresso or sugar syrup into the yolks while stirring continuously. Then cook the mixture only until it thickens slightly (or use a method that keeps it gentle and not boiling), and let it cool before folding into mascarpone. This helps the mascarpone mixture stay smooth and creamy rather than grainy or curdled.
How do I assemble tiramisu so the ladyfingers don’t get soggy?
Dip each ladyfinger quickly—just 1–2 seconds per side—so it absorbs espresso without becoming mushy. Use a shallow bowl of coffee and work efficiently, then layer immediately to keep structure. Also, spread a thin, even mascarpone layer between rows for a stable tiramisu that slices cleanly.
Why does my tiramisu taste too strong or too bitter, and how can I fix it?
Strong bitterness usually comes from over-brewed espresso or overly concentrated coffee for soaking. Try using a slightly weaker espresso, adding a small amount of sugar to balance, or stretching the coffee with a bit of water or milk before soaking. If you’re using coffee liqueur, keep it moderate so the overall tiramisu flavor stays balanced and dessert-like.
Which is the best way to store tiramisu to keep it creamy?
Cover your tiramisu and refrigerate it for at least 4–6 hours (overnight is best) so the flavors meld and the cream sets properly. Keep it chilled to maintain the mascarpone texture and prevent the coffee-soaked layers from loosening. For best results, serve within 24–48 hours of making the tiramisu recipe, because the ladyfingers will continue to soften over time.
References
- Tiramisu
https://en.wikipedia.org/wiki/Tiramisu - Tiramisu | Meaning, Ingredients, Origin, Desserts, & Taste | Britannica
https://www.britannica.com/topic/tiramisu - https://www.theguardian.com/food/2020/jun/03/tiramisu-recipe
https://www.theguardian.com/food/2020/jun/03/tiramisu-recipe - https://cooking.nytimes.com/recipes/1019726-tiramisu
https://cooking.nytimes.com/recipes/1019726-tiramisu - Google Scholar Google Scholar
https://scholar.google.com/scholar?q=how+to+make+tiramisu+recipe - Google Scholar Google Scholar
https://scholar.google.com/scholar?q+tiramisu+mascarpone+eggs+safety+emulsion - Google Scholar Google Scholar
https://scholar.google.com/scholar?q=tiramisu+coffee+savoiardi+recipe+method - https://www.theguardian.com/food/2018/sep/02/tiramisu-recipe
https://www.theguardian.com/food/2018/sep/02/tiramisu-recipe - how to make tiramisu recipe – Search results
https://en.wikipedia.org/wiki/Special:Search?search=how+to+make+tiramisu+recipe - https://www.ncbi.nlm.nih.gov/search/research-articles/?term=how+to+make+tiramisu+recipe
https://www.ncbi.nlm.nih.gov/search/research-articles/?term=how+to+make+tiramisu+recipe