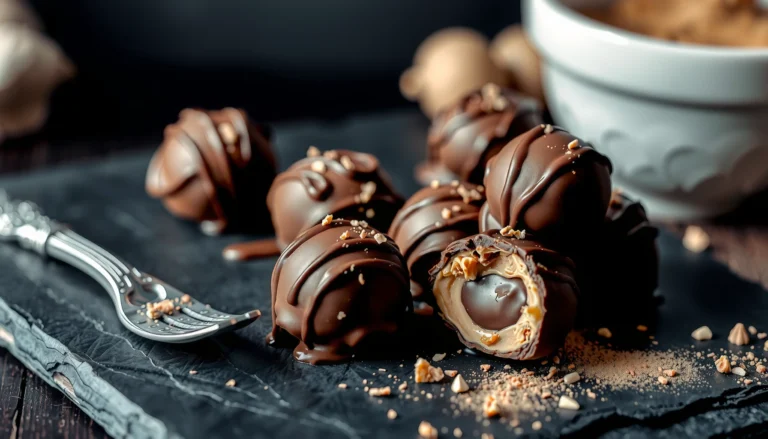
Looking for a healthy protein ball recipe that’s quick, easy, and actually nutritious? This winning recipe delivers no-bake protein balls with simple pantry ingredients and a balanced macro profile you can feel good about. If you want fast energy snacks without complicated steps, this is the one to make.
Protein balls are one of the fastest ways to turn protein powder (or Greek yogurt) and pantry staples into a satisfying, no-bake snack—so yes, you can make them at home quickly. With a properly balanced protein base, fiber-rich add-ins, and a binder that firms after chilling, you’ll get portion-friendly bites that support steady energy and better snack choices.
Protein balls work because they solve three common snack problems at the same time: (1) they deliver meaningful protein to reduce cravings, (2) they include fiber to improve fullness and gut health, and (3) they’re easy to batch, meaning you can plan your week instead of improvising. Below is a practical, step-by-step approach to building a reliable no-bake texture—plus flavor variations, storage guidance, and the mistakes that typically ruin the batch.
Estimated Nutrition for 1 Protein Ball (≈35 g, homemade)
| # | Protein Base | Calories | Protein | Fiber | Added Sugar* | Suitability |
|---|---|---|---|---|---|---|
| 1 | Whey protein + oats | 125 | 12 g | 3 g | 2 g | ★ High-protein |
| 2 | Casein protein + dates | 145 | 12 g | 4 g | 5 g | ★ Balanced |
| 3 | Greek yogurt + almond butter | 110 | 9 g | 2 g | 3 g | ★ Snackable |
| 4 | Pea protein + chia | 130 | 11 g | 5 g | 1 g | ★ Fiber-forward |
| 5 | Soy protein + shredded coconut | 140 | 12 g | 3 g | 2 g | ★ Plant-based |
| 6 | Protein powder + nut butter (no dates) | 160 | 14 g | 2 g | 0 g | ★ Low-sugar, lower fiber |
| 7 | Protein powder + blended oats (binder) | 135 | 12 g | 4 g | 2 g | ★ Reliable texture |
The table above reflects typical homemade formulas using common ingredients (protein powders, Greek yogurt, oats, dates, chia, and nut butter). Your exact macros will vary depending on brand and portion size, but these estimates are a useful way to choose the healthiest protein ball base for your goals—high-protein, low-sugar, or gluten-free.
Choose Your Healthy Protein Base

Start with the protein base because it sets the foundation for both nutrition and texture. In most healthy protein ball recipes, the “protein” ingredient is doing two jobs: providing amino acids and contributing solids that help the mixture hold shape after chilling.
– Pick protein powder or opt for Greek yogurt-like options (if your mix allows)
Protein powder is convenient and consistent. Whey and casein typically produce smoother mixes, while pea and soy are great for plant-based options. Greek yogurt can work well when your recipe needs extra moisture and a tangy flavor, but it may require more oats or chilling time to achieve a firm roll.
– Use nut butter (peanut/almond) to boost protein and healthy fats
Nut butter improves mouthfeel and flavor, and it helps bind the mixture. Peanut butter and almond butter both add fats that slow digestion, which can help you feel satisfied longer. If you’re aiming for higher protein, consider using a nut butter with no added sugar and pairing it with a higher-protein powder rather than relying on sugar-based binders.
– Ensure the base fits your dietary goal (high-protein, low-sugar, gluten-free)
Many “healthy” recipes accidentally add sugar through sweetened yogurt, chocolate syrups, or large amounts of dates. For low-sugar protein balls, choose unsweetened protein powder, unsweetened nut butter, and a minimal amount of natural sweetener (or none). For gluten-free, confirm that oats are certified gluten-free and that any protein powder or mix-ins are labeled accordingly.
Practical baseline: If you want a strong, beginner-friendly batch, choose one of these approaches:
1) Whey/pea protein powder + nut butter + oats/chia
2) Greek yogurt + nut butter + oats (or blended oats)
3) Plant protein powder + chia + shredded coconut
Add Fiber and Natural Sweetness

Fiber is the difference between “tastes good” and “keeps you full.” It also improves the rolling experience by increasing bulk and absorbing excess moisture.
– Combine with oats, chia, or shredded coconut for texture and fiber
Oats bring a neutral flavor and reliable binding, especially when you use quick oats or blend some of them for extra thickness. Chia is a powerful choice because it gels as it hydrates, which makes no-bake protein balls more stable. Shredded coconut adds structure and a slightly chewy texture—great for chocolate and vanilla flavor profiles.
– Use dates, honey, or maple syrup sparingly for sweetness
Dates are popular because they’re both sweet and naturally sticky. However, too many dates can make balls softer and harder to portion cleanly. Honey and maple syrup work similarly, but they’re easier to overdo—especially if your protein powder already has sweetness.
– Balance sweetness so the balls stay truly healthy
A “healthy” protein ball isn’t about eliminating all sweetness; it’s about keeping sugar in check while preserving flavor. If you prefer very low sugar, start with either:
– 0–1 tablespoon of sweetener per batch (for natural flavor from cocoa/vanilla), or
– dates only for binding, then reduce added sweeteners elsewhere.
Actionable technique: Add binder and fiber first, then adjust sweetness last. This order prevents you from committing to a batch that’s too wet, too sweet, or too crumbly.
Build the Perfect No-Bake Texture

Texture is where most DIY protein ball recipes succeed—or fail. The goal is a dough-like mix that holds together without being gummy.
– Add liquid slowly (milk, yogurt, or nut butter) to avoid overly sticky or dry mix
Start by mixing your dry ingredients (protein powder, oats/chia, cocoa/coconut) with nut butter. Then add moisture incrementally—one teaspoon at a time—until the mixture can be pressed firmly and holds its shape.
– If it’s too dry: add more nut butter or a splash of milk/yogurt.
– If it’s too sticky: add oats (or extra chia) and rest the mixture.
– Chill the mixture 20–30 minutes for easier rolling
Chilling isn’t optional if you want consistent shaping. It lets binders hydrate and firms up fats from nut butter so the balls don’t smear. For especially soft bases (like Greek yogurt-heavy mixes), chill closer to 45 minutes.
– Roll into bite-size portions for consistent fueling
Portioning also makes the snack more “diet-proof.” Use a tablespoon or small cookie scoop for uniform balls. For most people, 1–2 balls cover a typical snack portion, but your protein needs may adjust based on body size and training intensity.
Texture benchmark: You should be able to roll the mixture without it sticking to your hands excessively. If needed, lightly dampen your fingers or use parchment liners.
Flavor Variations (Same Healthy Recipe)

Once your base technique works, you can rotate flavors without starting over. Keep the same ratios and swap only the flavor components.
– Chocolate: cocoa powder + mini chocolate chips (optional)
Add unsweetened cocoa for depth, then include mini chocolate chips if you enjoy sweetness. For a low-sugar version, reduce chips or replace them with dark chocolate shavings and add extra cocoa instead.
– Peanut butter: extra peanut butter + pinch of salt
Peanut butter flavor benefits from a salt pinch—salt makes chocolate and nut flavors pop, and it can reduce the urge to add more sweetener.
– Vanilla cinnamon: cinnamon + vanilla extract for warm flavor
Cinnamon adds perceived sweetness, so you can often reduce sweeteners while keeping the taste satisfying.
Pro-level tip: Keep mix-ins dry (chips, shredded coconut) and add extracts/spices after the mixture thickens slightly. This prevents flavoring from making the mix runny.
Storage and Portion Tips
Batching is where protein balls become a true nutrition strategy rather than a one-off experiment.
– Refrigerate in an airtight container for up to 5–7 days
Cold storage helps maintain texture. Let balls sit at room temperature 3–5 minutes before eating if you prefer a softer bite.
– Freeze for longer storage; thaw in the fridge overnight
Freezing is ideal if you meal prep for training weeks. Store in a freezer-safe container and separate layers with parchment so you can grab individual balls.
– Aim for 1–2 balls per snack depending on your protein needs
Consider your overall daily protein target. If protein balls are a pre-workout snack, you may want 1 ball plus a meal component (like yogurt or a balanced lunch). If they’re a post-workout snack, 1–2 balls can complement a full protein meal.
Portion strategy: If you’re tracking macros, choose a consistent ball size and weigh one as your “unit.” That removes guesswork and makes your nutrition targets more accurate.
Common Mistakes to Avoid
Even simple recipes fail for predictable reasons. Avoid these and your batches will become reliably rollable, tasty, and portion-friendly.
– Too much sweetener causing softer, messy balls
Natural sweeteners like dates add moisture and stickiness. More sweetener can mean less structure. Reduce sweetener first before increasing oats or chilling longer.– Skipping chilling leading to difficult shaping
If you skip the rest time, binders won’t fully hydrate and fats won’t firm. You’ll end up with crumbles or balls that collapse.
– Under-measuring binder ingredients causing crumbles
Oats, chia, and blended oats are the most common binders. If your mix won’t hold, add binder gradually rather than adding more sweetener.
Troubleshooting quick fixes:
– Crumbly? Add 1 teaspoon nut butter or 1–2 teaspoons yogurt/milk, then chill 15 minutes.
– Too soft? Add oats/chia and chill longer.
– Too dry? Add moisture slowly—don’t pour in liquid all at once.
Protein balls are a simple, healthy protein snack you can make quickly with a solid protein base, fiber-rich add-ins, and a binder that firms up after chilling. Choose the base that matches your goals (high-protein, low-sugar, plant-based, or gluten-free), then use the texture cues—slow liquid, 20–30 minutes of chilling, and consistent portions—to ensure every batch rolls cleanly. Try one flavor variation next, and prep a week’s worth for dependable, energizing grab-and-go nutrition.
References
- Google Scholar Google Scholar
https://scholar.google.com/scholar?q=healthy+protein+balls+recipe - Google Scholar Google Scholar
https://scholar.google.com/scholar?q=protein+snack+energy+bites+oats+nuts+nutrition - Google Scholar Google Scholar
https://scholar.google.com/scholar?q=high+protein+snacks+health+effects+randomized+trial - https://ods.od.nih.gov/factsheets/Protein-HealthProfessional/
https://ods.od.nih.gov/factsheets/Protein-HealthProfessional/ - https://www.myplate.gov/eat-healthy/protein-foods
https://www.myplate.gov/eat-healthy/protein-foods - Strength training: How-to video collection – Mayo Clinic
https://www.mayoclinic.org/healthy-lifestyle/nutrition-and-healthy-eating/in-depth/protein/art-20046031 - https://www.hsph.harvard.edu/nutritionsource/what-should-you-eat/protein/
https://www.hsph.harvard.edu/nutritionsource/what-should-you-eat/protein/ - Healthy diet
https://www.who.int/news-room/fact-sheets/detail/healthy-diet - Protein
https://en.wikipedia.org/wiki/Protein - Protein | Definition, Structure, & Classification | Britannica
https://www.britannica.com/science/protein