Searching for a gluten free tiramisu dessert recipe that tastes like the classic version? This recipe delivers the real tiramisu flavor—coffee-soaked layers and creamy mascarpone—using gluten free ingredients so you can serve it without compromises. You’ll get clear, step-by-step instructions and a foolproof method for achieving the same texture every time.
Yes—you can make classic-tasting tiramisu that’s fully gluten free by using certified gluten free ladyfingers (or gluten free sponge cake) and keeping the traditional mascarpone–coffee–cocoa structure intact. This recipe uses the same creamy layers you expect from traditional tiramisu, while guiding you through soaking, folding, and chilling so the dessert sets cleanly and tastes light, not gummy.
This is one of the most reliable gluten free tiramisu approaches because it avoids “mystery” substitutions. Instead, it focuses on two controllable variables that determine success: (1) the gluten free base (ladyfingers/sponge) and (2) how much coffee liquid you allow the layers to absorb. Get those right, and the classic flavor profile—espresso-like depth, vanilla-cream richness, and cocoa bitterness—comes through beautifully.
Gluten Free Ingredient Checklist

A gluten free tiramisu recipe should start with a simple compliance mindset: confirm each component is truly gluten free, not just “likely gluten free.” Even small items—like cocoa blends or flavored extracts—can sometimes include traces of gluten depending on processing.
Use this checklist to build confidence before you begin:
– Use certified gluten free ladyfingers or gluten free sponge cake
Look for packaging that explicitly states “gluten free” and, ideally, includes certification from a recognized authority.
– Verify mascarpone, cocoa, and any flavorings are gluten free
Mascarpone is usually safe as-is, but always check the label. For cocoa, choose a brand that lists only cocoa (and sugar if applicable). For flavorings (vanilla, coffee extracts), verify there’s no added wheat-derived flavoring.
– Choose brewed coffee (and optional espresso) for the soaking liquid
Coffee is naturally gluten free, but confirm instant coffee blends if you use them. For the most classic tiramisu profile, brew strongly (or use espresso) so the flavor stands up against the cream.
Operational tip: If you’re preparing for someone with celiac disease, treat cross-contact seriously. Use clean utensils, a clean mixing bowl, and keep packaged gluten free items sealed until use.
| # | Tiramisu Component | What to Check | Best Gluten Free Choice | Risk Level |
|---|---|---|---|---|
| 1 | Ladyfingers / Sponge Base | Certification label; wheat/ barley/ rye | Certified GF ladyfingers or GF sponge | Low |
| 2 | Mascarpone | Ingredient list only; no “flavor” additions | Plain mascarpone from a GF-labeled brand | Low |
| 3 | Cocoa for Dusting | Single-ingredient cocoa vs cocoa blends | Unsweetened cocoa powder (GF-labeled) | Low |
| 4 | Coffee / Espresso Soak | Instant mix additives (if used) | Brewed coffee or espresso | Low |
| 5 | Sweetener (Sugar / Alternatives) | Manufacturing statements for blends | Granulated sugar or GF-labeled alternatives | Low |
| 6 | Eggs (if using classic method) | No gluten-related additives | Fresh eggs (plain) | Low |
| 7 | Flavoring (Vanilla, optional rum) | Alcohol-free vs flavored extracts; additives | Pure vanilla; GF-labeled extracts/spirits | Medium |
Best Gluten Free Ladyfingers (and Soaking Tips)

Ladyfingers are the “structure ingredient” in tiramisu. When they’re gluten free, the goal is the same as traditional: lightly soak so they become tender and flavorful, but not wet enough to collapse into coffee pudding.
Key best-practice guidance:
– Briefly dip ladyfingers—so they absorb coffee without turning mushy
Dip each side quickly (think “dip and lift”), and avoid soaking for long stretches. Gluten free sponge textures can vary—some absorb more quickly than wheat-based ones.
– Keep the soaking time consistent across layers
Consistency is what gives you even texture from the first bite to the last. If one layer is over-soaked, it can turn into a dense bottom layer while the top stays firmer.
– Let excess coffee drip to maintain structure
After dipping, place ladyfingers on a plate for a few seconds so excess liquid can run off. This step helps maintain the clean, layered look.
Choosing the base: If you have options, certified gluten free ladyfingers often behave closer to classic tiramisu than very soft GF cakes. However, a high-quality gluten free sponge cake cut into strips can also work very well—especially if it’s slightly firm when cold.
Creamy Mascarpone Layer (Step-by-Step)

The mascarpone layer is where you deliver the classic tiramisu identity: silky, rich, lightly sweet, and balanced by coffee bitterness. The technique matters because mascarpone can become grainy if handled aggressively.
– Whisk mascarpone until smooth before folding in other ingredients
Start by smoothing mascarpone with a whisk to remove lumps. This creates a stable base before you incorporate sugar and any flavorings.
– Fold gently to keep the mixture fluffy and thick
Once you introduce whipped cream (or egg-based components, depending on your preferred method), folding is about preserving air. Overmixing compresses the texture and can make the final dessert feel heavy.
– Adjust sweetness to taste using sugar or a preferred sweetener
Traditional tiramisu is typically moderately sweet. If your ladyfingers are sweet, consider slightly reducing sugar in the cream. If you love dessert-forward flavor, keep sweetness closer to classic.
Quality control tip: Taste your mascarpone mixture before assembly. If it’s too bland, the coffee will amplify that blandness once layered. If it’s overly sweet, it can read cloying by the third bite.
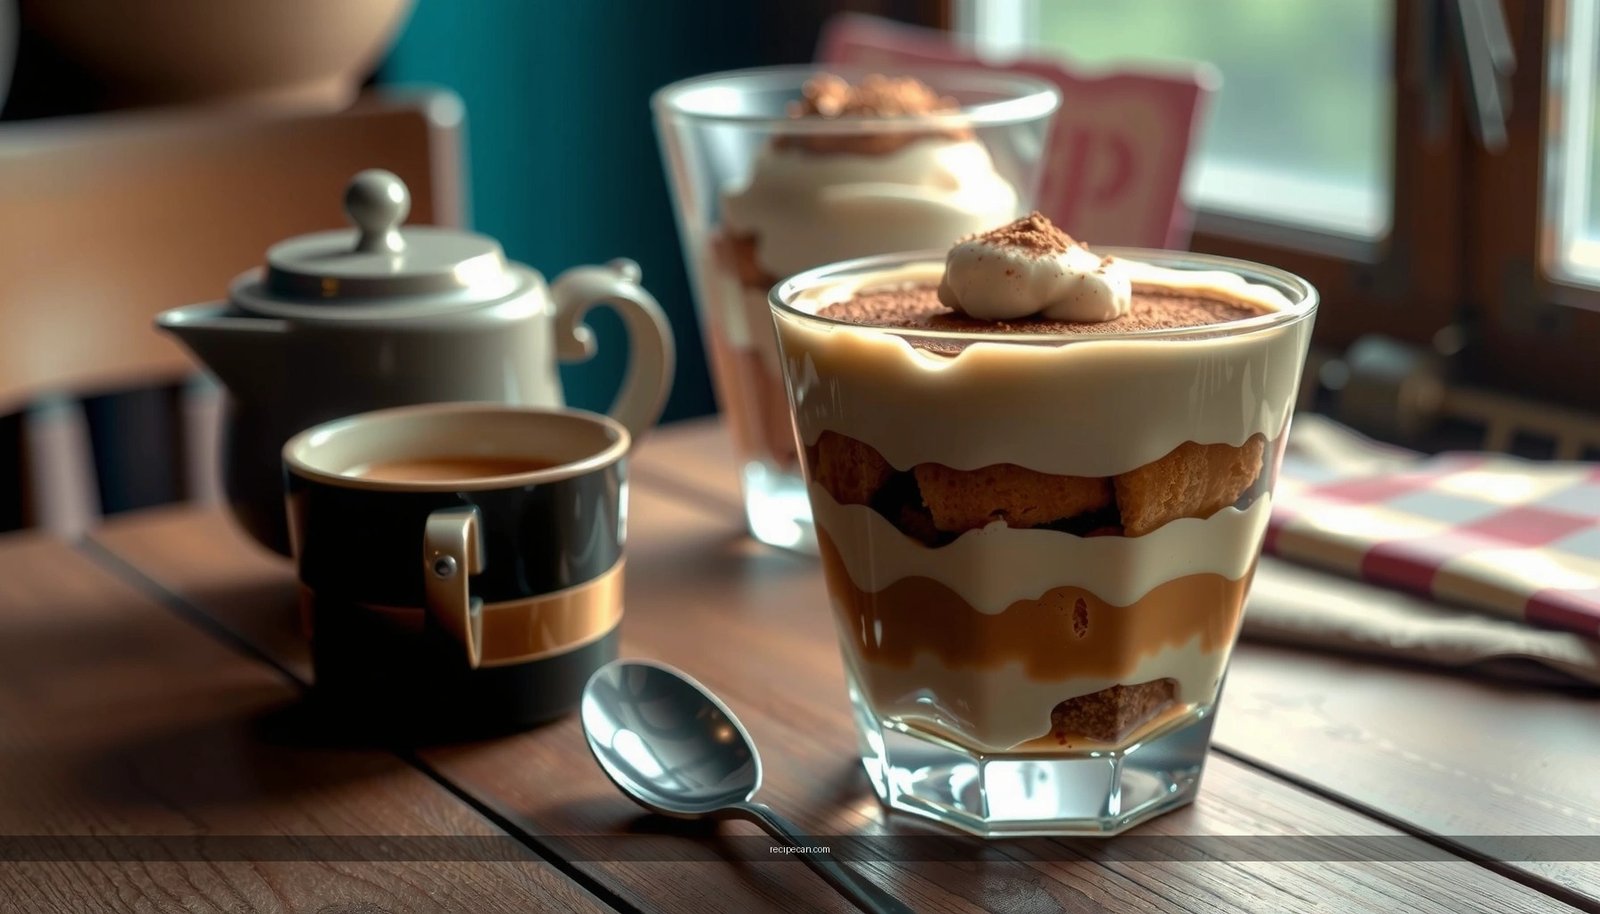
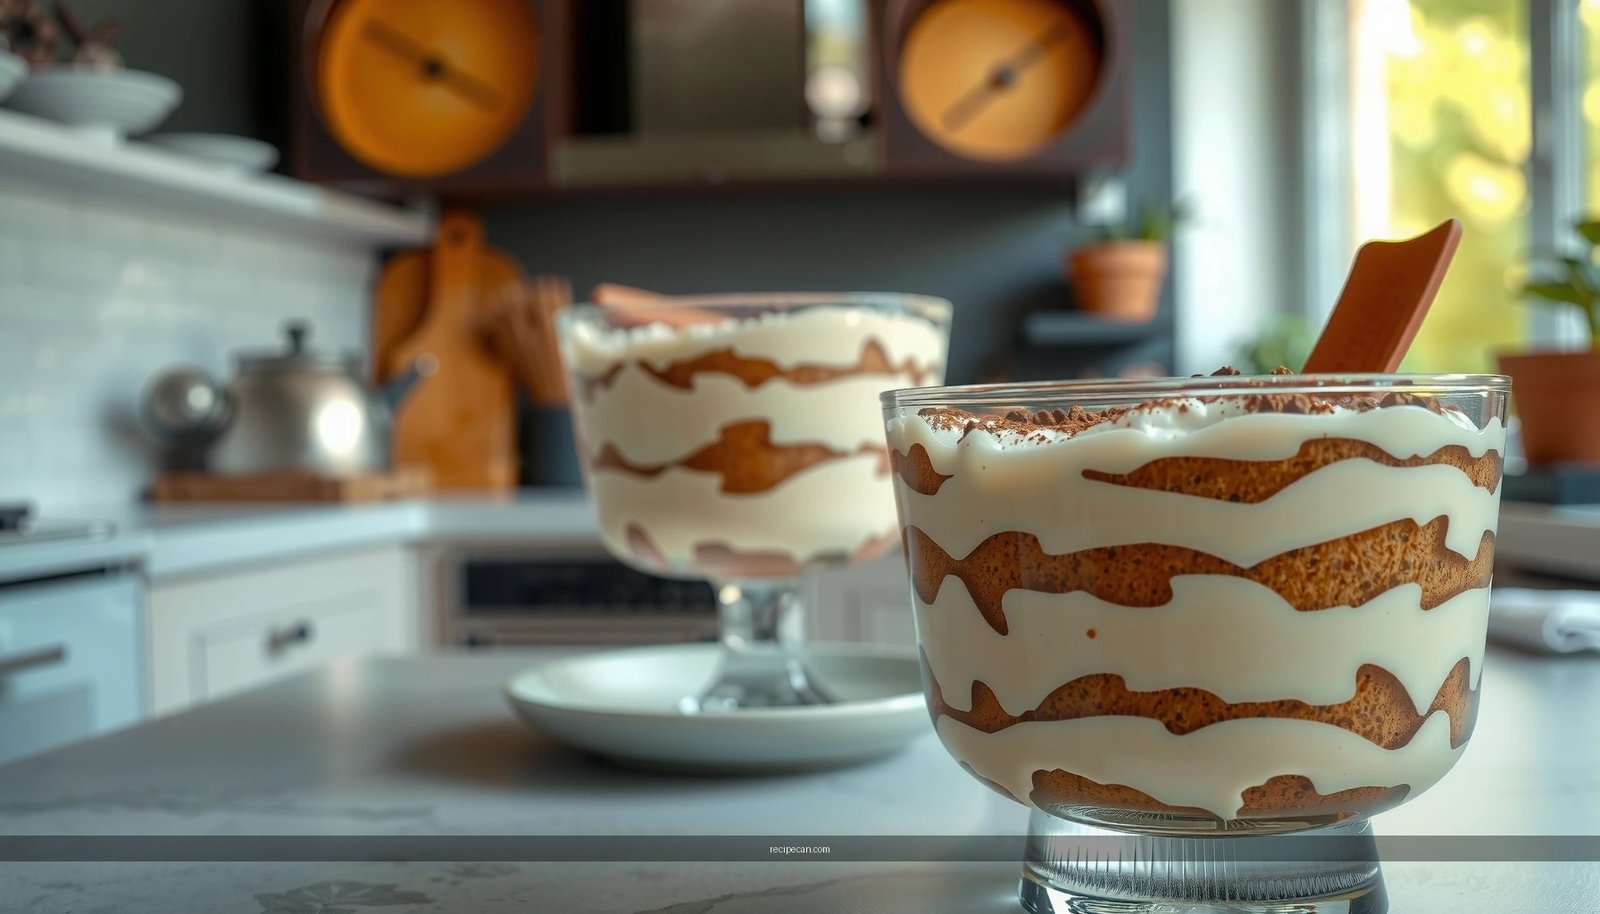
Layering and Assembly for Perfect Texture
Layering is not just visual—it’s structural. The right assembly method prevents gaps, reduces separation, and ensures each forkful has the same balance of cream and coffee-soaked cake.
– Build in a dish (or cups) with alternating ladyfingers and cream
Use a glass baking dish for an easy classic look, or portion into cups for individual servings. Alternation helps distribute moisture evenly.
– Spread evenly to avoid gaps and uneven settling
After placing soaked ladyfingers, spread cream to the edges. Gaps can trap air and create pockets that look separated when chilled.
– Smooth the top layer for clean, classic presentation
A smooth final layer makes it easier to dust evenly with cocoa right before serving.
Assembly order that works consistently:
1. Lightly soak ladyfingers.
2. Place a layer of ladyfingers in the dish.
3. Add mascarpone cream and spread fully.
4. Repeat for the second layer.
5. Finish with cream and smooth the surface.
If you’re short on time, preparing cups ahead can speed up chilling and portioning. But don’t skip the “spread to the edges” step—this is often where texture problems originate.
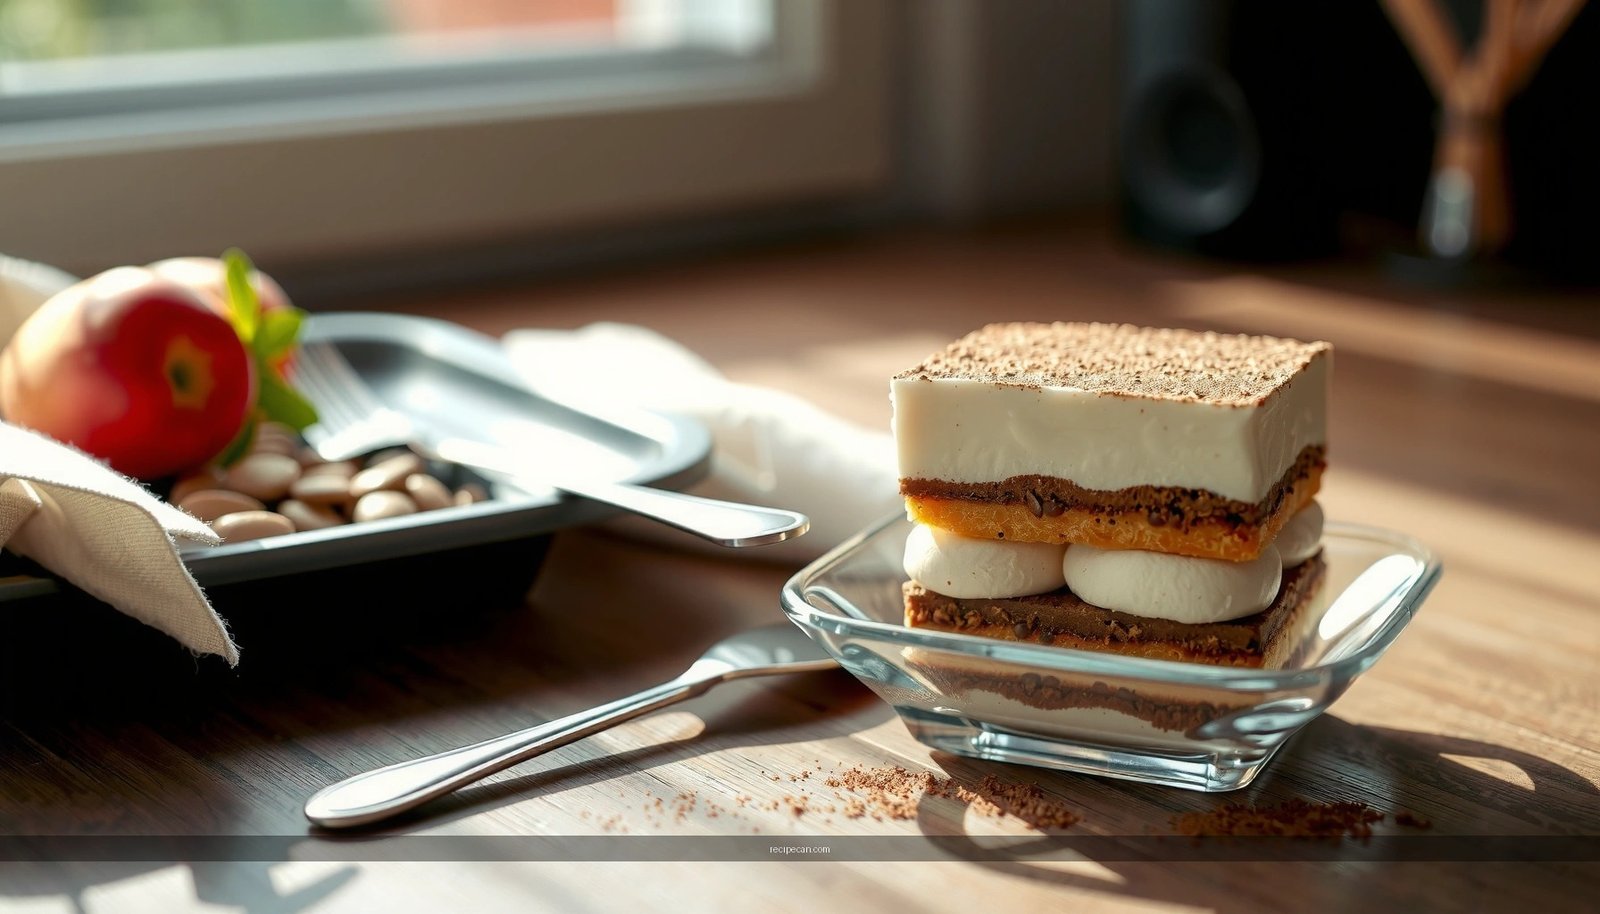
Chilling Time and Serving Suggestions
Chilling transforms tiramisu from assembled dessert to cohesive sliceable (or scoopable) texture. Gluten free bases tend to be more sensitive to over-wetting, so time and finishing steps matter.
– Chill at least 4–6 hours (or overnight) for best set
Overnight is ideal for a firm, clean texture. Four to six hours can work for smaller portions, but larger dishes often need more time for the cream to fully stabilize.
– Dust with cocoa right before serving to prevent sogginess
Cocoa absorbs moisture. Waiting to dust keeps the top looking fresh and tasting “cocoa-forward” rather than damp.
– Slice or scoop with a warm spoon for neat portions
Warming the utensil helps the cream glide instead of tearing the set layers—especially important with gluten free sponge textures.
Serving strategy: For clean portions, plan to chill thoroughly, then let the dish sit at room temperature for 5–10 minutes before slicing. This small window improves cream pliability without sacrificing set.
Troubleshooting Common Issues
Even reliable gluten free tiramisu recipes can run into predictable issues. Here’s how to diagnose and fix them fast.
– If it’s watery, reduce soaking time and chill longer
Watery tiramisu usually signals too much coffee absorption or insufficient setting time. Next time, shorten dips and allow a brief drip-off period. Also prioritize overnight chilling for best stability.
– If it’s too firm, ensure the cream isn’t overmixed and verify ingredient freshness
Overmixing can reduce the cream’s ability to stay smooth and spreadable. Check that mascarpone and any dairy components are fresh and at the appropriate temperature before combining.
– If layers separate, fold gently and spread immediately after mixing
Separation can happen when the cream breaks or when the mixture sits too long before layering. Fold gently, assemble promptly, and spread evenly.
Practical reset: If your first batch is slightly off, don’t discard it. Taste can still be excellent. Often, improved technique (soaking consistency and chill time) will correct texture without changing the flavor.
Toss this gluten free tiramisu dessert together, chill until fully set, and finish with a fresh cocoa dusting for the best classic flavor. Make it today, and if you want, try swapping coffee intensity or adding a flavored twist—then share your results or variations.
Gluten Free Tiramisu Dessert Recipe: Classic Flavor, No Gluten delivers classic mascarpone-and-coffee flavor without complicated gluten free substitutions—so long as you start with certified gluten free ladyfingers (or sponge cake), soak consistently and lightly, and chill long enough for the layers to set. Follow the assembly and troubleshooting guidance above, and you’ll get a light, cohesive tiramisu that’s sliceable, properly balanced, and clearly “no gluten” from the first bite to the last.
Frequently Asked Questions
What gluten free tiramisu dessert recipe is best for beginners?
Look for a gluten free tiramisu dessert recipe that uses a simple gluten free ladyfinger or gluten free sponge cake base and a no-cook mascarpone filling. Choose one that’s clear about substitutions, like using store-bought gluten free ladyfingers to avoid experimenting with homemade cake. A beginner-friendly version typically layers espresso-soaked gluten free ladyfingers with mascarpone, whipped cream, and cocoa for an easy, reliable gluten free tiramisu dessert.
How do I make gluten free tiramisu without gummy or soggy layers?
To prevent soggy gluten free tiramisu, quickly dip gluten free ladyfingers in cooled espresso rather than soaking them for long periods. Let the espresso fully cool so the layers don’t break down, and use a thick mascarpone mixture so it holds the structure. If your gluten free ladyfingers are delicate, dip just one side and assemble immediately to keep the texture of your gluten free tiramisu dessert crisp and sliceable.
Why do some gluten free tiramisu recipes turn out too dense or grainy?
Density or graininess usually comes from overmixing the mascarpone or using ingredients at the wrong temperature. Ensure your mascarpone is softened and then fold gently into the whipped cream rather than stirring vigorously, which can affect the texture. Also, check that your gluten free ladyfingers or cake base isn’t dry—proper espresso moisture helps balance the crumb in gluten free tiramisu.
Which gluten free ladyfingers should I use for tiramisu?
For the best results, use gluten free ladyfingers labeled gluten free and made to soak lightly without disintegrating. Brands vary, so choose ones that hold their shape when lightly dipped in espresso and have a cake-like texture rather than a brittle one. If you can’t find ladyfingers, use a gluten free sponge cake cut into rectangles as a reliable alternative for gluten free tiramisu.
What’s the best way to store gluten free tiramisu and keep it fresh?
Refrigerate your gluten free tiramisu covered to prevent it from drying out, and let it chill for at least 4–6 hours before serving so the flavors meld. For best quality, consume within 1–2 days, since gluten free layers can soften faster than traditional versions. If you want to prepare ahead, assemble up to a day in advance and add cocoa just before serving for a fresher look on your gluten free tiramisu dessert.
References
- Tiramisu
https://en.wikipedia.org/wiki/Tiramisu - Gluten-free diet
https://en.wikipedia.org/wiki/Gluten-free_diet - https://www.fda.gov/food/food-labeling-nutrition/gluten-free-labeling-final-rule
https://www.fda.gov/food/food-labeling-nutrition/gluten-free-labeling-final-rule - https://www.niddk.nih.gov/health-information/digestive-diseases/celiac-disease/gluten-free-diet
https://www.niddk.nih.gov/health-information/digestive-diseases/celiac-disease/gluten-free-diet - https://www.mayoclinic.org/diseases-conditions/celiac-disease/in-depth/gluten-free-diet/art-20048425
https://www.mayoclinic.org/diseases-conditions/celiac-disease/in-depth/gluten-free-diet/art-20048425 - Tiramisu | Meaning, Ingredients, Origin, Desserts, & Taste | Britannica
https://www.britannica.com/topic/tiramisu - https://pubmed.ncbi.nlm.nih.gov/?term=celiac+disease+gluten-free+diet+review
https://pubmed.ncbi.nlm.nih.gov/?term=celiac+disease+gluten-free+diet+review - https://pubmed.ncbi.nlm.nih.gov/?term=gluten-free+baking+technology+review
https://pubmed.ncbi.nlm.nih.gov/?term=gluten-free+baking+technology+review - Google Scholar Google Scholar
https://scholar.google.com/scholar?q=gluten+free+tiramisu+recipe - Google Scholar Google Scholar
https://scholar.google.com/scholar?q=gluten-free+baking+ladyfingers+recipe+substitution