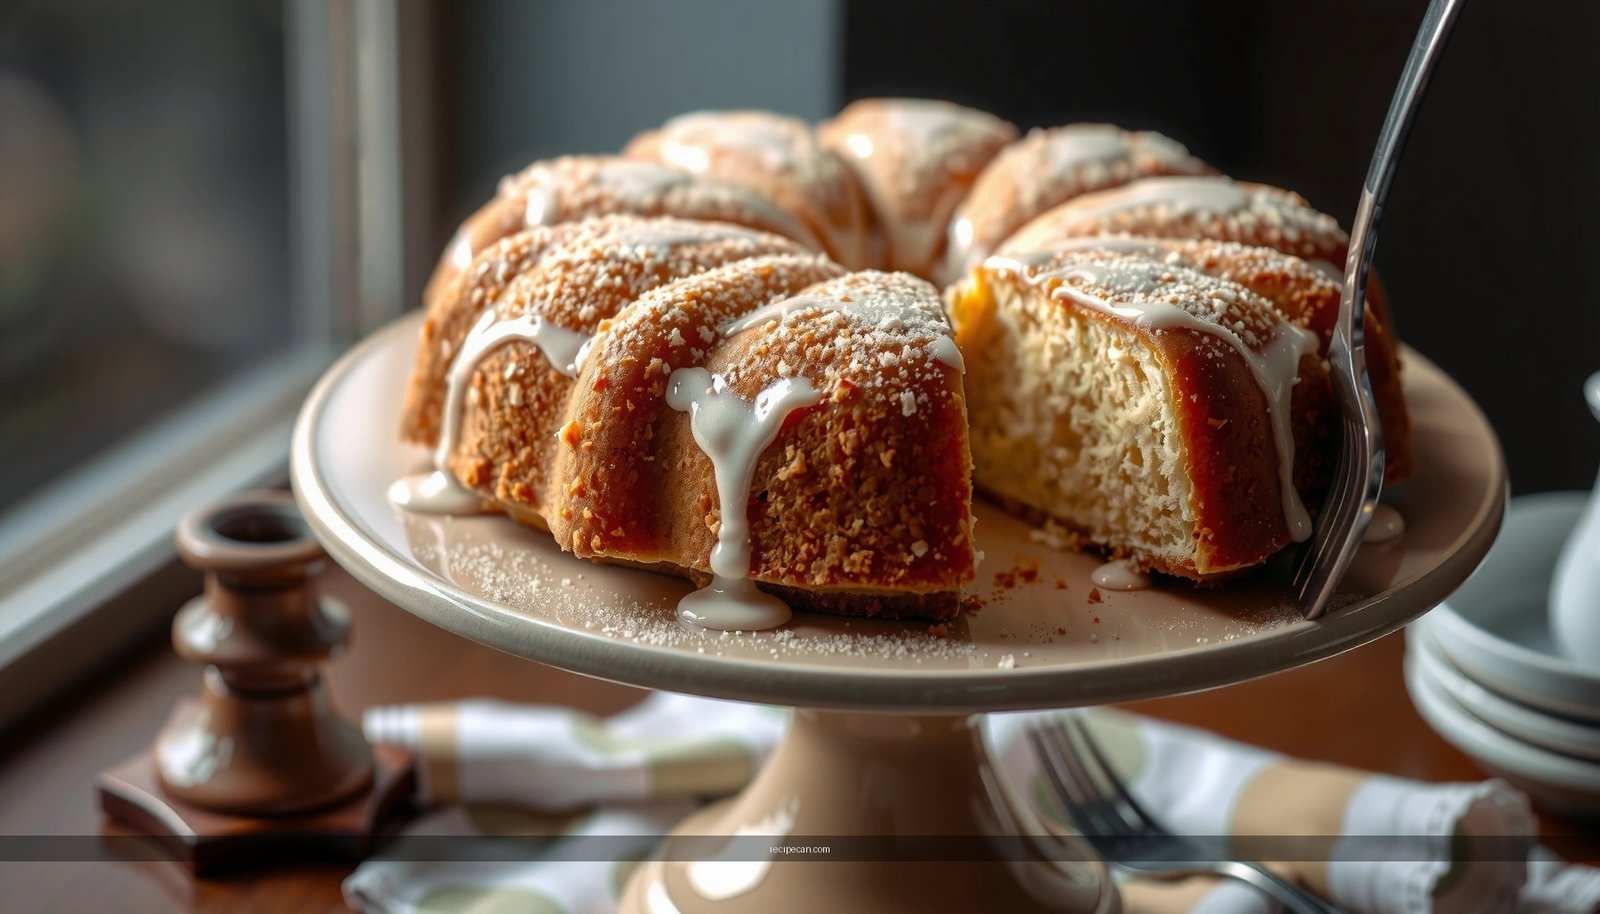
Get a gluten free plum pudding recipe that actually behaves like the traditional version—rich, moist, and sliceable—without gluten-heavy substitutions. This easy method answers how to bake a dependable plum pudding using gluten free flour and the right binding so it holds its shape every time. If you want the “classic” outcome with a gluten free ingredient list, this is the one to follow.
Make gluten free plum pudding the traditional way by using a gluten-free flour blend plus eggs for binding, then steaming the batter until it sets into a richly spiced, sliceable dessert. In this recipe, you’ll learn how to assemble the ingredients, select a gluten-free binder that mimics classic crumb structure, and steam (or bake) for the best traditional-style texture.
Gluten Free Plum Pudding Ingredients

Traditional plum pudding relies on gluten-free flour, fat, eggs, and structure-forming crumbs to create a pudding that holds together when steamed. Because gluten-free baking behaves differently, the goal is not to “swap one ingredient for another,” but to reproduce the same functional roles—thickening, binding, and moisture retention—using gluten-free components.
Core ingredient logic (what each part does):
– Reliable gluten-free flour blend (often xanthan gum included): Provides structure and helps prevent a gummy or fragile crumb. A blend with xanthan gum usually reduces the need for additional binders.
– Suet or a suitable substitute: Adds richness and helps the pudding stay tender and set when heated. If you can’t use suet, use a vegetarian suet substitute or a mix of butter and neutral oil (details below).
– Dried fruit: Delivers the signature plum pudding flavor, sweetness, and texture. A mix of raisins/currants and dried cherries (or prunes chopped finely) gives depth.
– Breadcrumbs / topping equivalents: Breadcrumbs mimic the classic pudding base that absorbs moisture and thickens as it heats. In gluten free, use gluten-free breadcrumbs or gluten-free crushed plain biscuits (ensure they’re certified GF).
– Spices and citrus: Mace, nutmeg, cinnamon, and citrus zest create classic holiday aromatics and balance the sweetness.
– Eggs (the binder): Eggs are the primary gluten-free binder here—they coagulate during steaming to create sliceable structure.
Typical ingredient set (for a classic, 8–10 serving pudding):
– Gluten-free flour blend (with xanthan gum if possible)
– Gluten-free breadcrumbs (or GF crushed biscuits)
– Suet (or vegetarian suet substitute)
– Mixed dried fruit (raisins + currants + chopped dried cherries)
– Brown sugar (optional but improves caramel notes)
– Eggs
– Milk or dairy-free milk
– Orange zest + a squeeze of orange juice (optional)
– Spices: cinnamon + nutmeg + ginger (optional) + a pinch of clove or mace
– Dried breadcrumbs for basin lining: helps prevent sticking
> Practical note: If your flour blend already includes xanthan gum, you typically don’t need extra. Adding too much binder can make the finished pudding rubbery instead of tender.
HTML data table (ingredient and structure “role” snapshot):
Gluten Free Plum Pudding: Structure Roles by Ingredient (Typical Outcome)
| # | Ingredient role | Main function in GF pudding | Best practice amount | Expected stability |
|---|---|---|---|---|
| 1 | Gluten-free flour blend | Structure + thickening | 200–240 g per 900 g batter | High |
| 2 | Eggs | Binder + set during steaming | 3–5 large eggs | Very High |
| 3 | Gluten-free breadcrumbs | Absorb moisture; prevent crumbling | 90–130 g | High |
| 4 | Suet / vegetarian suet | Tenderness + heat-set richness | 150–220 g | High |
| 5 | Mixed dried fruit | Flavor + moisture during rest | 500–650 g total | Medium-High |
| 6 | Spices + zest | Aromatics + flavor balance | 10–18 g spices + zest of 1–2 oranges | High |
| 7 | Liquid (milk/juice) | Hydration for thickening | 80–160 ml (as needed) | Moderate |
Prep Tips for Perfect Texture

Gluten-free plum pudding texture hinges on hydration management and gentle mixing. Too much liquid can produce a soft, unstable center; too much mixing can create a dense, tough crumb.
Key prep techniques that consistently improve results:
– Toss dried fruit with a little flour blend: This coats the fruit so it doesn’t sink and soaks up fewer free juices. Sinkage is one of the most common gluten-free failure modes because the batter can’t “stretch” like wheat-based dough.
– Bloom or soak fruit when possible: If your recipe uses alcohol or strong tea, soaking the fruit ahead improves flavor and helps the fruit distribute evenly.
– Mix thoroughly but avoid overworking: Stir just until the flour disappears into the batter. Gluten-free blends don’t develop “gluten,” but overmixing can still increase tackiness—especially with xanthan gum—leading to a gummy set.
– Rest the batter briefly (10–30 minutes): Gluten-free flour hydrates quickly, and a short rest helps you reach the right spoonable thickness without adding extra flour later.
– Check thickness before steaming: You want batter that drops from a spoon slowly, not one that runs like pancake batter. If it looks too loose, add 1–2 tablespoons of breadcrumbs; if too stiff, add a small splash of milk.
Binder choice guidance (quick perspective):
– For a traditional-style set, eggs + gluten-free flour blend + breadcrumbs is usually the most reliable combination.
– If your flour blend has no xanthan gum, consider adding a small amount of xanthan gum (or use a binder blend). Avoid large binder doses; they can turn the pudding chewy rather than tender.
Make the Batter and Shape the Pudding

This is where you create the structure that steaming will lock in. A classic plum pudding batter is dense and cohesive; your gluten-free version should be similarly thick and well-distributed.
Step-by-step assembly approach:
1. Mix dry ingredients first: gluten-free flour, spices, sugar (if using), and breadcrumbs.
2. Blend wet ingredients: melted suet (or warmed substitute), eggs, and milk/juice. Whisk until smooth.
3. Combine wet into dry: Add wet to dry gradually, stirring until evenly incorporated. Scrape the bowl sides and bottom to avoid flour pockets.
4. Fold in fruit last: Gently mix to distribute fruit without crushing it.
5. Shape in a lined basin: Grease your basin and line with baking paper and a layer of foil or parchment cover. Spoon batter in and smooth the top so the pudding releases cleanly.
6. Leave headspace: Don’t pack the pudding down too tightly; you want it to set evenly as it steams.
Shaping best practices for reliable slicing:
– Smooth the top and tap the basin lightly to release air pockets.
– Cover tightly and prevent water intrusion into the basin; water can dilute the batter and compromise the set.
– Label the basin with date and method (steamed vs baked) if you plan to make ahead—your future self will thank you.
Steaming vs. Baking Methods
Steaming delivers the classic, moist, richly set texture associated with traditional plum pudding. Baking is an effective alternative, but it tends to produce a slightly drier exterior and can alter how the center sets.
Steaming (recommended)
– Use a steamer with a tight lid and keep simmering water at a stable level.
– Place the basin on a trivet so it doesn’t touch the pot bottom.
– Maintain consistent heat: boiling aggressively can cause uneven setting and water entry.
Why steaming works for gluten-free: the batter hydrates and sets gradually, allowing eggs and flour to coagulate and thicken without drying out.
Baking (alternative)
If you don’t have steaming equipment, bake the pudding in a covered dish (or covered bain-marie-style setup). Expect to adjust times and monitor doneness carefully.
Key baking adjustments:
– Bake at a moderate temperature so the pudding sets from the outside in slowly.
– Cover well to prevent surface cracking and drying.
– If using a water bath, ensure the water level stays stable throughout baking.
Actionable recommendation: If you’re making your first gluten-free plum pudding, choose steaming. Once you’re confident in your batter consistency, baking becomes your dependable “backup method” for scheduling.
Timing, Doneness, and Cooling
Doneness is the difference between a pudding that slices cleanly and one that crumbles. Gluten-free batters can look set at the edges yet remain underdone in the center—so use multiple doneness checks, not just one.
How to tell when it’s done:
– Firmness: The pudding should feel firm when gently pressed through the lid cover (use caution—steam is hot).
– Edges set: Look for a noticeably set ring around the basin edge.
– Skewer test (carefully): Insert a skewer near the center; it should come out with minimal wet batter. Some moist crumbs are normal—aim for “no liquid batter.”
Cooling is non-negotiable for gluten-free:
– Let the pudding cool in the basin for a while (often 20–30 minutes), then cool further before unmolding.
– Portioning too early can cause crumbling because the egg-and-flour matrix continues to firm as it cools.
– For best texture, cool completely, then rest (even overnight) before reheating.
Common troubleshooting:
– If underdone: Re-steam for additional time in 15–20 minute increments.
– If too dry: Wrap tightly before storage and reheat gently—moisture returns with reheating.
– If gummy: Usually from excessive liquid or too much binder; next time, reduce added liquid and keep mixing brief.
Serving and Storage
Gluten-free plum pudding shines when reheated gently, not rushed. The goal is to warm through while preserving a tender, cohesive crumb.
Serving options (classic and modern):
– Serve with thick custard, vanilla cream, or a warm spoon of brandy butter.
– For a modern touch, add orange zest or a drizzle of spiced syrup over the top.
– Pair with tea, fortified wine, or hot cider for a classic winter serving profile.
Reheating
– Reheat in a steamer or covered microwave-safe container until warmed throughout.
– Avoid boiling directly; aggressive heat can dry the pudding surface.
Storage
– Cool completely, wrap tightly, and store in the fridge.
– When ready to serve, reheat gently and—if possible—re-steam to restore traditional moisture.
– For longer storage, freeze tightly wrapped; thaw in the fridge and reheat gently.
> Make-ahead advantage: Plum pudding improves with time. Planning ahead reduces holiday stress and gives flavors time to meld.
In practice: Steam first for the best texture, then build your hosting timeline around reheating. This is one of the most reliable gluten-free holiday desserts because the structure is designed to hold up through rest, storage, and gentle rewarming.
Enjoy your gluten free plum pudding by following the ingredient and method choices that replicate a classic steamed set. Try the steaming option first for the best texture, then make ahead for easier holiday hosting—save this recipe and cook it your next special occasion.
Frequently Asked Questions
What gluten free flour blend works best for a plum pudding recipe?
For a gluten free plum pudding, look for a 1:1 gluten free baking flour blend that includes xanthan gum or add your own binder if it doesn’t. A blend that contains rice flour plus starches (like tapioca or potato) helps mimic the chewy, dense texture of traditional pudding. If you prefer a more robust crumb, you can add a small amount of oat flour (certified gluten free) for depth without making the pudding too heavy.
How do you make a gluten free plum pudding that doesn’t fall apart?
The key is using a reliable binder and allowing enough resting time so the pudding hydrates and sets. Add xanthan gum (or psyllium husk for a slightly firmer, more sliceable texture) and make sure your gluten free flour is fully incorporated before steaming. After cooking, let the gluten free plum pudding cool and then chill briefly—this helps it firm up and slice more cleanly.
How long should you steam a gluten free plum pudding, and what temperature should it reach?
Steam a gluten free plum pudding for about 2.5 to 3.5 hours depending on the size of your mold, keeping a steady simmer in the water below. Check doneness by inserting a skewer into the center—it should come out mostly clean (a few moist crumbs are fine). Because gluten free puddings can cook unevenly, avoid lifting the lid too often and ensure the pudding reaches a set, pudding-like consistency before cooling.
Why does gluten free plum pudding turn out dry or gritty, and how can you fix it?
Dryness usually comes from overcooking or under-hydrating the gluten free flour and dried fruit mixture. Grittiness can result from certain flours or too little binding time, so be sure to use a high-quality gluten free flour blend and let the batter rest before steaming. Using certified gluten free breadcrumbs or extra moisture from suet substitutes, apple purée, or extra stout/juice can improve texture while keeping the pudding rich.
Which ingredients should you avoid in a gluten free plum pudding recipe?
Avoid wheat-based breadcrumbs, malt flavoring, or any flour that isn’t clearly labeled gluten free. Watch for gluten-containing additives in mince pies, suet alternatives, or packaged mincemeat—ingredients like barley, wheat flour, or malt extract are common culprits. Also check spices and baking powders for cross-contamination, and choose certified gluten free oats and dairy ingredients if you’re cooking for sensitive guests.
References
- Google Scholar Google Scholar
https://scholar.google.com/scholar?q=gluten-free+plum+pudding+recipe - Google Scholar Google Scholar
https://scholar.google.com/scholar?q=gluten-free+christmas+pudding+recipe - Google Scholar Google Scholar
https://scholar.google.com/scholar?q=gluten-free+traditional+plum+pudding+technique - Christmas pudding
https://en.wikipedia.org/wiki/Plum_pudding - Christmas pudding
https://en.wikipedia.org/wiki/Christmas_pudding - https://www.britannica.com/topic/plum-pudding
https://www.britannica.com/topic/plum-pudding - Gluten-free Christmas pudding recipe | Good Food
https://www.bbcgoodfood.com/recipes/gluten-free-christmas-pudding - https://www.theguardian.com/food/2014/dec/01/gluten-free-christmas-pudding-recipe
https://www.theguardian.com/food/2014/dec/01/gluten-free-christmas-pudding-recipe - https://pubmed.ncbi.nlm.nih.gov/?term=gluten-free+baking+recipe+technique
https://pubmed.ncbi.nlm.nih.gov/?term=gluten-free+baking+recipe+technique - Google Scholar Google Scholar
https://scholar.google.com/scholar?q=gluten+free+plum+pudding+recipe