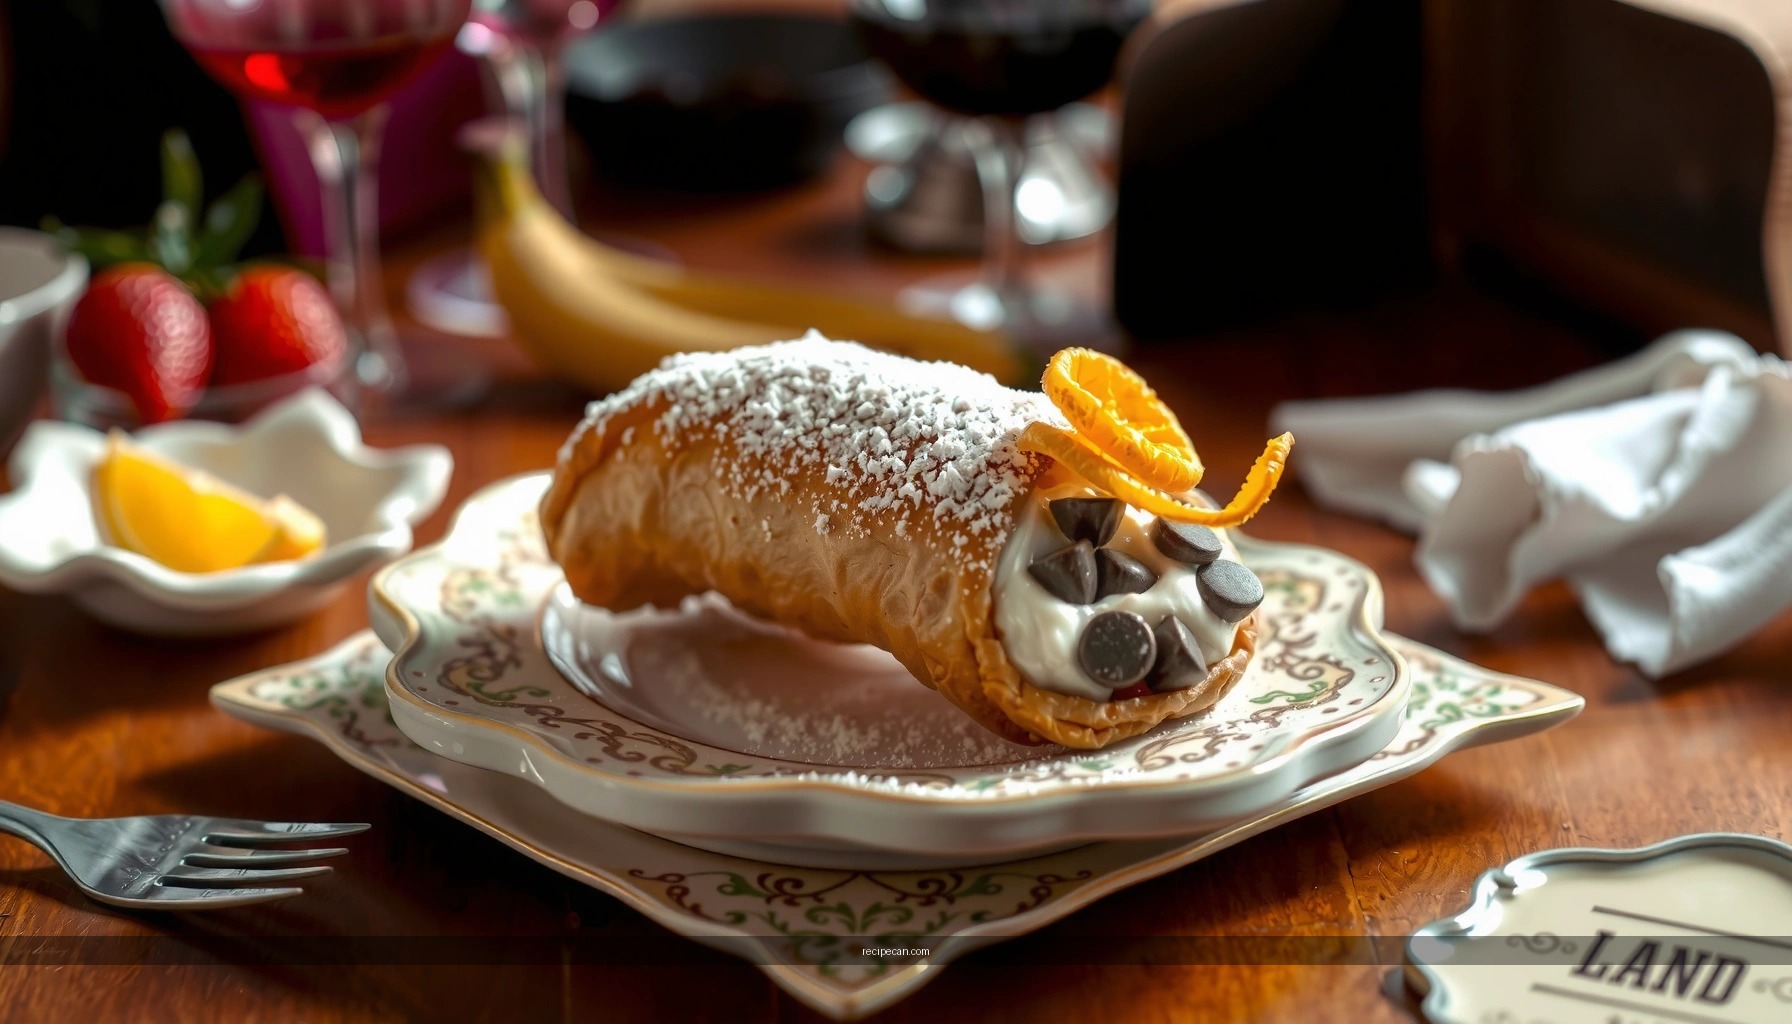
Get a classic Florentine cannoli recipe that delivers crisp shells and a creamy filling you’ll want to spoon straight from the bag. This recipe answers the key question—how to make Florentine-style cannoli with the right balance of ricotta sweetness, citrus brightness, and smooth texture. Follow it exactly and you’ll turn out cannoli that taste like a proper Italian bakery rather than a dessert that just looks right.
Yes—you can make classic Florentine-style cannoli at home by frying crisp shells and filling them with a well-drained, citrus-kissed ricotta cream; the key is timing (fill just before serving) and texture control (properly drained ricotta and a thickened filling). In this guide, you’ll learn a reliable method to produce bakery-style cannoli: crunchy shells shaped correctly, a smooth ricotta filling flavored with lemon or orange (with optional cinnamon), and an assembly approach that prevents sogginess while keeping everything visually “restaurant-ready.”
Cannoli Shell & Filling Targets for Consistent Results
| # | Quality Metric | Typical Target | Impact on Outcome | Chef Score |
|---|---|---|---|---|
| 1 | Ricotta drainage | ≥ 2–4 hours | Prevents grainy/soupy filling | ★★★★★ |
| 2 | Oil temperature for shells | 175–185°C (350–365°F) | Achieves crisp, fast set | ★★★★☆ |
| 3 | Shell thickness (dough) | ~1.0–1.5 mm | Balance of crispness & strength | ★★★★☆ |
| 4 | Shell shaping timing | <= 30–60 seconds after frying | Prevents shell cracking/warping | ★★★★★ |
| 5 | Filling consistency | Pipes with firm ribbons | Holds shape; avoids leakage | ★★★★☆ |
| 6 | Chill before filling | 20–30 minutes | Improves flavor & thickens | ★★★★☆ |
| 7 | Assembly timing | Fill within 2–4 hours | Maintains shell crunch | ★★★★☆ |
Gather Ingredients for Florentine Cannoli

A classic Florentine cannoli recipe centers on two components that must work in harmony: crisp cannoli shells and a creamy ricotta filling brightened with citrus. Start with the best raw materials you can source—especially ricotta—because it largely determines whether your filling is luxurious and stable or loose and gritty.
Core ingredients for the shells
– Flour: All-purpose flour works reliably for a tender yet fryable dough.
– Eggs: Provide structure and richness; they also help the dough stretch thin without tearing.
– Sugar (optional, small amount): A touch supports browning and flavor; keep it modest so the shells remain neutral enough for the sweet filling.
– Neutral oil or butter for dough (depending on your preferred style): Adds pliability and improves texture.
– Pinch of salt: Enhances sweetness and balances the ricotta.
– For frying: A high-smoke-point oil such as canola, grapeseed, or sunflower.
Core ingredients for the Florentine ricotta cream
– Ricotta (key): Choose fresh, high-quality whole milk ricotta. For the most “professional” texture, drain it thoroughly (you’ll do this again in the filling section).
– Powdered sugar: Dissolves quickly and yields a smooth cream—much better than granulated sugar for a piping consistency.
– Citrus: Use lemon or orange zest (and a small amount of juice if needed). Citrus is a classic Florentine-adjacent signature because it lifts the richness of ricotta.
– Vanilla and/or cinnamon (optional): Cinnamon can be used sparingly if you want a warm undertone; too much can overpower the delicate dairy and citrus profile.
– Sweet add-ins:
– Chocolate chips for classic bursts
– Candied fruit for a more traditional, colorful Florentine style
– Optional chopped candied citrus peel for extra aroma
Practical ingredient strategy
– Plan for separate workflow: shells take time but don’t require refrigeration; filling benefits from chilling for structure.
– If your ricotta is especially wet, use fewer liquid additions (or skip any added juice) and rely on drainage plus chilling rather than “fixing” texture with extra sugar or liquid.
Make the Cannoli Shells

The shell is where many home cooks run into trouble—usually due to dough thickness, oil temperature, or delayed shaping. Your goal is a shell that fries fast, bubbles lightly, and sets into a crisp tube when shaped on cannoli forms.
1) Mix and rest the dough
– Combine flour, eggs, a pinch of salt, and any small amount of sugar or fat called for in your preferred dough style.
– Knead just until smooth; over-kneading can reduce tenderness.
– Resting (even 20–30 minutes) relaxes gluten so you can roll thinner without shrinking back.
2) Roll the dough thin and evenly
– Roll to about 1.0–1.5 mm for the classic balance of crispness and strength.
– If using cannoli forms, thin dough should wrap without tearing.
3) Fry at the right temperature
– Heat oil to 175–185°C (350–365°F).
– Fry in small batches so temperature doesn’t drop.
– The shells should turn golden; avoid dark browning, which can taste bitter and may soften later.
4) Drain and shape immediately
– Lift shells out with a slotted tool and let excess oil drip briefly.
– Shape promptly while pliable—typically within 30–60 seconds.
– Wrap and “lock” them onto cannoli tubes (or traditional forms). If you wait too long, they can crack or stay flat instead of forming a clean cylinder.
5) Cool completely
– Place shaped shells on a rack. Cooling finishes the crisping process.
– Never fill while shells are warm; trapped heat can soften the shell.
Prepare the Florentine Ricotta Filling

A traditional filling is not just “sweet ricotta.” The goal is a piped, silky cream that holds shape and tastes bright. The two deciding factors are draining and mixing method.
1) Drain ricotta thoroughly
– Line a sieve with cheesecloth (or a clean kitchen towel) and refrigerate the ricotta for 2–4 hours (or longer if it’s watery).
– This step prevents a common cannoli failure: filling that seeps into shells and turns them soggy.
2) Achieve a smooth texture
– Press drained ricotta through a fine sieve or mix it briefly until smooth.
– Add powdered sugar gradually while mixing to avoid graininess.
3) Flavor with Florentine-style brightness
– Fold in zest of lemon or orange.
– Add a small amount of vanilla, and if desired, a very light pinch of cinnamon for warmth (think “aroma,” not “dessert spice”).
4) Fold in chocolate or candied fruit
– Stir in chocolate chips for classic contrast, or candied fruit for a more traditional look and a sweet, fruity bite.
– If you’re adding candied fruit, chop pieces to a uniform size so the filling pipes evenly.
5) Thicken by chilling
– Cover and refrigerate the filling 20–30 minutes.
– This firms the texture so it pipes cleanly and tastes more integrated—citrus notes especially bloom after chilling.
Assemble Cannoli Like a Pro
Assembly is where you control the customer experience—shape, cleanliness, and the crisp-to-creamy contrast. The most important rule: fill right before serving.
1) Use a piping bag for even distribution
– Transfer filling to a piping bag fitted with a medium round tip.
– Insert the tip into one end of the shell and pipe until you see gentle resistance and a consistent filling level.
2) Fill “inward,” not “flooding”
– Overfilling causes leakage and makes shells collapse faster.
– For a professional presentation, aim to fill to the point of stability while keeping the shell intact.
3) Cap and finish
– Some bakers garnish ends lightly with extra chocolate chips or candied fruit.
– If you want a bakery-style look, dust the completed cannoli lightly with powdered sugar just before serving.
4) Maintain the crisp window
– Keep shells at room temperature in a dry container.
– Keep filled cannoli chilled only if necessary for safety—then serve promptly. Cold can firm cream but may slightly soften shells depending on humidity.
Tips for Best Texture and Flavor
If you want “classic cannoli” rather than “cannoli-ish,” treat these as non-negotiables.
– Chill the filling briefly: The 20–30 minute rest improves thickness and flavor blending, leading to a smoother taste per bite.
– Don’t rush the ricotta: Grainy or watery filling almost always traces back to insufficient draining or mixing.
– Avoid sogginess with storage discipline: Store shells and filling separately. Shells should be airtight or in a sealed container with a paper towel nearby to manage minor humidity.
– Control sweetness balance: Because ricotta is mild, citrus zest provides lift. If your filling tastes flat, add a bit more zest rather than more sugar.
– Cinnamon use is optional: In Florentine-style variations, cinnamon can complement chocolate or candied fruit, but it should never dominate the ricotta-citrus identity.
– Use fresh shells when possible: Even great shells can soften over time once filled. For best results, plan to fry shells earlier in the day and fill close to serving.
Serving and Storage Suggestions
Cannoli is best treated as a “right-now” dessert: crunchy shells with a creamy center are a contrast that degrades as time passes.
Serving
– Serve immediately for maximum crunch and creamy center balance.
– Plate cannoli in small stacks (rather than spreading them wide on a warm surface) to preserve crispness.
Storage (components separately)
– Shells: Store airtight at room temperature to prevent moisture absorption. If your kitchen is humid, refrigerating shells may introduce condensation when you bring them back to room temperature—test if needed.
– Filling: Refrigerate in a covered container. Good ricotta cream should keep for about 2–3 days, but flavor is often best on day one due to citrus brightness.
– Assembled cannoli: If you must prepare ahead, fill the shells partially or fill a small batch just before service. For best texture, keep assembled cannoli to a short window (typically under a few hours).
Workflow planning for a smooth experience
– Fry shells first (or earlier the same day).
– Drain and mix filling in parallel.
– Chill filling briefly.
– Assemble and serve in a tight time window—this ensures the hallmark “bakery” experience at home.
Florentine cannoli thrives on technique: crisp shells from correct frying and immediate shaping, and a creamy ricotta filling that’s smooth, citrus-bright, and thick enough to pipe without leaking. By focusing on ricotta drainage, oil temperature, and the timing of assembly—filling right before serving—you’ll produce classic cannoli that keep their crunch and deliver the sweet, aromatic center guests expect. Use the tips above to manage texture at every stage, and you’ll consistently get bakery-style results with a professional look and reliable flavor balance.
Frequently Asked Questions
What makes a Florentine cannoli different from traditional Sicilian cannoli?
Florentine cannoli are typically flavored with Tuscan influences like a richer ricotta filling and sometimes include citrus zest, vanilla, or subtle almond notes. The dough can be slightly different in sweetness and texture compared with classic Sicilian cannoli, which are often more simply seasoned. Despite regional variations, the defining feature is still the crunchy cannoli shell paired with a creamy ricotta-based filling.
How do you make Florentine cannoli shells crispy instead of soggy?
Use cold dough and fry the shells at the right oil temperature (typically around 350°F/175°C) so they puff and brown quickly without absorbing too much oil. After frying, cool the shells completely on a rack so steam doesn’t soften them, and fill them only right before serving for the best crunch. If you store filled cannoli, keep them refrigerated but assemble as close to serving time as possible.
How do you prepare the ricotta filling for Florentine cannoli so it isn’t grainy?
Start with high-quality ricotta and strain it well to remove excess moisture—this is the most common cause of grainy or watery filling. For a smooth texture, beat or process the ricotta until creamy, then mix in powdered sugar and any Florentine flavorings like orange zest or vanilla. Finally, fold in chocolate chips or candied fruit gently so the filling stays airy and luscious.
Which ingredients are best for a classic Florentine cannoli recipe?
For authenticity and flavor, choose fresh whole-milk ricotta, good-quality powdered sugar, and real citrus zest (like orange or lemon) to brighten the filling. Use a neutral frying oil with steady heat for the cannoli shells, and consider adding cinnamon or vanilla to echo Tuscan dessert notes. If your recipe includes chocolate, dark chocolate chips complement the sweetness and help balance the rich ricotta.
Why do Florentine cannoli recipes call for resting or chilling the dough and filling?
Resting the dough allows gluten to relax, which improves shell tenderness and helps the cannoli hold their shape during frying. Chilling the filling firms up the ricotta mixture so it pipes cleanly and tastes fresh, especially when paired with crunchy shells. Even a short refrigeration time can significantly improve the texture and overall balance of your Florentine cannoli.
References
- Cannoli
https://en.wikipedia.org/wiki/Cannoli - https://www.britannica.com/topic/cannoli
https://www.britannica.com/topic/cannoli - Cannoli recipe | Good Food
https://www.bbcgoodfood.com/recipes/cannoli - https://www.theguardian.com/food/2020/sep/19/cannoli-recipe
https://www.theguardian.com/food/2020/sep/19/cannoli-recipe - https://cooking.nytimes.com/recipes/1019697-cannoli
https://cooking.nytimes.com/recipes/1019697-cannoli - Google Scholar Google Scholar
https://scholar.google.com/scholar?q=Florentine+cannoli+recipe - Google Scholar Google Scholar
https://scholar.google.com/scholar?q=cannoli+alla+fiorentina+ricotta+recipe - Google Scholar Google Scholar
https://scholar.google.com/scholar?q=Florentine+cannoli+history - https://pubmed.ncbi.nlm.nih.gov/?term=cannoli+ricotta
https://pubmed.ncbi.nlm.nih.gov/?term=cannoli+ricotta - Google Scholar Google Scholar
https://scholar.google.com/scholar?q=Italian+pastry+cannoli+traditional+recipe+ricotta


