If you’re searching for an easy tiramisu recipe, this simple classic delivers the best balance of flavor and effort—no fancy equipment required. You’ll get a clear, step-by-step method for making layered coffee-soaked ladyfingers with creamy mascarpone that sets up reliably. Follow it exactly and you’ll have tiramisu you can confidently serve, even if you’re making it for the first time.
Skip baking—assemble tiramisu in minutes using espresso-soaked ladyfingers, a creamy mascarpone filling, and cocoa on top; then chill until it sets. This easy tiramisu recipe focuses on the most reliable ingredient ratios and timing details so you get clean layers, a stable cream, and that signature rich coffee-chocolate flavor without stress.
Easy Tiramisu Ingredients

– Gather mascarpone, heavy cream, espresso (or strong coffee), ladyfingers, sugar, and cocoa powder
– Optional: add vanilla extract and a pinch of salt to boost flavor
– Keep ingredients chilled for a smoother, thicker cream
To make this classic tiramisu work the first time, treat ingredients like a system: the cream needs body (from properly whipped heavy cream), the coffee needs intensity (strong espresso or brewed coffee), and the ladyfingers need just enough moisture to soften without dissolving.
Core ingredient roles (and what to look for):
– Mascarpone cheese: The foundation of the filling—choose a brand that’s smooth and not overly runny. If yours seems loose, chilling it helps, but avoid adding extra liquid.
– Heavy cream: Whipped to aerate the filling and stabilize the mascarpone. Use a cold, high-fat cream for best results (and fastest whipping).
– Espresso / strong coffee: Use freshly brewed espresso when possible for robust aroma. If you use drip coffee, brew it stronger than usual.
– Sugar: Sweetens and helps balance espresso bitterness.
– Ladyfingers: Savoiardi-style work best—structured enough to hold layers and absorb coffee without collapsing.
– Cocoa powder: For the authentic finish, use unsweetened cocoa. A fine-milled cocoa creates an even top layer that looks professional.
Simple, reliable ingredient ratio (for an 8×8 in / ~20×20 cm dish):
– Mascarpone: 16 oz (450 g)
– Heavy cream: 1 cup (240 ml)
– Sugar: 1/3 cup (65–70 g) (adjust to taste)
– Espresso/coffee: 1 to 1 1/2 cups (240–360 ml) depending on how generously you dip
– Ladyfingers: ~24–28 pieces (depends on thickness and how tightly you layer)
– Cocoa powder: 2–3 tbsp for topping (plus more for serving if desired)
Optional flavor upgrades that still keep it “easy”:
– Vanilla extract (1 tsp): Rounds out coffee bitterness.
– Pinch of salt: Makes the chocolate and coffee flavors taste more “complete,” not sharper.
– If you enjoy the classic “boozy” profile: tradition often includes a splash of Marsala or coffee liqueur. For an alcohol-free option, stick to coffee or add a teaspoon of vanilla and extra coffee depth instead.
Simple Equipment & Prep

– Use a mixing bowl, whisk or mixer, and a baking dish
– Brew espresso ahead and let it cool slightly
– Set up assembly space so you can layer quickly
Good equipment doesn’t have to be fancy—consistency matters more than tools. Here’s how to prep so you don’t rush assembly and end up with uneven soaking or lumpy cream.
Minimum equipment that works:
– 1 mixing bowl (large enough for whisking cream)
– Hand mixer or whisk
– Rubber spatula for folding mascarpone smoothly
– 8×8 in (or similar) baking dish
– Shallow bowl or plate for the coffee-dipping step
– Sifter (optional) for ultra-smooth cocoa dusting
Prep steps that prevent common tiramisu failures:
1. Chill your mascarpone and cream (even 20–30 minutes helps). Cold dairy whips faster and holds shape longer.
2. Brew espresso/coffee and cool it to warm or room temperature. If it’s hot, it can prematurely soften ladyfingers and slightly loosen the cream during assembly.
3. Plan your layering order before you start. Create a “line” of components: ladyfingers near the coffee, cream ready, dish out on the counter, and cocoa close to the finish step.
4. Use the right surface time. You want to dip ladyfingers quickly, not soak. Keep your dipping rhythm steady: dip → place immediately.
Step-by-Step Layering Instructions

– Whip mascarpone with sugar, then fold in whipped cream for a light filling
– Dip ladyfingers briefly in espresso (don’t soak through)
– Layer: cream → ladyfingers → cream → finish with cocoa
This is where easy tiramisu becomes reliably “great.” Most issues come from two places: cream technique (overmixing can break texture) and ladyfinger soaking (too long leads to mushy layers).
1) Make the mascarpone-cream filling
1. Whisk mascarpone + sugar until smooth. Start on low to avoid lumps, then increase briefly.
2. Whip heavy cream separately until it holds soft peaks (not dry/crumbly). Aim for a texture that looks thick but still looks creamy when you lift the whisk.
3. Fold whipped cream into mascarpone gently in 2–3 additions. Folding keeps the filling light and reduces the risk of graininess.
Why folding matters: Heavy mixing can deflate the whipped cream and reduce volume. The goal is a filling that spreads easily but still feels structured when chilled.
2) Dip the ladyfingers
– Dip each ladyfinger for about 1 second per side (or just until the surface darkens).
– Place immediately into the dish.
– If your ladyfingers are thinner, reduce dipping time—thin ones soften faster and can over-saturate.
3) Assemble with clean layers
Use this dependable build:
– First layer: spread a thin layer of cream on the bottom (this prevents shifting).
– First ladyfinger layer: arrange dipped ladyfingers in a snug grid.
– Second layer: spread cream evenly.
– Repeat: ladyfingers → cream.
– Finish: dust generously with cocoa powder. For a more “classic” look, dust the top right before serving (or dust after the first chill if you prefer a deeper cocoa set).
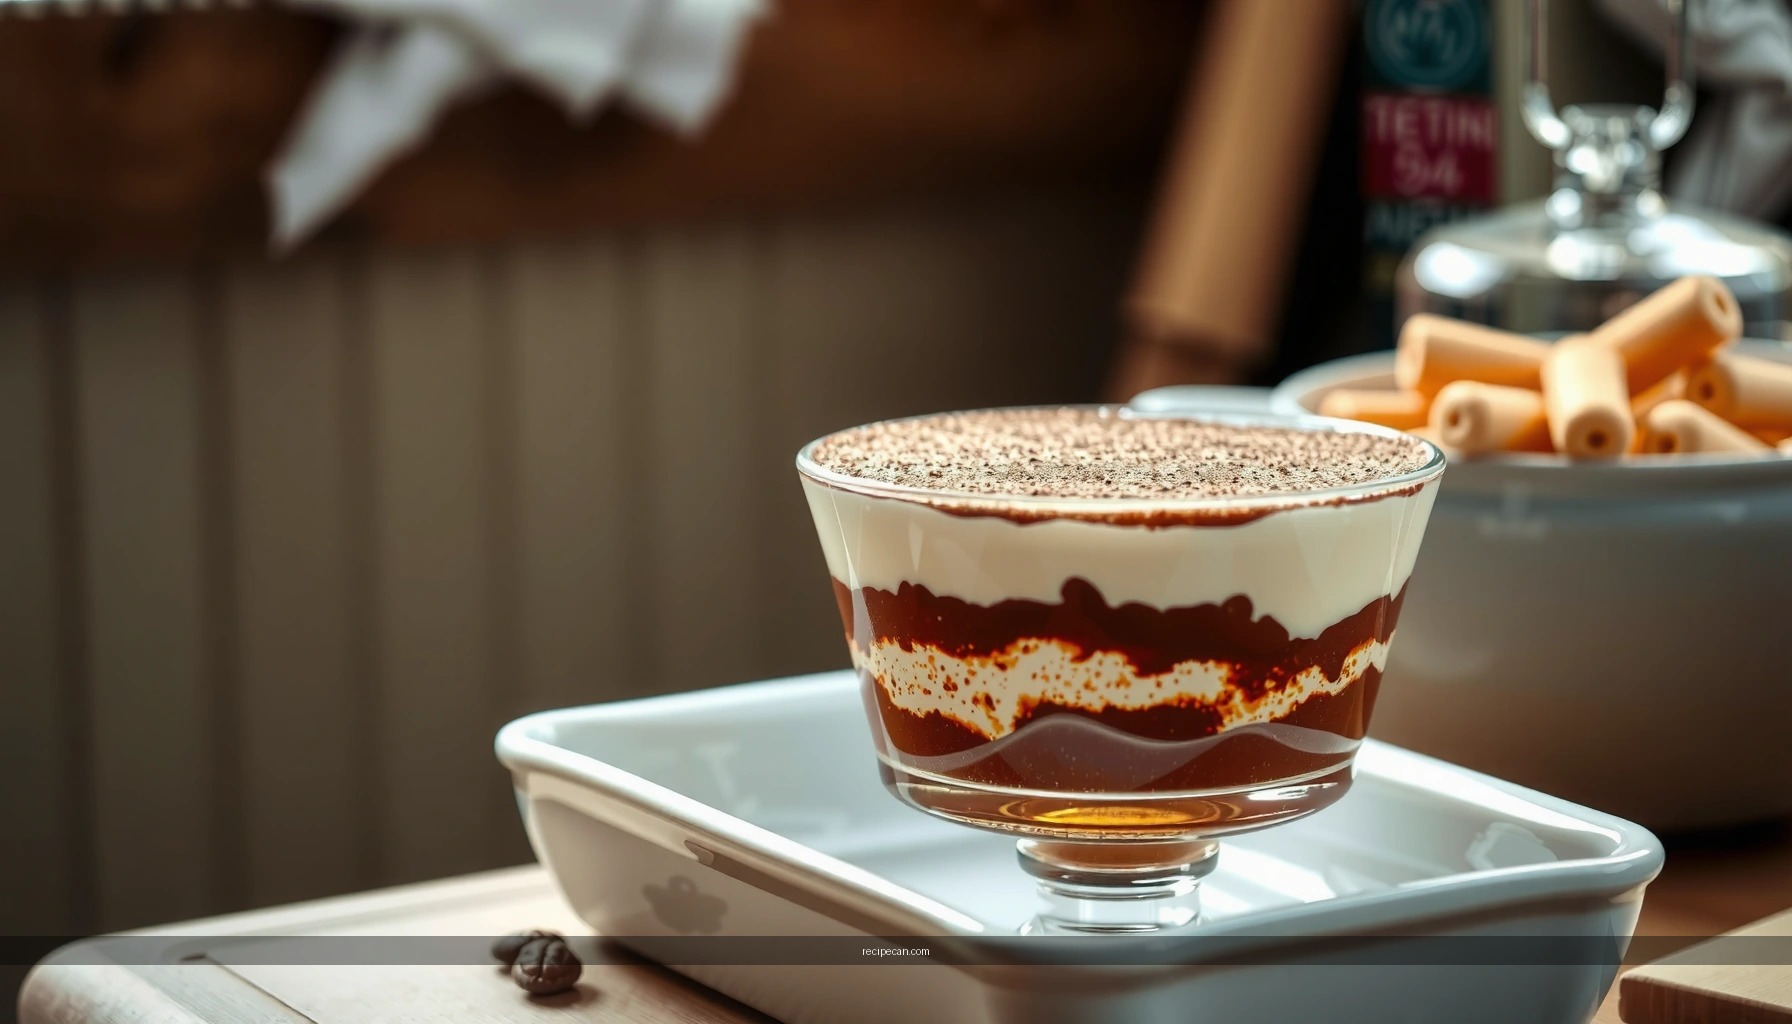
What “good” layers look like: After chilling, the slices should show distinct bands—coffee-softened ladyfingers that still hold form, separated by creamy mascarpone filling.
Practical visual guide: ingredient stability checklist
How Chilling and Dipping Affect Easy Tiramisu
| # | Step | Target Timing | Result You Want | Risk if Off-Target |
|---|---|---|---|---|
| 1 | Whip cream to soft peaks | 2–4 min (hand mixer) | Cream holds shape, still glossy | Over-whipping → grainy filling |
| 2 | Cool coffee/espresso | 10–20 min | Dip stays quick, even | Hot liquid → mushy ladyfingers |
| 3 | Dip ladyfingers | ~1 sec/side | Softened edges, intact centers | Too long → collapsed layers |
| 4 | Chill before slicing | ≥4 hours | Cream sets, clean slice lines | Short chill → runny filling |
Tips for the Best Texture
– Aim for “just dipped” ladyfingers to avoid sogginess
– Chill at least 4 hours (overnight is even better)
– Use a fine cocoa for a clean, classic finish
Texture is the difference between “tastes good” and “looks bakery-made.” Here are the highest-impact practices that improve your tiramisu immediately.
Get the coffee soak right
The goal isn’t saturation—it’s flavor transfer. Ladyfingers should soften from the outside in, then set once chilled.
– If your tiramisu often turns watery, reduce dip time and ensure your coffee isn’t too hot.
– If your ladyfingers stay too firm, dip slightly longer (but still quickly) and confirm you’re using a strong espresso.
Chill time is not optional
Tiramisu is essentially a set cream with softened sponge layers. Without chilling:
– The mascarpone-cream mixture won’t fully firm.
– Layers smear when sliced.
For best results, plan overnight chilling. At minimum, chill 4 hours.
Use cocoa strategically
Dusting with fine cocoa produces a classic look and prevents clumps.
– Sift the cocoa through a small mesh strainer.
– If you’re preparing for a party, you can dust right before serving to keep the top visually crisp.
Quick Variations (Still Easy)
– Use decaf or omit alcohol (if using) to fit any preference
– Add chocolate shavings or a drizzle of espresso syrup
– Try instant espresso if you’re short on time
Even classic tiramisu can be adapted—without sacrificing the structure that makes this dessert dependable.
1) Decaf tiramisu
– Use decaf espresso or strong decaf coffee to keep the flavor profile while avoiding caffeine.
– The layering and chilling steps remain identical.
2) Booze-free (or alcohol-light) version
– Skip any liqueur and simply enhance coffee depth with a richer brew.
– If you want sweetness without liquor, add a few teaspoons of sugar to the coffee and stir until fully dissolved.
3) Chocolate-forward finish
– Add chocolate shavings between layers or on top.
– A drizzle of espresso syrup (made from espresso + sugar reduced slightly) can intensify aroma and make the dessert taste more “restaurant-level.”
4) Instant espresso option
If time is tight:
– Dissolve instant espresso powder in hot water, then cool completely before dipping.
– Stir thoroughly so there are no gritty bits in the coffee.
Make-Ahead, Storage, and Serving
– Refrigerate covered; best within 2–3 days
– Serve cold for the best flavor and texture
– Slice cleanly with a sharp knife wiped between cuts
This easy tiramisu recipe is ideal for planning ahead—its flavor deepens and the layers stabilize overnight.
Make-ahead timing
– Assemble and chill for at least 4 hours.
– For best flavor and sliceable texture, chill overnight.
Storage guidelines
– Cover and refrigerate promptly. Tiramisu holds well for 2–3 days.
– Keep it covered to prevent cocoa from absorbing fridge odors.
Serving for clean slices
– Use a sharp knife and wipe it between cuts (warm water on the knife works well, then dry).
– Serve cold; room-temperature tiramisu can loosen as the cream softens.
Nutritional note (practical, not preachy)
Because tiramisu is creamy and cocoa-rich, portion size matters. If you’re serving a group, plan for smaller slices—your guests will get the full flavor without overwhelming sweetness.
Easy Tiramisu Recipe Summary: What to Remember
Refreshing and foolproof, this easy tiramisu recipe delivers creamy layers, rich espresso flavor, and classic cocoa in less time than you’d expect. Follow the layering and chilling tips—especially the quick ladyfinger dip and the overnight rest—then make it ahead for the smoothest texture. Try it this week, and share your favorite variation (decaf, chocolate shavings, or a coffee syrup finish) to make the classic truly yours.
Frequently Asked Questions
What is the easiest tiramisu easy recipe for beginners?
The easiest tiramisu easy recipe uses no baking and only a few simple ingredients: mascarpone, eggs (or pasteurized eggs), coffee, sugar, ladyfingers, and cocoa powder. Start by whipping mascarpone with sugar (and egg yolks if using), then dip ladyfingers briefly in coffee and layer them with the cream. Chill the assembled tiramisu for at least 4 hours so the flavors meld and the texture sets.
How do you make tiramisu without eggs using an easy recipe?
For a no-egg tiramisu easy recipe, use mascarpone mixed with whipped cream and a little sugar to create a stable, fluffy layer. Whip cold heavy cream to soft peaks, fold into mascarpone, then layer with quick coffee-dipped ladyfingers and cocoa. This method avoids egg concerns while still delivering the classic tiramisu flavor and creamy texture.
Why does your tiramisu turn out runny, and how can you fix it?
Runny tiramisu usually happens when the mascarpone mixture is too loose or the ladyfingers are soaked too long in coffee. Keep coffee dipping quick—just a second or two per side—so the cookies absorb flavor without becoming mushy. Also chill long enough (at least 4–6 hours) and use properly cold dairy to help the cream thicken in the fridge.
What is the best coffee to use for an easy tiramisu recipe?
The best coffee for an easy tiramisu easy recipe is strong brewed espresso or strong coffee because it stands up to the sweetness and mascarpone. Let the coffee cool to room temperature before dipping ladyfingers so the texture doesn’t break down. If you want a sweeter flavor, you can use a lightly sweetened coffee, but keep the tiramisu balanced with the sugar in the cream.
Which ladyfingers work best for tiramisu, and how do you dip them correctly?
For tiramisu easy recipes, choose savoiardi (Italian ladyfingers) because they’re designed to absorb liquid without disintegrating as quickly. Dip each ladyfinger briefly in coffee—aim for a quick soak and immediate layering—to avoid a watery dessert. Layer promptly, then chill to let everything firm up into clean, sliceable tiramisu.
References
- Tiramisu
https://en.wikipedia.org/wiki/Tiramisu - https://en.wikipedia.org/wiki/Mascarpone
https://en.wikipedia.org/wiki/Mascarpone - Lady finger
https://en.wikipedia.org/wiki/Ladyfinger - Espresso
https://en.wikipedia.org/wiki/Espresso - Cocoa
https://en.wikipedia.org/wiki/Cocoa - https://en.wikipedia.org/wiki/Egg_(food
https://en.wikipedia.org/wiki/Egg_(food - https://en.wikipedia.org/wiki/Salmonella
https://en.wikipedia.org/wiki/Salmonella - Tiramisu | Meaning, Ingredients, Origin, Desserts, & Taste | Britannica
https://www.britannica.com/topic/tiramisu - Google Scholar Google Scholar
https://scholar.google.com/scholar?q=tiramisu+recipe - Google Scholar Google Scholar
https://scholar.google.com/scholar?q=tiramisu+mascarpone+egg+safety


