Want an easy Italian cannoli cake recipe that reliably delivers a crowd-pleasing dessert? This simple cannoli cake recipe answers the one question that matters—how to make the creamy ricotta filling and sweet cookie base without fuss, so you get bakery-style flavor at home. Expect clear steps, dependable results, and the kind of cannoli-inspired finish that disappears fast at parties and potlucks.
This easy Italian cannoli cake recipe delivers the creamy cannoli flavor you love in a straightforward, bake-and-assemble format—so you can skip the tricky filling-and-shell process. In this guide, you’ll bake a simple cake base, fold together a cannoli-style ricotta filling, and assemble everything quickly for a dessert that’s reliably crowd-pleasing.
What You’ll Need (Ingredients Checklist)

To make this cannoli-inspired cake without fuss, start by organizing your ingredients into two groups: the cake base and the cannoli-style ricotta filling. The goal is to keep the method simple while still hitting the key cannoli notes—creamy ricotta sweetness, vanilla warmth, and chocolate pops.
Cannoli-style ricotta filling (core flavor)
– Ricotta cheese: Use whole-milk ricotta for the best creamy mouthfeel. If your ricotta looks very wet, plan to drain it (more on that below) to avoid a runny filling.
– Powdered sugar: Dissolves smoothly for a classic cannoli sweetness.
– Vanilla extract: Adds a warm bakery-style aroma.
– Pinch of salt: Balances sweetness and makes the flavors taste “brighter,” not flat.
– Chocolate chips: The essential texture cue—think “cannoli filling with mini chocolate bits.”
– Optional pistachios: Chopped pistachios bring a nutty, authentic cannoli vibe.
Cake base (simple baking staples)
– Eggs
– Milk (or buttermilk for extra tender crumb)
– Sugar (for cake sweetness; usually granulated)
– Butter or neutral oil (for richness)
– Vanilla extract (optional in cake as well, for layering flavor)
Optional flavor enhancers
– Citrus zest (orange or lemon): Cannoli lovers often expect a slight citrus lift; it makes the filling taste more “lively.”
– Mini candied fruit: For an extra traditional Italian-dessert touch (use sparingly so it doesn’t overpower the ricotta).
– Gluten-free flour blend: If you want a gluten-free version, a good 1:1 baking blend works well for cake structure.
A quick, professional tip: measure ricotta carefully. Ricotta density varies by brand—if your brand tends to be looser, you’ll get better results by draining for a short time before mixing.
Cannoli-Style Cake Build: Sweetness & Texture Targets (1 8–inch Cake, 10–12 slices)
| # | Cake Component | Quantity | Purpose | Impact if Off-Target |
|---|---|---|---|---|
| 1 | Ricotta (whole-milk) | 16 oz (454 g) | Creamy body | Too loose → slices slide |
| 2 | Powdered sugar | 3/4 cup (90 g) | Balanced sweetness | Too high → filling tastes heavy |
| 3 | Vanilla extract | 2 tsp (10 ml) | Signature aroma | Low → dessert tastes muted |
| 4 | Chocolate chips | 3/4 cup (120 g) | Cannoli-style texture | Too low → fewer “pops” |
| 5 | Orange zest (optional) | 1–2 tsp (2–4 g) | Bright, classic lift | Skip → flavor reads flatter |
| 6 | All-purpose flour | 1 3/4 cups (220 g) | Structure & crumb | Too much → dense slices |
| 7 | Chill time before slicing | 2 hours | Cleaner cuts | Enough → holds shape |
Make the Cannoli-Style Ricotta Filling

This is where you capture the cannoli identity—creamy ricotta, sweet balance, vanilla aroma, and chocolate bits. The process is straightforward, but a couple of control points determine whether your filling is spoonable and sliceable or loose and messy.
1. Start with smooth ricotta.
If your ricotta is grainy or watery, press it through a fine-mesh sieve or stir vigorously to homogenize. For especially wet ricotta, drain in a lined strainer for 10–20 minutes before mixing.
2. Blend with powdered sugar, vanilla, and salt.
Mix until the mixture looks cohesive and silky. Powdered sugar is important here: it dissolves quickly and prevents a gritty texture.
3. Fold in chocolate chips (and pistachios if using).
Folding preserves the cream’s texture and prevents the chips from sinking unevenly. Aim for even distribution so each slice gets chocolate “surprises.”
4. Chill briefly for assembly readiness.
Refrigerate the filling for 15–30 minutes after mixing. This firms it slightly, making it easier to spread cleanly on the cooled cake without smearing.
Professional-quality benchmark: the filling should be thick enough to mound slightly when you spoon it, but still spreadable with a spatula. If it’s too thick, stir in 1–2 teaspoons of milk; if it’s too thin, chill longer or add a tablespoon more powdered sugar.
Prepare the Cake Base

The cake base in a cannoli cake should be tender, lightly sweet, and sturdy enough to support the filling. Because this is designed to be easy, you’ll keep the method classic: whisk dry, mix wet, combine, bake, then cool thoroughly.
1. Whisk dry ingredients first.
Combine flour and baking powder evenly to ensure consistent rise. This prevents “hot spots” where the cake puffs unevenly.
2. Combine wet ingredients until smooth.
Mix eggs, milk, sugar, and melted butter (or oil) until uniform. Add vanilla if you want a deeper flavor layer in the crumb.
3. Combine gently—don’t overmix.
Fold or stir just until the batter looks smooth. Overmixing can develop gluten and make cake slices tougher than you want under a creamy filling.
4. Bake until the center springs back.
Use a toothpick test: it should come out clean or with a few dry crumbs (not wet batter). Overbaking is a common issue—aim for doneness with a soft crumb, not dryness.
5. Cool completely before filling.
This is non-negotiable for best results. Warm cake will melt the filling and can cause sliding layers. Cooling also improves slice structure after chilling.
If you want a two-layer cake, bake two rounds (or bake one deep pan and split carefully after cooling). Either approach works—what matters is structural stability and a cool surface for the cannoli filling.
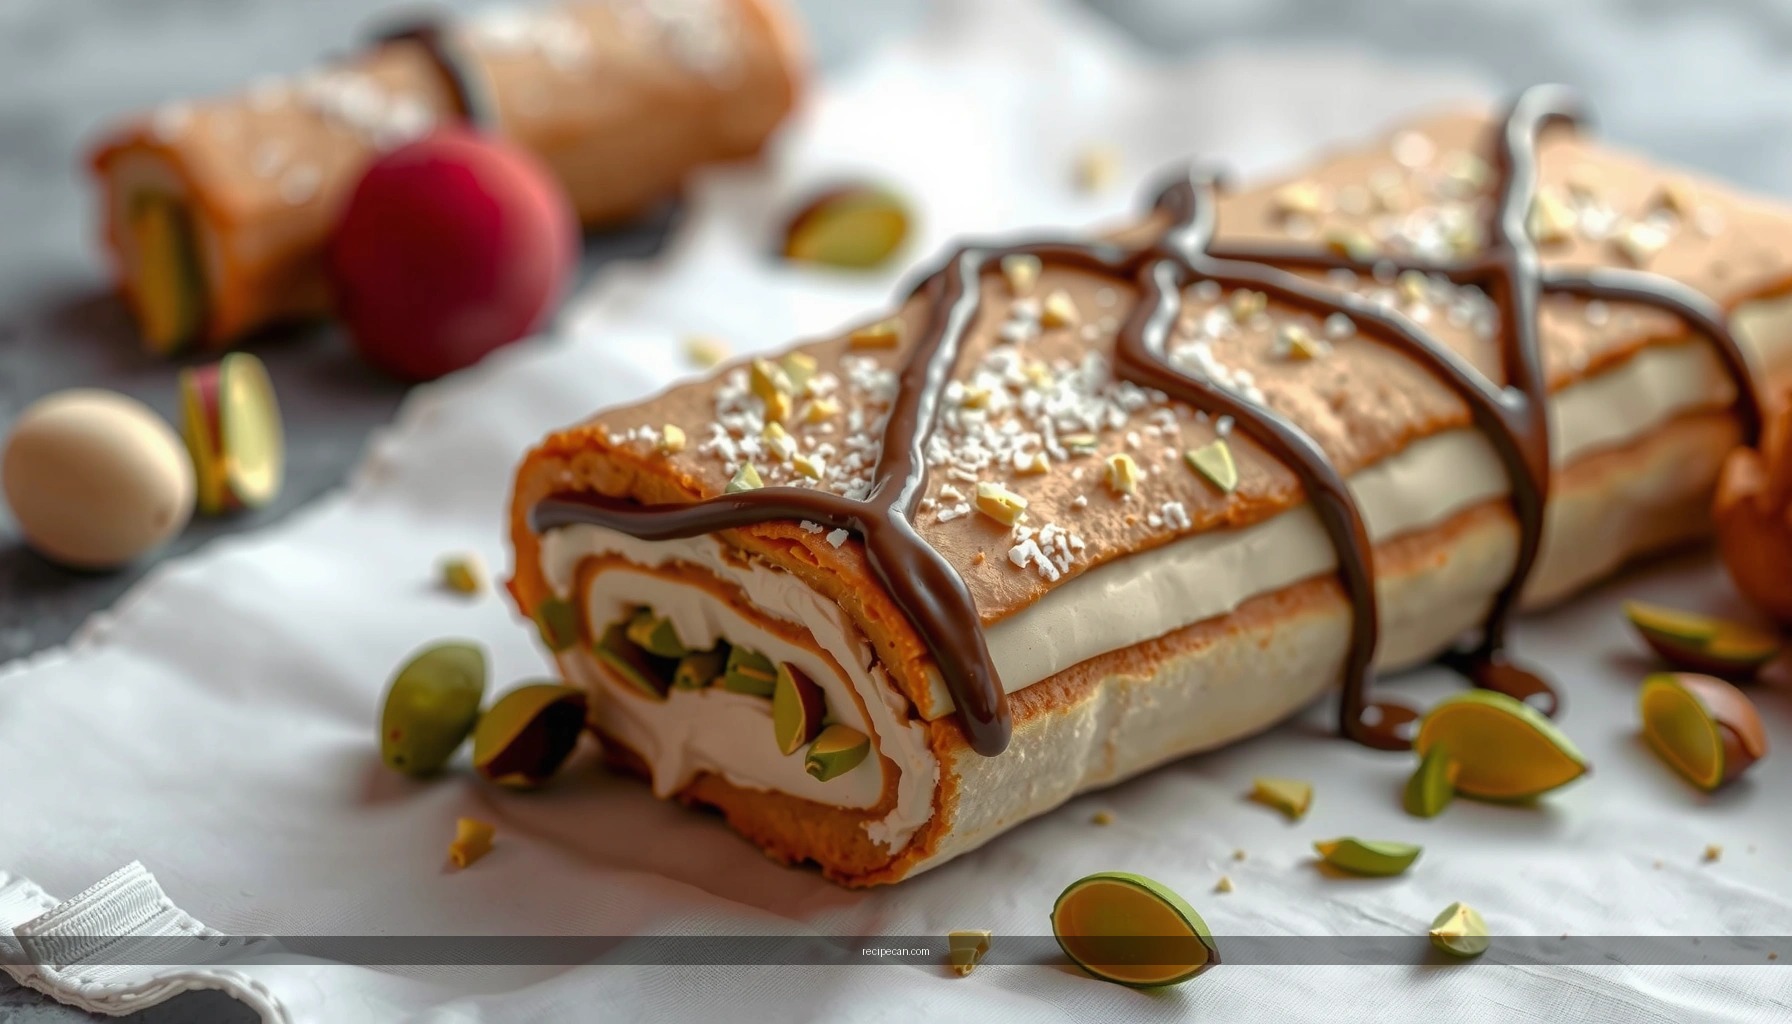
Assemble Your Cannoli Cake
Assembly is fast, but precision here makes the difference between “pretty” and “polished.” Think of the filling as a filling, not frosting—the aim is even coverage and confident texture.
1. Spread the cannoli-style ricotta filling evenly.
Use an offset spatula if you have one. Even distribution prevents thin spots where chocolate and ricotta flavors can get diluted.
2. Add a final top layer of chocolate and/or pistachios.
This mirrors the classic cannoli experience: chocolate flecks throughout and a visually appealing finish. Keep toppings lightly pressed so they adhere during chilling.
3. Chill until set (for clean slices).
Refrigerate for at least 2 hours. This firms the ricotta slightly, helping the cake hold its shape and slice cleanly—especially if you’re serving to guests.
Operational tip for large gatherings: assemble a few hours ahead, slice right before serving, and keep the cake chilled until it hits the table. The flavor is best when cold to room temperature, not warm.
Easy Variations and Flavor Boosters
The beauty of an easy Italian cannoli cake is its flexibility. You can tailor it to taste preferences while still keeping the cannoli essence intact.
– Thicker, more “classic” texture:
If you want a closer ricotta feel, use well-drained ricotta. The result is a filling that holds shape better and feels more like traditional cannoli texture.
– Brighter cannoli-style flavor:
Add orange zest (or lemon zest) and consider folding in mini candied fruit for a traditional citrus-forward profile. Keep fruit portions modest so the ricotta remains the hero.
For a simple gluten-free version, use a 1:1 gluten-free baking flour blend. This maintains cake structure without requiring recipe rewrites. If your blend includes xanthan gum, you’ll usually get reliable lift and a cake that cuts well.
– Chocolate texture upgrade:
Swap some chocolate chips for chopped dark chocolate or even a small amount of cocoa nibs. This adds a grown-up bitterness that balances sweet ricotta.
A practical note: any variation that adds moisture (like fruit) may slightly loosen the filling. To compensate, either drain add-ins well or chill the filling longer before spreading.
Serving Tips and Storage
A cannoli cake shines when served with the right temperature, clean cuts, and thoughtful storage habits—especially when entertaining.
Serving
– Slice with a sharp knife and wipe between cuts for neat edges. A damp paper towel can help clean the blade quickly.
– Serve chilled or at room temperature based on preference:
– Chilled emphasizes clean ricotta structure and stronger flavor definition.
– Room temperature can enhance aroma and soften the crumb.
Storage
– Store the cake covered in the refrigerator to protect texture and prevent fridge odors from transferring.
– For best quality, enjoy within 2–3 days. The cake remains delicious beyond that, but the crumb may lose some tenderness over time.
If you’re making this for an event, slice shortly before serving to maximize visual appeal. With proper chilling and cool cake layers, the cannoli-style filling should hold up beautifully.
This easy Italian cannoli cake recipe gives you the creamy cannoli vibe with far less work—just bake, fill, and chill. Follow the filling tips and cool-before-assembling step for the best texture, then make it your own with chocolate chips, pistachios, or citrus zest. Try it this week and share your favorite variation!
Frequently Asked Questions
What is an easy Italian cannoli cake recipe and how does it differ from classic cannoli?
An easy Italian cannoli cake recipe captures the classic cannoli flavors—creamy ricotta filling and sweet hints of citrus—inside a simple cake structure. Instead of filling individual shells, you bake a cake and layer or top it with a cannoli-style ricotta mixture, making it far less labor-intensive. This approach still delivers that signature cannoli texture and taste while saving time and effort in the kitchen.
How do I make the ricotta filling for an easy cannoli cake without it turning watery?
To prevent watery filling, use well-drained ricotta and strain it (or use ricotta labeled “thick”/“scoopable”) before mixing. If needed, stir in a little confectioners’ sugar and let the mixture sit briefly so it thickens. You can also fold in whipped cream or mascarpone for a more stable, creamy cannoli cake filling that holds its shape.
Why do I need to drain ricotta for cannoli cake, and what’s the best way to do it?
Ricotta contains extra moisture, which can make your cannoli cake filling collapse or seep into the cake. The best way is to drain it in a fine-mesh sieve or through cheesecloth in the fridge for about 30 minutes to a few hours, depending on how watery it is. Once drained, combine it with sugar, vanilla, and citrus zest to keep the filling smooth and rich.
Which cake base works best for an easy Italian cannoli cake—vanilla, sponge, or something else?
For an easy Italian cannoli cake recipe, a tender vanilla cake or simple sponge-style layer works best because it pairs well with creamy ricotta and won’t overpower the flavor. Vanilla pound cake or a basic butter cake provides structure and moisture, while a sponge cake gives a lighter bite. Choose what you can bake most reliably—either option will work as long as you keep the filling thick and balanced.
What’s the best way to assemble and serve an easy cannoli cake for the freshest flavor and best texture?
Assemble the cake once the cake layers have cooled completely, then spread the cannoli-style ricotta filling evenly and garnish with mini chocolate chips or chopped pistachios. For the best flavor, chill the cannoli cake for at least 2–4 hours so the filling sets and the cake absorbs moisture. Serve cold or at cool room temperature for clean slices and that classic Italian cannoli-inspired taste.
References
- Cannoli
https://en.wikipedia.org/wiki/Cannoli - Ricotta
https://en.wikipedia.org/wiki/Ricotta - Italian cuisine
https://en.wikipedia.org/wiki/Italian_cuisine - List of Italian desserts and pastries
https://en.wikipedia.org/wiki/List_of_Italian_desserts - Confectionery
https://en.wikipedia.org/wiki/Confectionery - Marsala
https://en.wikipedia.org/wiki/Marsala - https://www.britannica.com/topic/cannoli
https://www.britannica.com/topic/cannoli - Google Scholar Google Scholar
https://scholar.google.com/scholar?q=easy+italian+cannoli+cake+recipe - Google Scholar Google Scholar
https://scholar.google.com/scholar?q=cannoli+ricotta+sugar+chocolate+chips+recipe+technique - Google Scholar Google Scholar
https://scholar.google.com/scholar?q=Italian+desserts+cannoli+pastry+shell+methods


