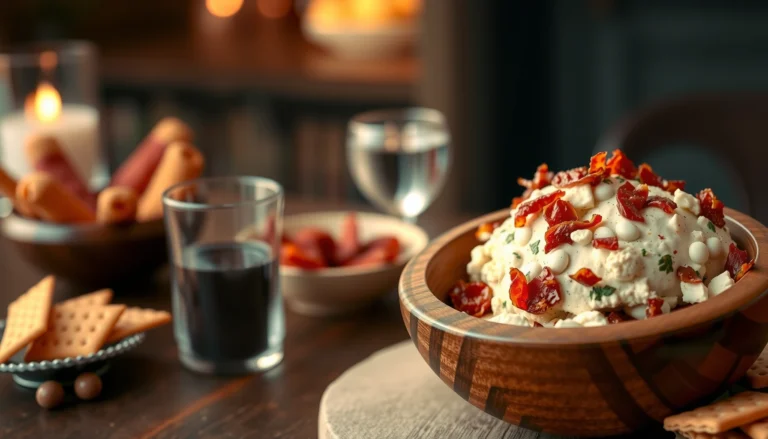
This dried beef cheese ball recipe delivers the best no-fuss results when you want a creamy, savory appetizer with minimal effort and maximum crowd-pleasing flavor. You’ll get straightforward steps, the right mix-ins, and an easy shaping-and-chilling method that makes the texture set every time. If your goal is a reliable party centerpiece without complicated prep, this is the version that wins.
This dried beef cheese ball recipe is straightforward: you mix cream cheese with chopped dried beef and seasonings, form it into a ball, then chill so it slices and spreads cleanly. In the sections below, you’ll get a dependable ingredient list, exact shaping guidance, and practical topping and serving ideas that bring out the savory “old-school deli” flavor in every bite.
Ingredients for a Classic Dried Beef Cheese Ball

– Gather cream cheese, chopped dried beef, and a few basic seasonings
– Choose optional add-ins (like garlic powder or Worcestershire) for extra punch
A classic dried beef cheese ball is built on a simple ratio: softened cream cheese for structure, chopped dried beef for bold savoriness, and seasonings for balance. The dried beef provides the signature tangy, peppery profile, while cream cheese creates that creamy, spreadable texture that makes this an instant party favorite.
Core ingredients (typical for a standard 8–10 serving cheese ball):
– Cream cheese (softened): Use full-fat for the best flavor and smooth consistency.
– Dried beef, chopped: Choose a brand that’s cured and deli-style. Finely chopping helps distribute flavor evenly.
– Freshly cracked black pepper: Adds warmth and contrast to the salty dried beef.
– Optional salt control: Dried beef is salty, so you may not need much additional salt—taste as you go.
Optional add-ins for extra punch (highly recommended if you want “restaurant-style” depth):
– Garlic powder (subtle, even flavor)
– Worcestershire sauce (umami boost and a savory finish)
– Smoked paprika (a gentle smoky note—optional, but effective)
– Finely minced onion or onion powder (for aromatic lift)
Texture and prep tip: If your dried beef comes in larger pieces, chop it finely (or pulse briefly in short bursts). If it seems unusually dry, you can fold it in as-is—cream cheese will rehydrate the flavor and help it bind, especially after chilling.
Cheese Ball Topping & Flavor Matching Guide (Dried Beef Style)
| # | Topping / Coating | Best Pair | Effort | Taste Fit |
|---|---|---|---|---|
| 1 | Chopped pecans | Toasted crackers | Low | ★★★★☆ |
| 2 | Finely chopped parsley | Sliced baguette | Low | ★★★☆☆ |
| 3 | Shredded sharp cheddar | Caraway rye crackers | Low | ★★★★☆ |
| 4 | Cracked black pepper (light dust) | Vegetable dippers | Very Low | ★★★☆☆ |
| 5 | Everything bagel seasoning | Pretzel chips | Very Low | ★★★★★ |
| 6 | Toasted sesame + green onion | Wheat thins | Medium | ★★★☆☆ |
| 7 | Crushed bacon bits | Rye crackers | Low | ★★☆☆☆ |
How to Make the Dried Beef Cheese Ball Mixture

– Beat cream cheese until smooth, then fold in dried beef and seasonings
– Mix just until combined to keep the texture rich and spreadable
The mixture step is where you either get a luxurious, sliceable cheese ball—or end up with something that crumbles or won’t hold its shape. The goal is simple: smooth cream cheese first, then gentle mixing after the dried beef goes in.
Step-by-step mixing approach
1. Soften and prep your cream cheese
– Place cream cheese at room temperature for about 30–60 minutes (or until it’s easily dented).
– Softened cream cheese beats more evenly and prevents lumps.
2. Beat until smooth
– Use a hand mixer or stand mixer on medium speed for 30–60 seconds.
– You want a uniform base so the flavor from the dried beef distributes evenly.
3. Fold in chopped dried beef
– Add the chopped dried beef and mix on low just until combined.
– Overmixing can make the mixture feel greasy rather than creamy.
4. Season and taste
– Add black pepper, and if you’re using Worcestershire, garlic powder, or onion powder, add them here.
– Taste is critical because dried beef varies in saltiness. Adjust only if needed.
Why mixing technique matters
– Too much mixing after adding dried beef can change the texture—think of it as turning the mixture from “spreadable” into “loose” or “shredded.”
– Not mixing enough can leave uneven pockets of dried beef, meaning some bites taste intensely savory and others taste muted.
Quick benchmark
A good dried beef cheese ball mixture should be:
– Firm enough to hold a scoop
– Soft enough to press or roll without cracking
– Smooth with visible flecks of dried beef (not dry or crumbly)
Shape, Chill, and Set the Cheese Ball

– Form into a ball (or log) and smooth the surface for even coating
– Chill at least 2 hours so it holds shape and tastes better
Shaping is where your effort becomes visible. Whether you prefer a classic ball or a more modern log, the technique is the same: compress gently, smooth the surface, and chill long enough for the cheese to set.
Shaping best practices
– Portion first: Scoop with a spoon or cookie scoop to keep sizes consistent (helps with even serving).
– Form using gentle pressure: Roll between your palms for a ball, or shape on parchment into a log.
– Smooth the surface: Even if you plan to coat it, a smooth exterior helps the coating adhere and look polished.
Chill time: don’t rush the set
– Chill at least 2 hours for best firmness.
– For maximum flavor integration, aim for 4–24 hours before serving.
– During chilling, the cream cheese absorbs the cured-beef notes and seasonings become more “rounded.”
Serve-ready tip
If you’re coating the cheese ball after chilling:
– Roll it right after removing from the fridge so the outer surface is slightly tacky and the coating sticks.
Best Coatings and Serving Ideas

– Roll in chopped nuts, parsley, or shredded cheese for easy presentation
– Serve with crackers, toasted bread, or sliced veggies for quick snacking
A dried beef cheese ball is already flavorful, but toppings add contrast—crunch, freshness, and visual appeal. Use coatings that complement the cured, savory profile rather than overpower it.
Simple coating options (and what each does)
– Chopped pecans or walnuts: Adds a buttery crunch that pairs naturally with the richness of cream cheese.
– Parsley: Brings brightness and a fresh aroma that balances the saltiness.
– Shredded cheddar: Boosts dairy flavor and creates a more “comfort food” vibe.
– Everything bagel seasoning: Delivers a mixed texture of sesame, garlic, and onion notes—excellent with deli-style flavors.
Serving ideas that make the cheese ball “work” for guests
Choose dippers that vary in texture:
– Crackers: Crisp crunch offsets creamy texture.
– Toasted bread or baguette slices: Slight chew and browning enhance flavor.
– Sliced cucumbers, bell peppers, or carrots: Refreshing bite for guests who want a lighter pairing.
– Pretzel chips: Salty-crunch compatibility with cured meats.
Presentation tip
Arrange dippers around the cheese ball and keep a small spoon or spreader nearby. For maximum convenience at parties, place napkins and a “first dip” utensil right at the edge—this reduces the likelihood of double-dipping.
Make-Ahead, Storage, and Freezing Tips
– Refrigerate covered for up to a few days for best freshness
– Freeze the formed ball (or pre-mix) and thaw in the fridge before serving
This is one of the biggest advantages of a dried beef cheese ball: it’s built for planning. Whether you’re hosting a game night or bringing a dish to a gathering, proper make-ahead storage preserves flavor and texture.
Refrigeration
– Store the cheese ball covered in the refrigerator.
– Best quality is typically up to 2–3 days.
– If you coated it, avoid letting it sit uncovered—toppings can soften or absorb fridge moisture.
Make-ahead strategies
– Option A: Mix and chill
– Make the mixture up to 24 hours ahead.
– Shape and coat closer to serving for a fresher look.
– Option B: Fully assemble early
– If you’re using a dry coating like nuts or seasoning blends, you can form and coat earlier with good results.
Freezing (useful, but plan texture expectations)
Freezing can work, especially if you freeze the mixture or uncoated formed ball:
– Wrap tightly to prevent freezer burn.
– Thaw in the refrigerator overnight.
– Expect minor textural changes (cream cheese can soften after thawing), but it’s still suitable for spreadable serving.
Food safety note
Because cream cheese is dairy, keep the cheese ball chilled until serving and discard any portion that sits out too long at room temperature.
Troubleshooting Common Cheese Ball Problems
– If it’s too soft, chill longer or add a bit more dried beef
– If it’s bland, adjust salt/seasoning and consider a small extra accent (like garlic)
Even reliable recipes benefit from quick diagnostic thinking. Here are the most common issues with dried beef cheese ball results and the most effective fixes.
Problem: It’s too soft or won’t hold shape
Likely causes
– Cream cheese wasn’t fully softened and mixed well, or
– Not enough chilling time, or
– Mixture has excess moisture.
Fixes
– Chill longer—often an additional 1–2 hours solves it.
– Add more chopped dried beef (it acts like a binding flavor component).
– If you want a “sure set,” add a small amount of finely chopped nuts (they absorb moisture and increase structure).
Problem: It tastes bland
Likely causes
– Dried beef salt level varies by brand.
– Seasonings are under-measured.
Fixes
– Add black pepper and taste again.
– Use Worcestershire or garlic powder for an immediate umami/aroma lift.
– If needed, add a pinch of salt—but do it carefully since dried beef is already salty.
Problem: The texture is lumpy
Likely causes
– Cream cheese wasn’t adequately softened before mixing.
Fix
– Let it sit at room temperature 10–15 minutes, then beat again briefly until smooth.
Problem: Coating won’t stick
Likely causes
– The surface is too dry from long refrigeration or isn’t tacky.
Fix
– Coat immediately after taking it out of the fridge.
– Press lightly to help toppings adhere evenly.
This dried beef cheese ball recipe delivers a crowd-pleasing appetizer with minimal effort—just mix, shape, chill, and serve with your favorite dippers. Make it ahead for the easiest hosting, then roll it in a coating you love for that final wow factor—try it tonight and share your favorite topping!
References
- Google Scholar Google Scholar
https://scholar.google.com/scholar?q=dried+beef+cheese+ball+recipe - Google Scholar Google Scholar
https://scholar.google.com/scholar?q=cheese+ball+recipe+cream+cheese+dried+beef - Google Scholar Google Scholar
https://scholar.google.com/scholar?q=food+handling+cheese+ball+dairy+leftovers+food+borne+illness - Cheese ball
https://en.wikipedia.org/wiki/Cheese_ball - https://en.wikipedia.org/wiki/Dried_beef
https://en.wikipedia.org/wiki/Dried_beef - Cream cheese
https://en.wikipedia.org/wiki/Cream_cheese - About Listeria Infection | Listeria Infection | CDC
https://www.cdc.gov/listeria/ - https://www.cdc.gov/foodsafety/keep-food-safe.html
https://www.cdc.gov/foodsafety/keep-food-safe.html - https://pubmed.ncbi.nlm.nih.gov/?term=listeria+cream+cheese
https://pubmed.ncbi.nlm.nih.gov/?term=listeria+cream+cheese - Food Safety Basics | Food Safety and Inspection Service
https://www.fsis.usda.gov/food-safety/safe-food-handling-and-preparation/food-safety-basics